You can add memberships for a client’s family members directly from the Memberships section on their profile. This article walks you through how to update the package owner.
Things to Know:
- The ability to add memberships for family members through client profiles is managed by the "Accessing Memberships" access control permission.
- On the membership configuration page:
- If "Individual Family Member" is selected, the membership can only be used by the specific family member(s) selected at the time of purchase.
- If "All Family Members" is selected, the membership can be used by all family members listed on the client's profile.
- Staff can either process the payment immediately or add a membership without completing payment. This behavior is controlled by the hidden setting “Prevent adding a membership to a client record without taking payment.” To enable this setting, please reach out to support@mytime.com.
- On the client’s profile, the family member’s name will appear next to the membership status to identify them as the membership owner.
- In related reports, the family member’s name will be shown in the Family Member column to indicate ownership.
To add memberships for family members on client profiles:
- Launch the MyTime Scheduler app on your device
- Choose your login method:
- Standard: Enter your registered email address and password, then tap 'Sign In'
- Social Login: Select 'Continue with Google' or 'Continue with Apple' to use your existing credentials for a faster login experience. For detailed instructions, learn more here

- After signing in, you will be directed to the Schedule by default
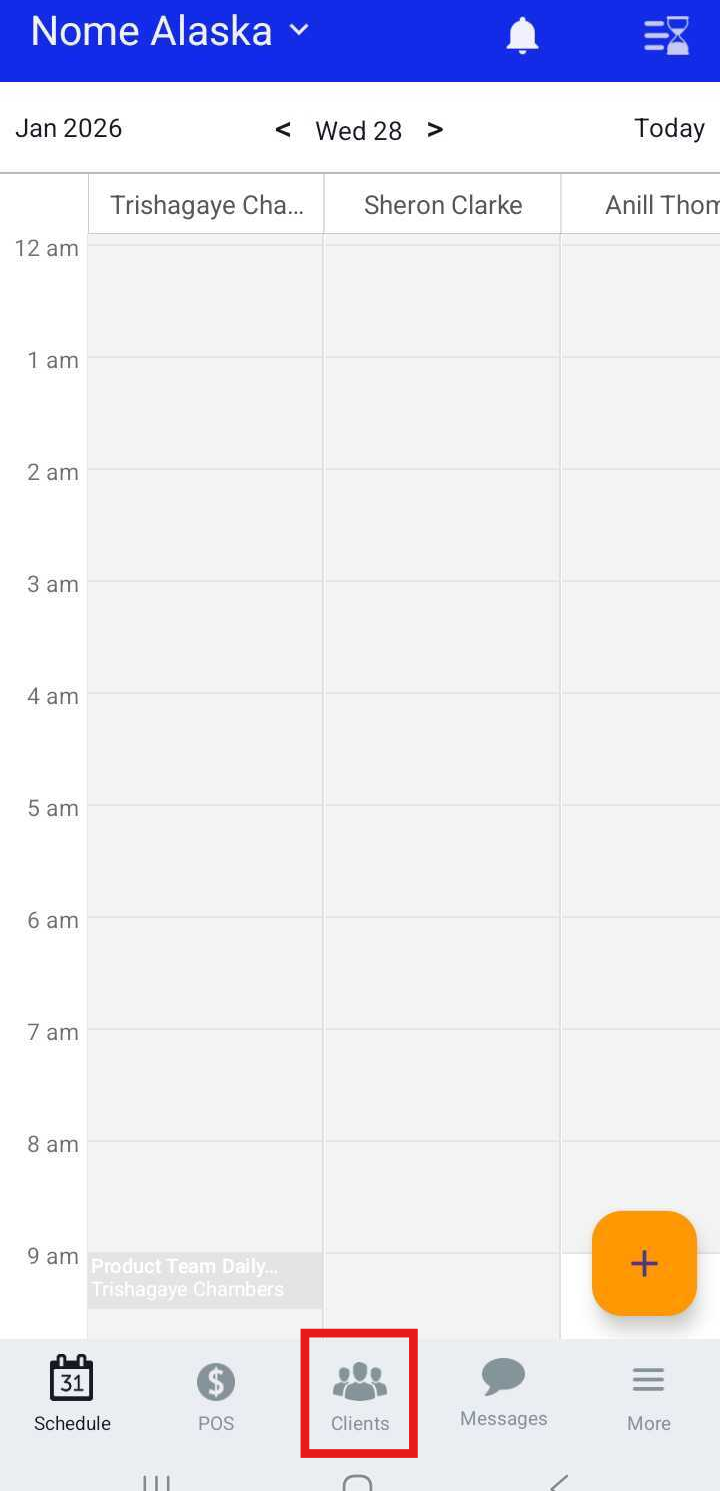
- Tap the Clients icon at the bottom of the screen
- Search for the client by typing their name in the Search field, or select the client from the client list
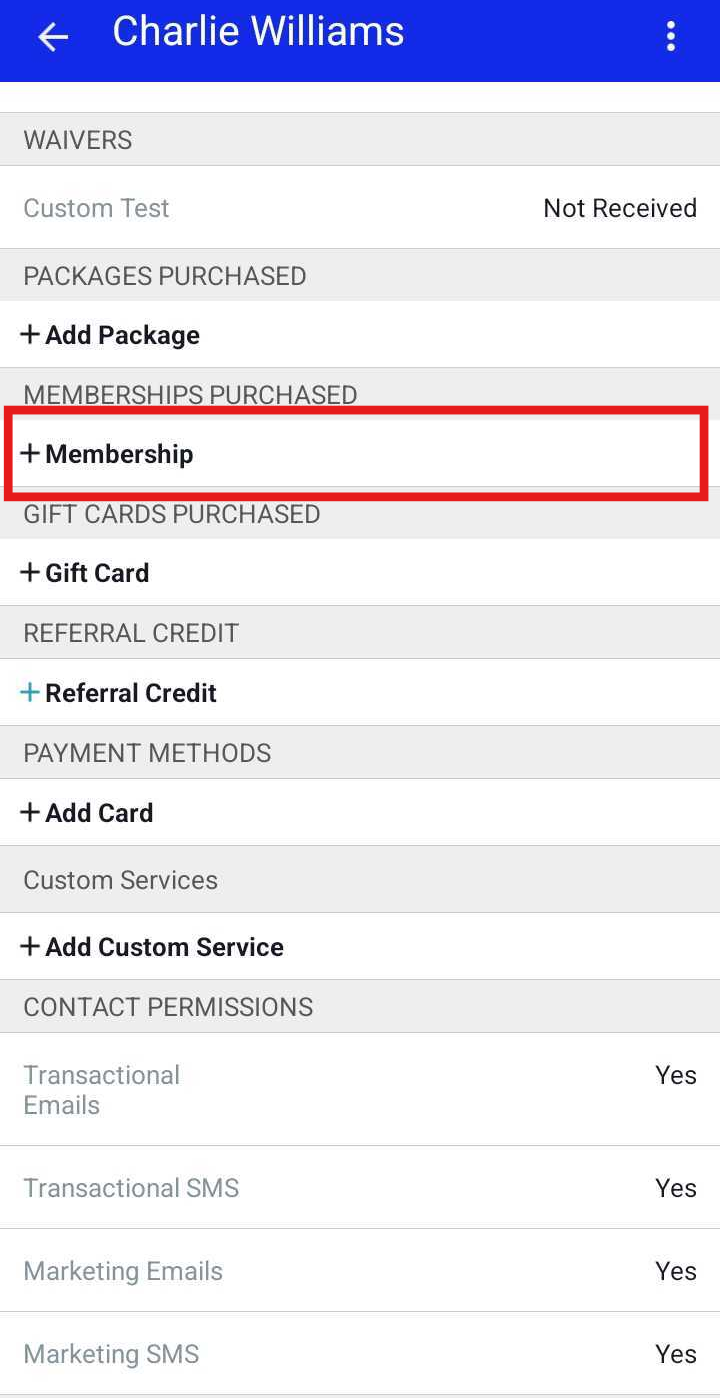
- On the client’s profile, scroll to the Memberships Purchased section
- Tap + Membership
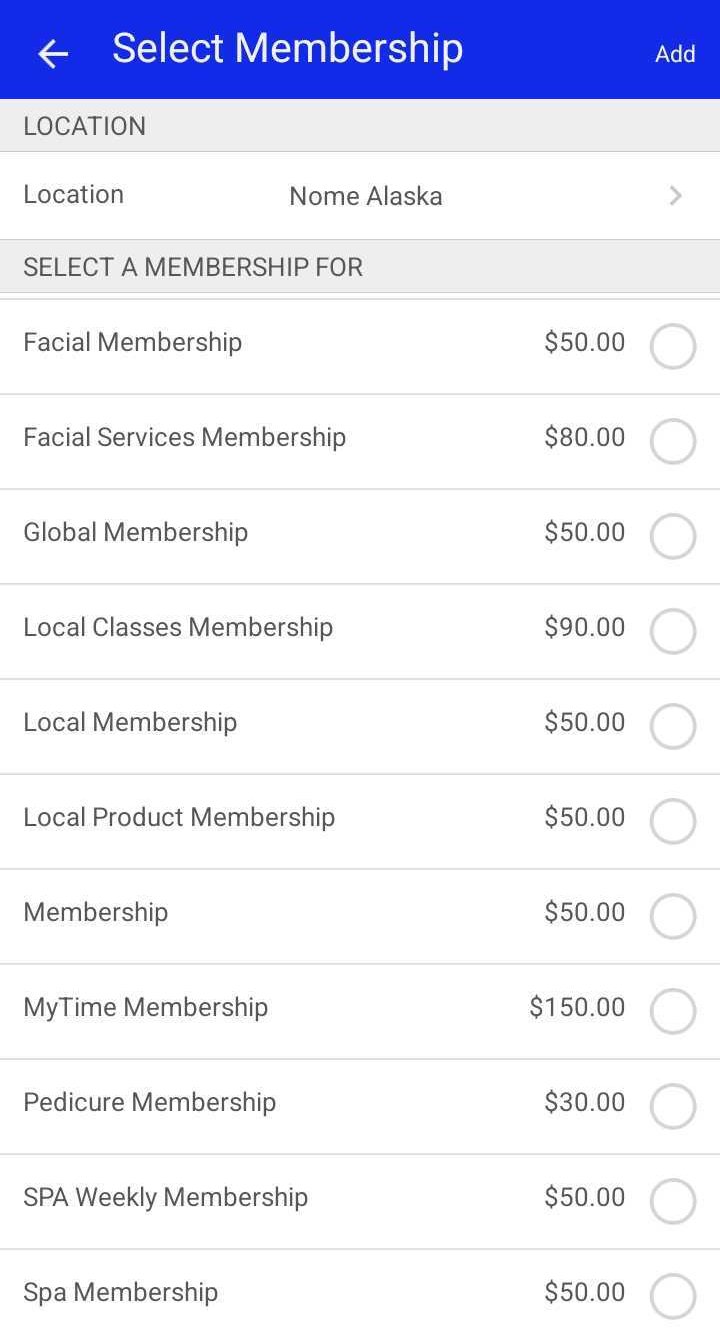
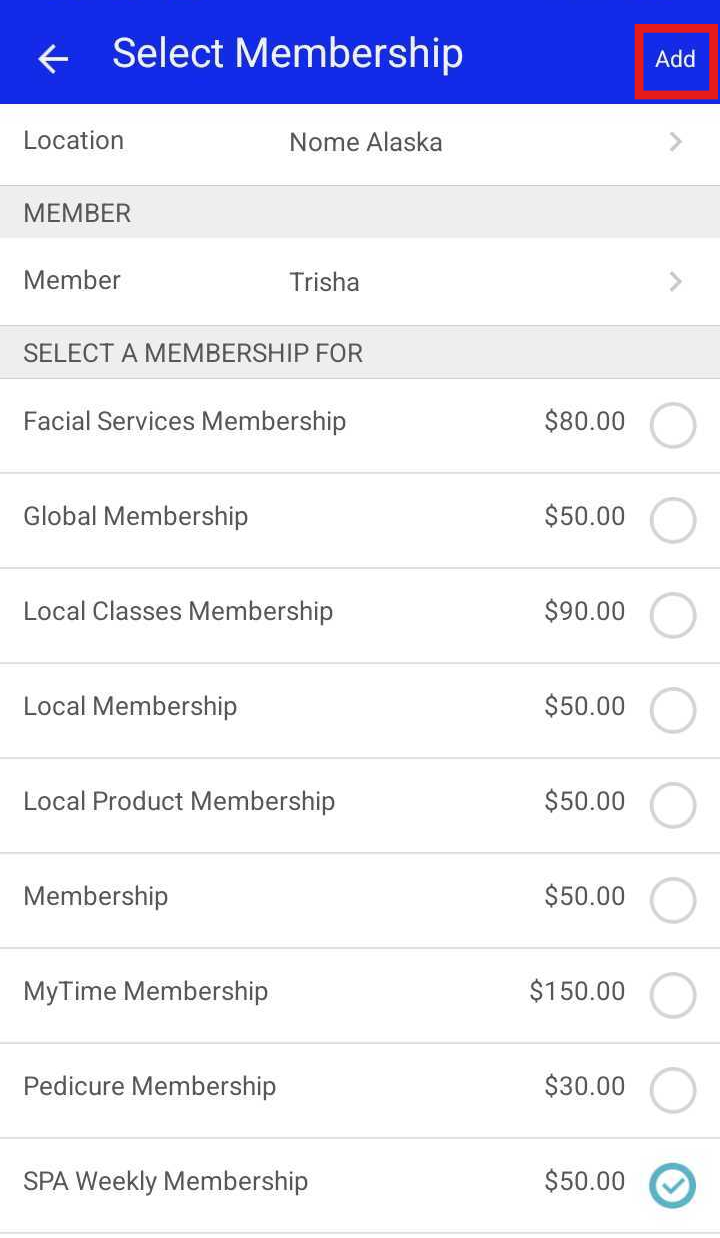
- Tap the Location field to select the correct location, then choose the desired membership
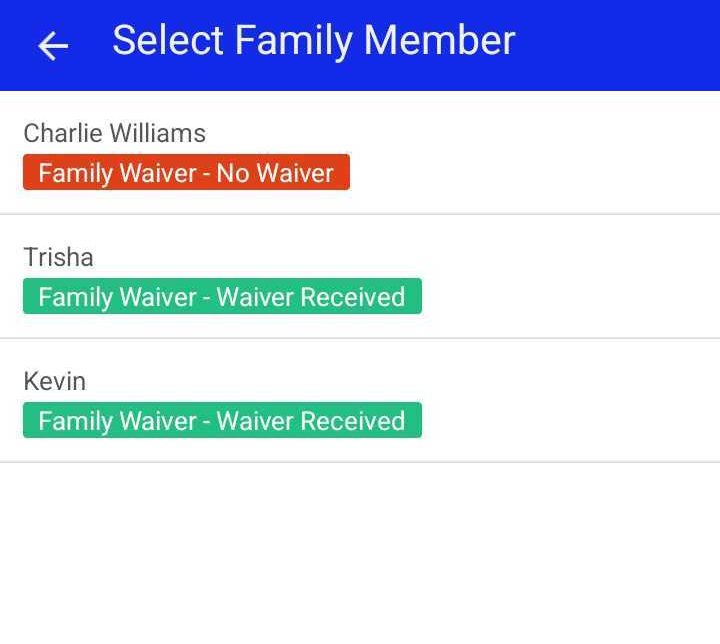
- If the membership is configured for individual family members, the Member field will appear
- By default, it displays the primary client’s name. Tap the field to select a family member from the client’s profile as the membership owner
- To add the membership without processing payment immediately, tap Add at the top of the screen
- The membership will appear on the client’s profile with the selected family member listed as the owner
- To collect payment immediately, tap Take Payment

- You will be directed to the POS screen.
- In the Commission field, select the staff member who sold the membership.
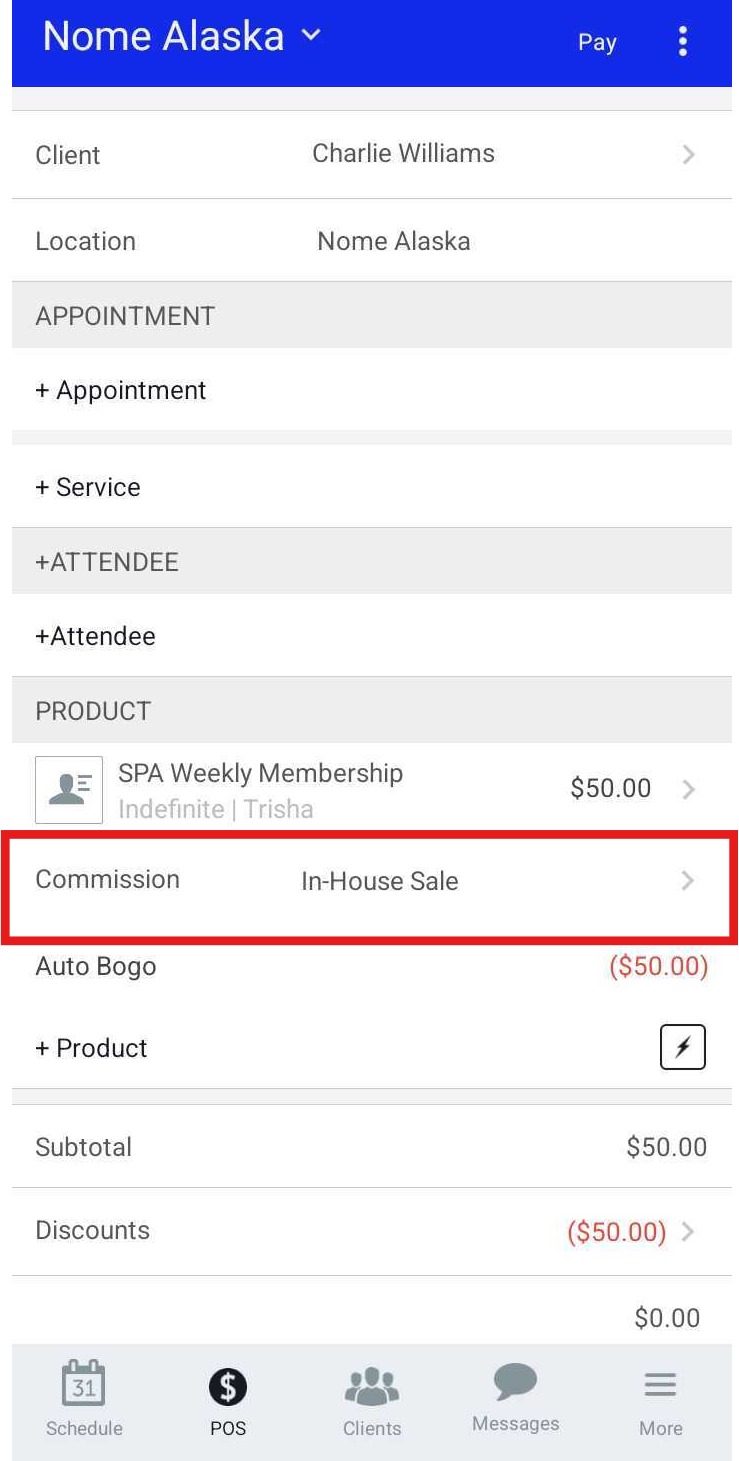
- Tap Pay, then close the ticket once payment is received.
For more information, contact us at support@mytime.com
Related Articles:
Installing MyTime on Scheduler App (Android and iOS)
Changing Associated Family Member on Purchased Memberships on Scheduler App
Selling Memberships for Family Members in POS on Scheduler App
Was this article helpful?
That’s Great!
Thank you for your feedback
Sorry! We couldn't be helpful
Thank you for your feedback
Feedback sent
We appreciate your effort and will try to fix the article