This article provides steps for scheduling recurring sessions and the seamless process of adding attendees to a full roster on the scheduler app.
Things to know:
- Scheduling classes/events requires both the "Schedule Classes/Events" company setting and the "Schedule Classes/Events" access control permission.
- Classes can be scheduled at either physical or virtual locations
- Most fields will auto-fill based on the class configuration. While you cannot change the attendee type during scheduling, other pre-filled details can be adjusted as needed. Learn more here.
- The attendee type and the amount charged are determined by the class configuration.
- Multiple attendees can be added to a class session by selecting quantities for specific attendee types directly from the class roster. This feature requires the “Allow Selecting Session Enrollment Attendee Quantity on Roster Page” hidden setting to be enabled. To enable this setting, please contact MyTime Support at support@mytime.com
- By default attendee capacity always takes priority over the resource’s capacity. Example:
- A classroom resource is set to accommodate 4 people per time slot.
- The class assigned to that classroom has an attendee capacity of 10.
- Despite the resource’s limit, all 10 attendees can be enrolled for that class session.
- You can enable the “Enable Attendee Resources for Classes” setting to limit class capacity based on the resources assigned to each attendee type. Attendee resources refer to specific equipment or space allocated to different attendee groups, such as "General" and "VIP" types. For each time slot, the system determines availability by using the lower of the attendee limit or the resource limit. The combined total slots available for the class is the sum of these individual limits across all attendee types. Example:
- General Attendees: Limit 10
- Resource Limit 5 = 5 slots available
- VIP Attendees: Limit 2
- Resource Limit 3 = 2 slots available
- Total Class Capacity: 7 combined slots available
Contents:
Scheduling Recurring Classes/Events
1. Launch the MyTime Scheduler app on your device
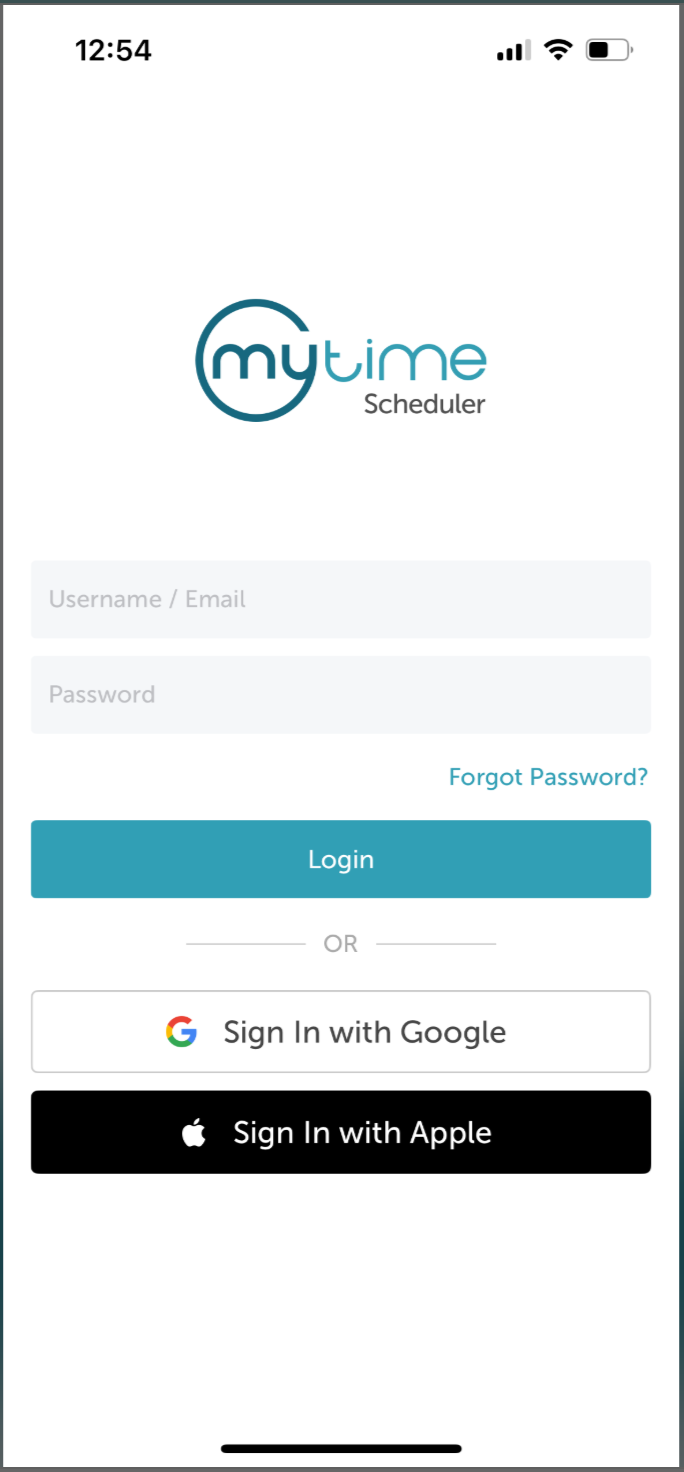
2. Choose your login method:
- Standard: Enter your registered email address and password, then tap 'Sign In'
- Social Login: Select 'Continue with Google' or 'Continue with Apple' to use your existing credentials for a faster login experience. For detailed instructions, learn more here
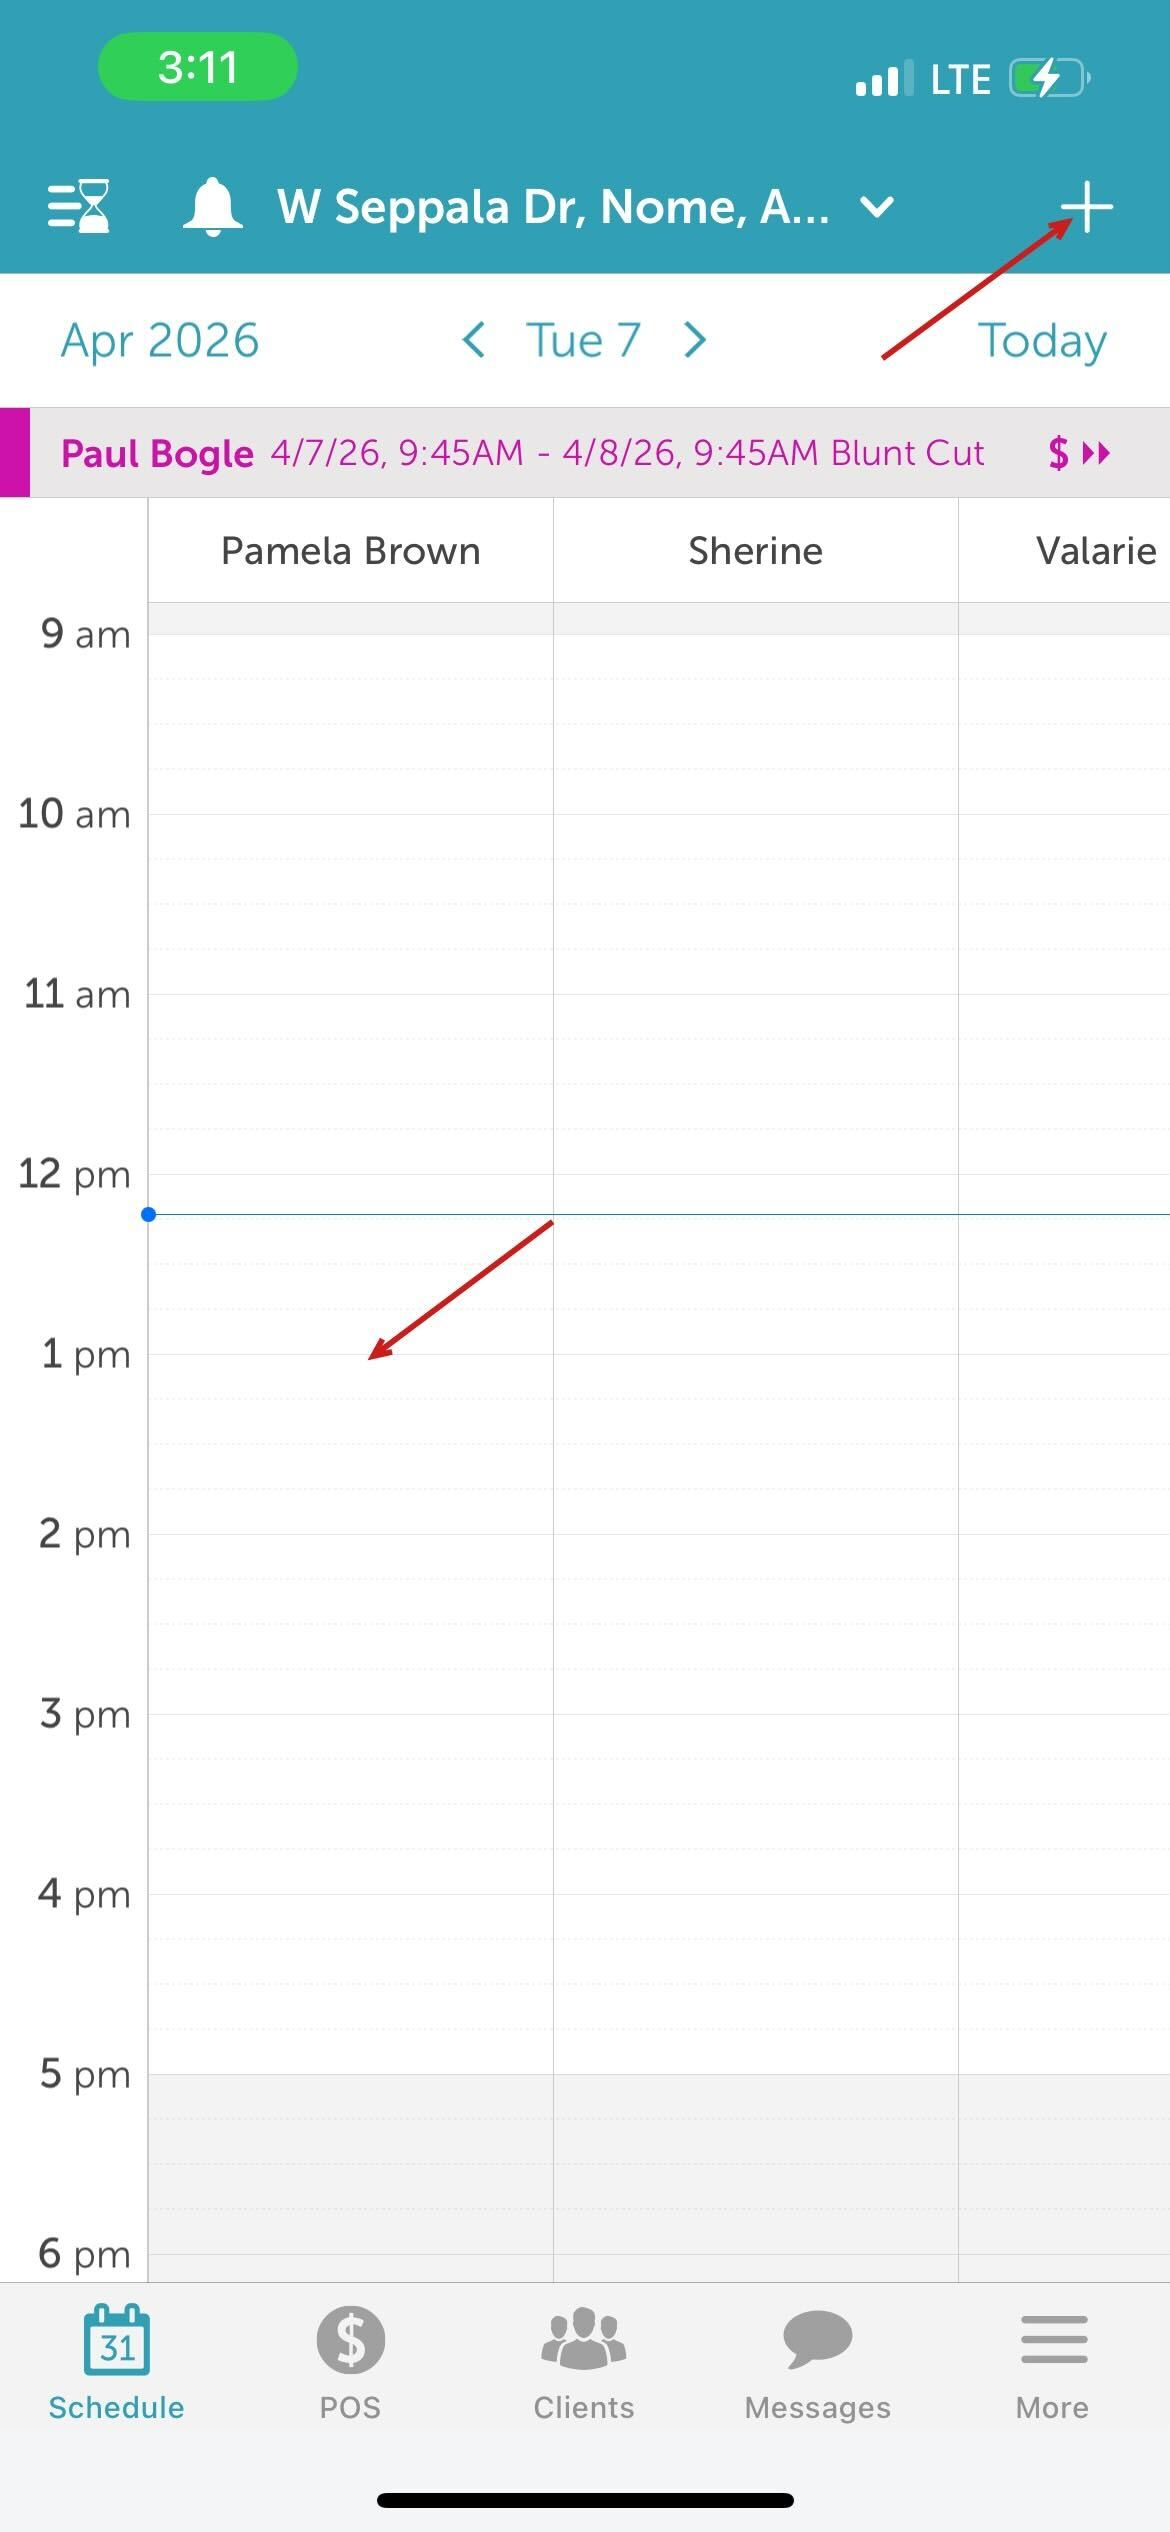
3. Once signed in you will be directed to the schedule by default.
4. Tap the specific time slot under your preferred staff member OR tap the "+" icon in the bottom right corner of the screen.
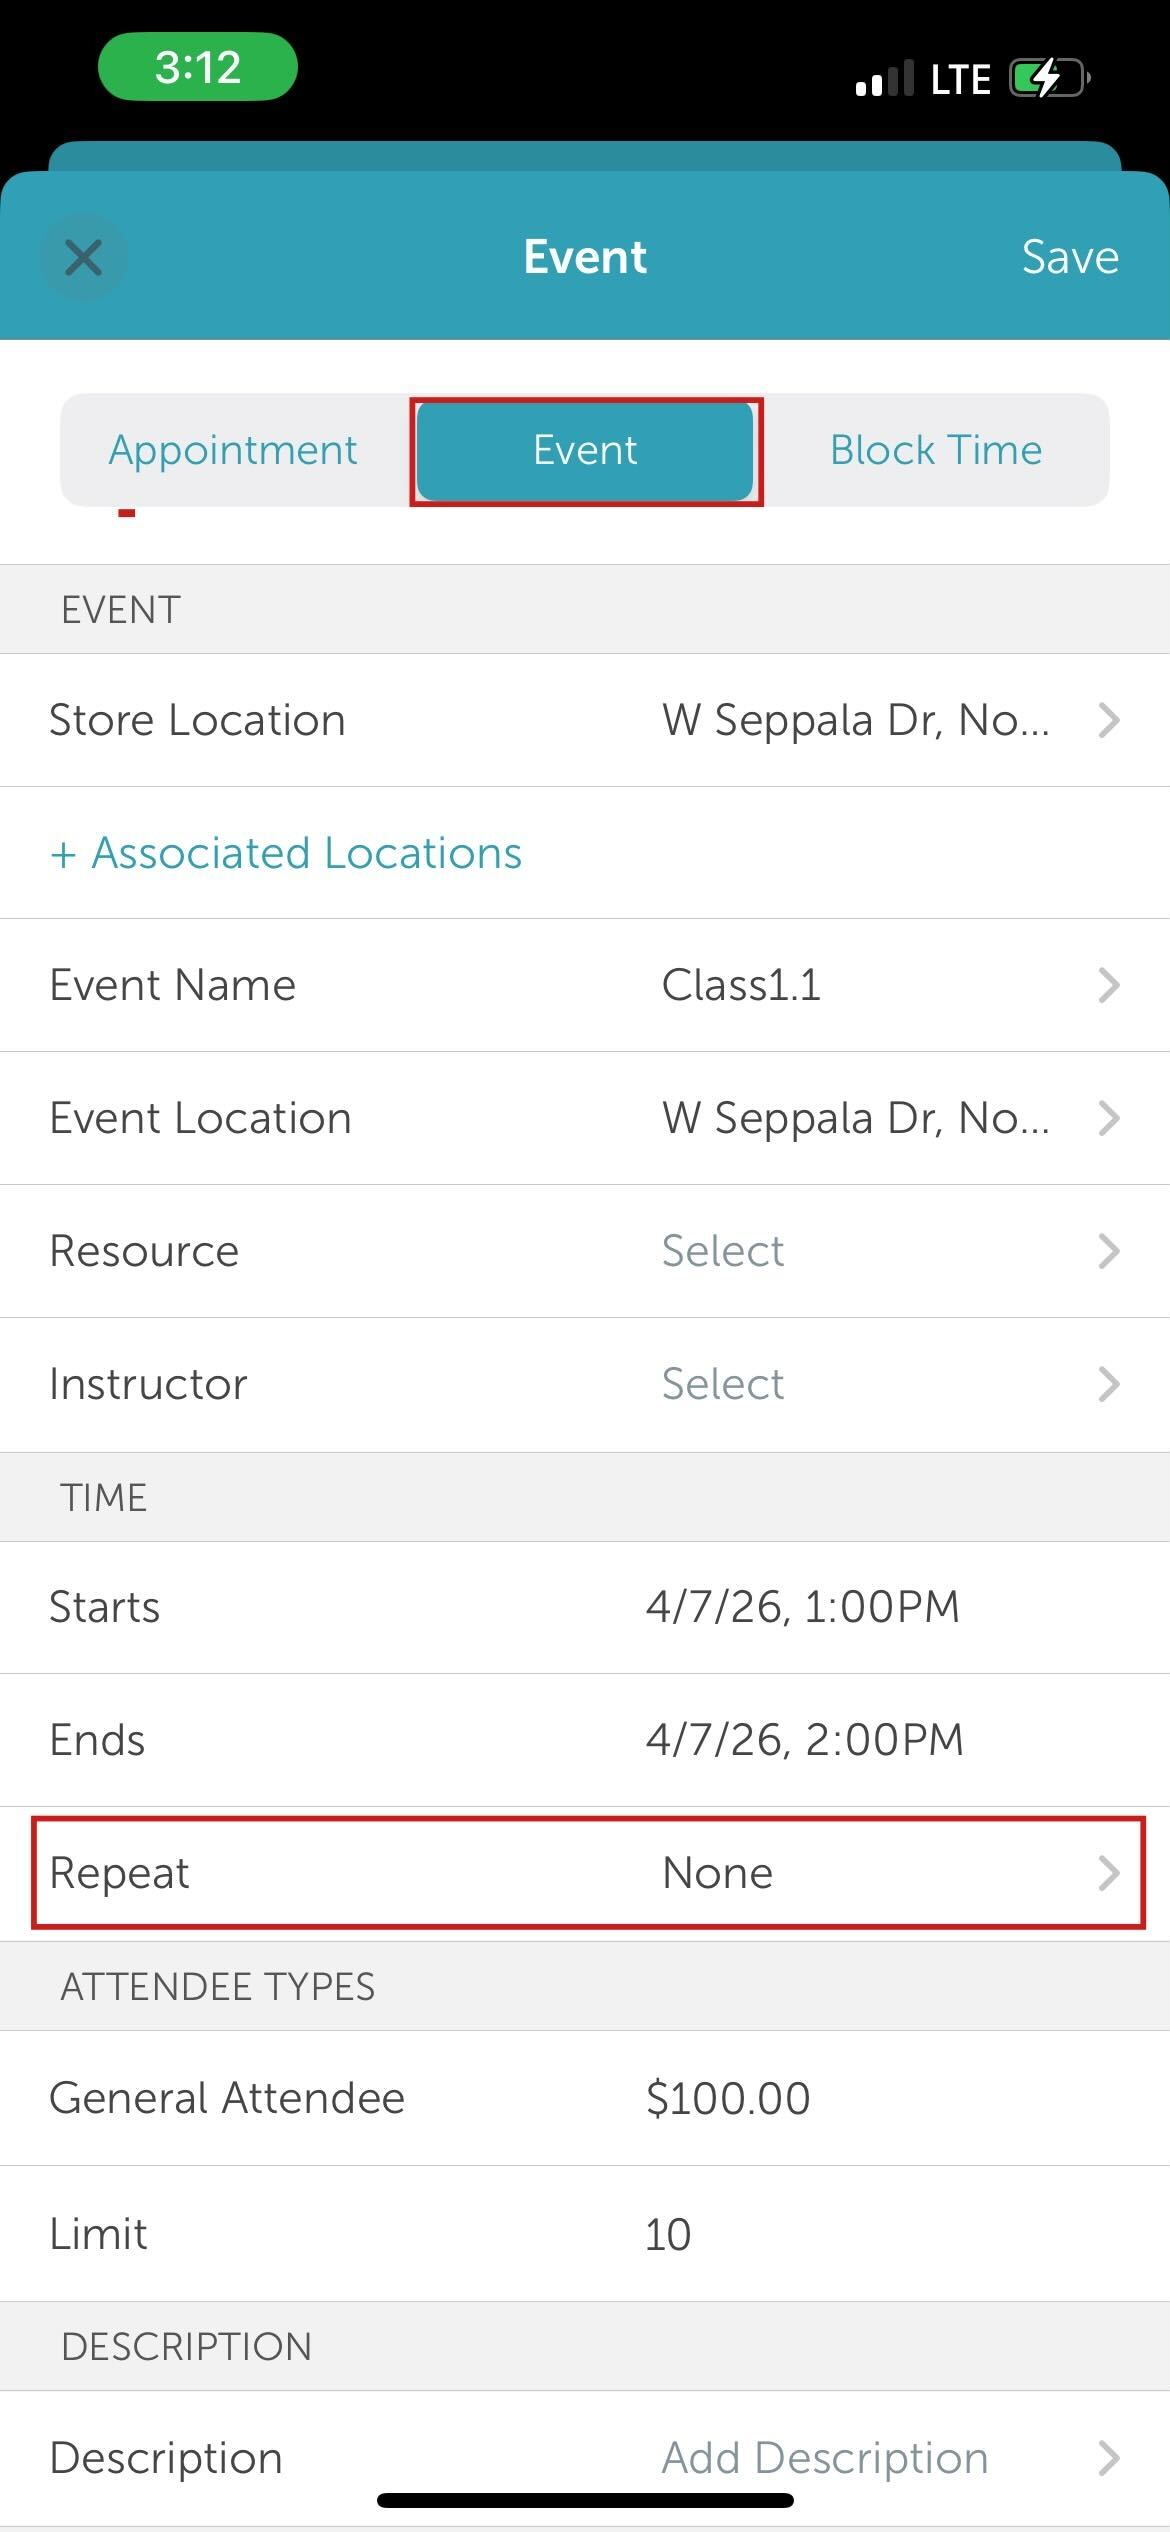
5. On the New Event modal, ensure the 'Event' tab is selected, complete any required event details (e.g., Title, Staff, Capacity) that are not already prefilled.
6. In the time section, tap Repeat.
7. Toggle the 'Add End Date?' button to On. 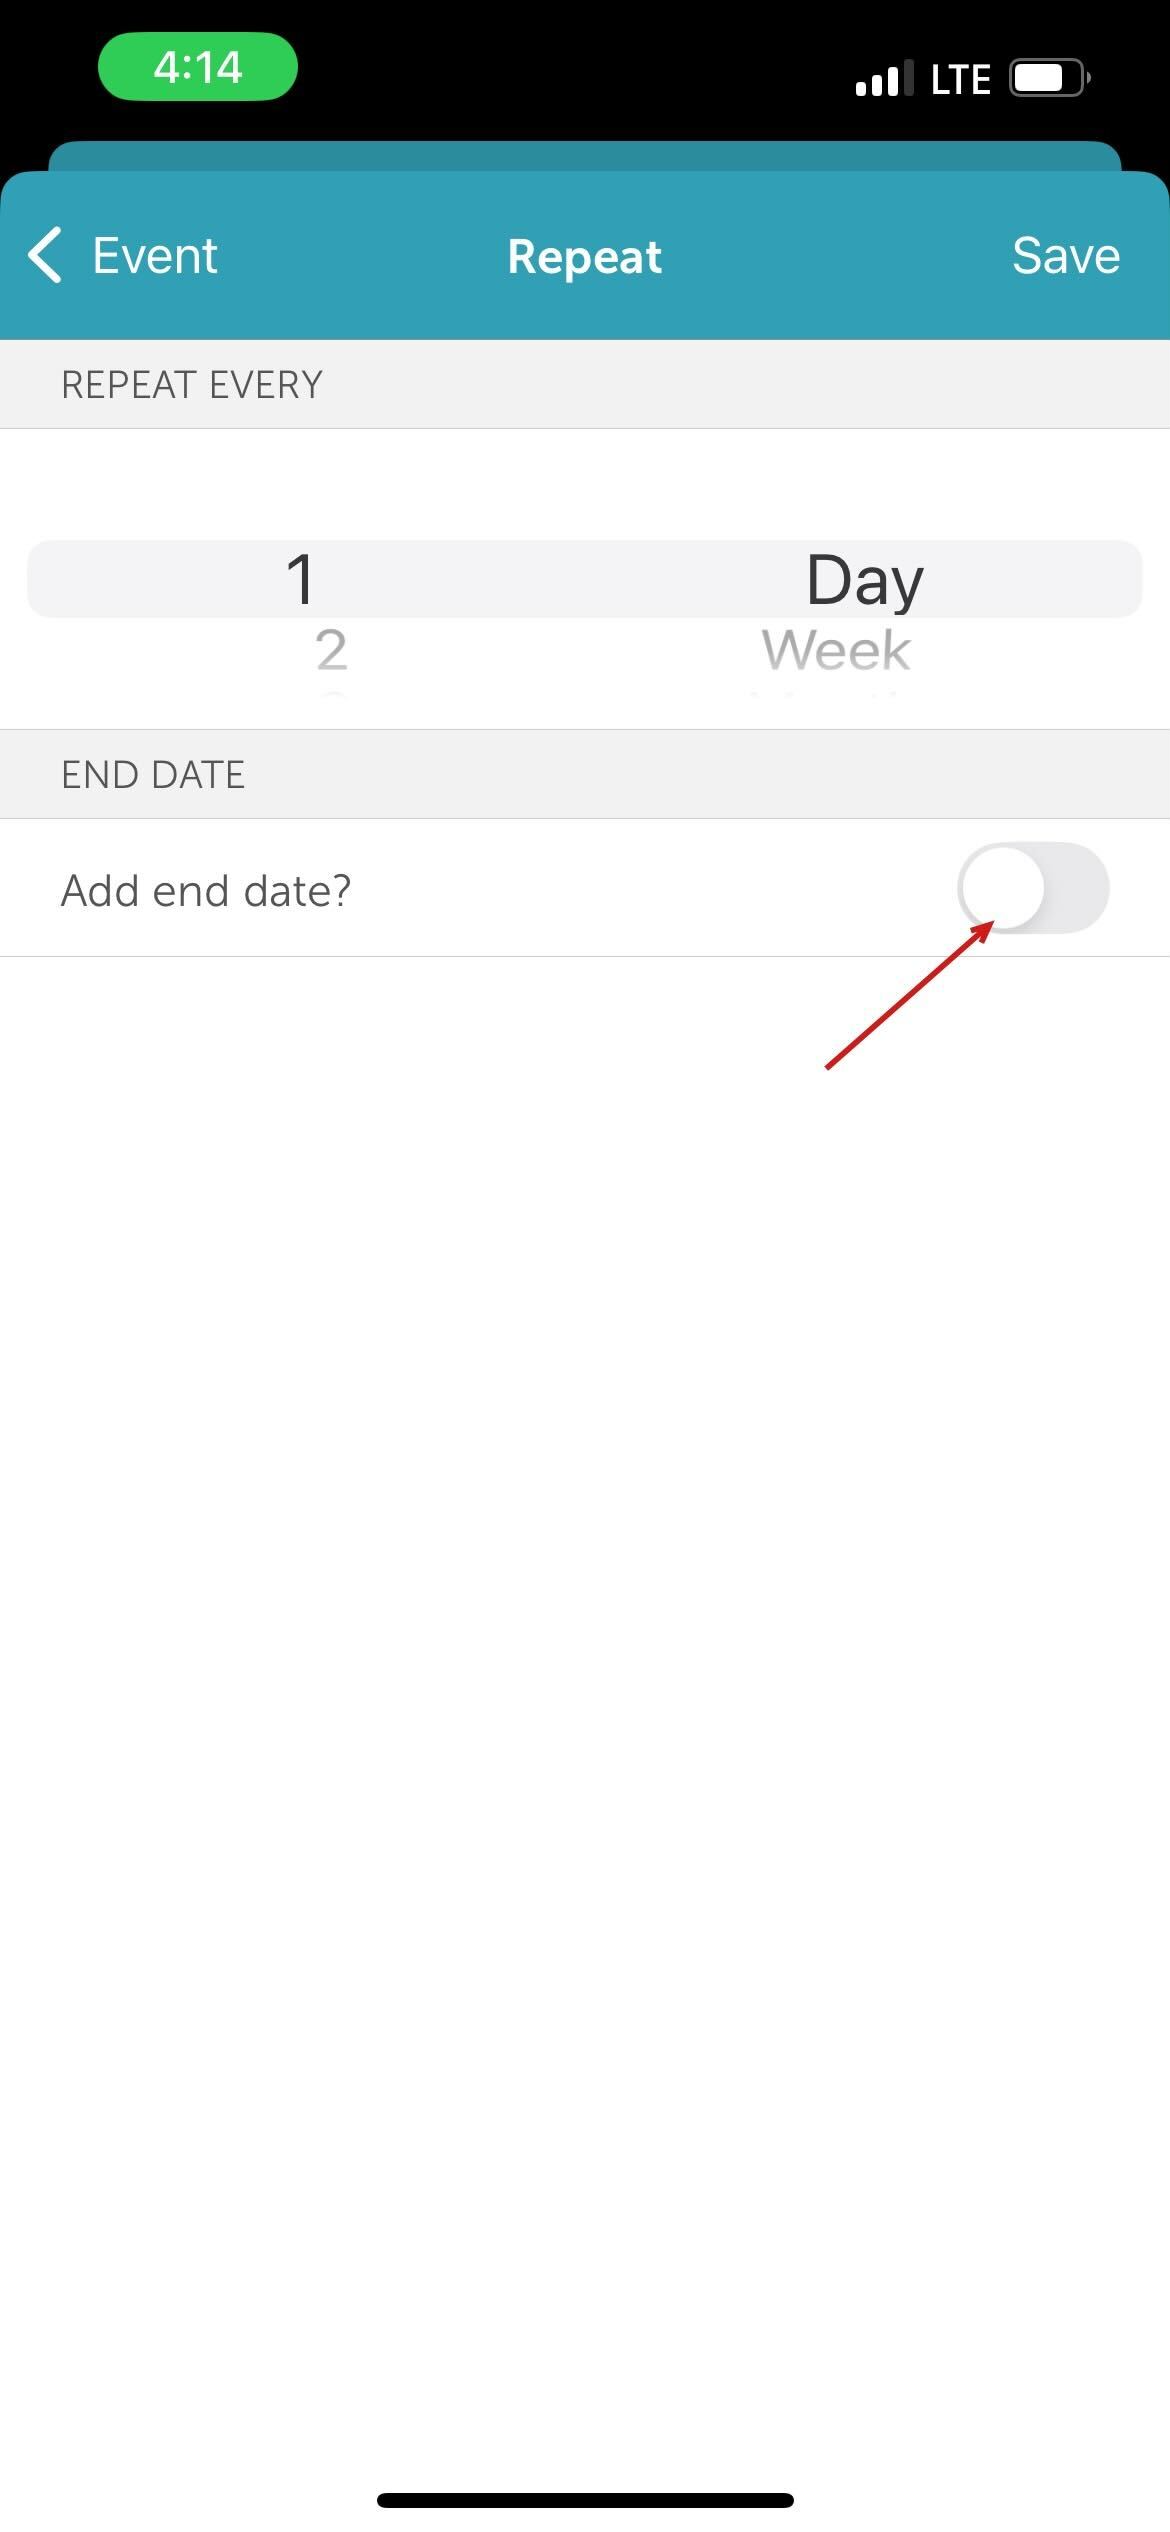
8. Once toggled, set class recurring frequency:
- Repeat Every: Specify the interval (e.g., for a session every 2 months, select Month and enter 2).
- Day: Selected by default.
- Week: Select the day(s) of the week the session should occur.
- Month: Choose the number of months between sessions.
- Select whether the session repeats on the same calendar date or on the same week and day of the month.
- End Date: Choose the specific days or monthly patterns (e.g., "the 2nd Tuesday of the month").
- A specific end date, or
- A total number of occurrences.
9. Define Enrollment Window:
- First Session Only: Clients can only join at the very start of the series.
- Anytime During the Series (Default): Clients can join at any point, even if they missed the first session.
10. Define Session Commitment:
- All Remaining Sessions: Clients are automatically booked for all future dates in the series upon joining.
- Individual Sessions, Client Chooses (Default): Clients can pick and choose specific dates without committing to the full series.
11. After configuring your recurring options, tap Save in the top right corner.
12. You will return to the main event modal, where the recurring frequency will now be displayed. Review all details one last time and tap Save again to finalize the class.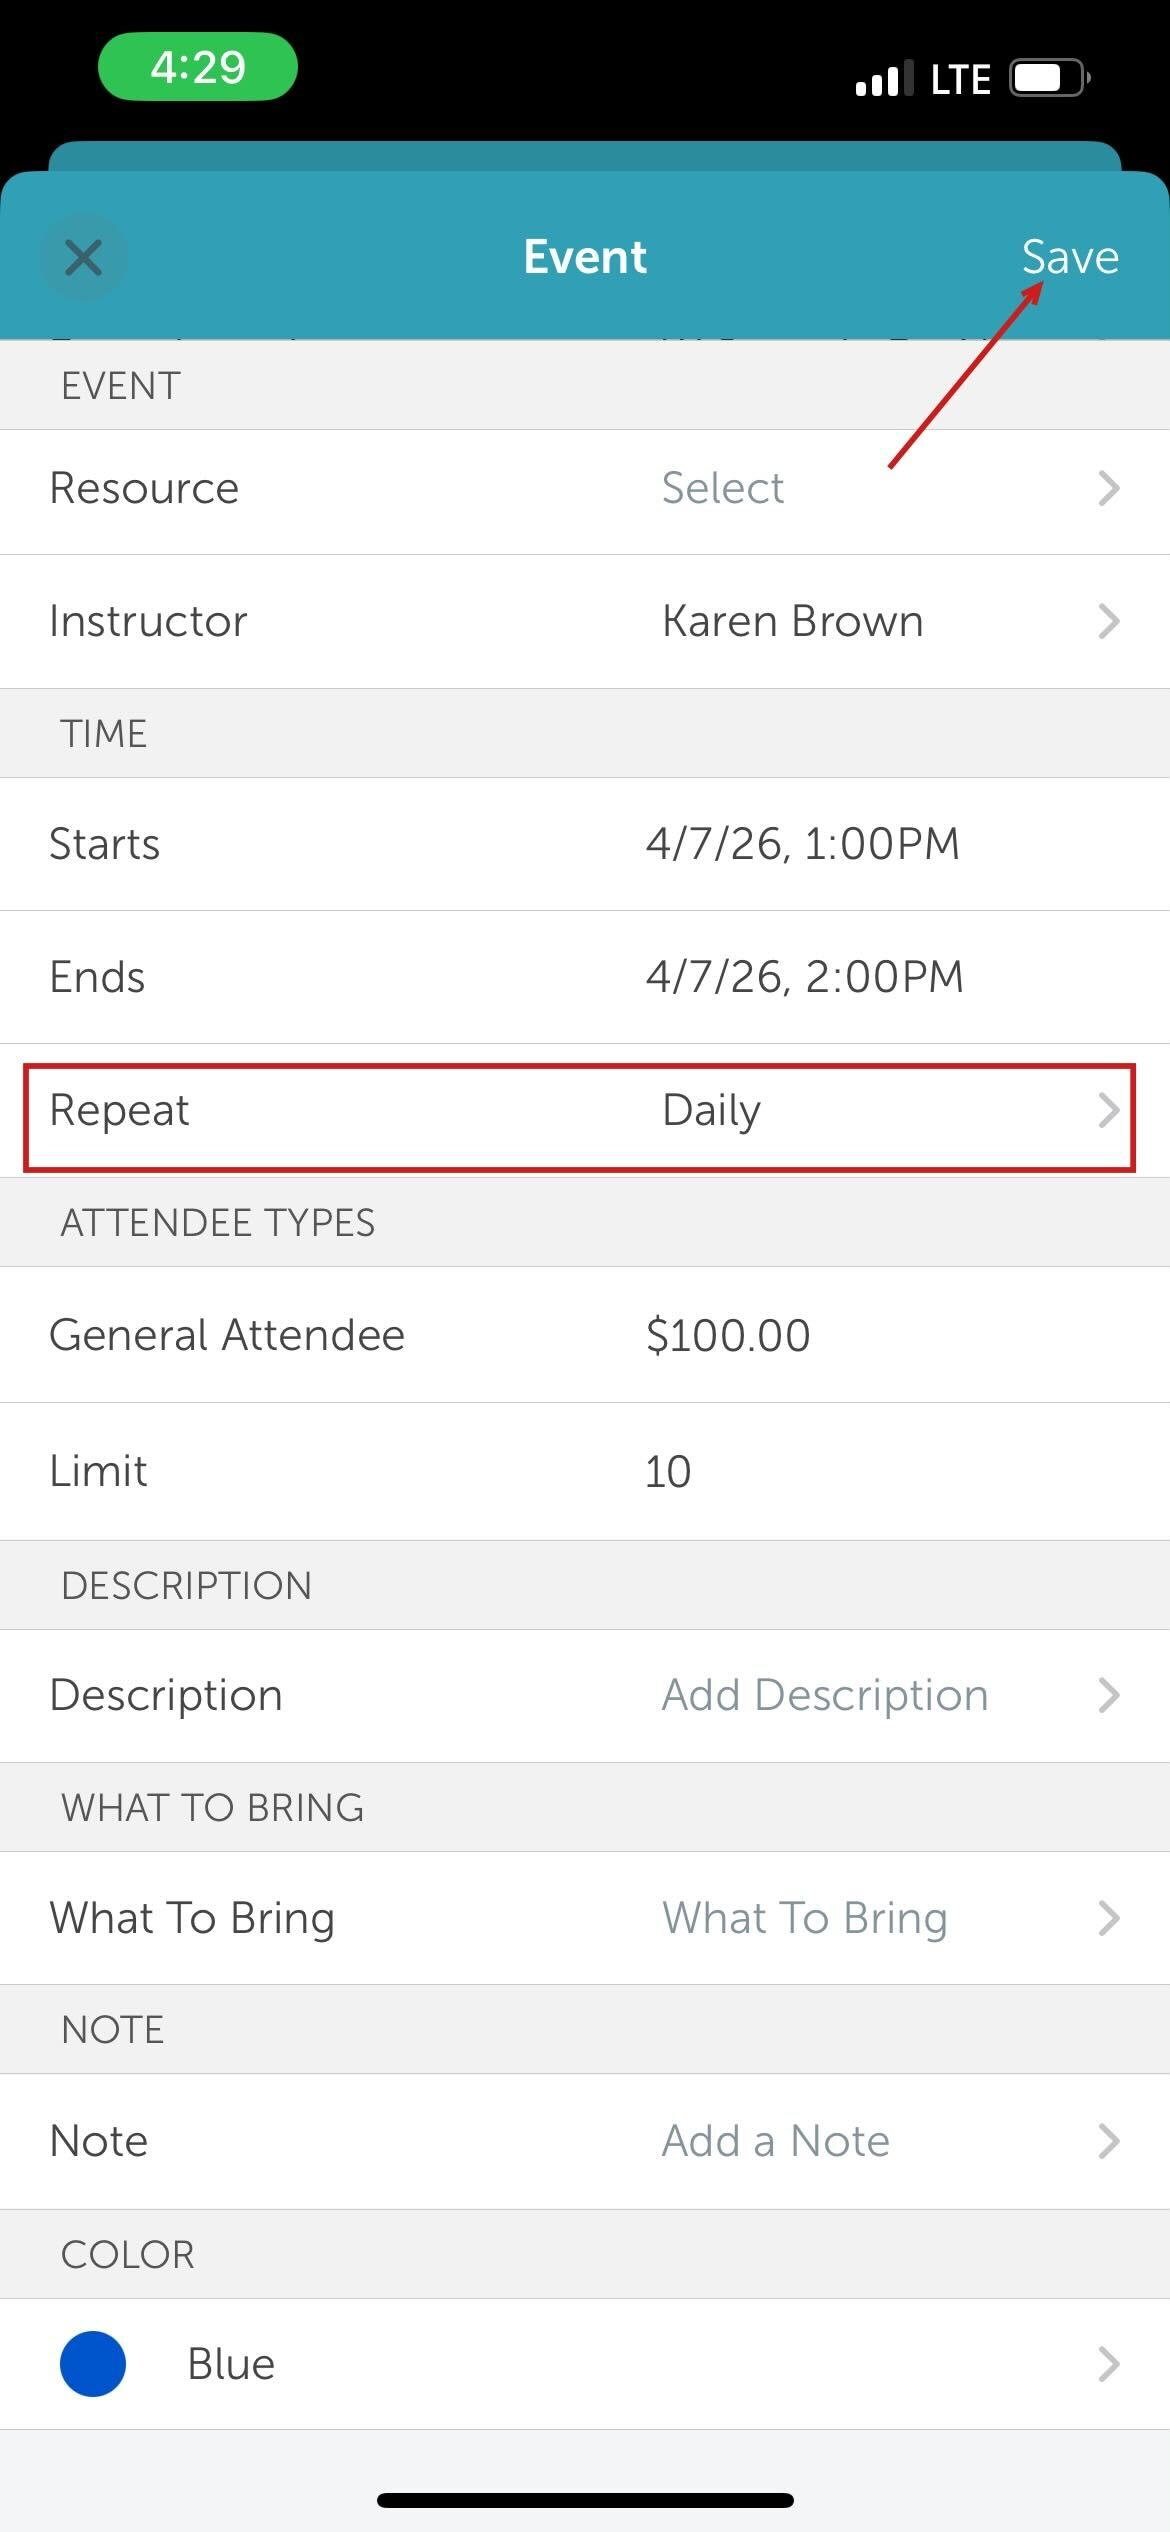
Adding Attendee to Recurring Classes/Events
1. From your Schedule, locate and tap the specific class session to open it. 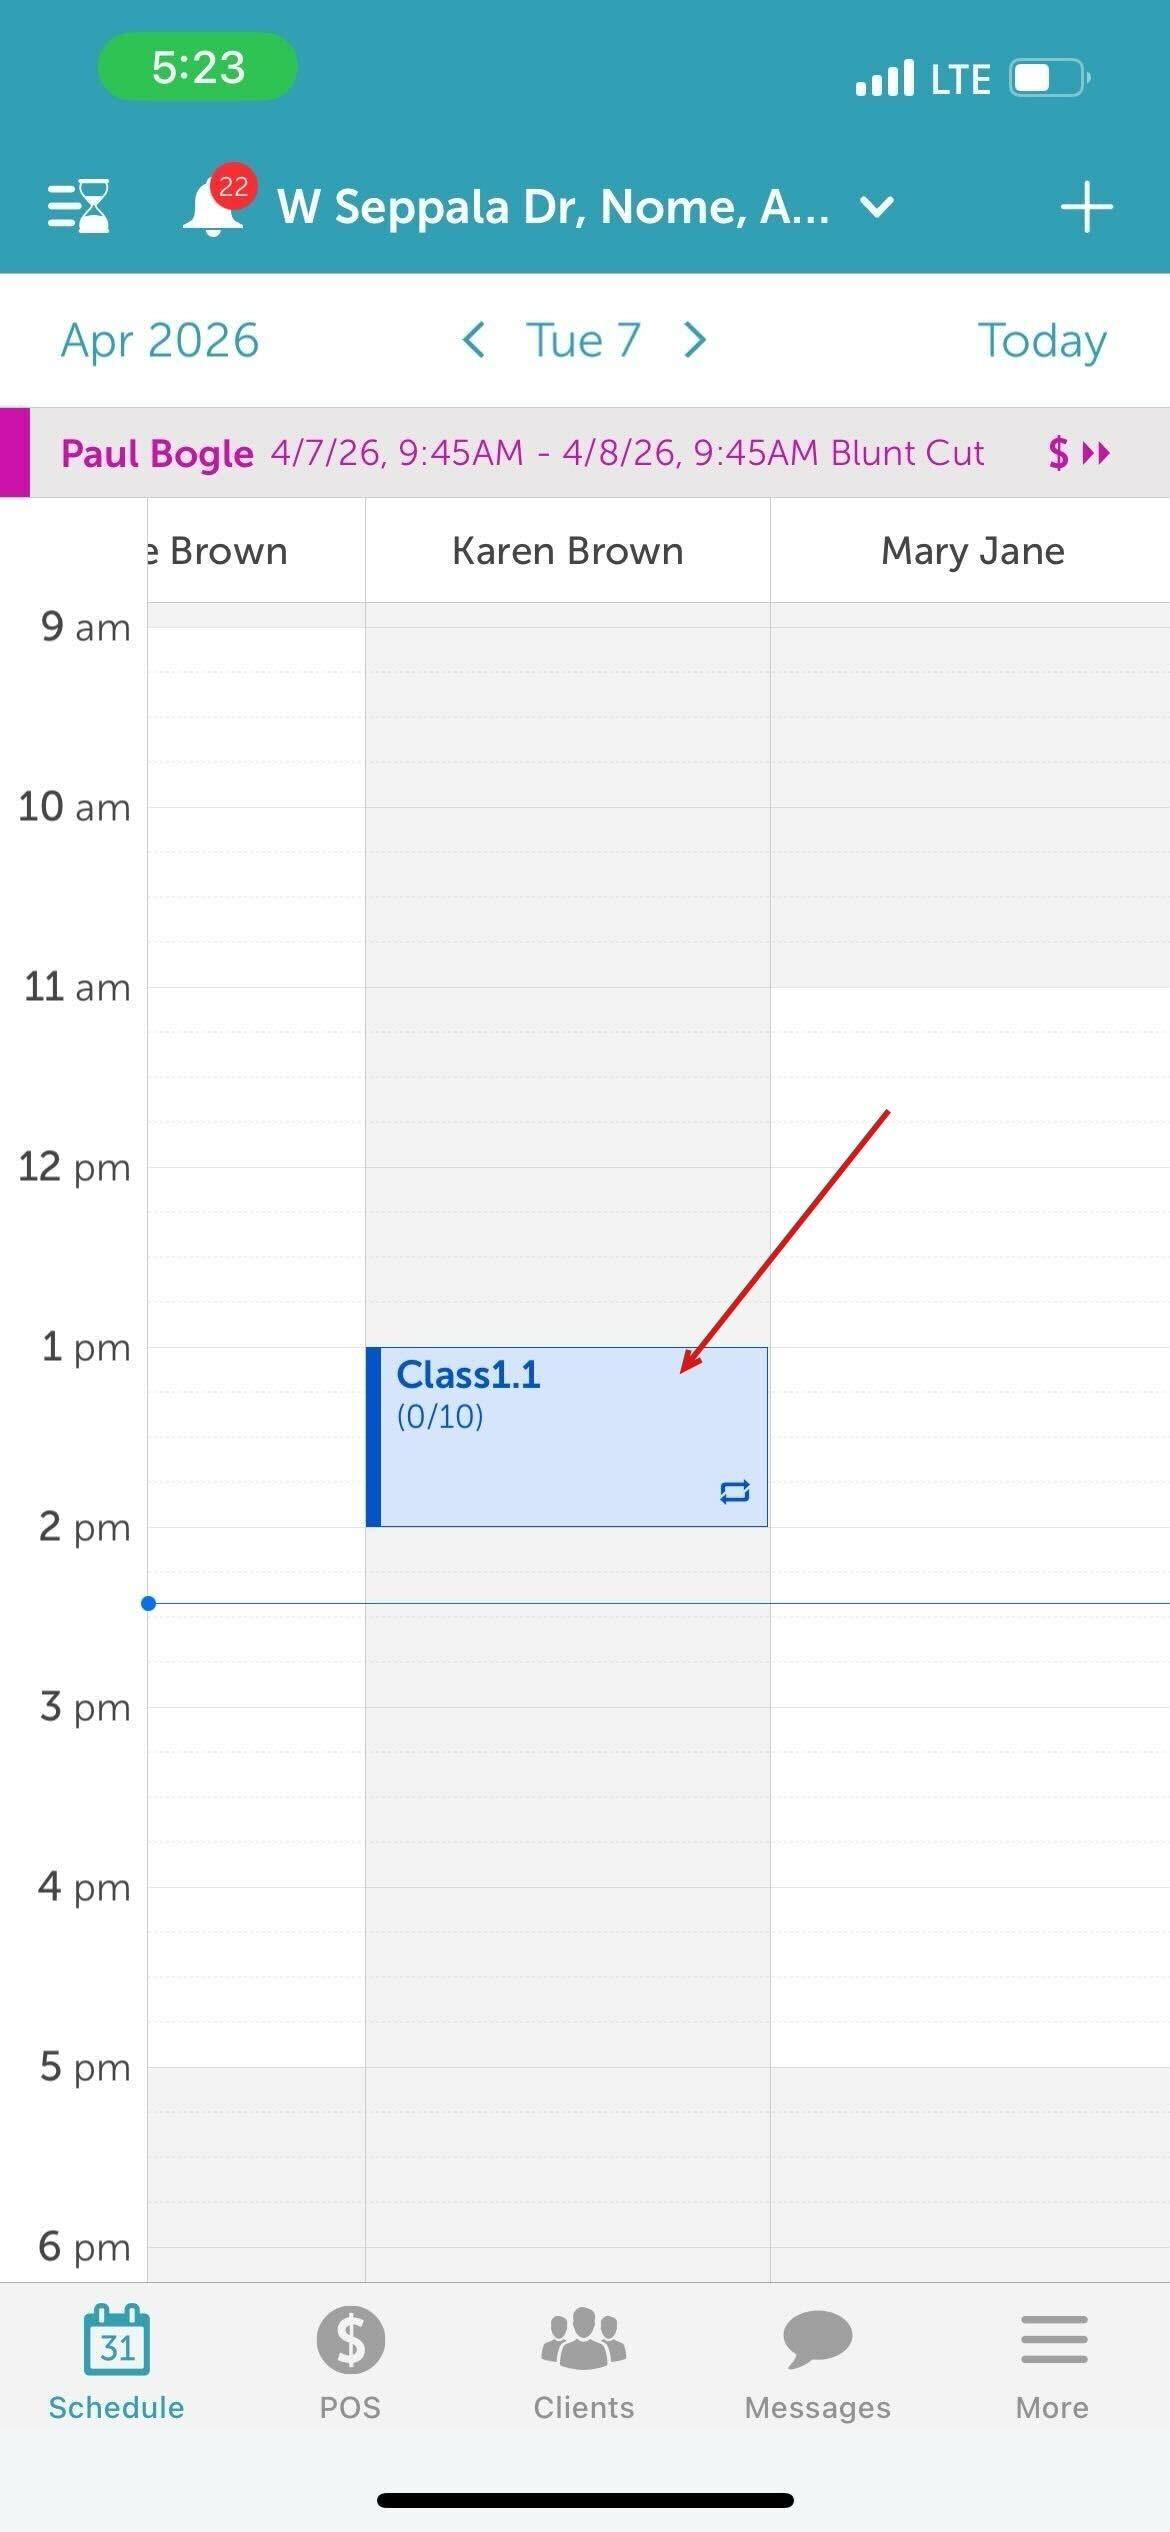
2. Tap View Attendees 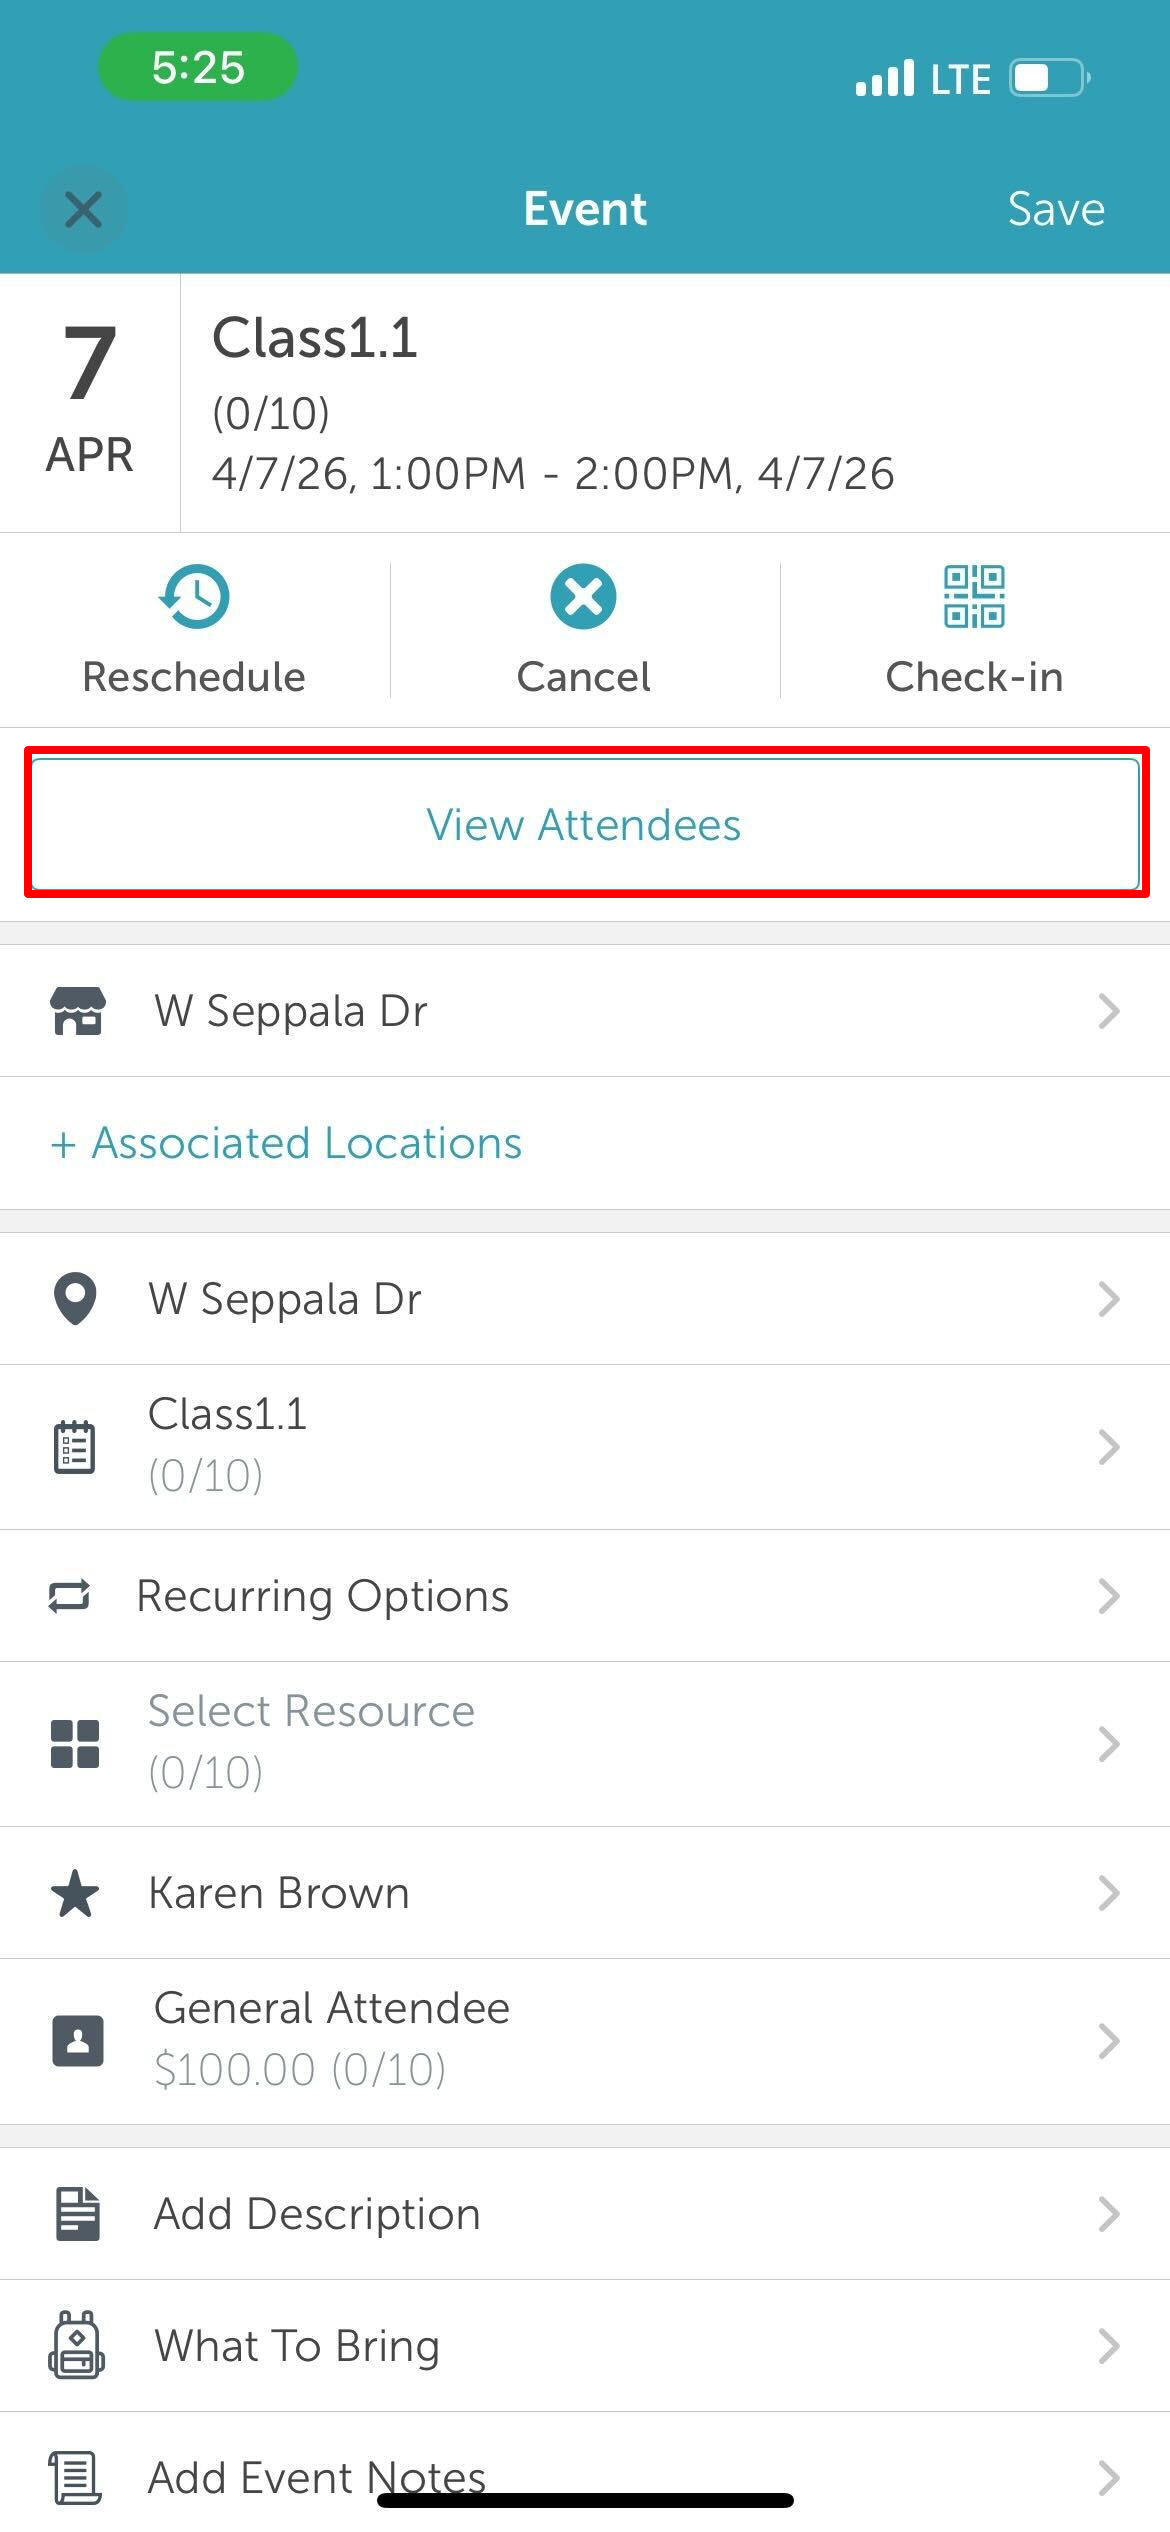
3. Tap the '+' icon in the top right of the screen 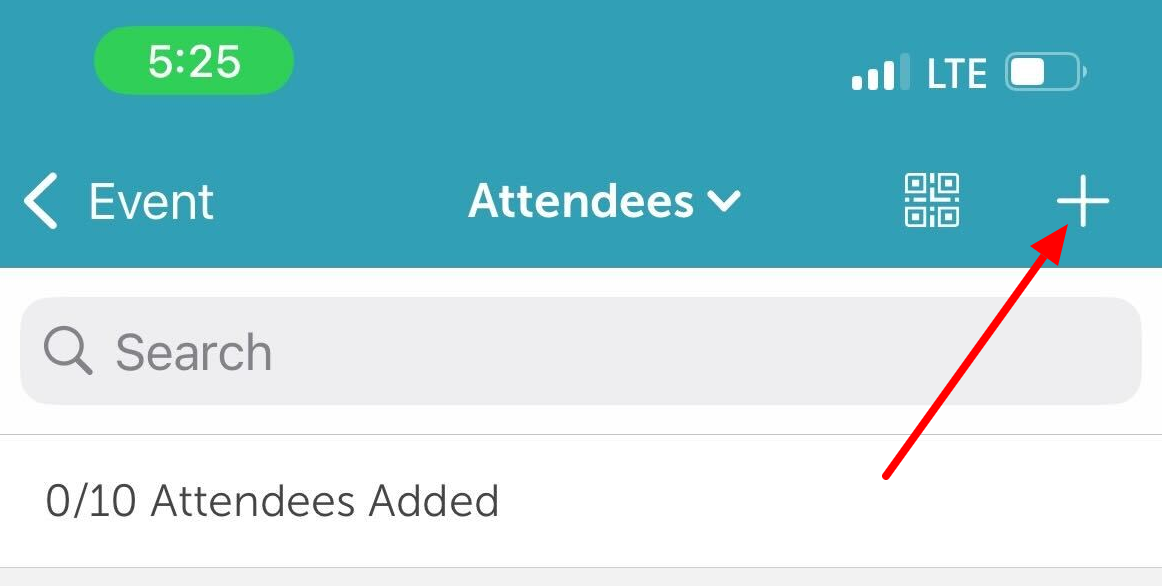
4. Search and select the client from the client list or add new client by tapping the '+' icon in the top right of the screen 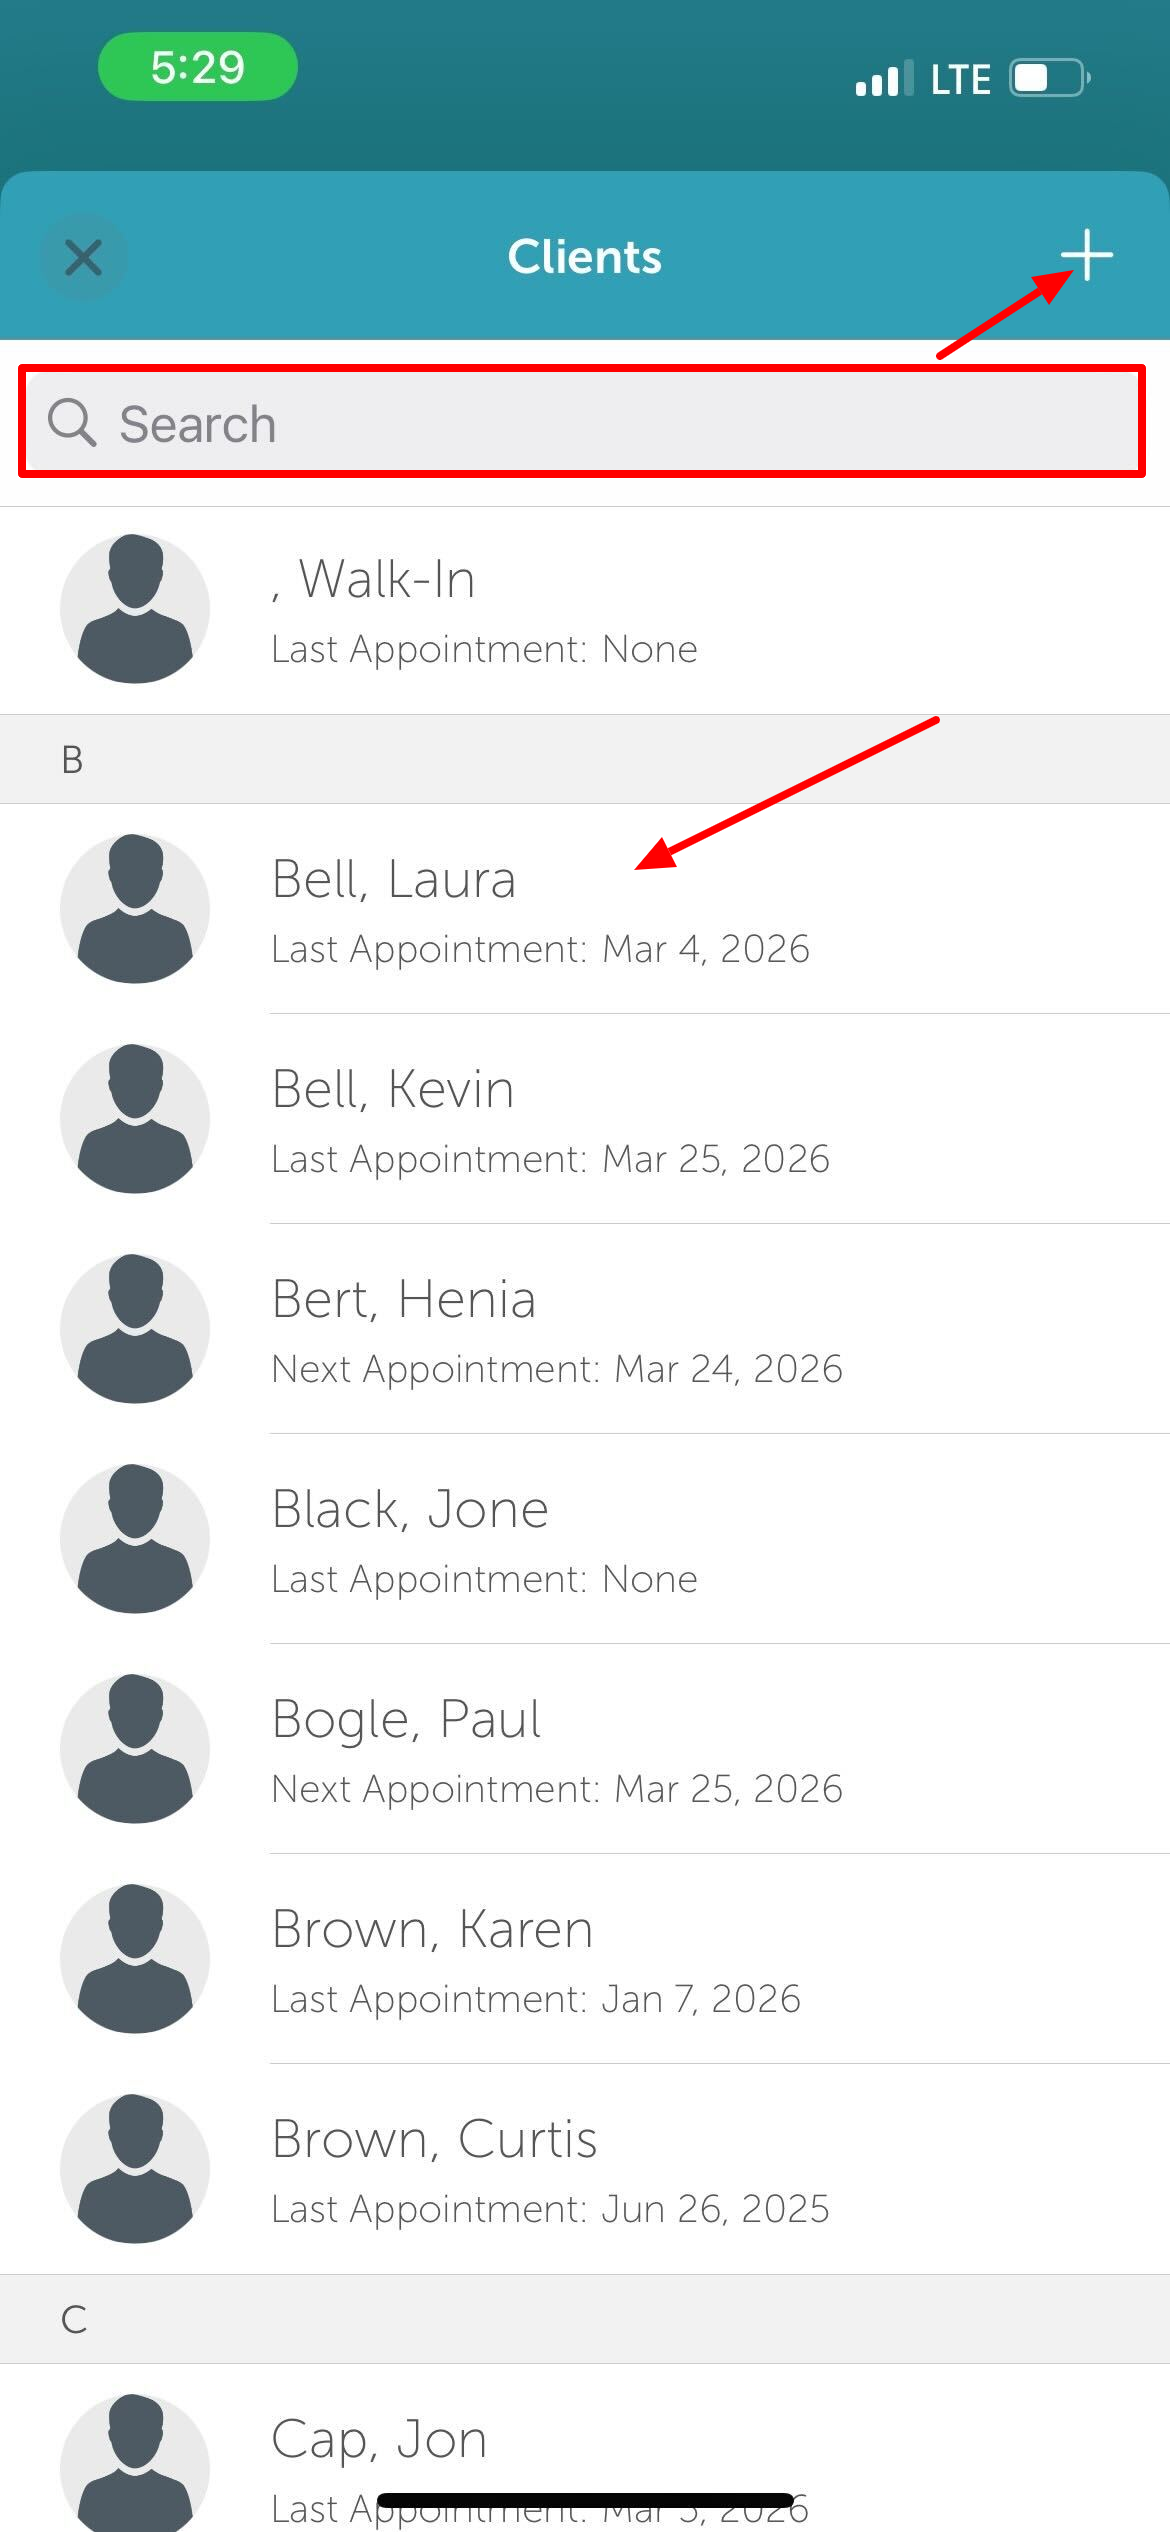
5. Select the attendee 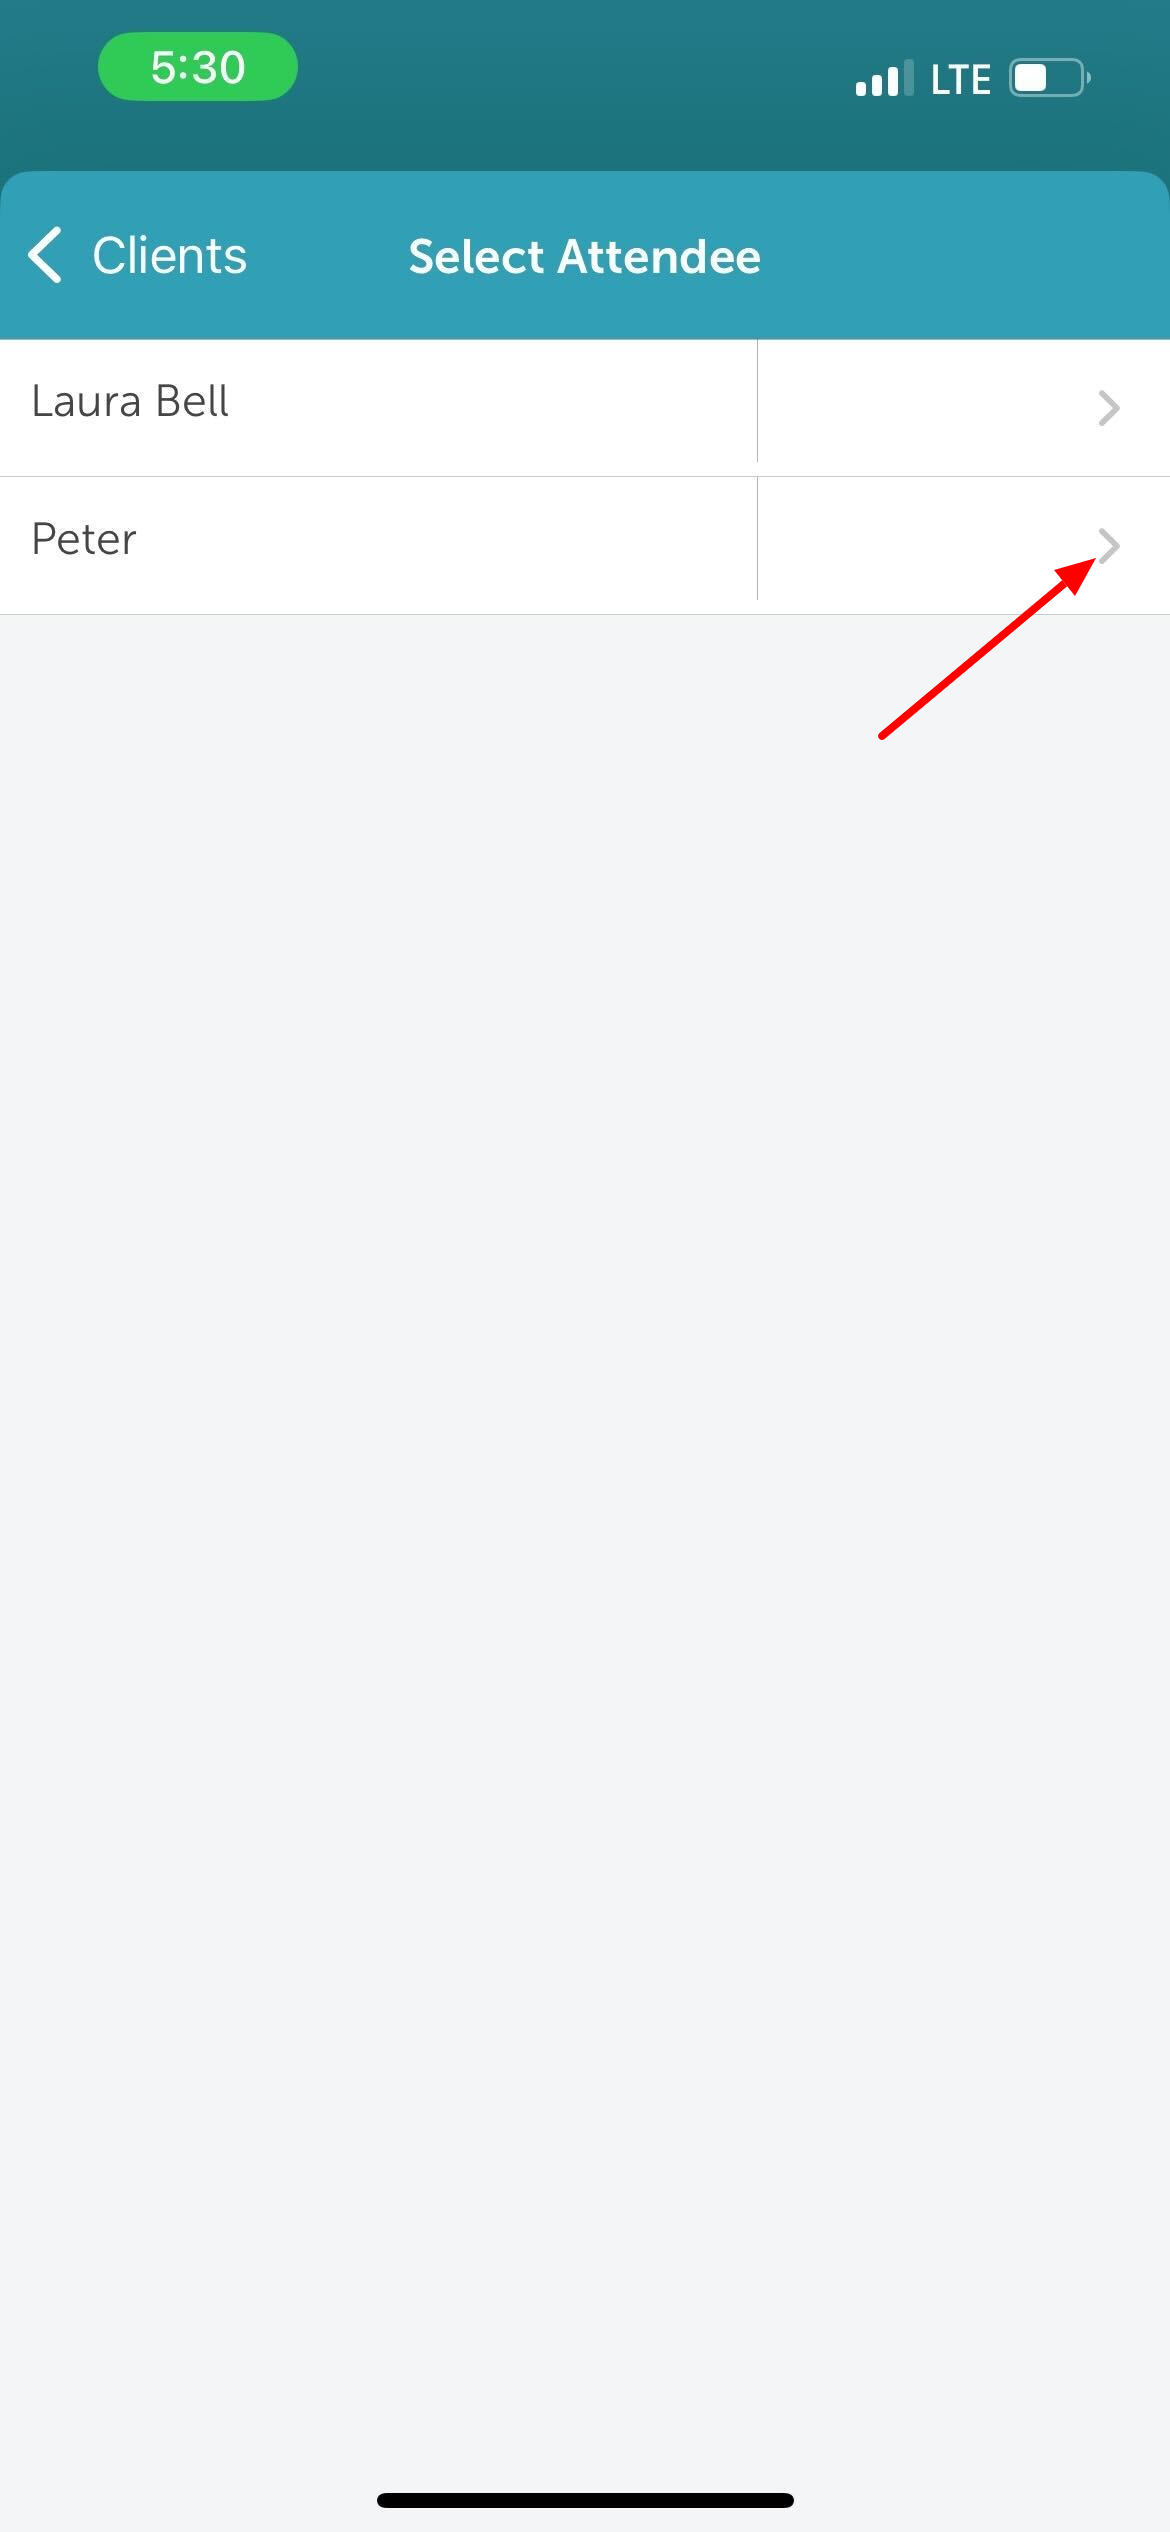
6. Once the client is selected, choose the Attendee Type (e.g., Client, Pet, or Family Member).
7. Select Dates: You will see a list of sessions in the recurring series. Tap the desired dates to enroll the client in those specific sessions.
8. After setting the session details, tap Save in the top right corner.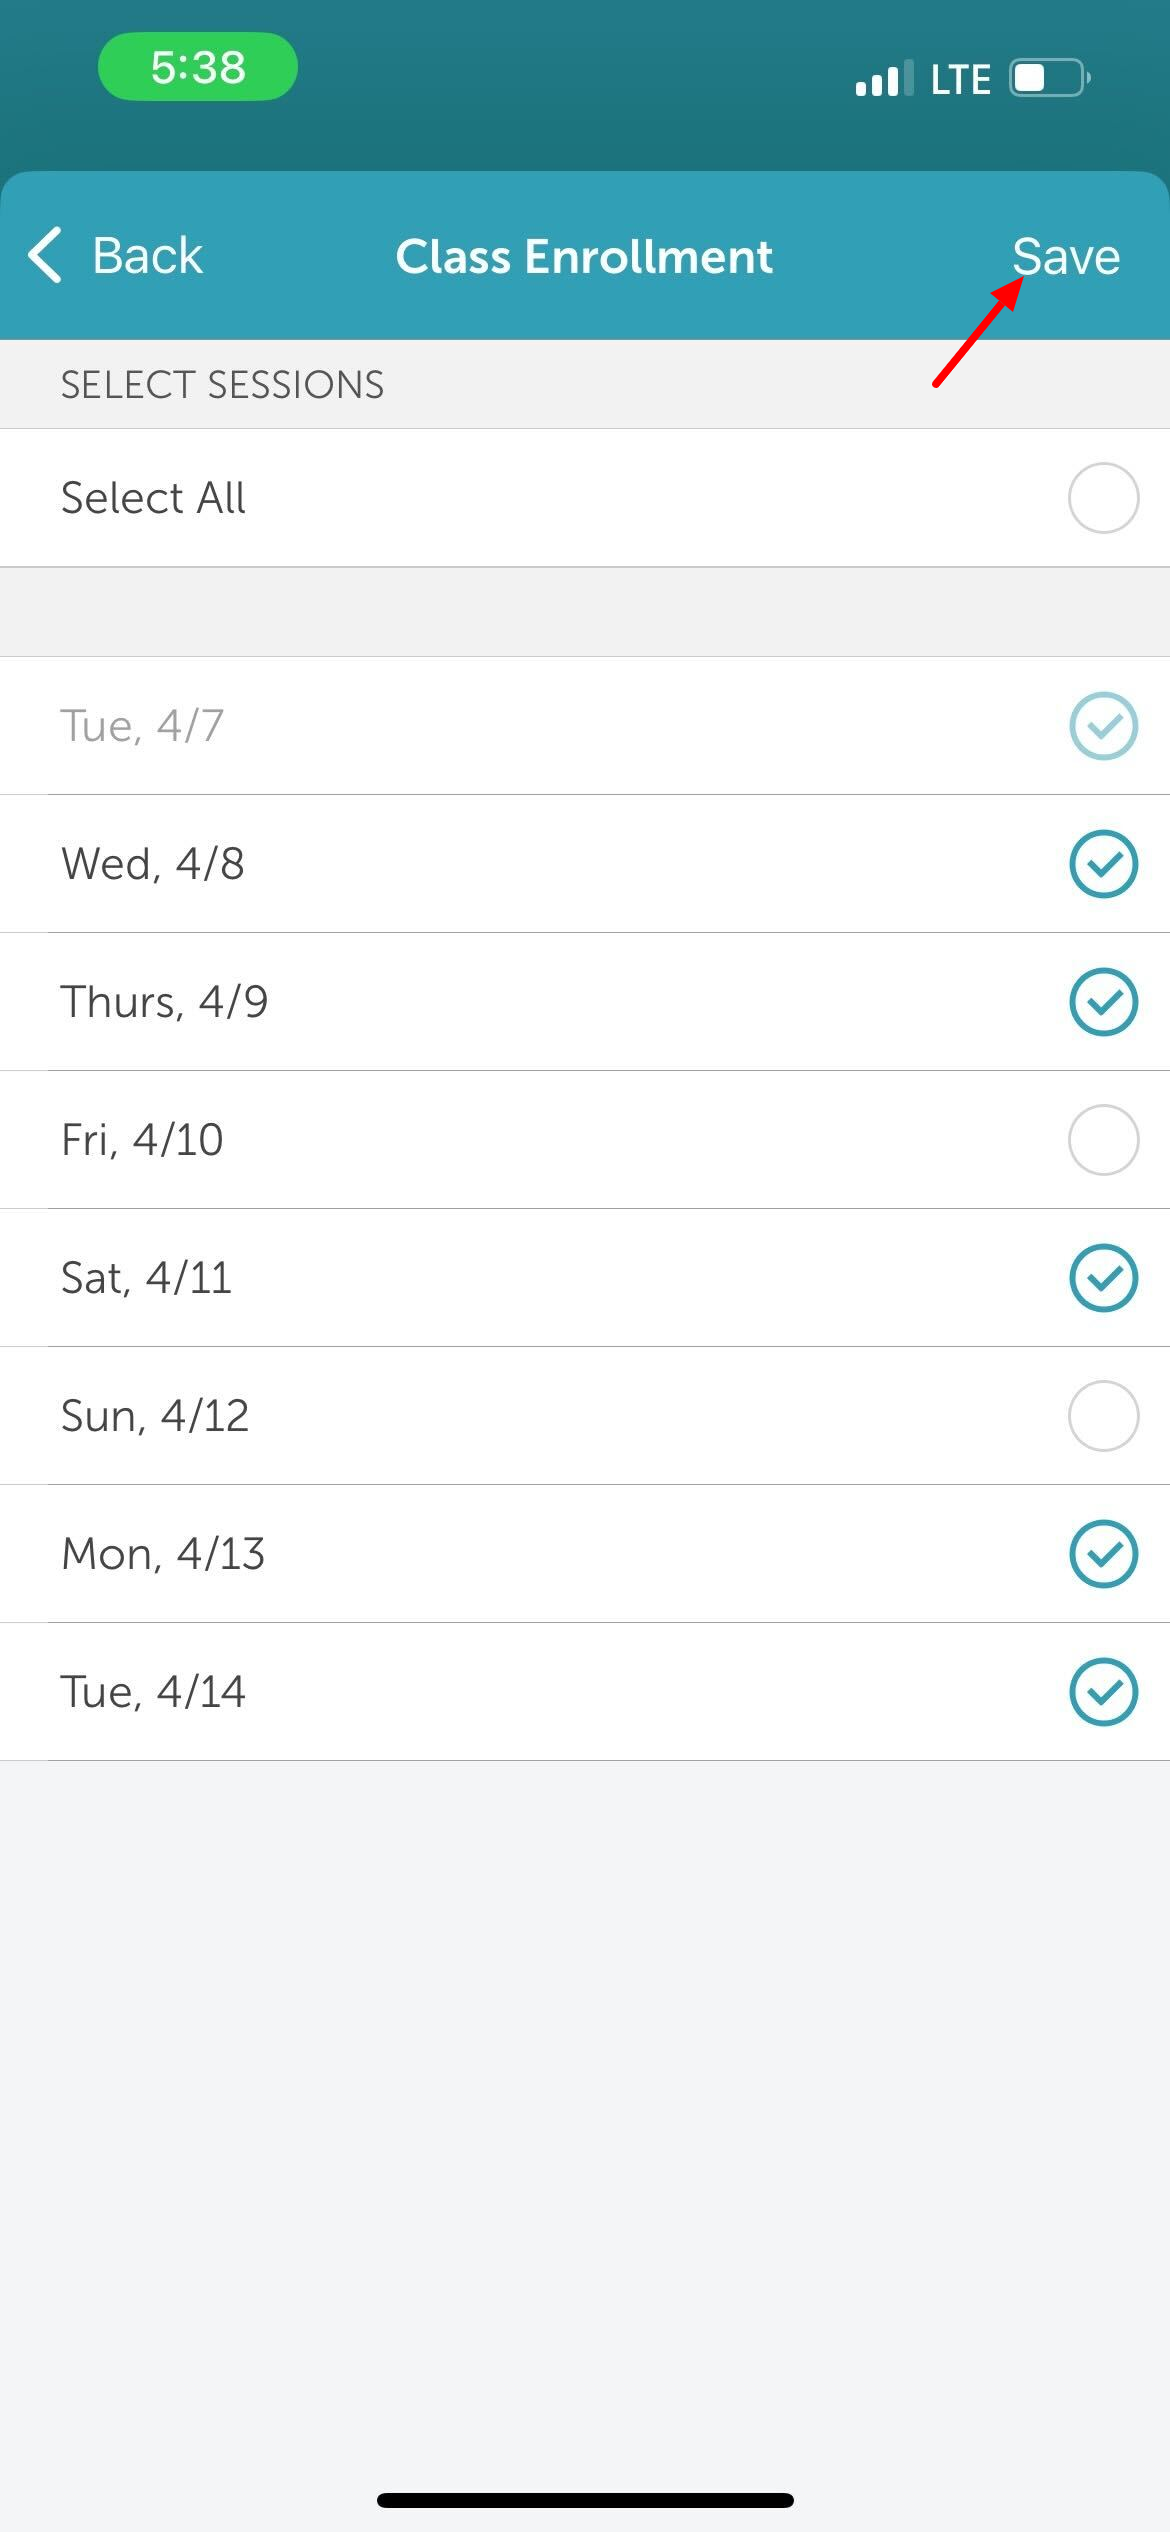
9. The system will create individual bookings for each selected date, and the client will now appear on the roster for those sessions.
For more information, contact us at support@mytime.com.
Related Articles:
Installing MyTime on Scheduler App (Android and iOS)
Signing into MyTime on Scheduler App (Android and iOS)
Scheduling Classes/Events on Scheduler App
Adding Clients to Class Sessions on Scheduler App
Was this article helpful?
That’s Great!
Thank you for your feedback
Sorry! We couldn't be helpful
Thank you for your feedback
Feedback sent
We appreciate your effort and will try to fix the article