After a class is created, you can add clients directly from the roster. This article provides step-by-step guidance on how to manage class attendees.
Things to know:
- The ability to add attendees to classes/events is controlled by the "Schedule Classes/Events" access control setting.
- The attendee type and the amount charged are determined by the class configuration. Learn more here
- You can add more attendees than the scheduled limit, but the system will notify you when the limit is exceeded
Multiple attendees can be added to a class session by selecting quantities for specific attendee types directly from the class roster.
Each time an attendee is added, the "Booked" section on the right increases by one
When viewing a class or event roster, you can customize how your clients are displayed using:
Show Cancelled Enrollments Checkbox:
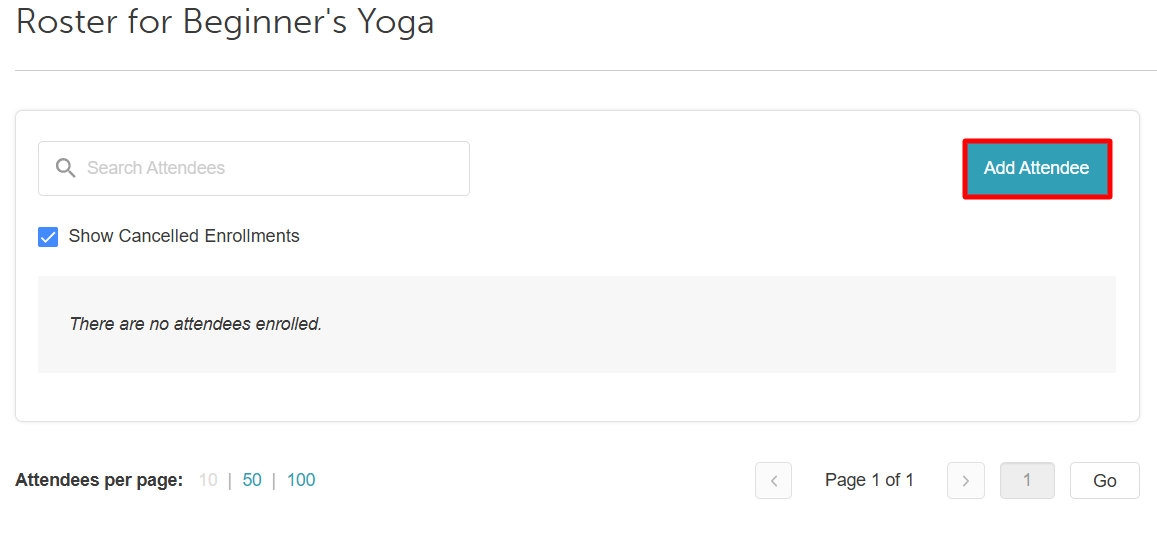
Enabled: The roster includes clients who have cancelled their spots, allowing you to track historical changes or identify recently vacated openings.
Disabled (Default): The roster displays only active participants for a streamlined check-in process.
'Sort class session roster by attendee name' company setting:
Enabled: The list automatically reorganizes into alphabetical order by the client’s first name.
Disabled: The list displays attendees chronologically, based on the order in which they were originally added to the session.
When viewing a class roster, staff can quickly locate enrolled attendees by searching for either the dependent (family member/pet) or the primary account holder.
Searching by Family Member / Pet Name: Enter the family member or pet's first name, last name, or full name. Partial name searches (3+ characters) also return matching records.
Searching by Primary Client: Enter the primary client's name, email address, or phone number to locate all associated family members or pets on the roster.
Contents
Adding Attendees to Classes/Events
To access the roster:
- Navigate to your schedule
- Locate the class/event on the schedule
- Click on the class/event
- Select the View Attendees button
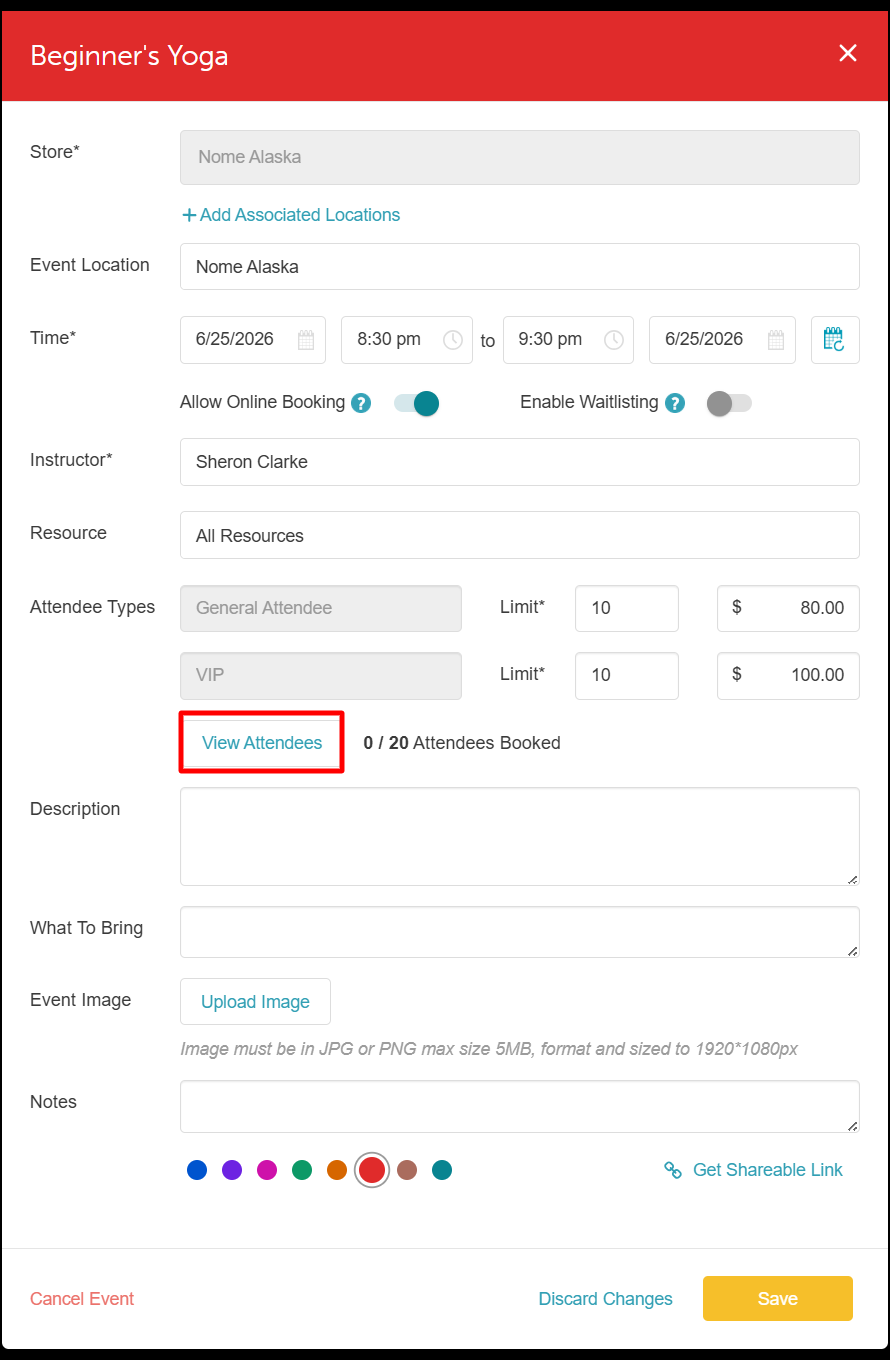
- When the roster opens, click on Add Attendee
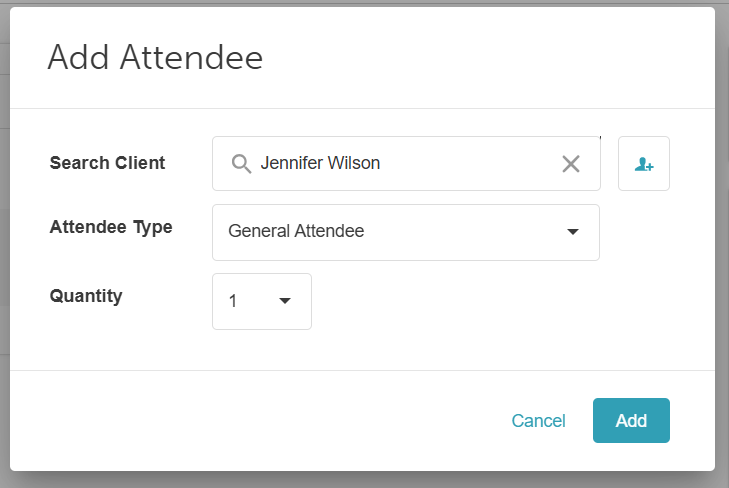
- You can search for an existing client using the search field or add a new client using the icon on the right-hand side.
- Select the appropriate Attendee Type
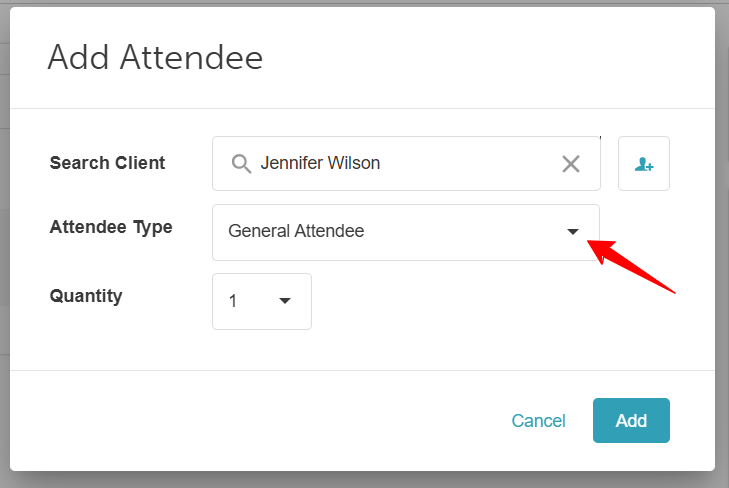
- If the "Allow Selecting Session Enrollment Attendee Quantity on Roster Page” setting is enabled, use the Quantity field to choose how many spots the client would like to book for that attendee type
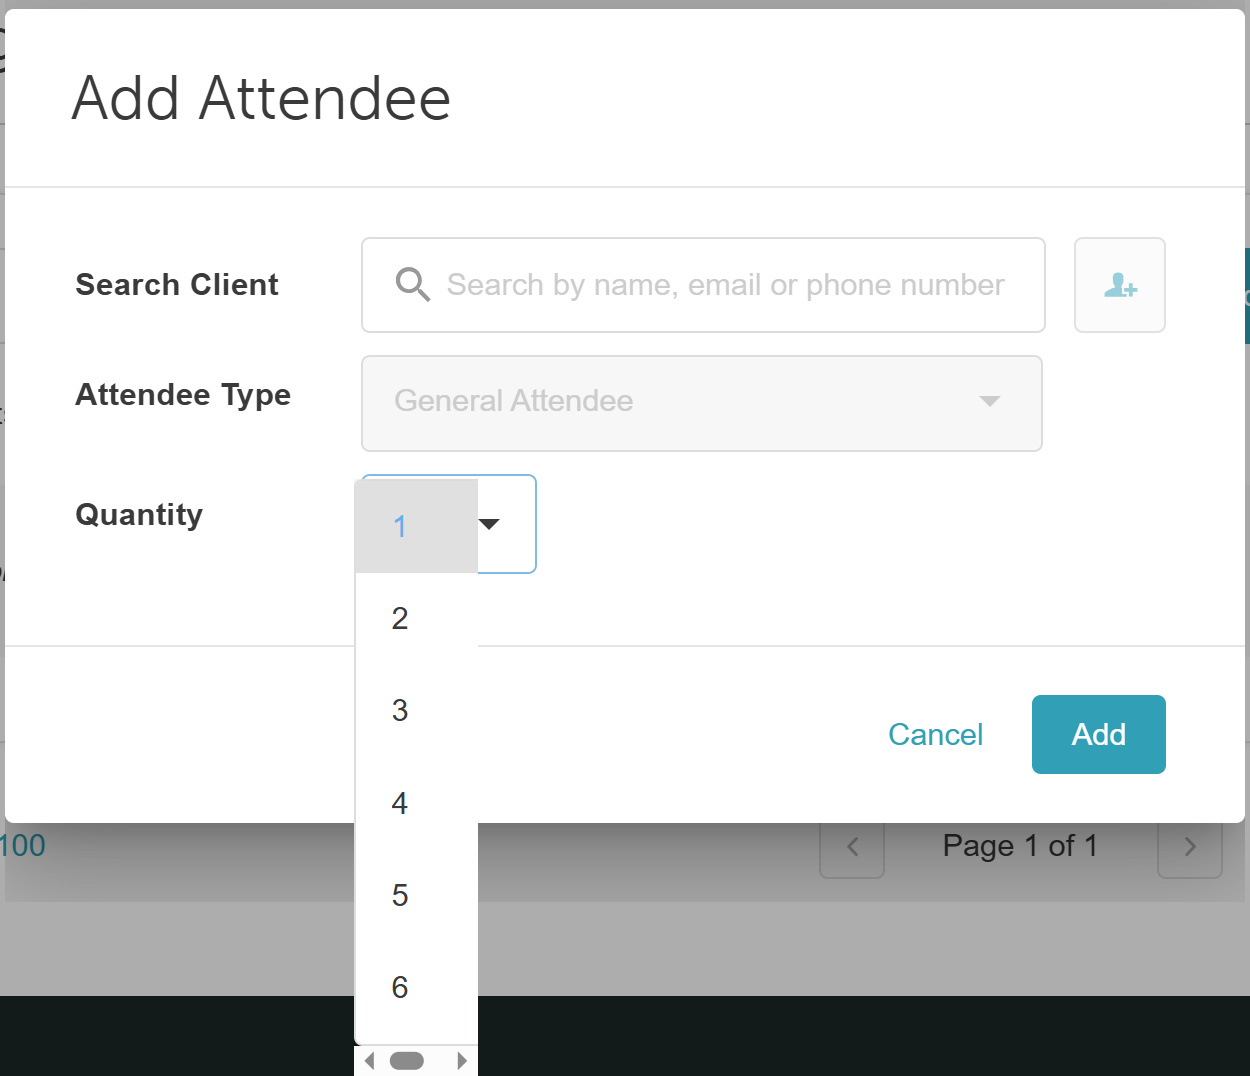
- Next, select the Add button
- The client will then be successfully added to the class/event session
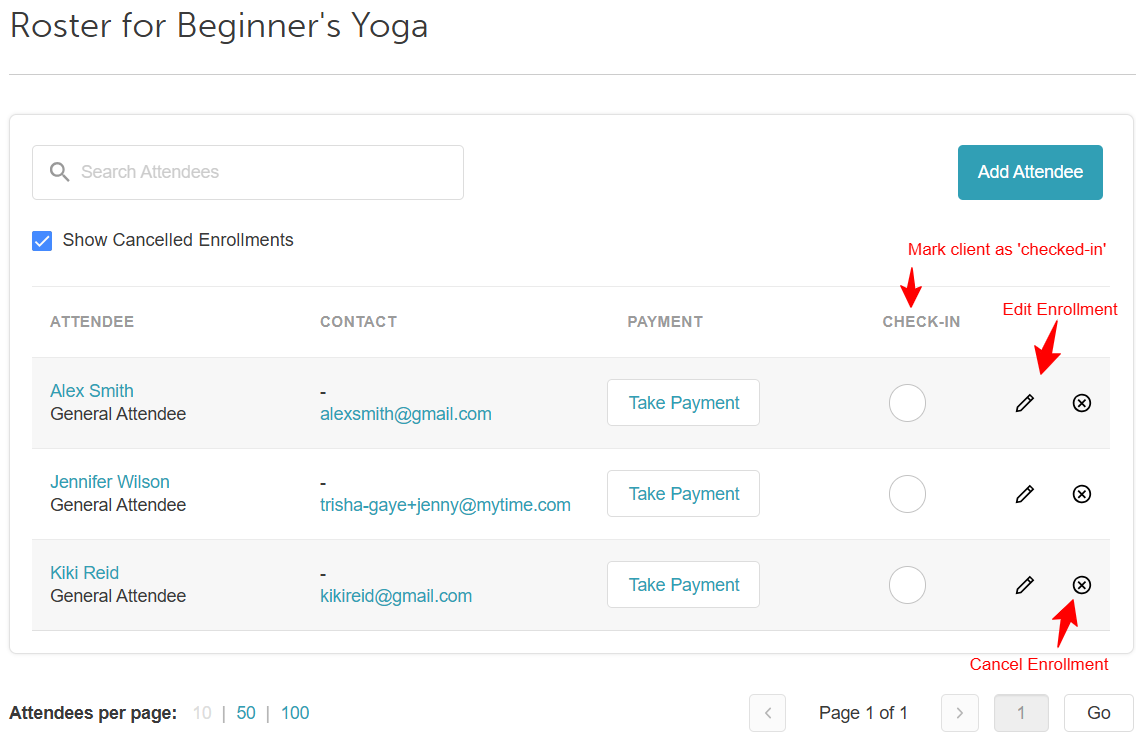
- Use the following buttons to perform an action on the roster
Messaging Class Attendees
You can send a message directly to all attendees registered for a specific class session from the session edit form. This makes it easy to broadcast important updates, reminders, or schedule changes directly to your roster.
Things to Know
- This feature is controlled by the "Schedule Classes/Events" and "Accessing Email/SMS Campaigns" access control settings.
- Messages only go to clients with an active spot (booked, confirmed, or checked in). Canceled clients are excluded.
- Clicking "Message Attendees" opens a message editor pre-filled with just that session's roster. You can't add or remove recipients from this list.
- Delivery & Opt-Outs
- Messages support both SMS and email, and you can adjust your preferred delivery methods on the campaign screen.
- Clients will not receive duplicate notifications. By default, the system attempts SMS first (if a mobile number is on file) and falls back to email if SMS is unavailable.
- Because these are operational class updates, messages are delivered regardless of a client's marketing opt-out preferences.
- Messages support both SMS and email, and you can adjust your preferred delivery methods on the campaign screen.
- Invalid emails and blocked numbers are excluded. If a client opted out of SMS by replying "STOP," the system automatically routes the message to their email instead.
How to message class attendees
- Go to your Schedule and click the class session you want to message
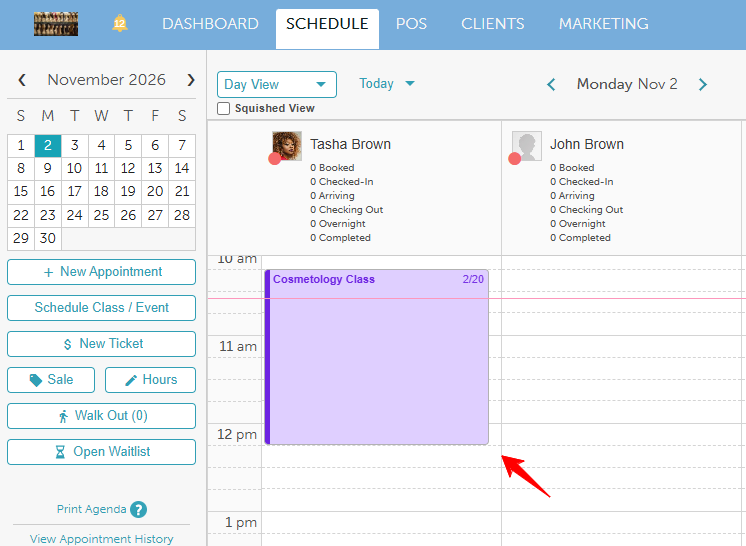
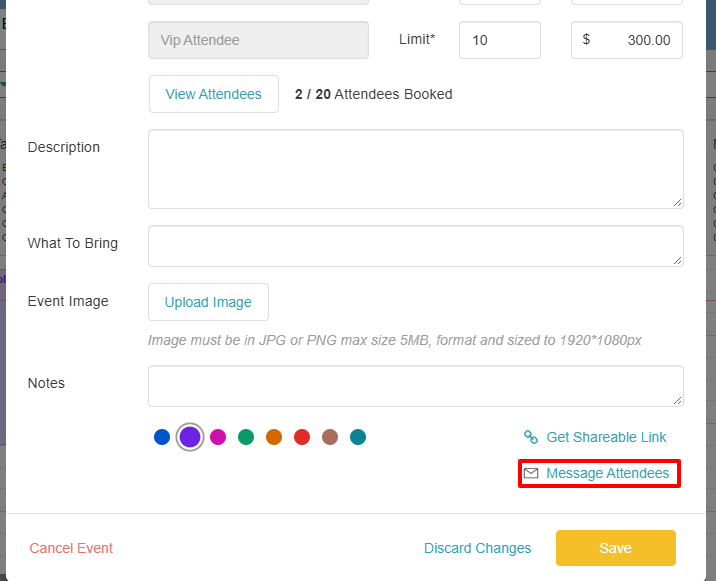
- In the session edit form, click "Message Attendees" (the email icon located directly below Get Shareable Link).
- In the message editor that opens, select your delivery channel (SMS or email) and write your subject and message.
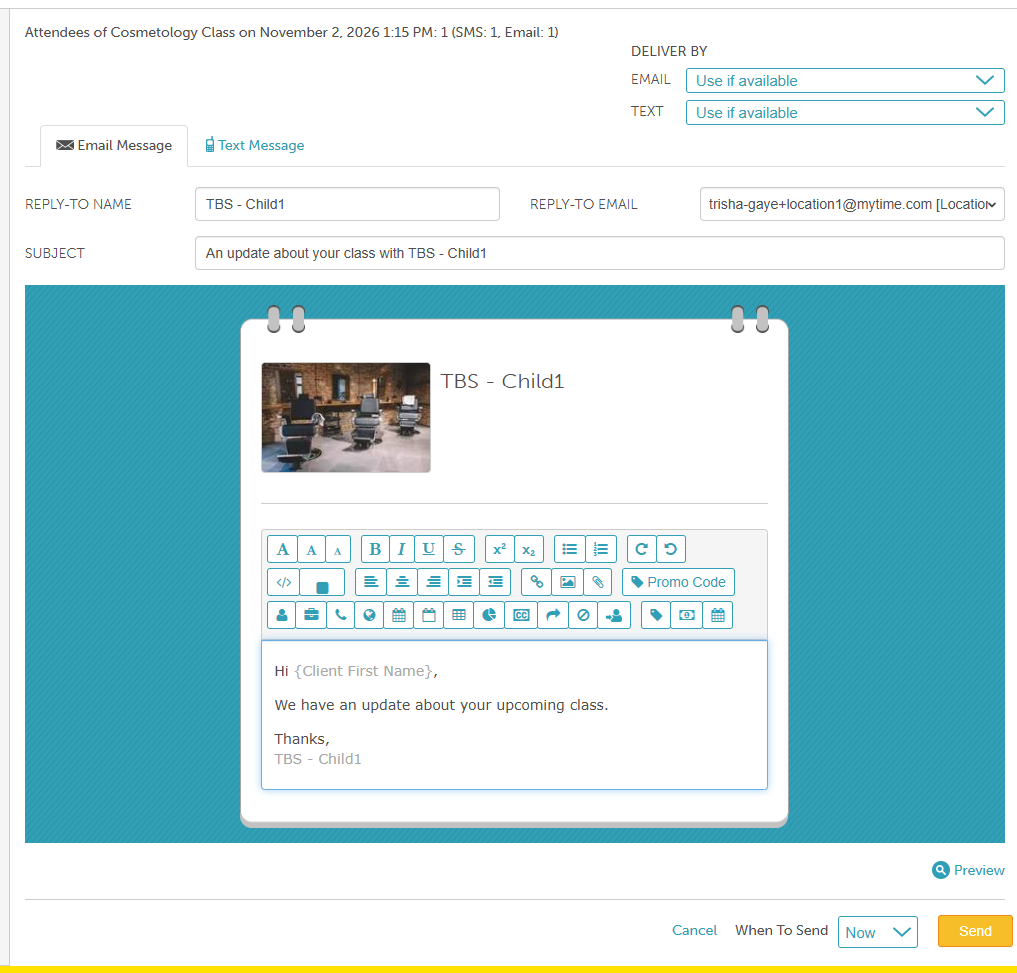
- Review the recipient list and click Send
For more information, contact us at support@mytime.com or (385) 233-6964.
Related Articles:
Was this article helpful?
That’s Great!
Thank you for your feedback
Sorry! We couldn't be helpful
Thank you for your feedback
Feedback sent
We appreciate your effort and will try to fix the article