In this article, we will walk through the steps on how to configure class-specific instructions for automated messages.
Things to know:
- The ability to configure class-specific instructions for automated messages is controlled by the "Accessing Automated Messages" access control setting.
- For franchise businesses with the "Marketing Campaigns on Parent Account" hidden setting and/or global marketing enabled at the parent account level:
- Global Classes: Class-specific instructions can be added at both the parent and child levels.
- Parent-Level Instructions: Instructions added at the parent level will automatically apply to all child accounts.
- Child-Level Customization: Child accounts can edit and customize these instructions as needed.
- Pre-Existing Child-Level Instructions: Instructions added previously at the child level for a global class will not be overridden by parent-level instructions.
- For franchises offering global classes but without global marketing enabled, class-specific instructions applied at the child level only affect that specific child account.
- Common class instructions can be applied to all classes within a category or selected classes within that category. For example, an instruction to arrive 10 minutes early can be applied to the Yoga category, eliminating the need to add the instruction to each Yoga class individually.
- When setting up class instructions, all class categories will appear in the dropdown menu, even if some classes have no variations configured
- Classes are listed in the modal according to their arrangement in the Classes Menu
- You can only add class-specific instructions to Class Notifications automated message templates
- By default, the same class-specific instructions appear on all automated message templates. The option to add unique instructions per template is a hidden setting managed by the MyTime team. Contact support to enable.
- After adding class-specific instructions to automated templates, you can preview them for all class categories or for specific classes within a selected category.
- Selecting the "Apply Changes to All Campaigns" checkbox will update all templates that support these instructions. This is managed by a hidden setting enabled by default; contact support for assistance.
- If you try to leave without saving changes, a pop-up alert will remind you to save your work
Contents
- Configuring Class-Specific Instructions for Email Templates
- Configuring Class-Specific Instructions for SMS Templates
- Configuring Class-Specific Instructions for Push Notification Templates
Configuring Class-Specific Instructions for Email Templates
To configure class-specific instructions:
- Navigate to Marketing > Automated Messages
- Hover over the desired template and select View

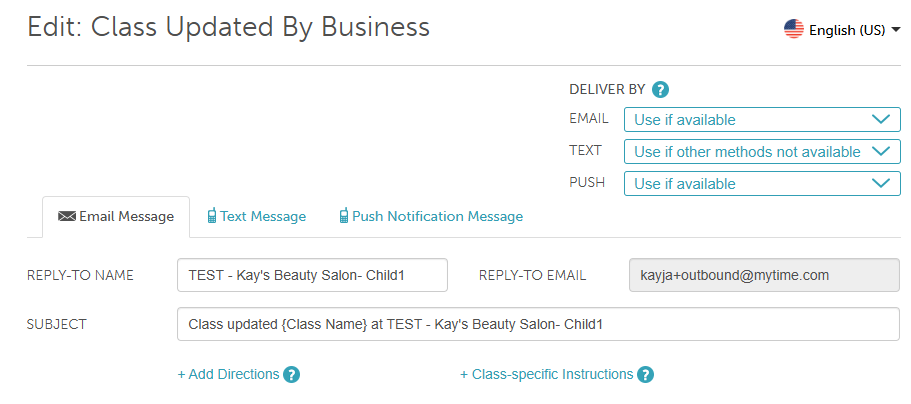
- Click the Email tab
- Select the + Class-Specific Instructions link
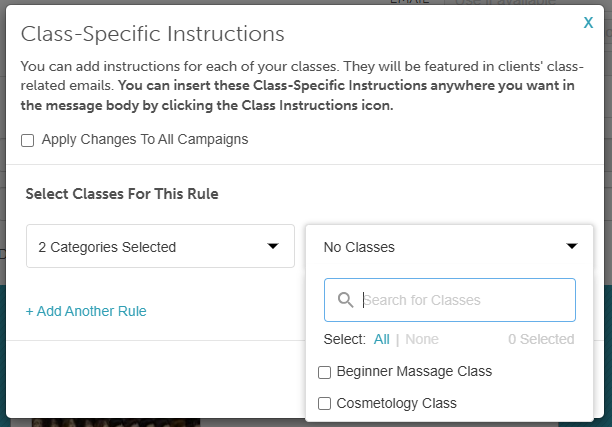
- In the Class-Specific Instructions modal, click + Add Another Rule
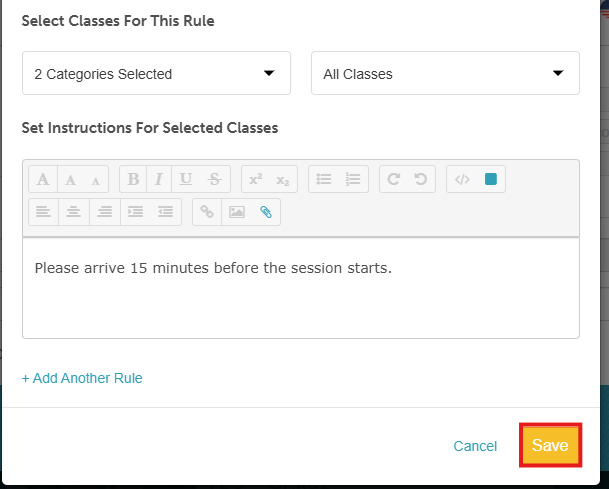
- Choose the appropriate class category and class session
- Enter your instructions. You can include photos and links, and you may apply the instructions to all class notifications if needed

- Click Save at the bottom of the modal
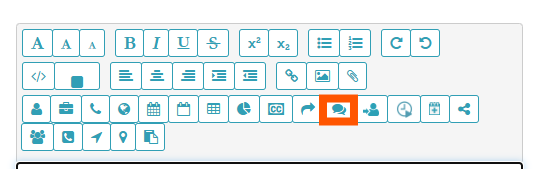
- To insert the instructions into the email template, click the Class Instruction icon and place the text where you want it to appear
- Click Save to finalize your changes
Once saved, any class-related email notifications sent to clients will automatically include the class-specific instructions.
Configuring Class-Specific Instructions for SMS Templates
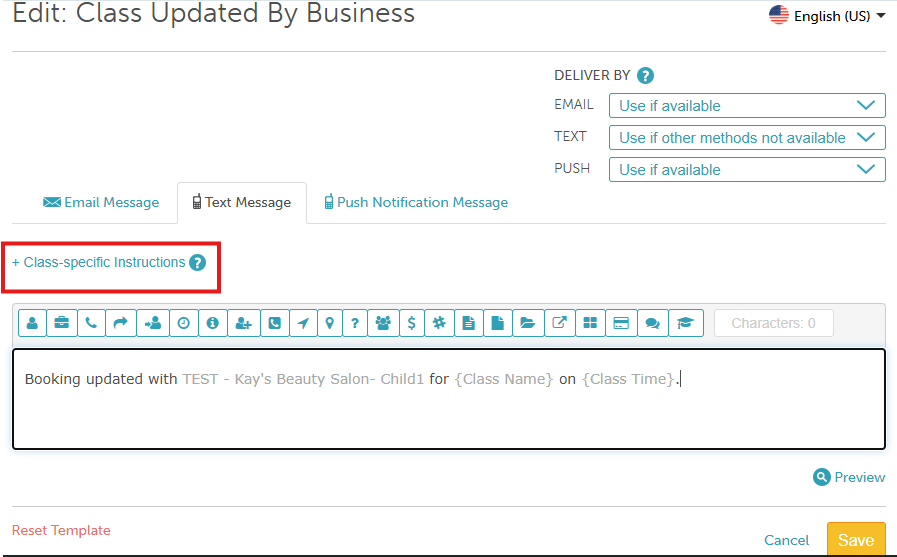
To configure class-specific instructions:
- Navigate to Marketing > Automated Messages
- Hover over the desired template and select View
- Click the Text Message tab
- Select the + Class-Specific Instructions link
- In the Class-Specific Instructions modal, click + Add Another Rule
- Choose the appropriate class category and class session
- Enter your instructions. You can include photos and links, and you may apply the instructions to all class notifications if needed
- Click Save at the bottom of the modal
- To insert the instructions into the SMS template, click the Class Instruction icon and place the text where you want it to appear
- Click Save to finalize your changes
Once saved, any class-related SMS notifications sent to clients will automatically include the class-specific instructions.
Configuring Class-Specific Instructions for Push Notification Templates
To configure class-specific instructions:
- Navigate to Marketing > Automated Messages
- Hover over the desired template and select View
- Click the Push Notification Message tab

- Select the + Class-Specific Instructions link

- In the Class-Specific Instructions modal, click + Add Another Rule
- Choose the appropriate class category and class session
- Enter your instructions. You can include photos and links, and you may apply the instructions to all class notifications if needed
- Click Save at the bottom of the modal
- To insert the instructions into the push notification message template, click the Class Instruction icon and place the text where you want it to appear
- Click Save to finalize your changes
Once a client books a class session, any class-related notifications they receive will include the class-specific instructions that were added.
For more information, contact us at support@mytime.com or (385) 233-6964.
Related Articles
Service Specific Instructions For Automated Messages
Activate/Deactivate Automated Messages
Fallback Delivery Method for Automated Messages
Push Notifications for Automated Messages
Was this article helpful?
That’s Great!
Thank you for your feedback
Sorry! We couldn't be helpful
Thank you for your feedback
Feedback sent
We appreciate your effort and will try to fix the article