You can encourage clients to complete payments independently using our self-checkout process. The Self-Checkout Automated Message template automatically reaches out to clients via email, SMS, and push notifications, providing a unique, secure link to settle their invoice directly from their personal device. In this article, we will discuss how to customize your automated template and how clients would utilize this self-checkout feature.
Things to know:
- This automated message template requires the Invoice feature to be enabled on your account for clients to self-checkout. Learn more about invoicing here
- The ability to customize the self-checkout automated messages is governed by the "Accessing Automated Messages" access control setting.
- For franchise businesses using global automated messages, this template is controlled at the parent level.
- If both the 'Self-Checkout' and 'Invoicing' templates are active, clients will receive both notifications simultaneously when an appointment is marked complete.
- When an appointment ends, MyTime automatically builds a unique link for that specific client's invoice and includes it in their text or email. Tapping the link takes them straight to their bill so they can pay on their phone.
- Notification Requirements:
- SMS Notifications: Clients must have a valid phone number on file and be single-opted in to receive transactional SMS.
- Email Notifications: Clients must have a valid email address on file and be opted in to receive transactional emails.
- Push Notifications: Can only be delivered to clients who have the custom MyTime Guest App installed on their mobile device.
- SMS Segments & Billing
- SMS billing is calculated per segment, not per message.
- Encoding Types
- GSM Encoding
- Up to 160 characters per segment
- Long messages split into 153-character segments
- UCS-2 Encoding
- Used when messages include emojis or special characters
- Up to 70 characters per segment
- Long messages split into 67-character segments
- Note: Even a single emoji forces UCS-2 encoding.
- Billing Rules
- Each segment is billed individually
- Each recipient receives their own copy of the message
- Total cost = segments × recipients × rate. Example: 2-segment message sent to 50 recipients = 100 billable segments
- Learn more about SMS Segments & Billing here.
- GSM Encoding
- Encoding Types
- SMS billing is calculated per segment, not per message.
- SMS Campaign Opt-Out Disclaimer: When configuring or sending an SMS campaign, an orange disclaimer note will appear directly below the text box as a reminder: "We automatically append "Reply STOP to Unsubscribe" to the message if the client has not received the disclaimer in the past 30 days. This counts against the message limit of 160 characters per SMS segment."
- Client Opt-Out Behavior: Clients can unsubscribe from SMS marketing messages at any time by replying with any of the following keywords:
`STOP`
`UNSUBSCRIBE`
`UNSTOP` (dependent on client's carrier)
Once a client unsubscribes, they will no longer receive SMS marketing messages from your business.
- Automated text messages cannot be sent from the dedicated phone number because these are two-way messages. Since SMS messages don’t carry any metadata, MyTime needs to rotate phone numbers in order to determine which message someone is replying to
- Clients associated with a specific location under a multi-location account will receive automated messages customized for that location. The From field and Reply-To name in these emails display the location’s nickname by default, as defined in Business Setup > Business Profile > Edit Location. For example, a business named Urban Spa has two locations: Downtown and Westside. If a client is associated only with the Westside location, any automated appointment reminders they receive will appear with the Westside location nickname. The name displayed in the "Sender Label" is determined based on the following hierarchy (order of priority):
- Location Nickname: If a nickname is configured for a specific location, this will always be the primary sender name.
- Reply-To Name: If no location nickname exists, the system will fall back to the Reply-To Name configured in your messaging settings.
- Company Name: If neither a nickname nor a Reply-To Name is found, the system will use your overall Company Name as the final fallback.
- By default, this is set to the location’s email address configured under Business Setup > Business Profile > Edit Location.
- If no email is configured for the location, the system will use the location owner’s email address instead.
- If the “Use a specific reply-to email for outbound emails” hidden setting is enabled, the system will use the email address entered in the “Reply-To Email for Outbound Emails” field.
- Curly braces {} are reserved characters in MyTime’s email template system and are used as variable placeholders. If a client’s pet name contains curly braces (for example, {Bella}), any automated message or notification that references the pet’s name may fail to send.
The marketing editor automatically detects and retains line breaks and paragraph spacing when you paste content from external sources. This removes the need for manual reformatting and ensures your newsletters and SMS campaigns appear exactly as intended.
The ability to customize automated messages is not available on the Scheduler App
Contents:
Customizing Self-Checkout Template
Navigate to Marketing > Automations
In the Booking Notification section, locate the Self-Checkout Sequence template
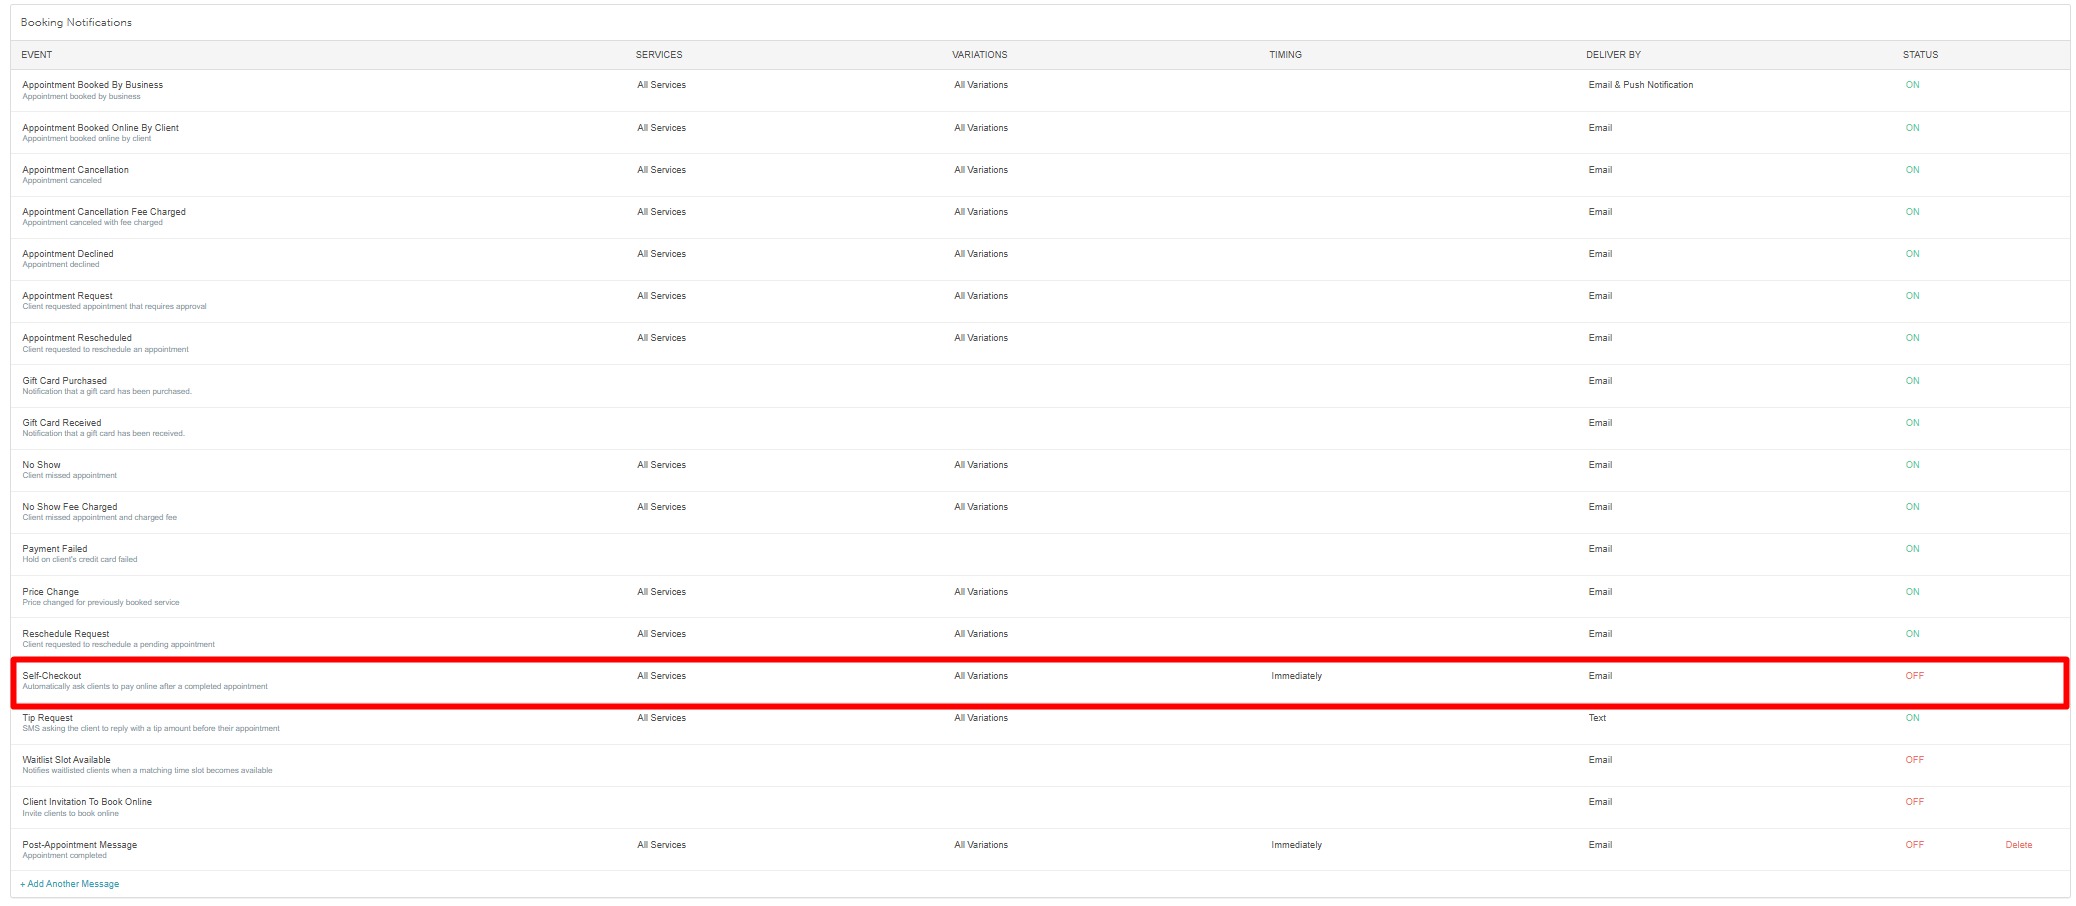
Hover over the desired template and select View

Configure the available settings (if your subscription allows):
Template Name: Customize the internal name of the template
Send X After the Appointment: Decide how long after the appointment is completed the notification should be sent. By default, this dropdown is set to 'Immediately,' but it can also be configured to minutes or hours.
Applies To: Choose the service category and specific variation(s) that trigger automated notifications for your template.
Reply-to name: This is the name that appears when clients reply to an automated email. By default, it is pulled from the business name set on the Business Profile page.
Delivery By: You can specify a fallback delivery method (email, SMS, or push notification) when the primary method is unavailable. Learn more here
Use if available: This is the primary method that will be attempted first
Use if other methods not available: This method will be attempted if the primary option is unavailable (because contact information is not on file or the user opted out)
Never Use: This method will not be used, even if none of the other options are available
The header contains your location information. You can edit this information from your business profile. Learn how to here
The appointment details, such as service, date, and time, etc., cannot be edited. These are custom contents that will be set on delivery.
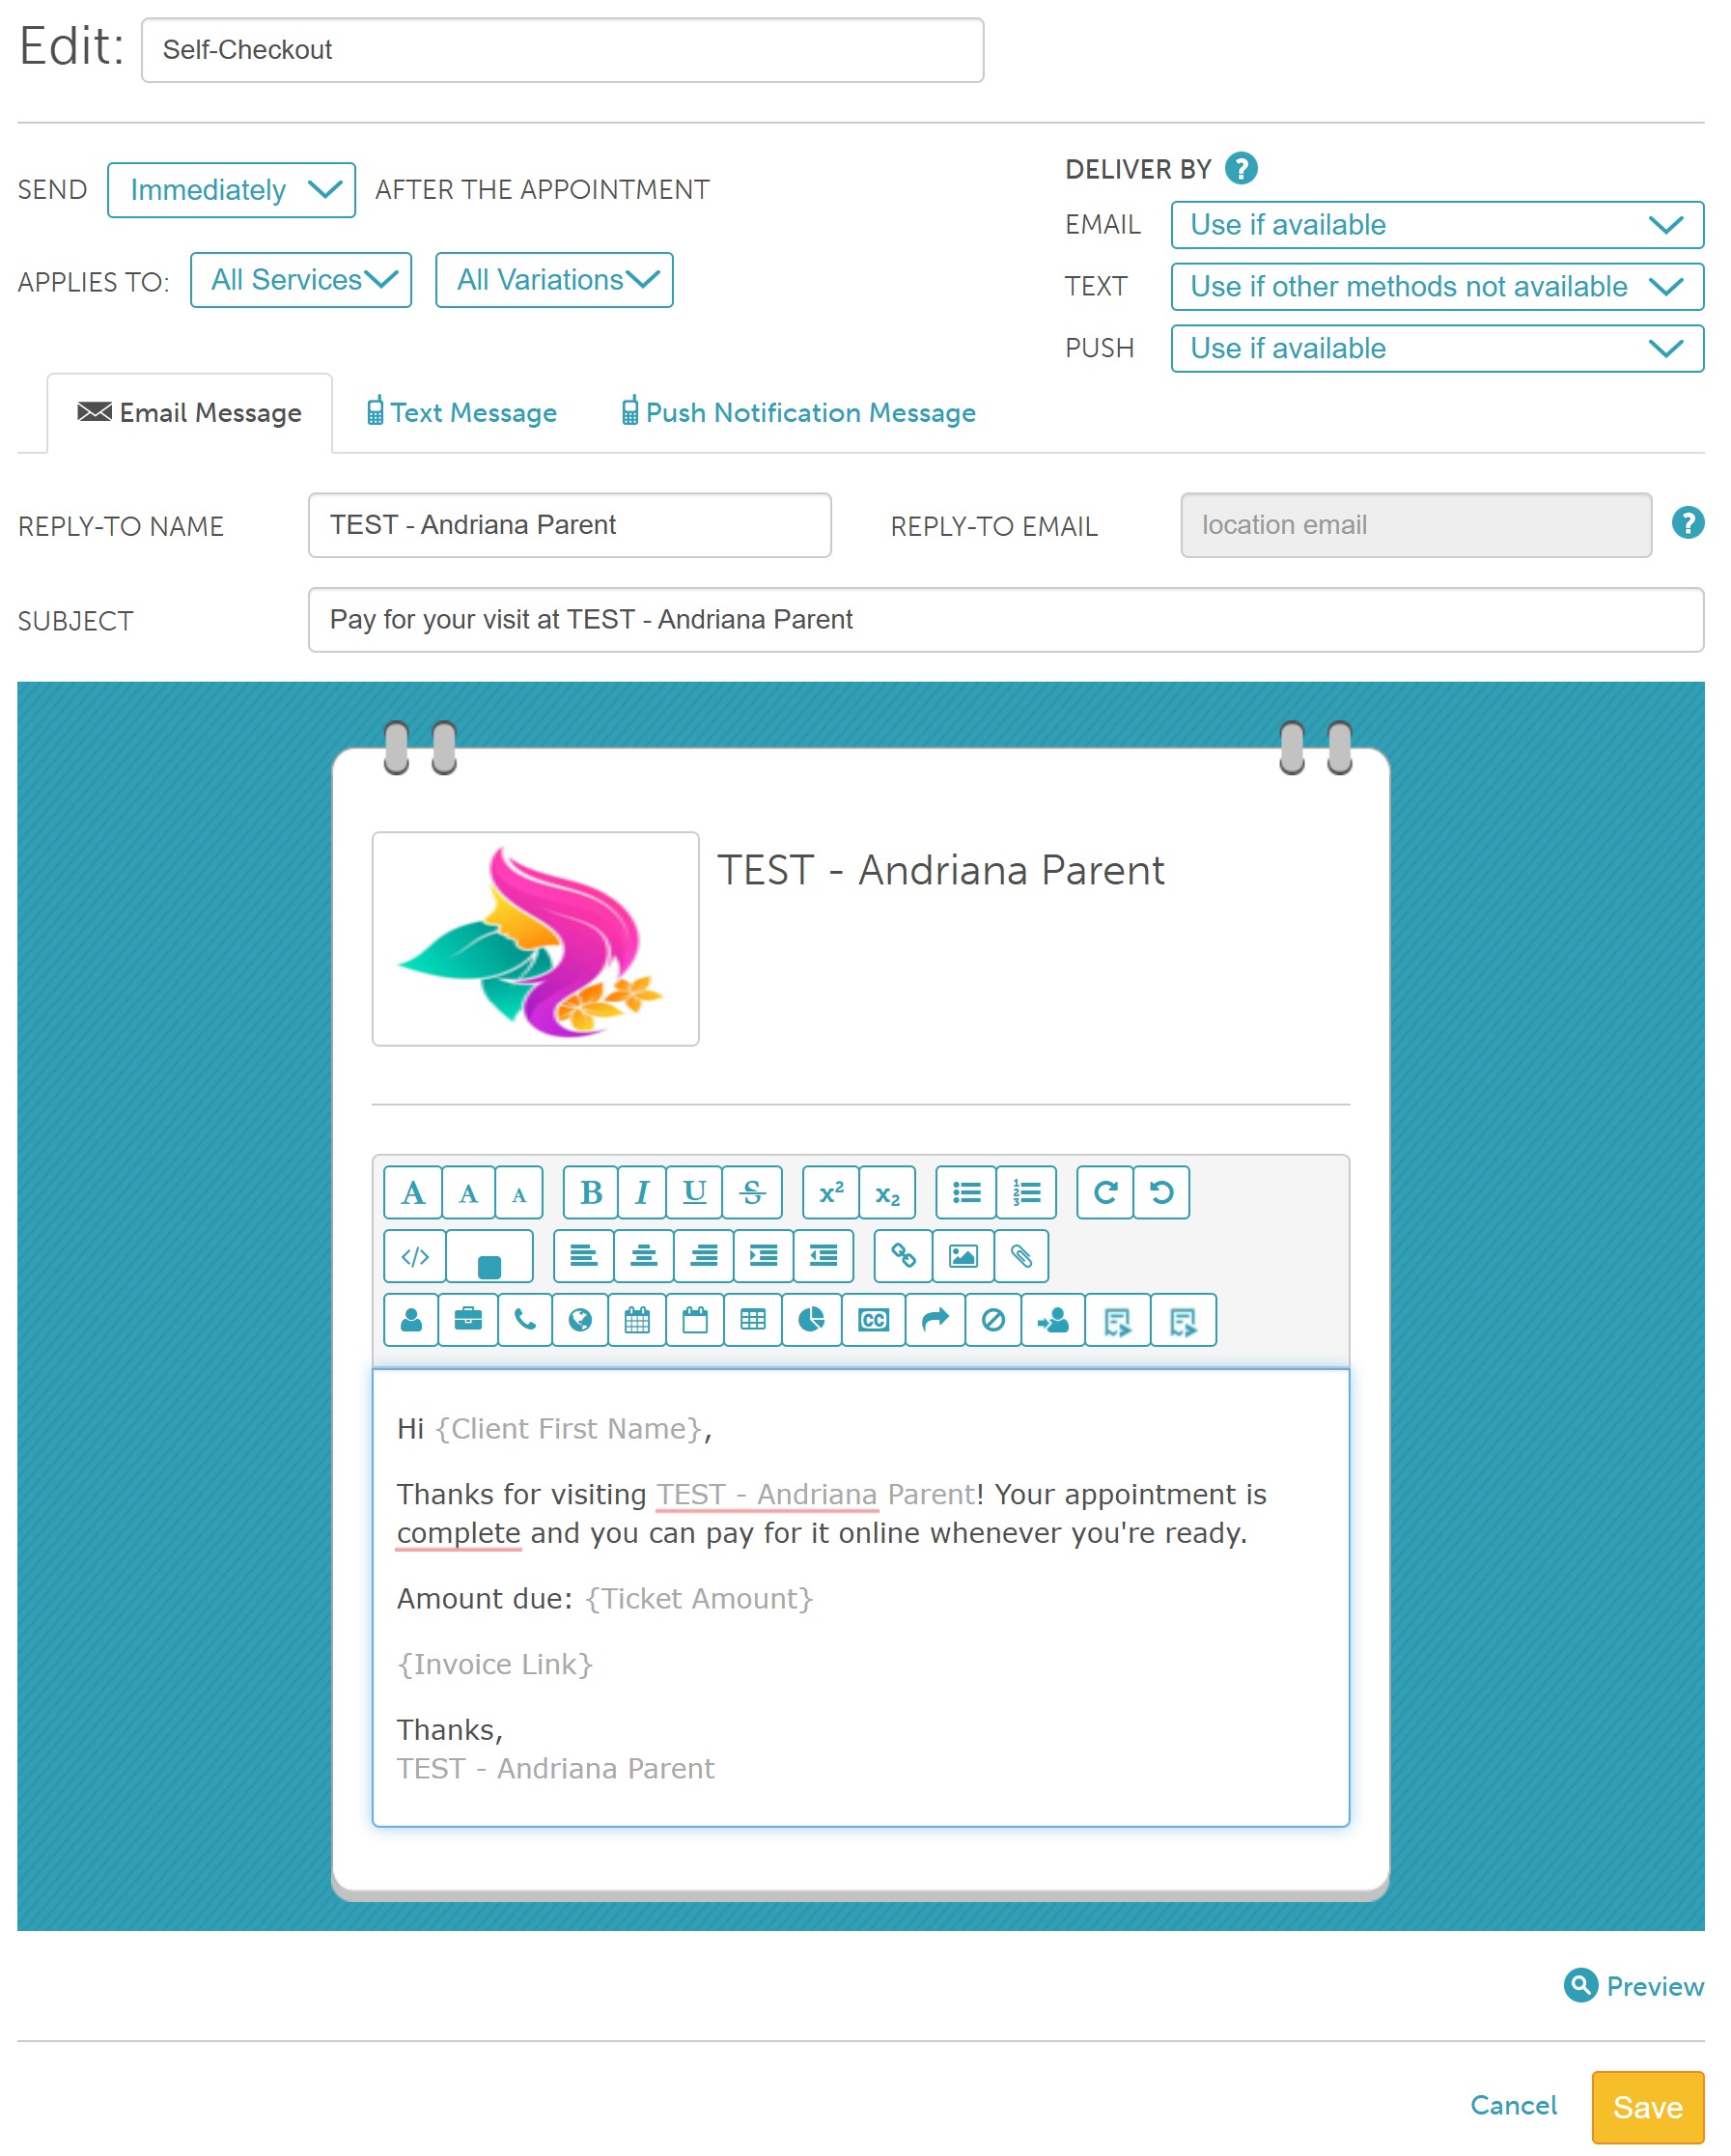
Save changes
Client Self-Checkout Flow
Once the template is activated and an appointment containing a configured service is marked as completed, the notification process begins:
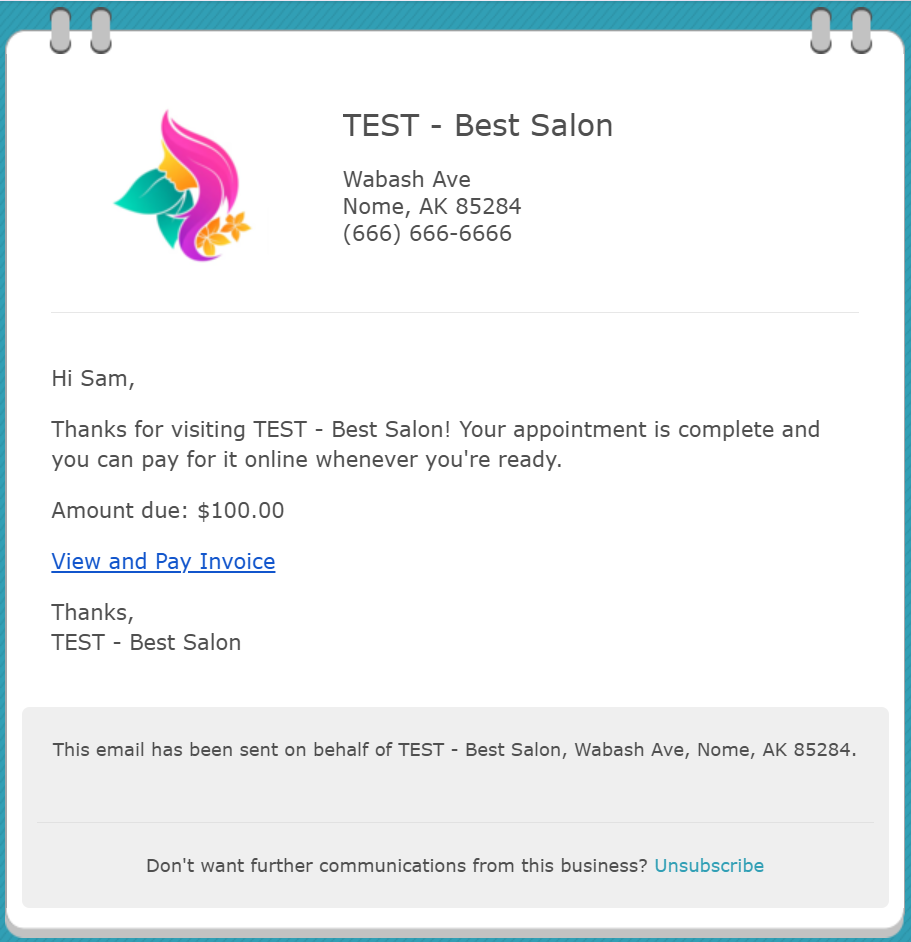
- The client receives the self-checkout notification via their active delivery method (Email, SMS, or Push Notification)
- The client opens the message and taps the View & Pay Invoice link
- The invoice portal opens in their browser, allowing the client to complete their payment securely using the invoicing feature
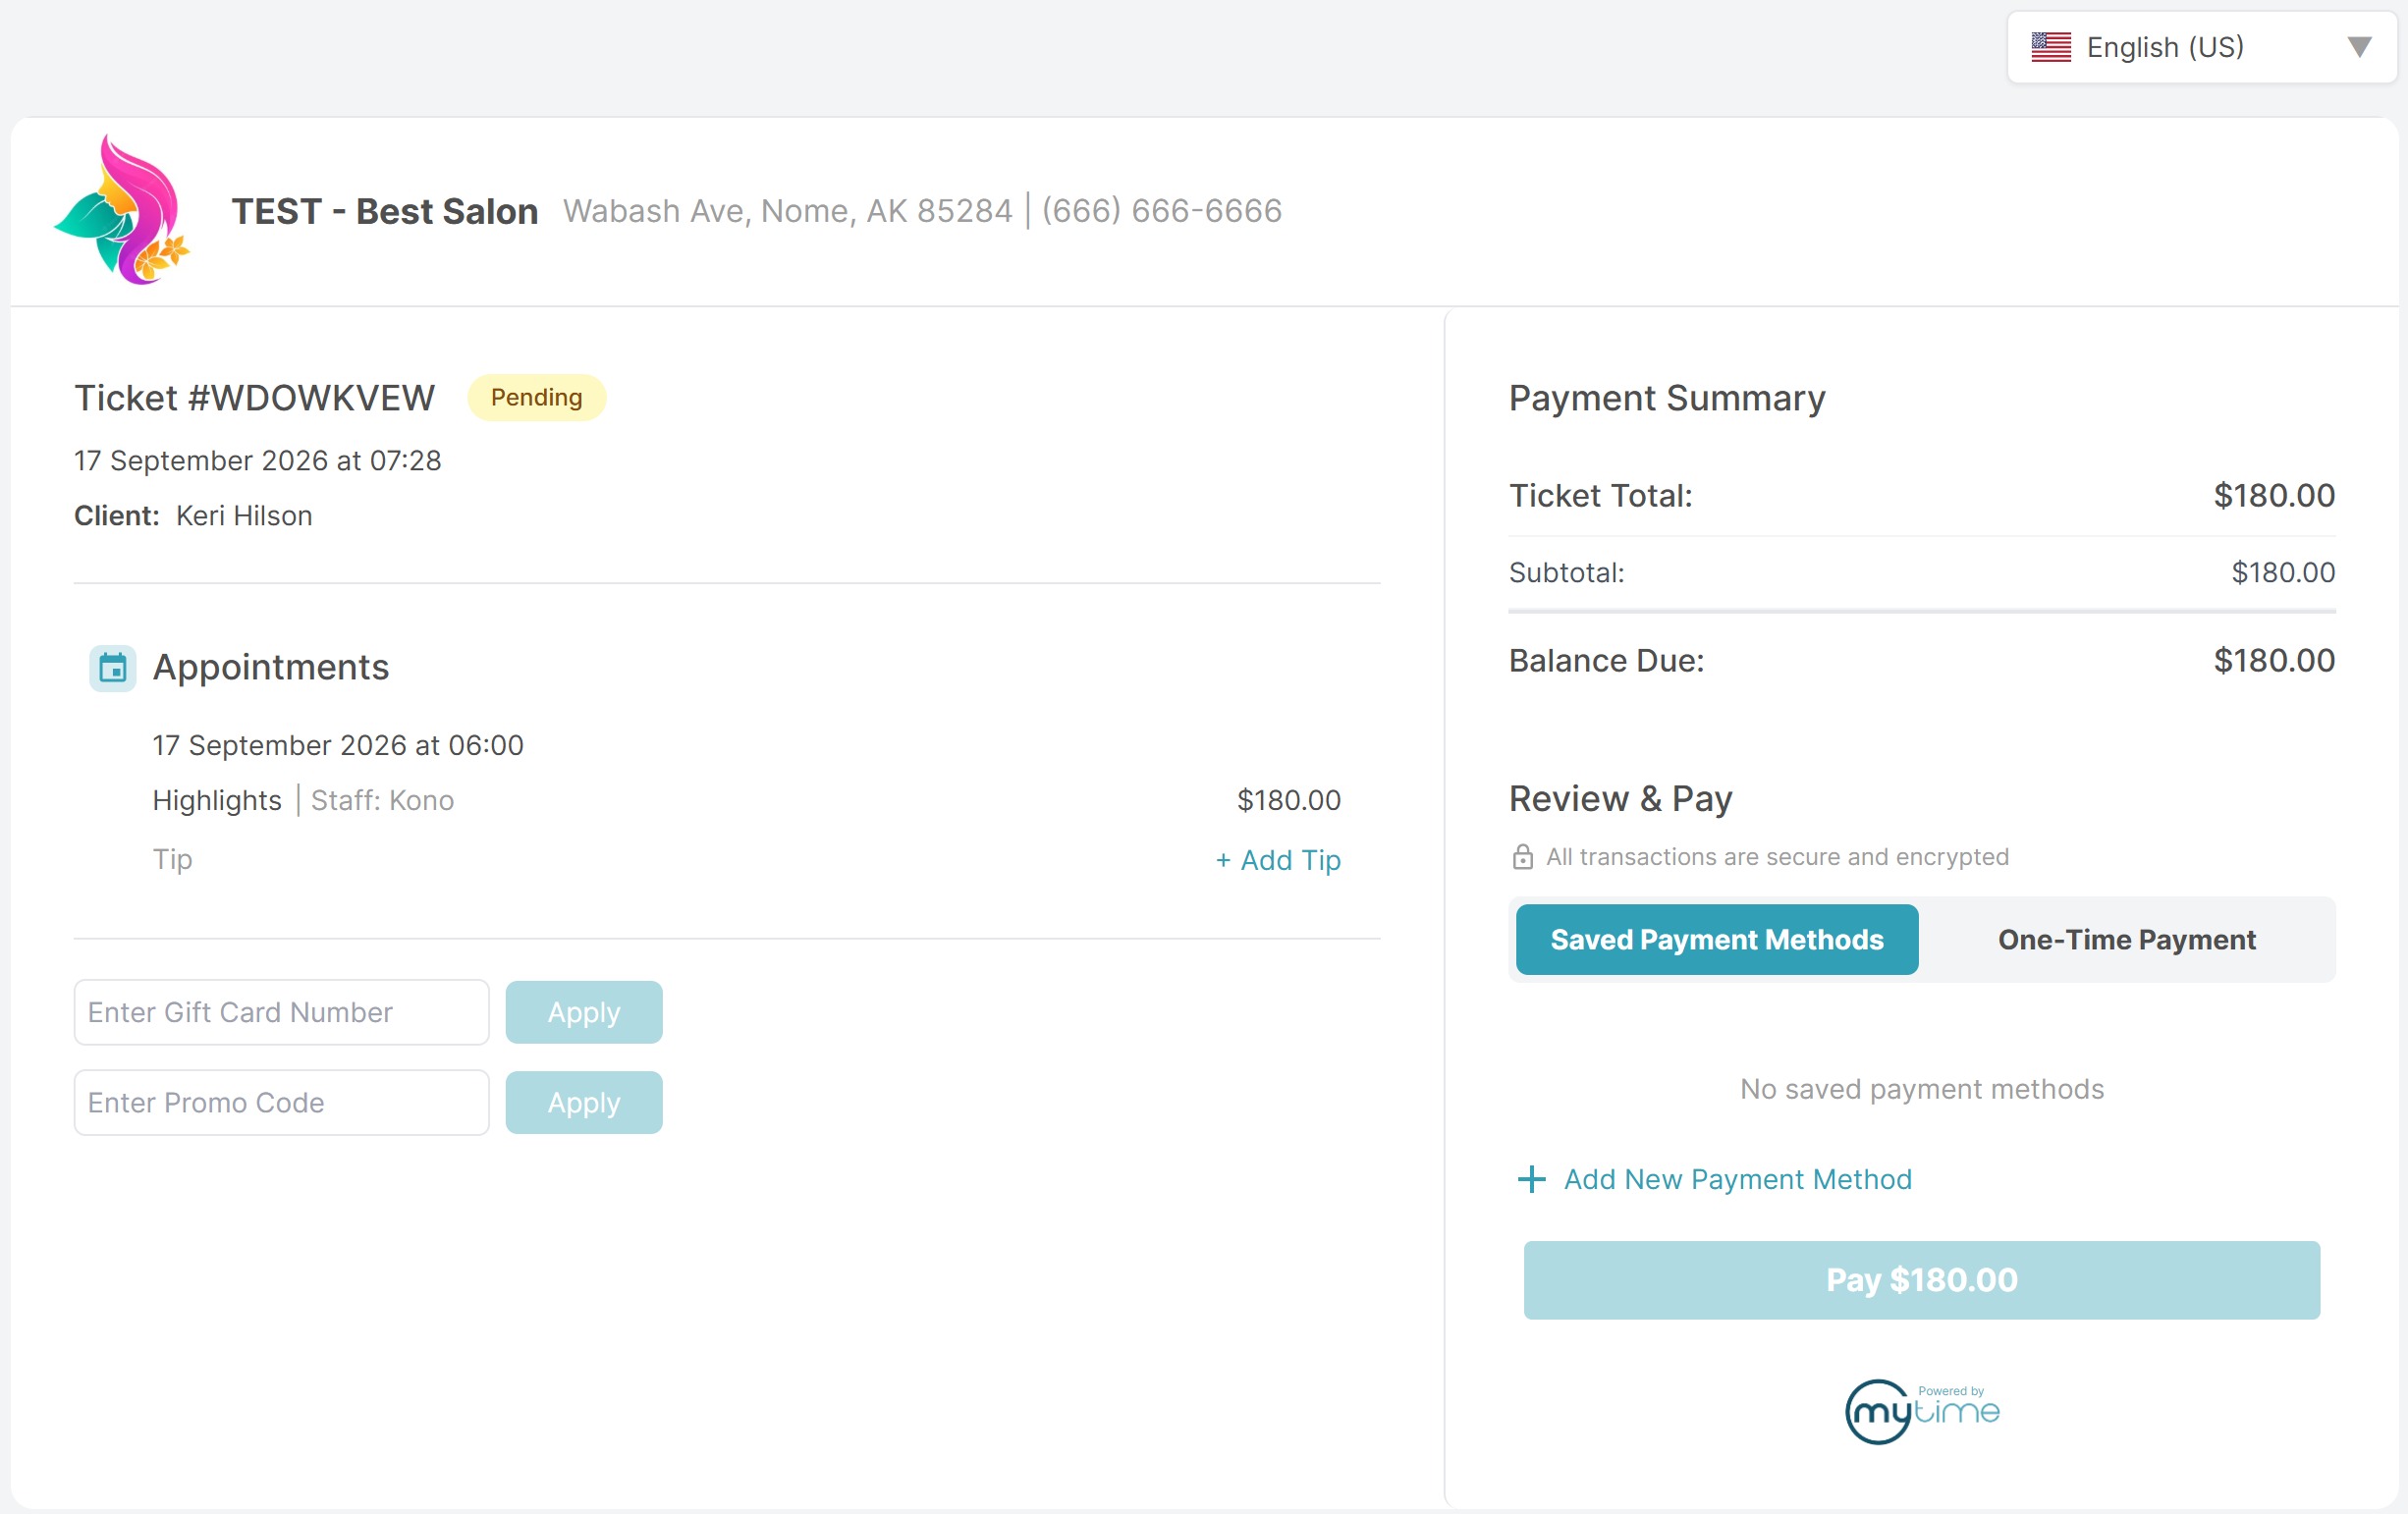
- Once the payment is processed successfully, the open POS ticket automatically closes in-store.
Related Articles:
Was this article helpful?
That’s Great!
Thank you for your feedback
Sorry! We couldn't be helpful
Thank you for your feedback
Feedback sent
We appreciate your effort and will try to fix the article