Editing closed tickets enables you to make necessary revisions to closed tickets, ensuring that all relevant information is appropriately documented. In this article, we will guide you through the steps to edit closed tickets on the scheduler app.
Things to know:
- The ability to edit a ticket is controlled by the "Edit/Refund Closed Tickets" access control setting.
- Refunds and edits cannot be processed for tickets linked to a deleted location or account.
- If a child account is deleted, the associated tickets will no longer be accessible.
- If a single location is deleted from a child account that still has other active locations, the tickets will remain accessible from the client profile and reports but cannot be edited or refunded.
- Once a ticket is closed, you will only be able to edit or issue a refund. However, tickets with services or products covered by packages or memberships can only be edited.
- The following info can be edited on a closed ticket:
- The employee assigned to a gift card, package, membership, or product sale
- The employee who performed a service
- Items can be removed from the ticket and, once refunded, are restocked into inventory
- Once a ticket is fully refunded or partially refunded, it cannot be reopened.
- Tips on a closed ticket cannot be edited after they have been withdrawn from the register. Attempting to do so will display the following error: "Cannot edit because tips were already withdrawn."
- Once the prepaid ticket is closed, it cannot be edited
- Edited tickets that result in an additional payment or refund will appear in reports on both the original closing date and the date of the most recent edit. For example, a ticket closed on September 1 for $100 and later edited on September 5 to add a $20 item will show the following:
- $100 on September 1
- $20 on September 5
- If an item of equal value is added during an edit, no payment or refund will be required.
Commission for product, membership, package, and gift card purchases is determined by the staff member selected in the commission dropdown on the ticket. - By default, a staff member is assigned based on the “Default Commissionable Employee for Product and Prepaid Sales” setting. Learn more here
- When a closed ticket is edited (reopened) and items are removed, a red “Removed” label will appear next to the item on the ticket. This label includes the following details:
- Products: Item name, quantity, refunded value, the employee who performed the removal, and a timestamp
- Services & Class Enrollments: Client name, assigned employee, appointment or class session start and end times, refunded value, and the employee who performed the removal. Removing a service or class enrollment from a ticket does not delete the appointment or enrollment. It simply unlinks it from the ticket, allowing it to be added to another ticket.
- Memberships: Name of the membership, refunded value and the employee who performed the removal and time stamp
- Packages & Gift Cards: Name of the package or value of the gift card, refunded value and the employee who performed the removal and time stamp
- By default, ticket numbers are generated as alphanumeric codes (e.g., R0T4TX5P). You can configure your account to use sequential ticket numbers instead (e.g., 062-00002). This is controlled by the hidden setting “Show Sequential Receipt Number on Tickets.” To enable this feature, please contact our support team at support@mytime.com.
CONTENTS
Accessing The Ticket
A closed ticket can be accessed from either the Schedule or the POS.
1. Launch the MyTime Scheduler app on your device
2. Choose your login method:
- Standard: Enter your registered email address and password, then tap 'Sign In'
- Social Login: Select 'Continue with Google' or 'Continue with Apple' to use your existing credentials for a faster login experience. For detailed instructions, learn more here
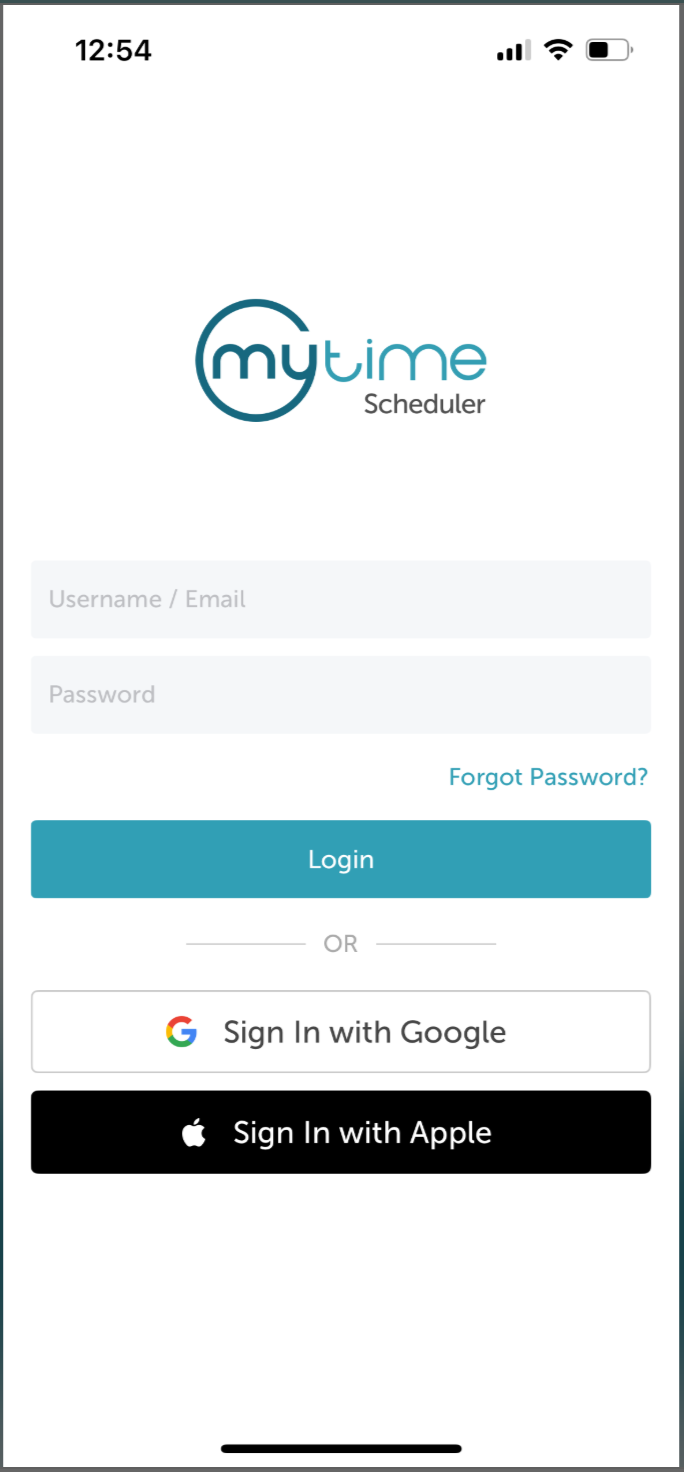
3. After signing in, you will be directed to the Schedule by default
Option A: From the Schedule
1. Locate and select the appointment from the schedule 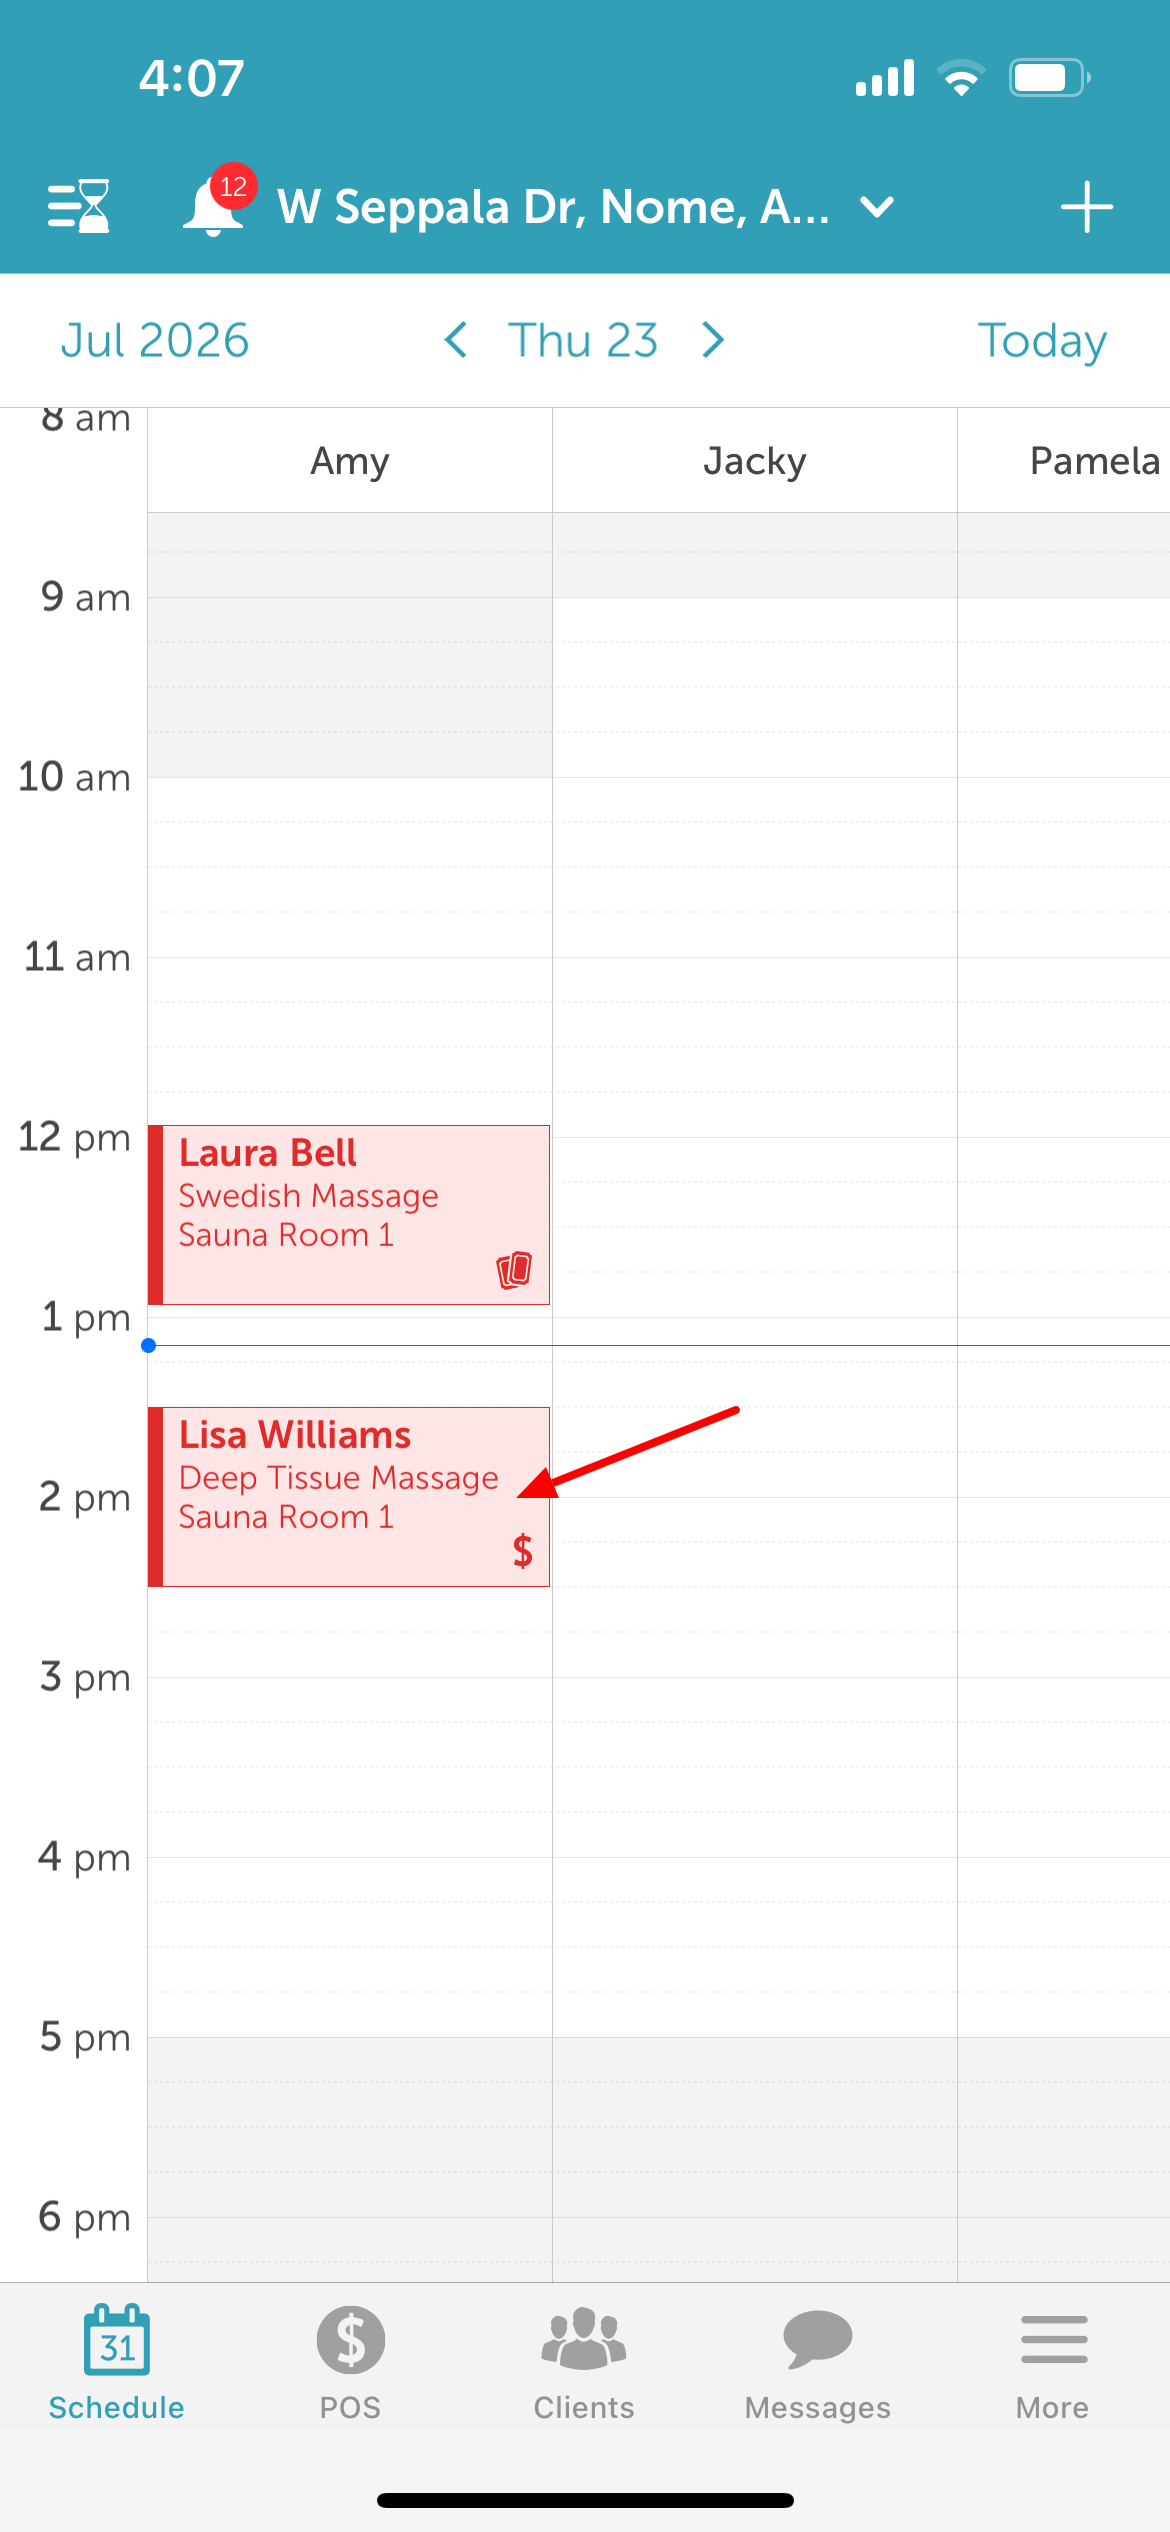
2. Tap View Ticket 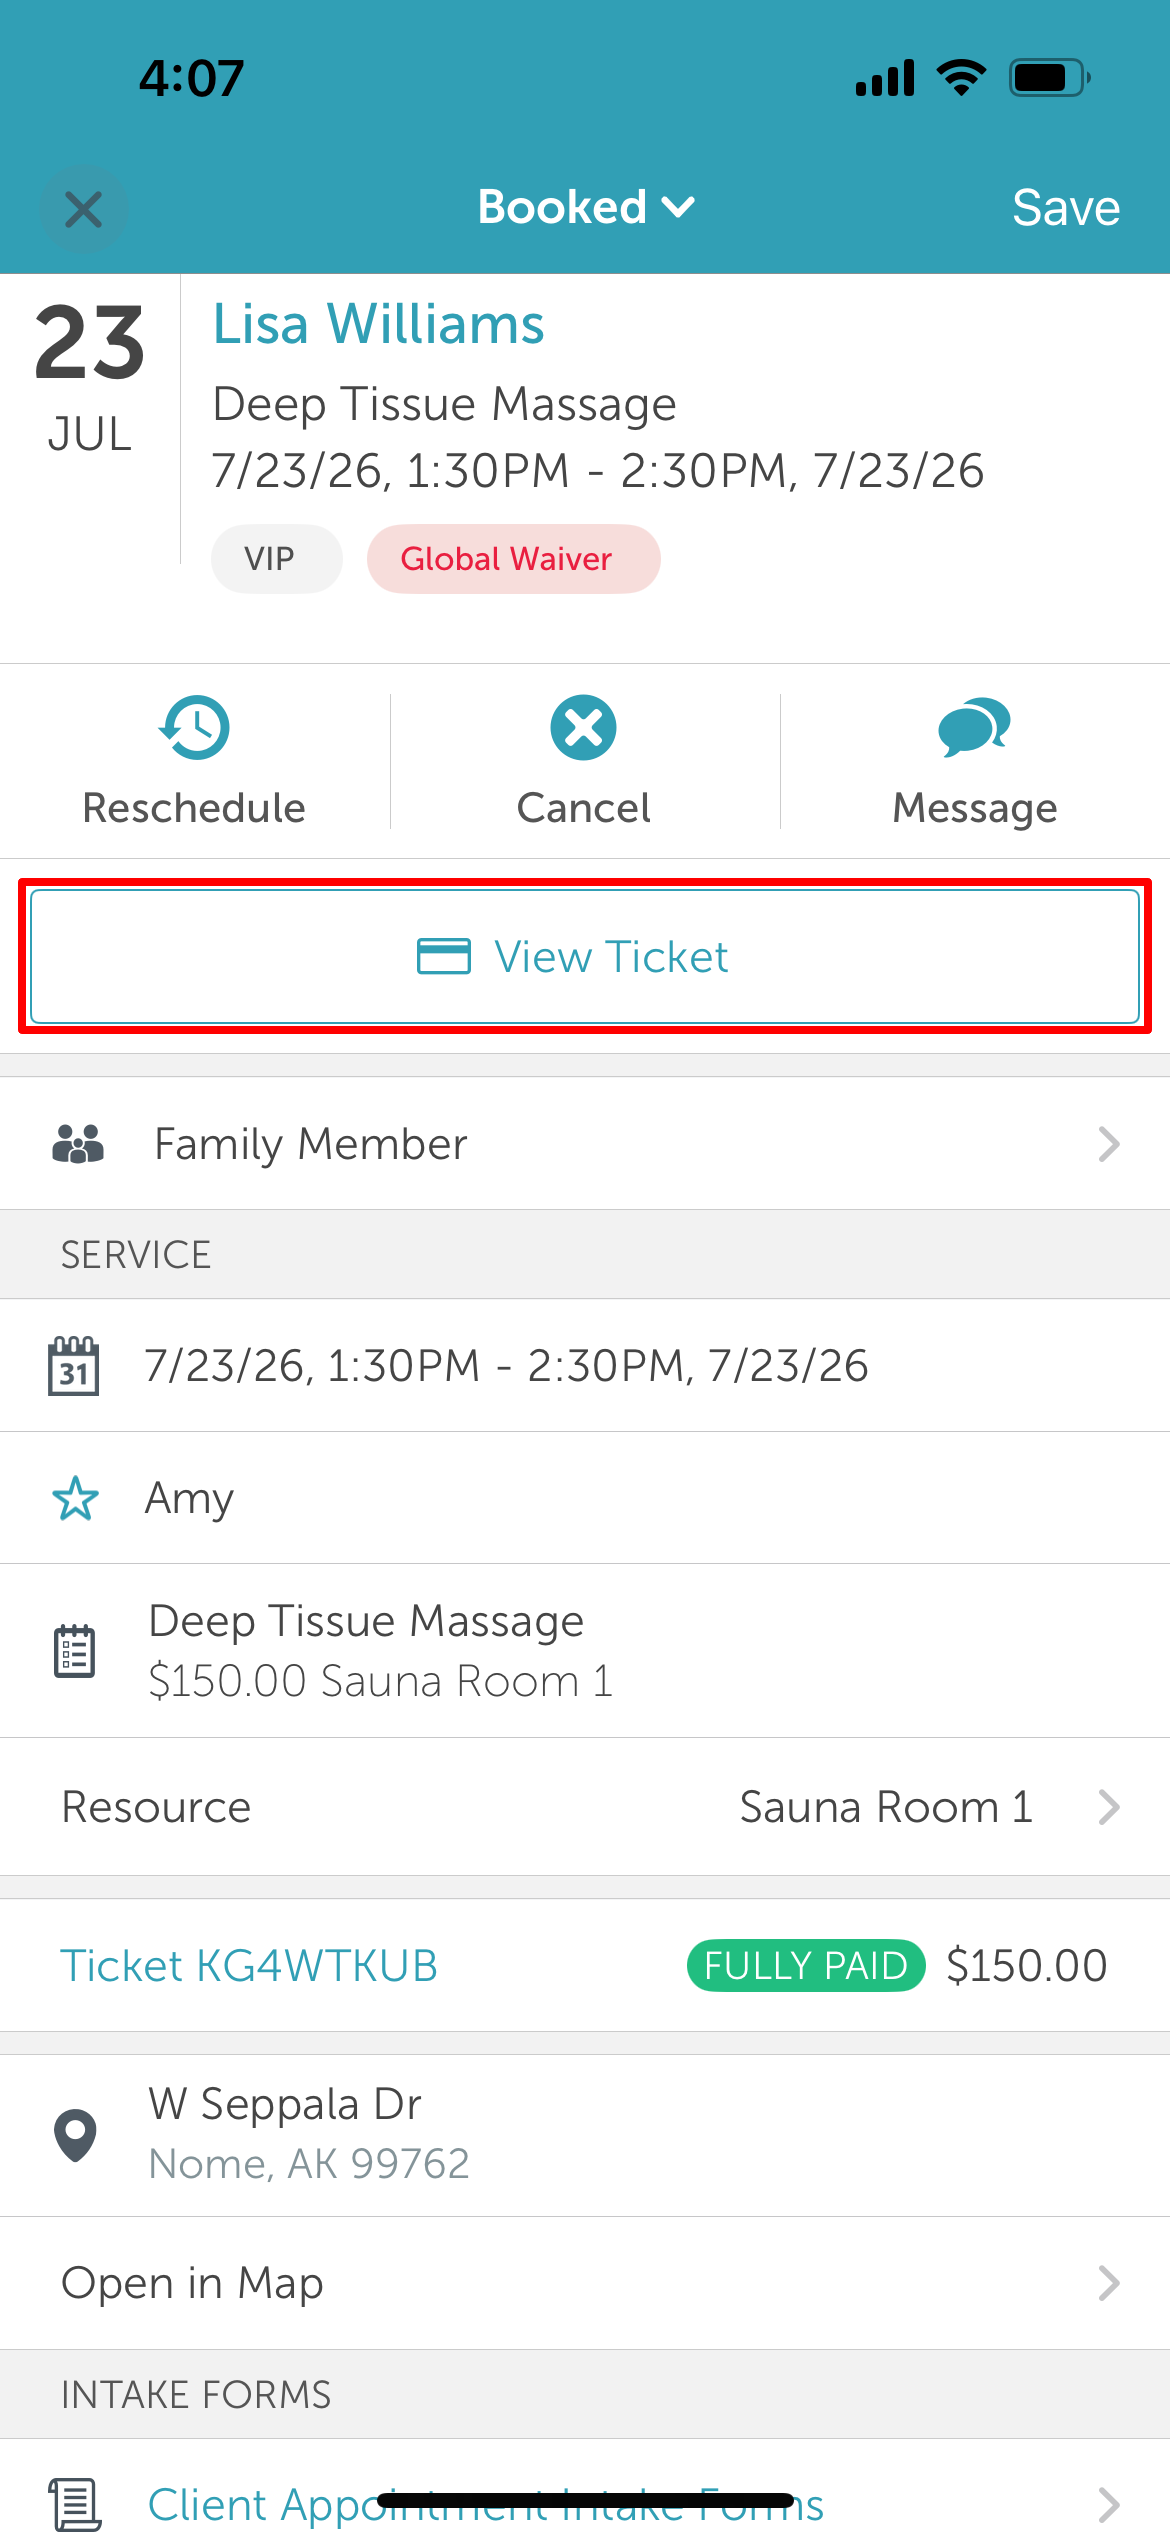
3. On the Charges Tab, tap Edit Ticket at the bottom of the screen
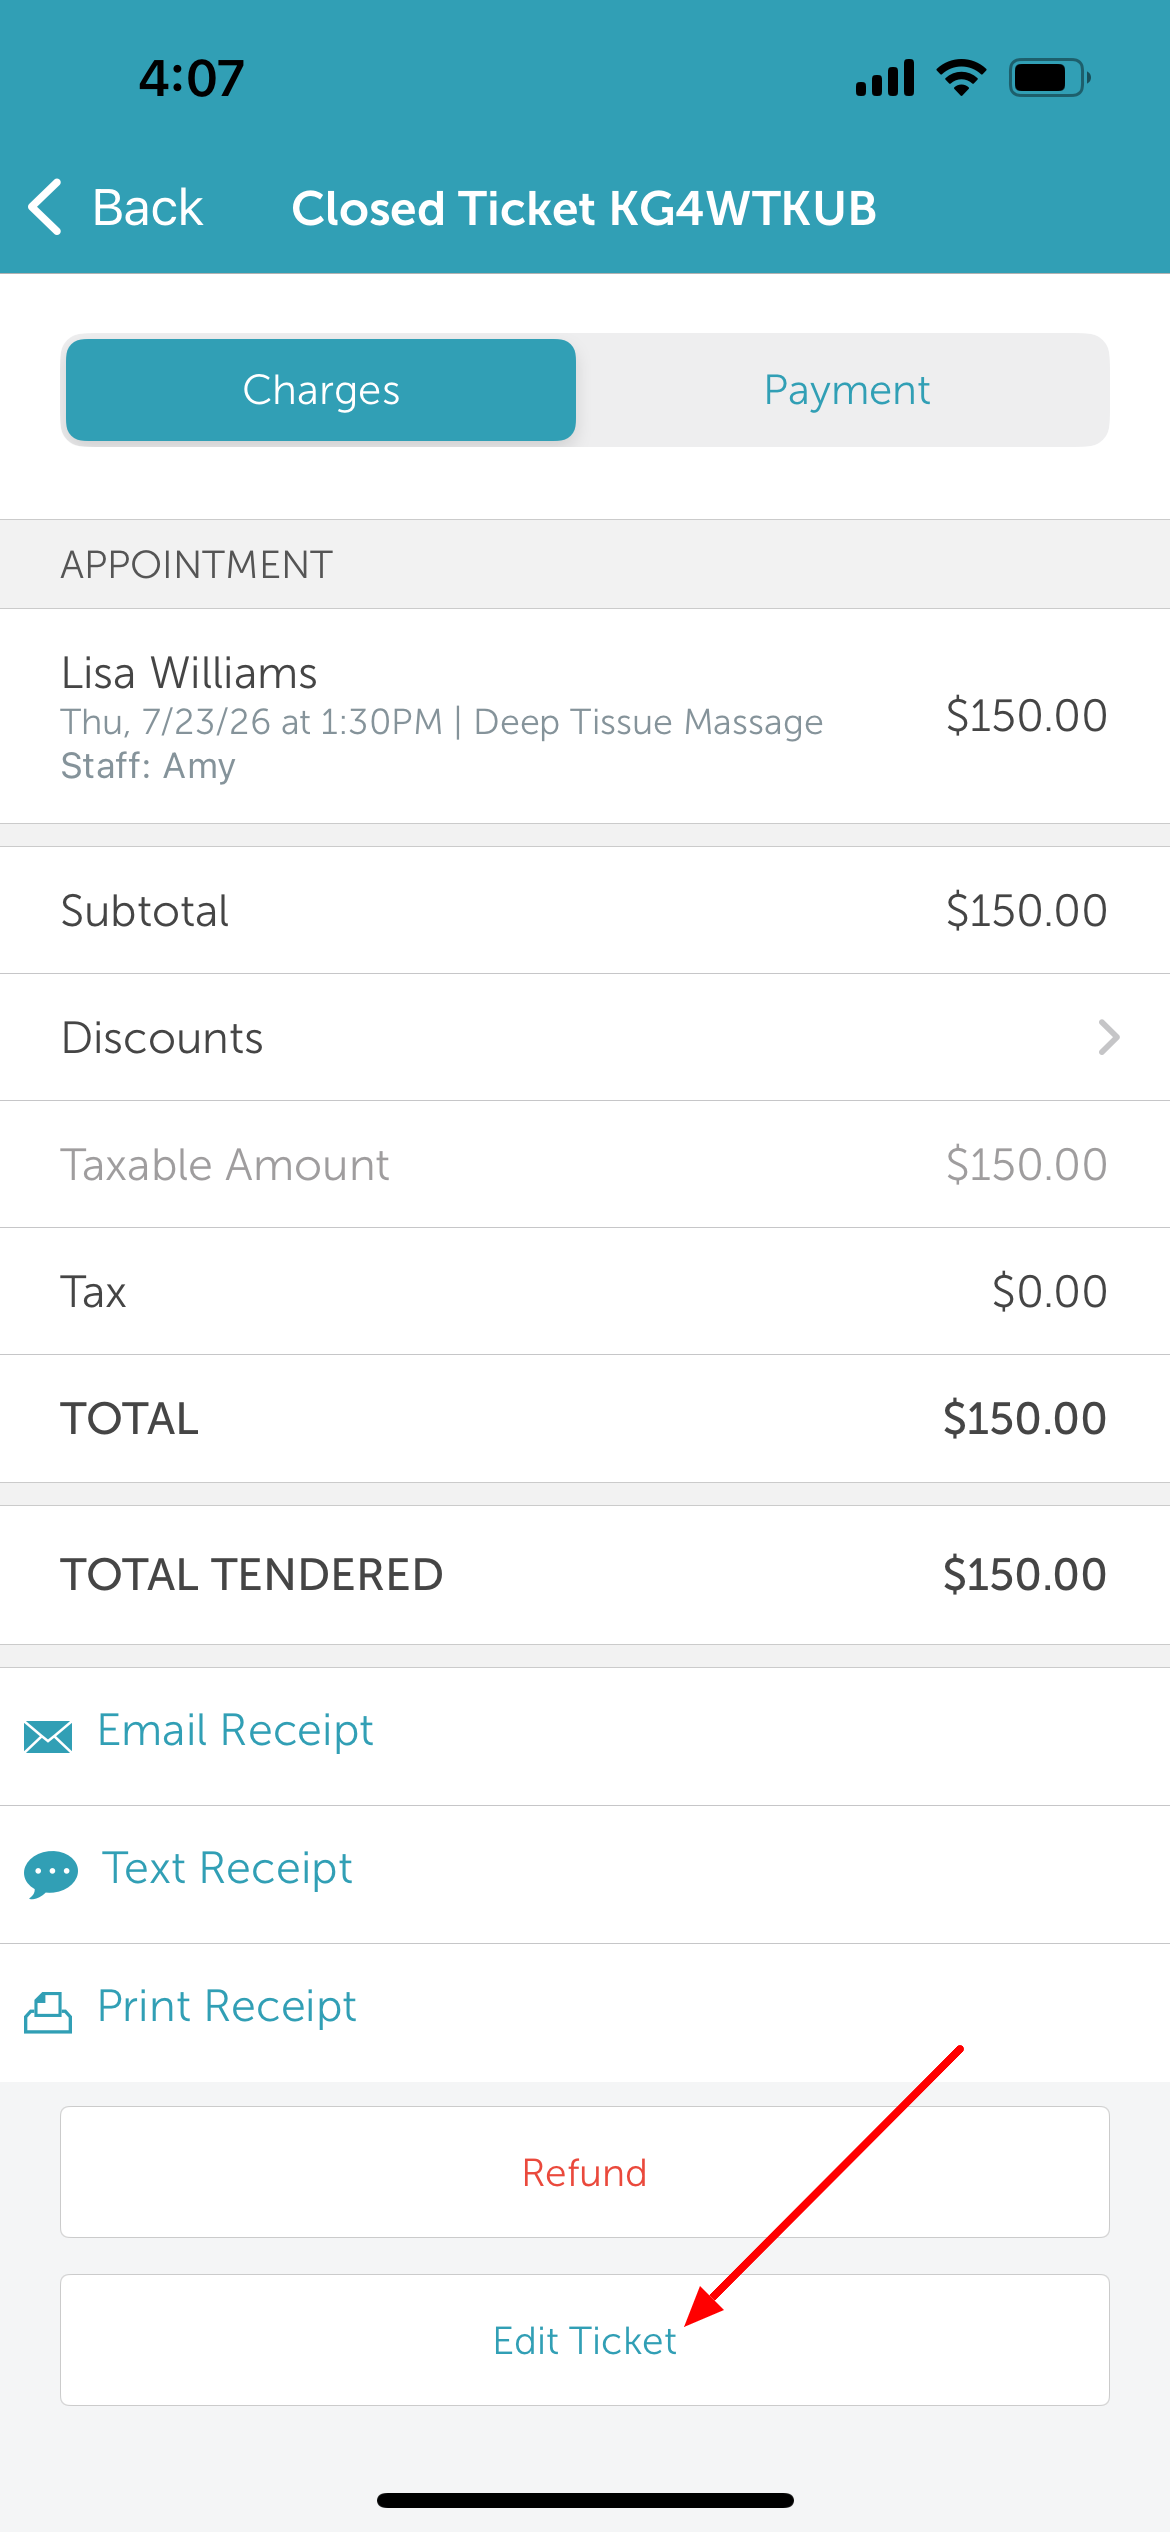
Option B: From POS
1. From the schedule, tap POS 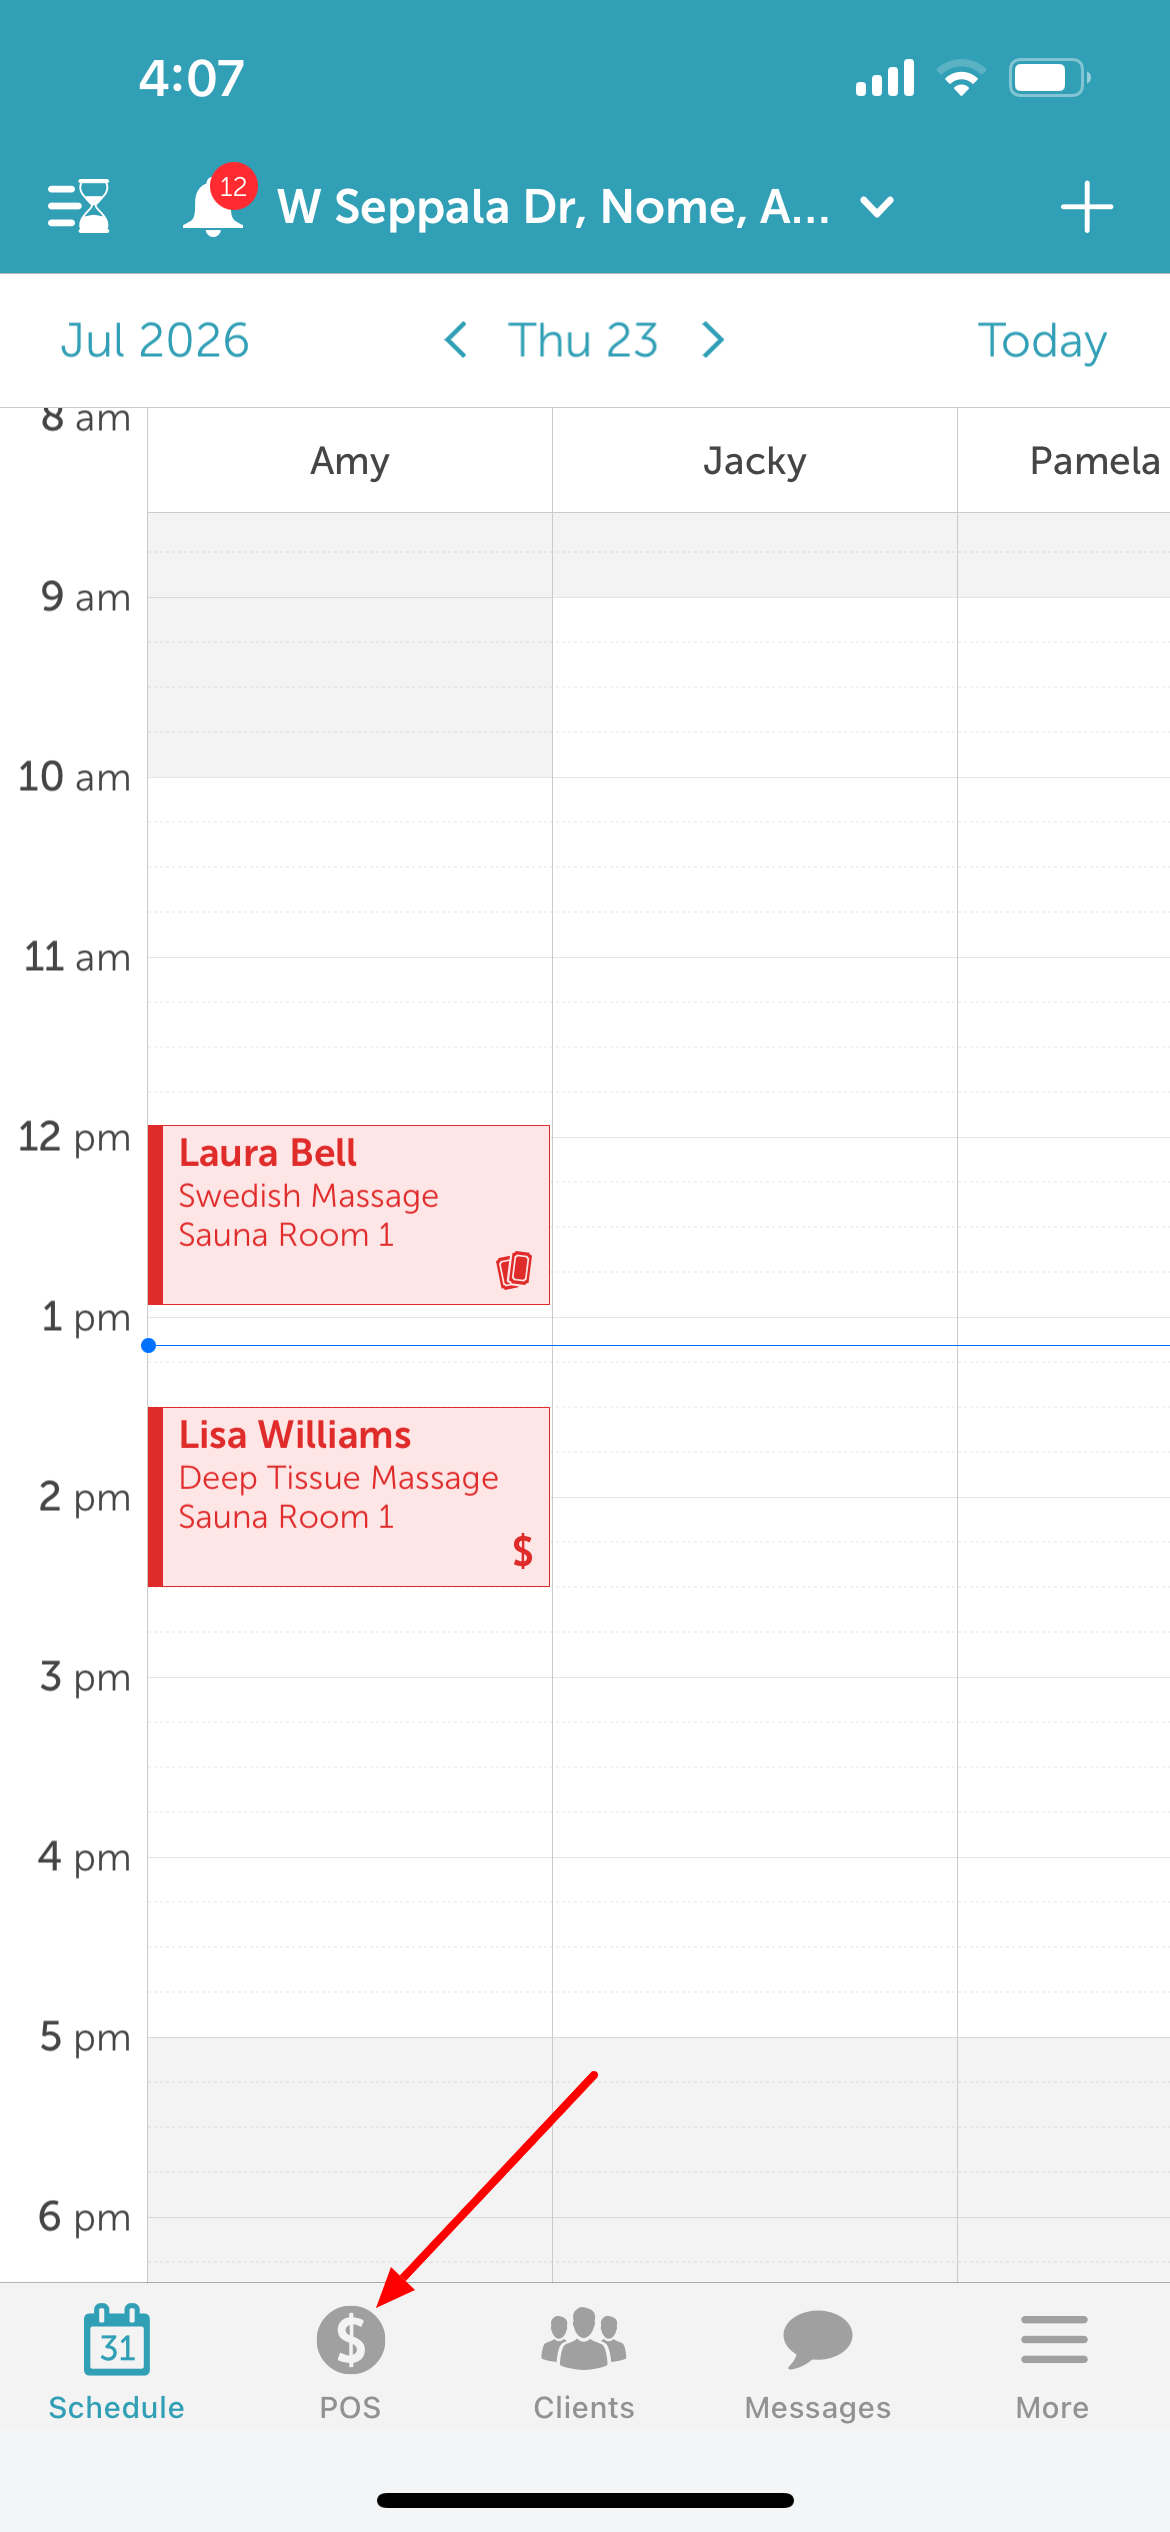
2. Tap History in the top left of the screen 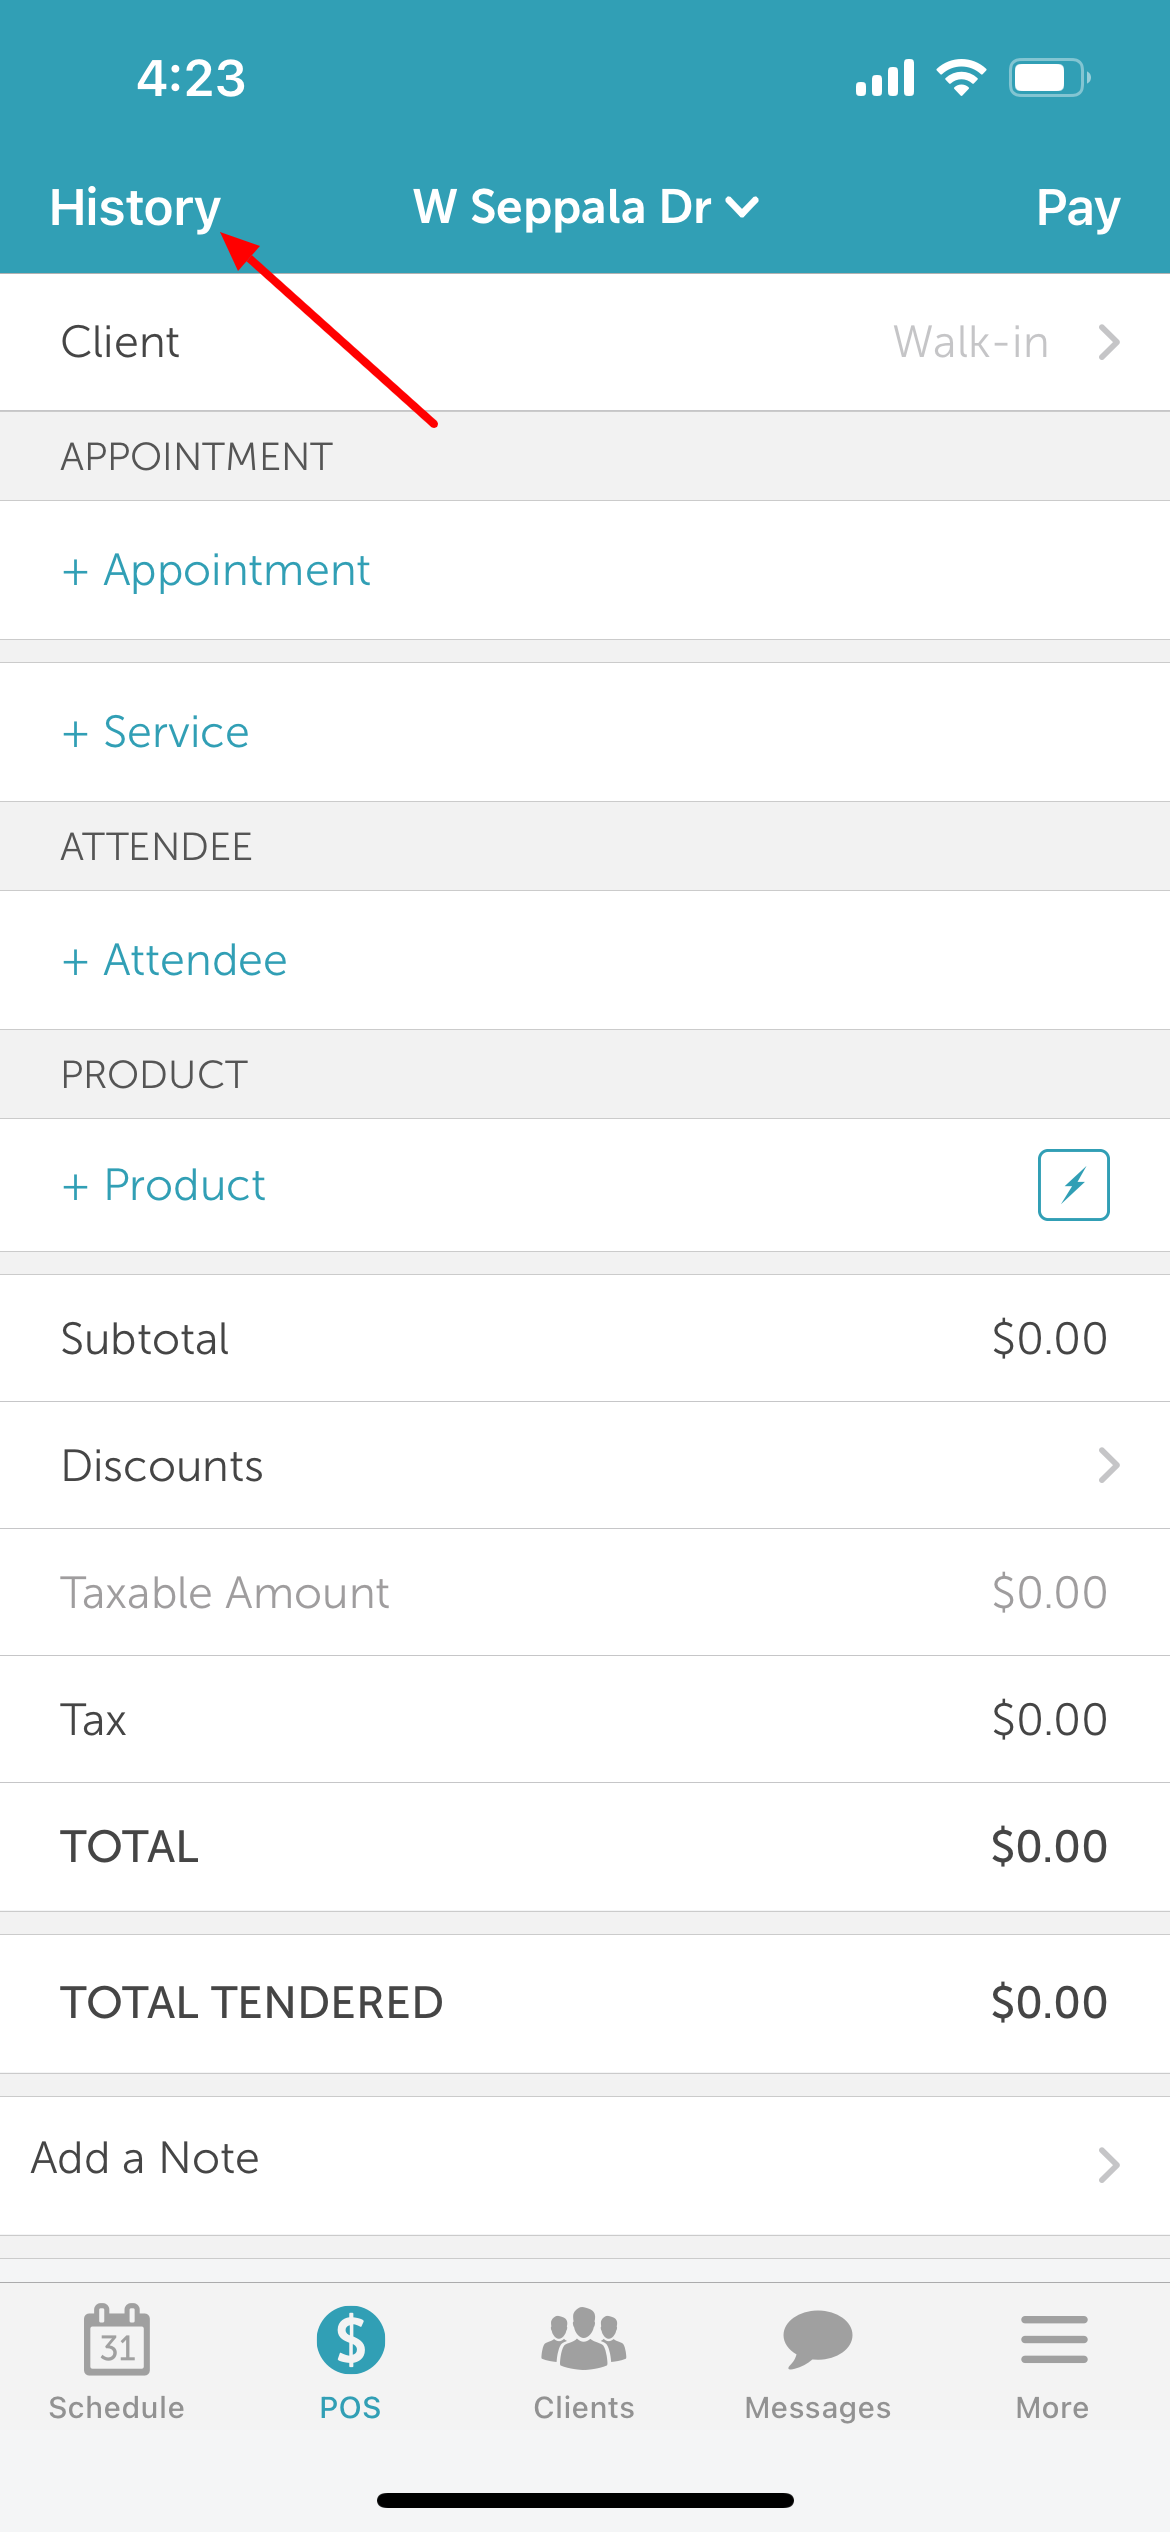
3. Select the Closed tab
4. Select the desired ticket from the list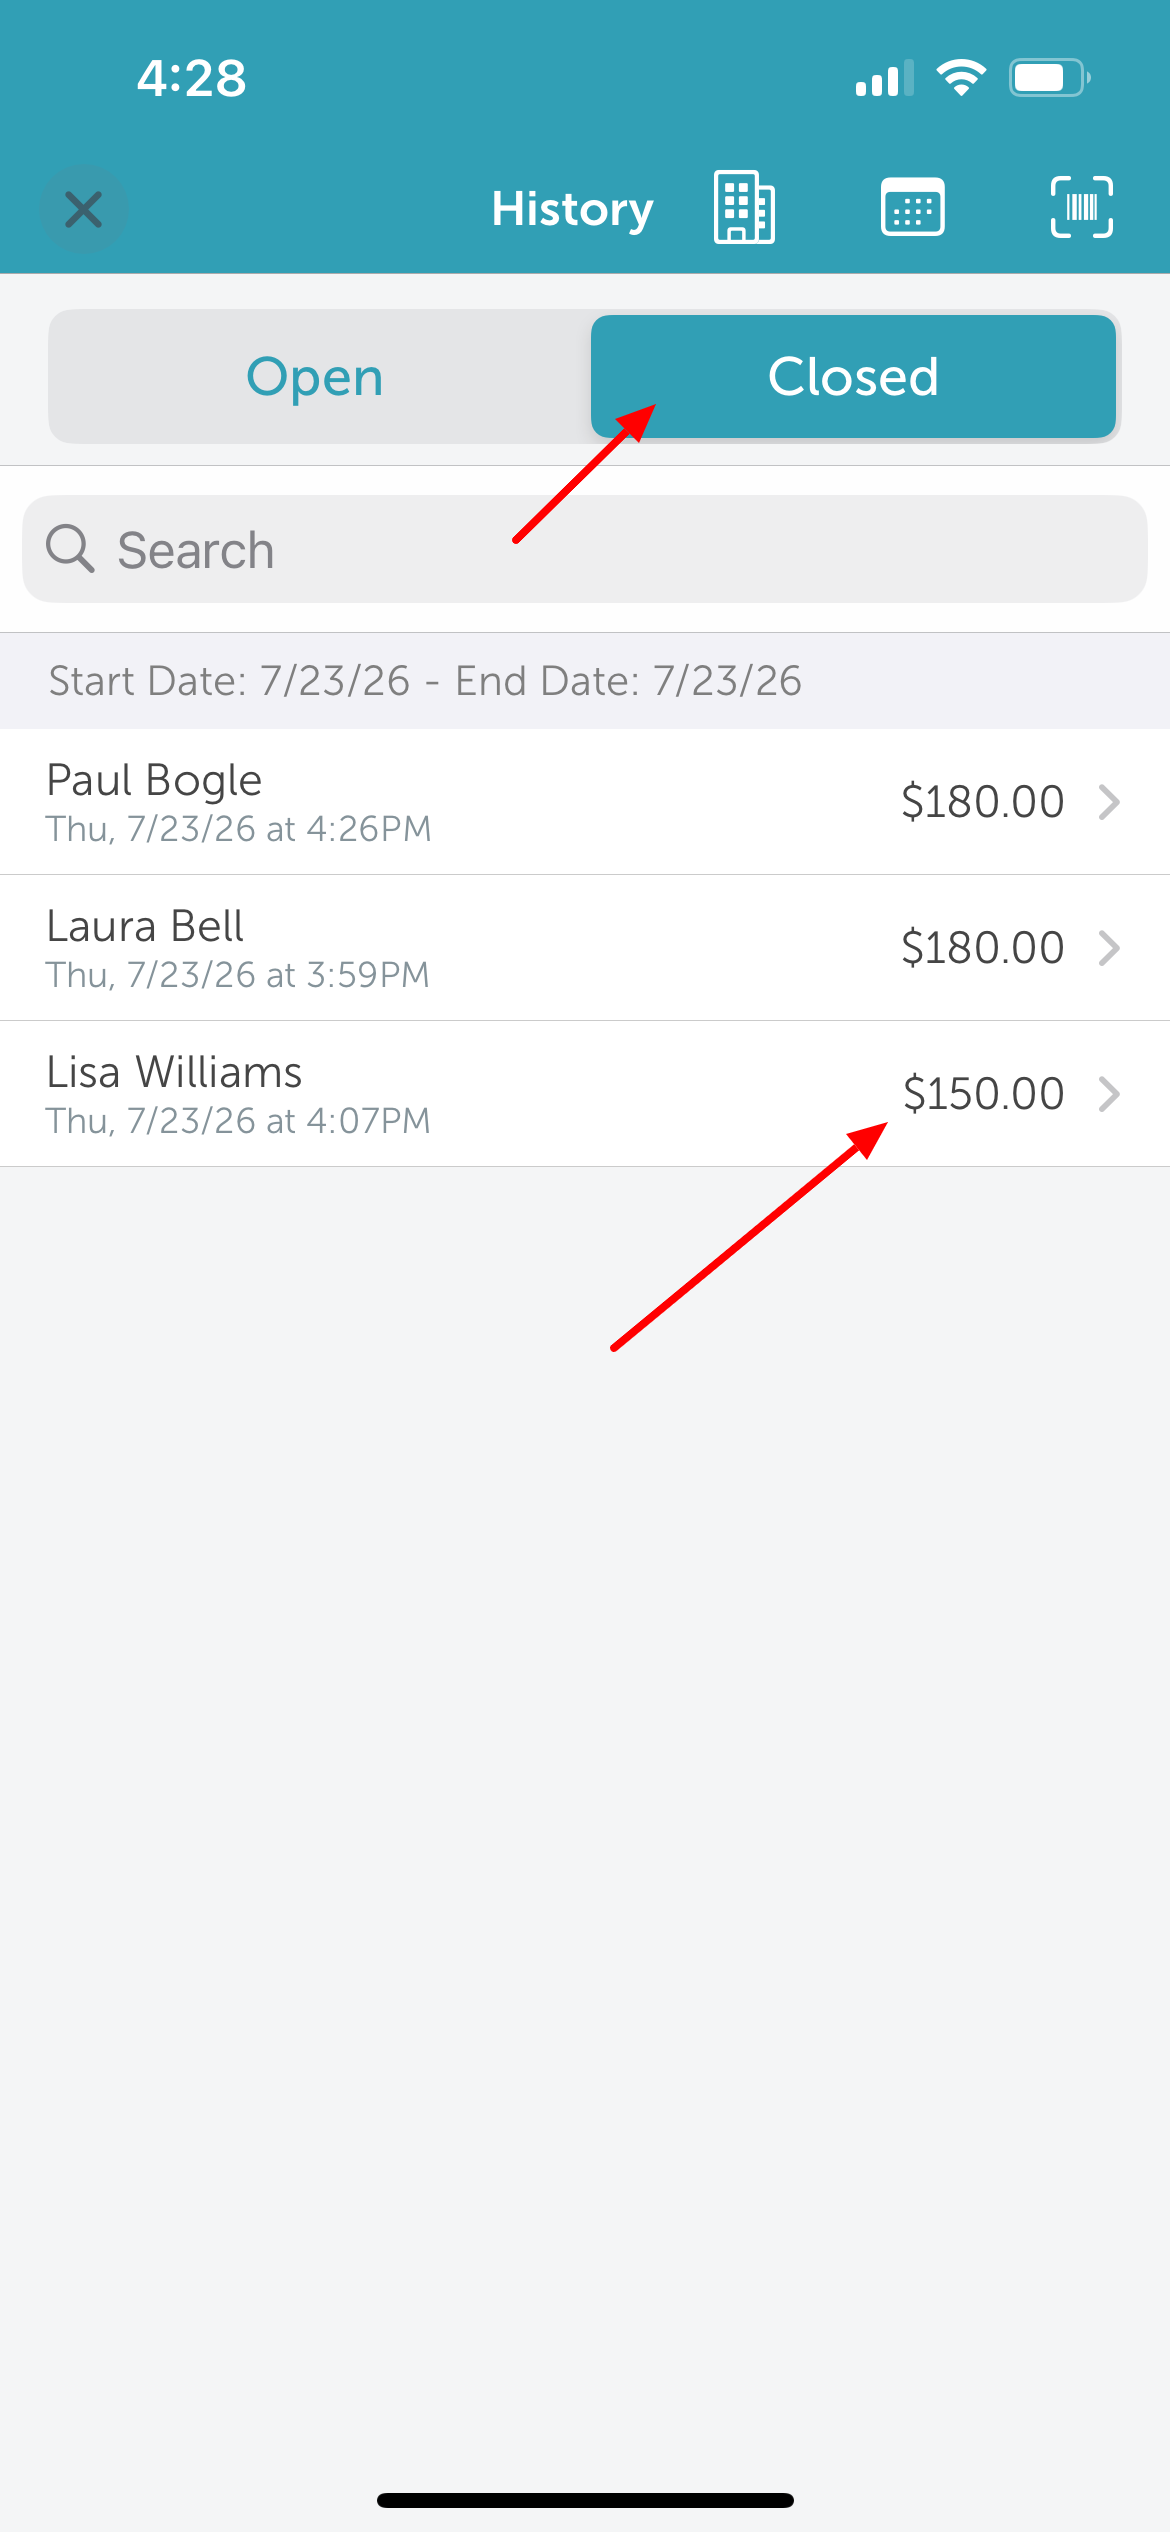
5. Tap Edit Ticket at the bottom of the Charges screen 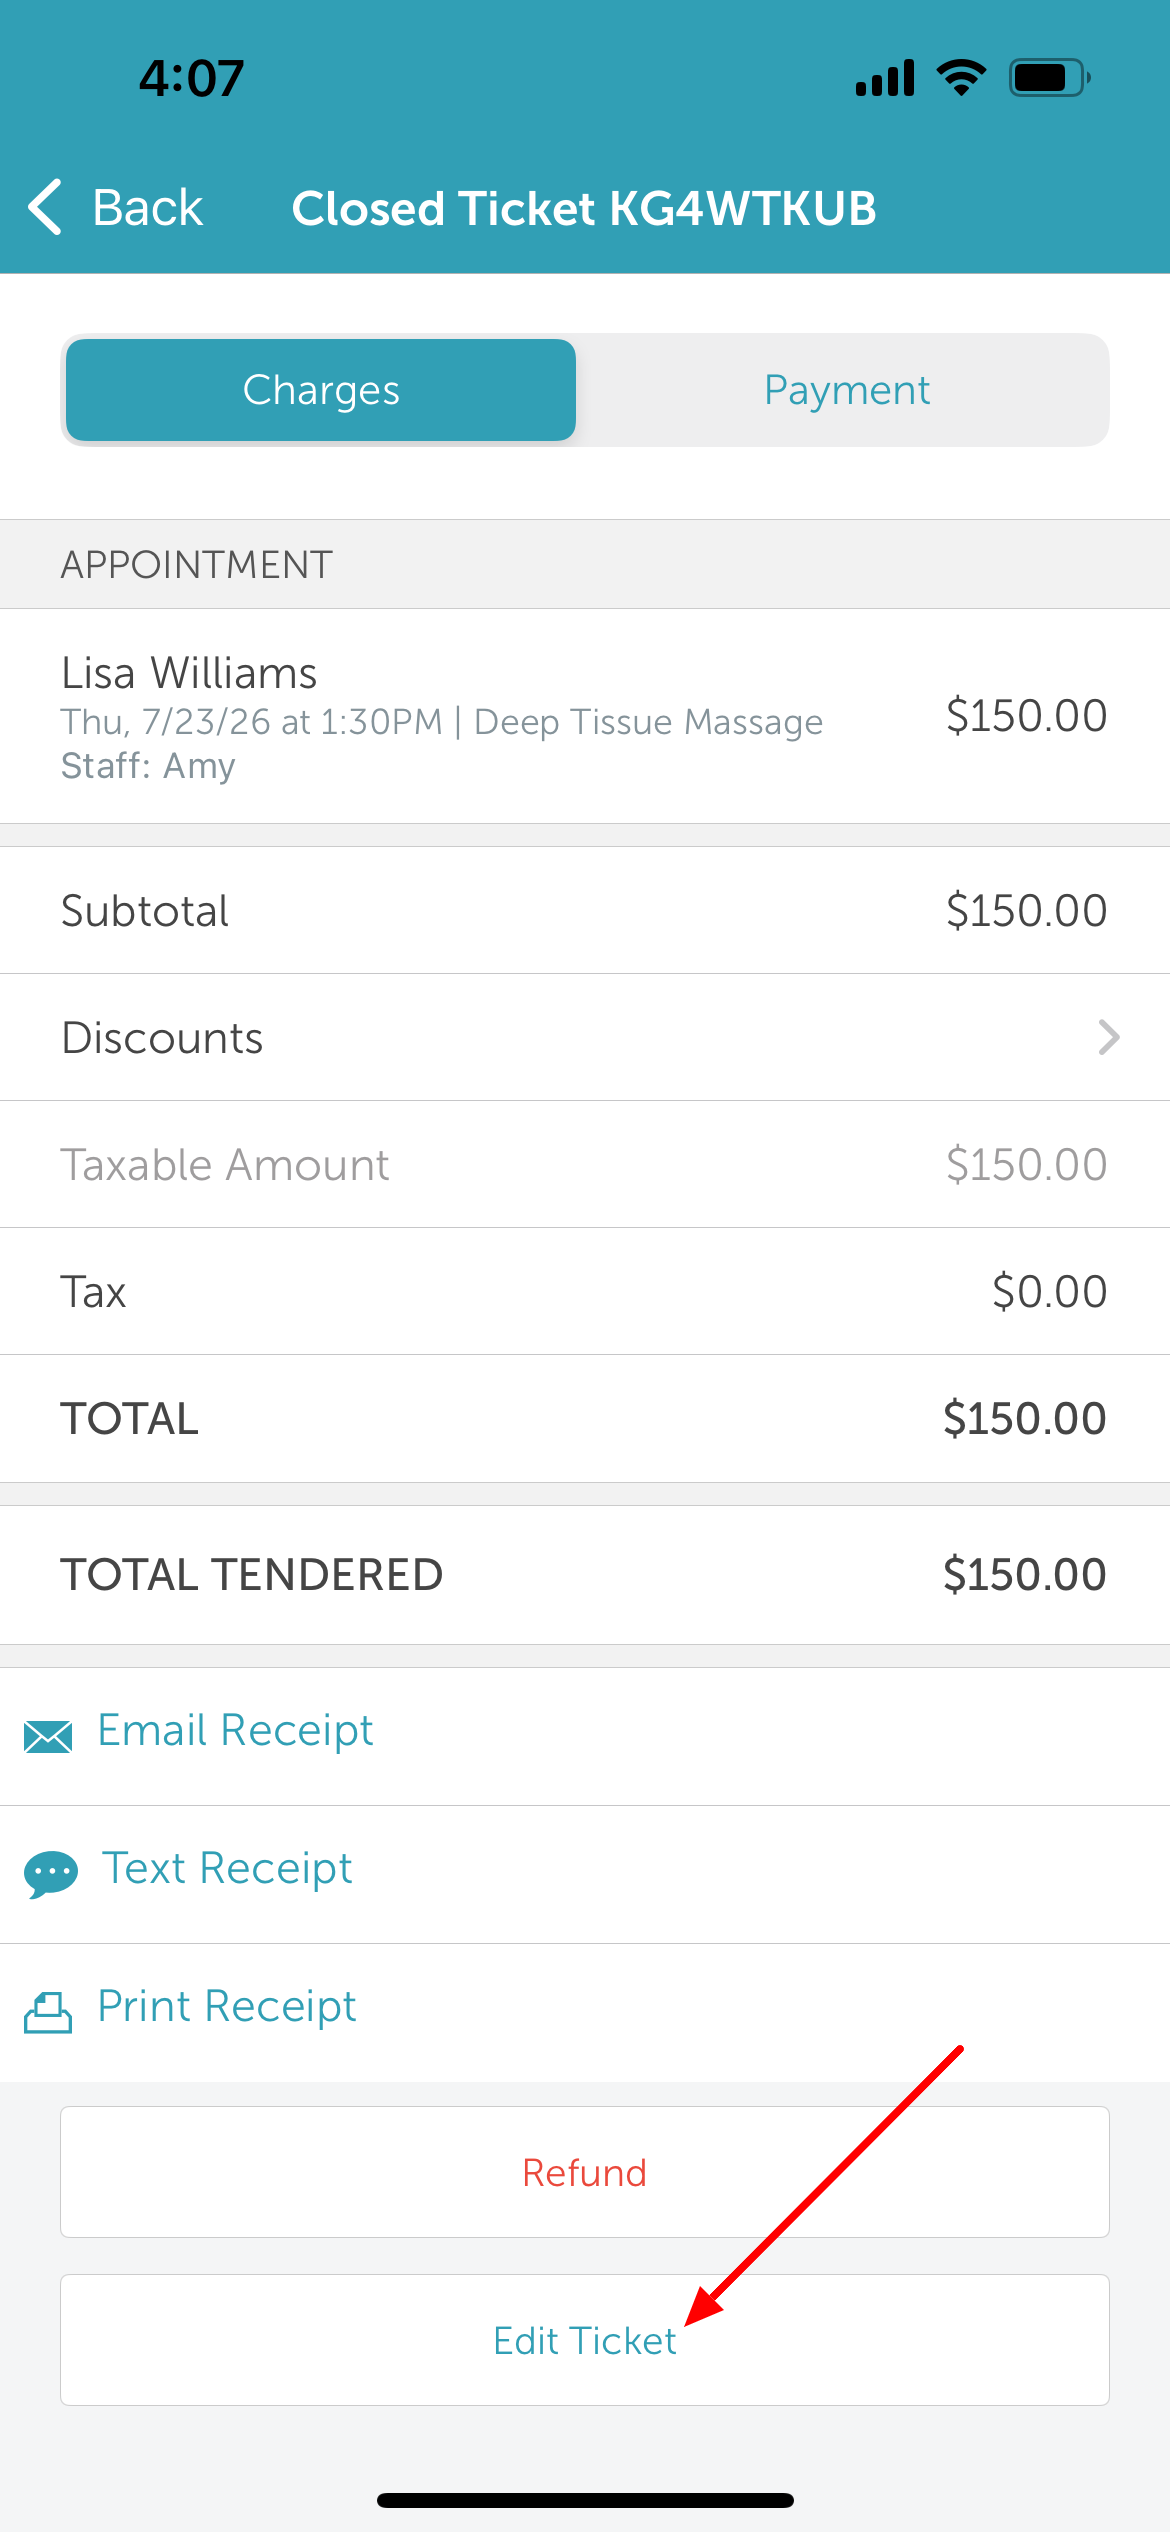
Editing Tickets with Services
1. Once the ticket is reopened, make necessary adjustments (e.g., updating price, adding tips, services, classes, or products).
2. Tap Pay in the top right of the screen 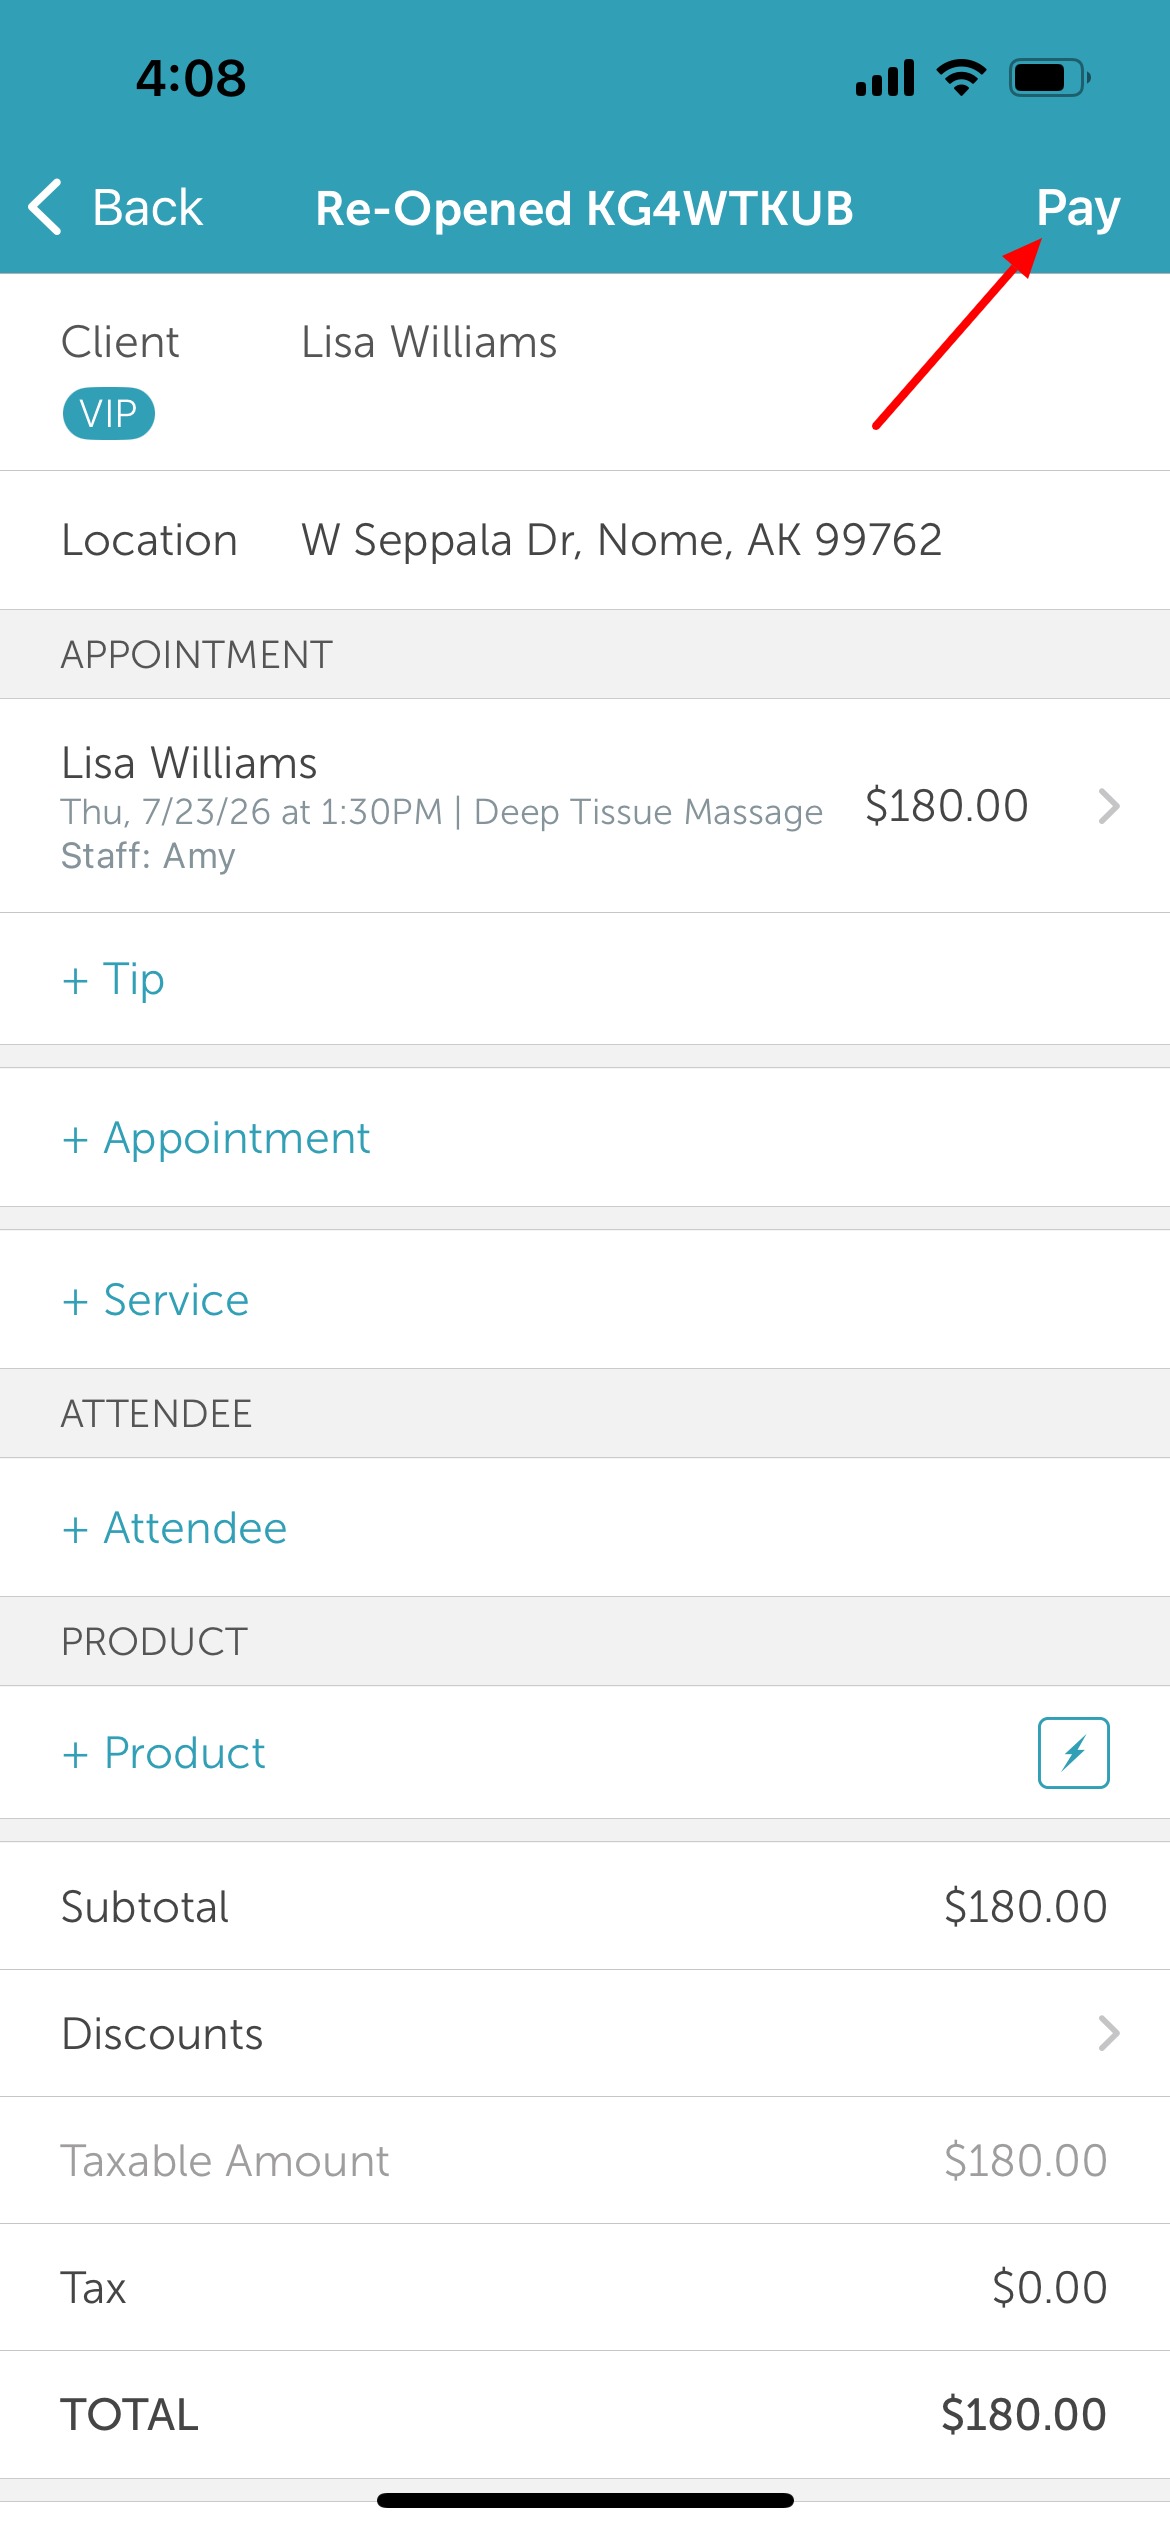
3. Process any required refund or collect additional payment.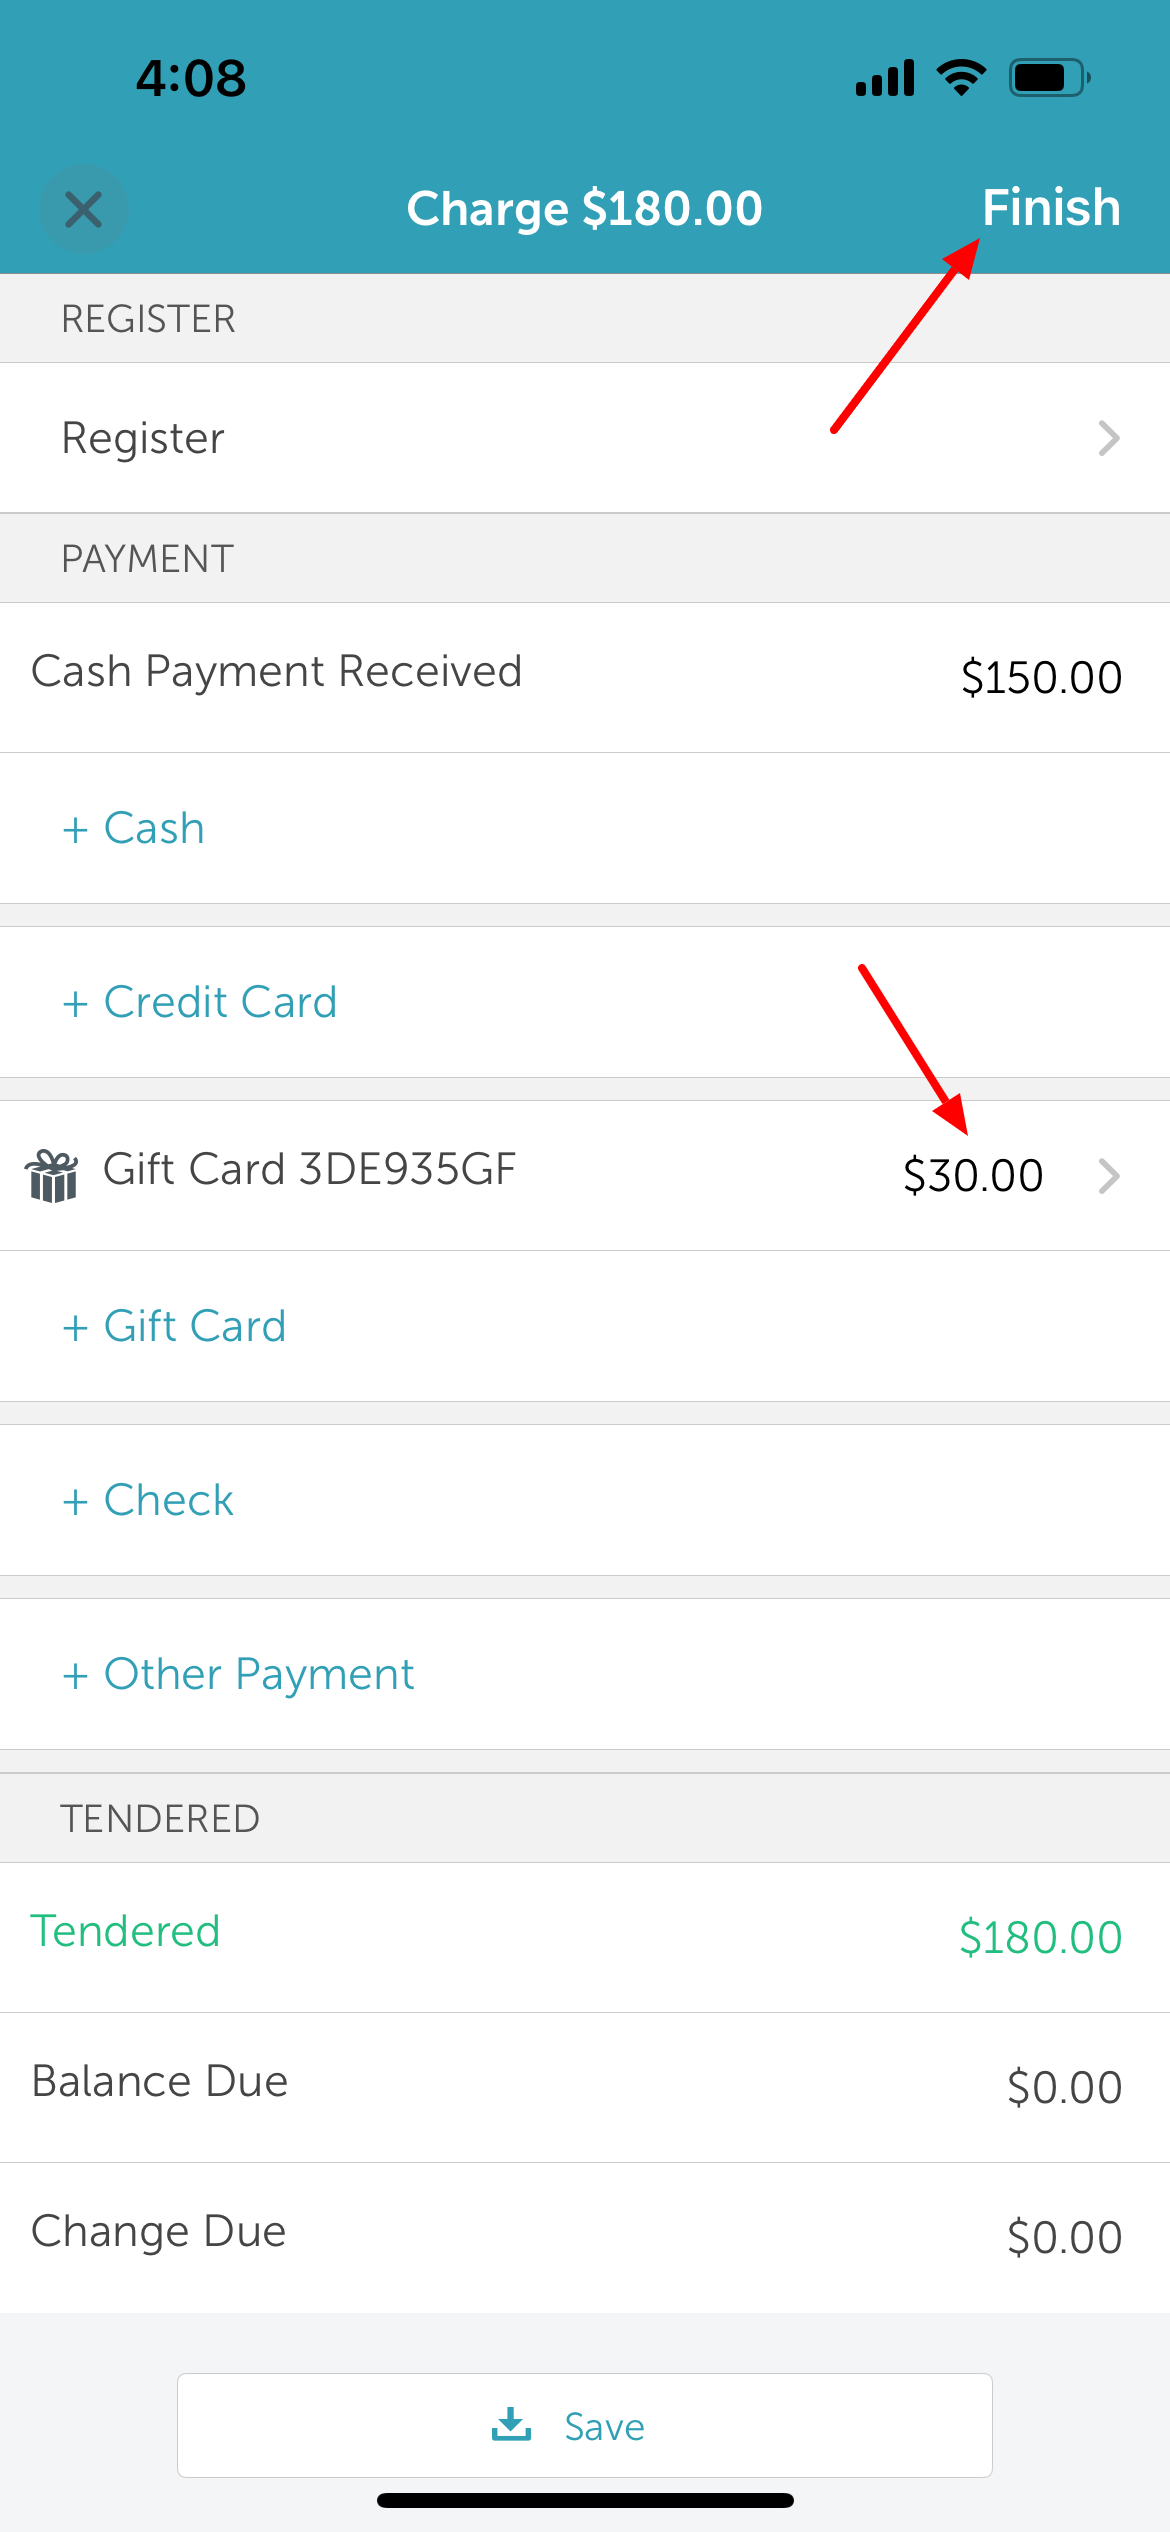
Editing Tickets with Product
1. Tap Edit Ticket at the bottom of the Charges screen 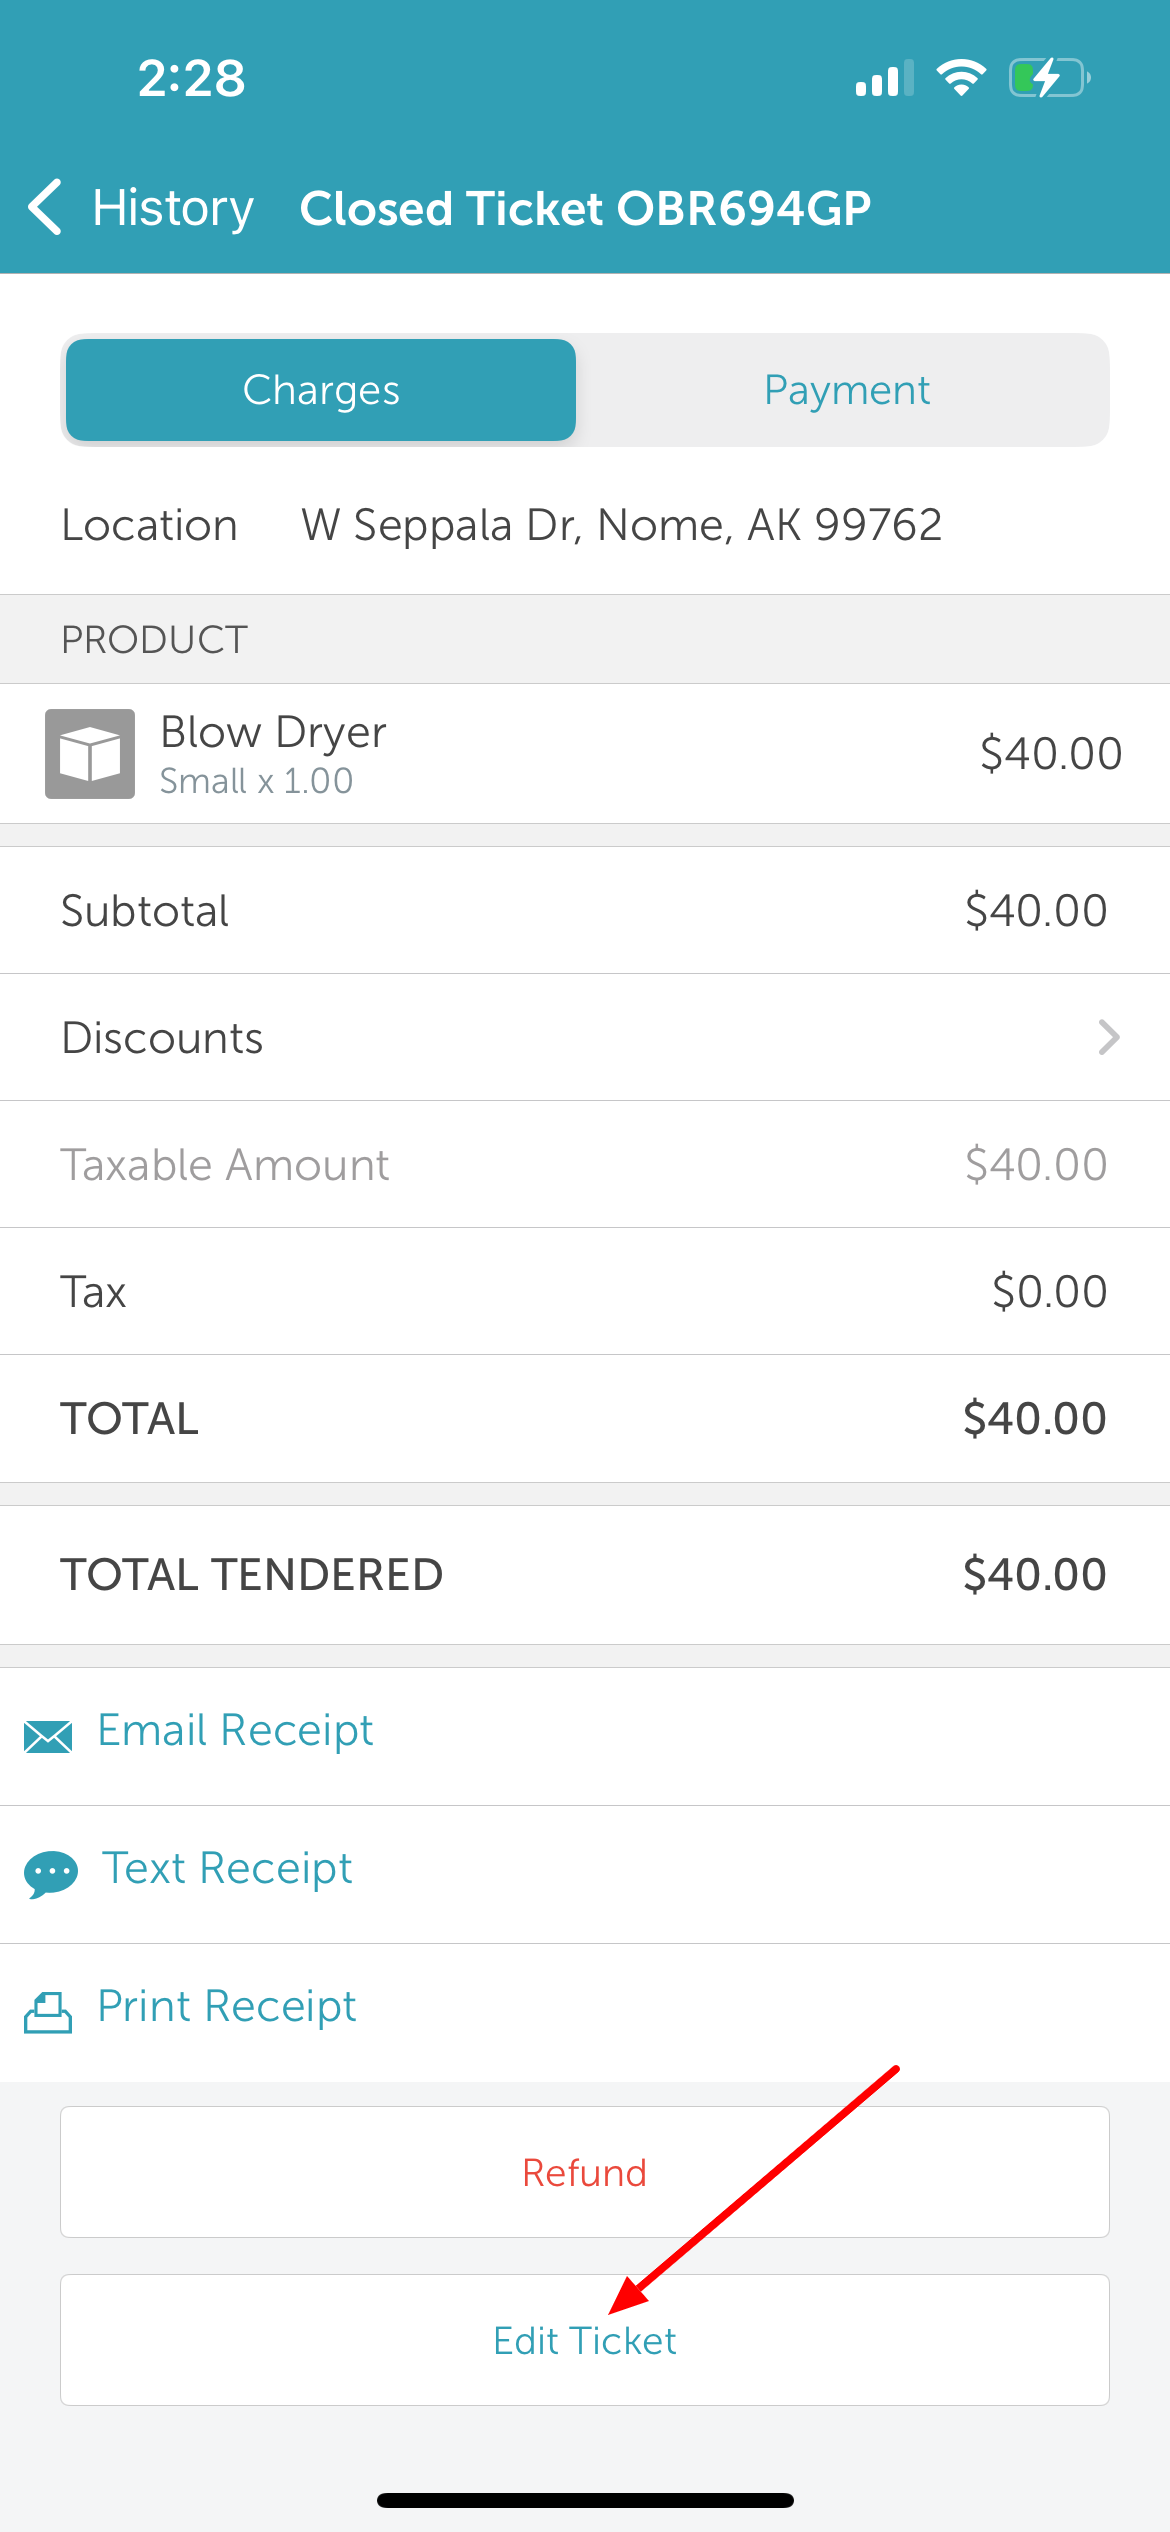
2. Once the ticket reopens, make necessary adjustments (e.g., updating price, reassigning commission staff, or adding products).
3. Tap Pay in the top right of the screen 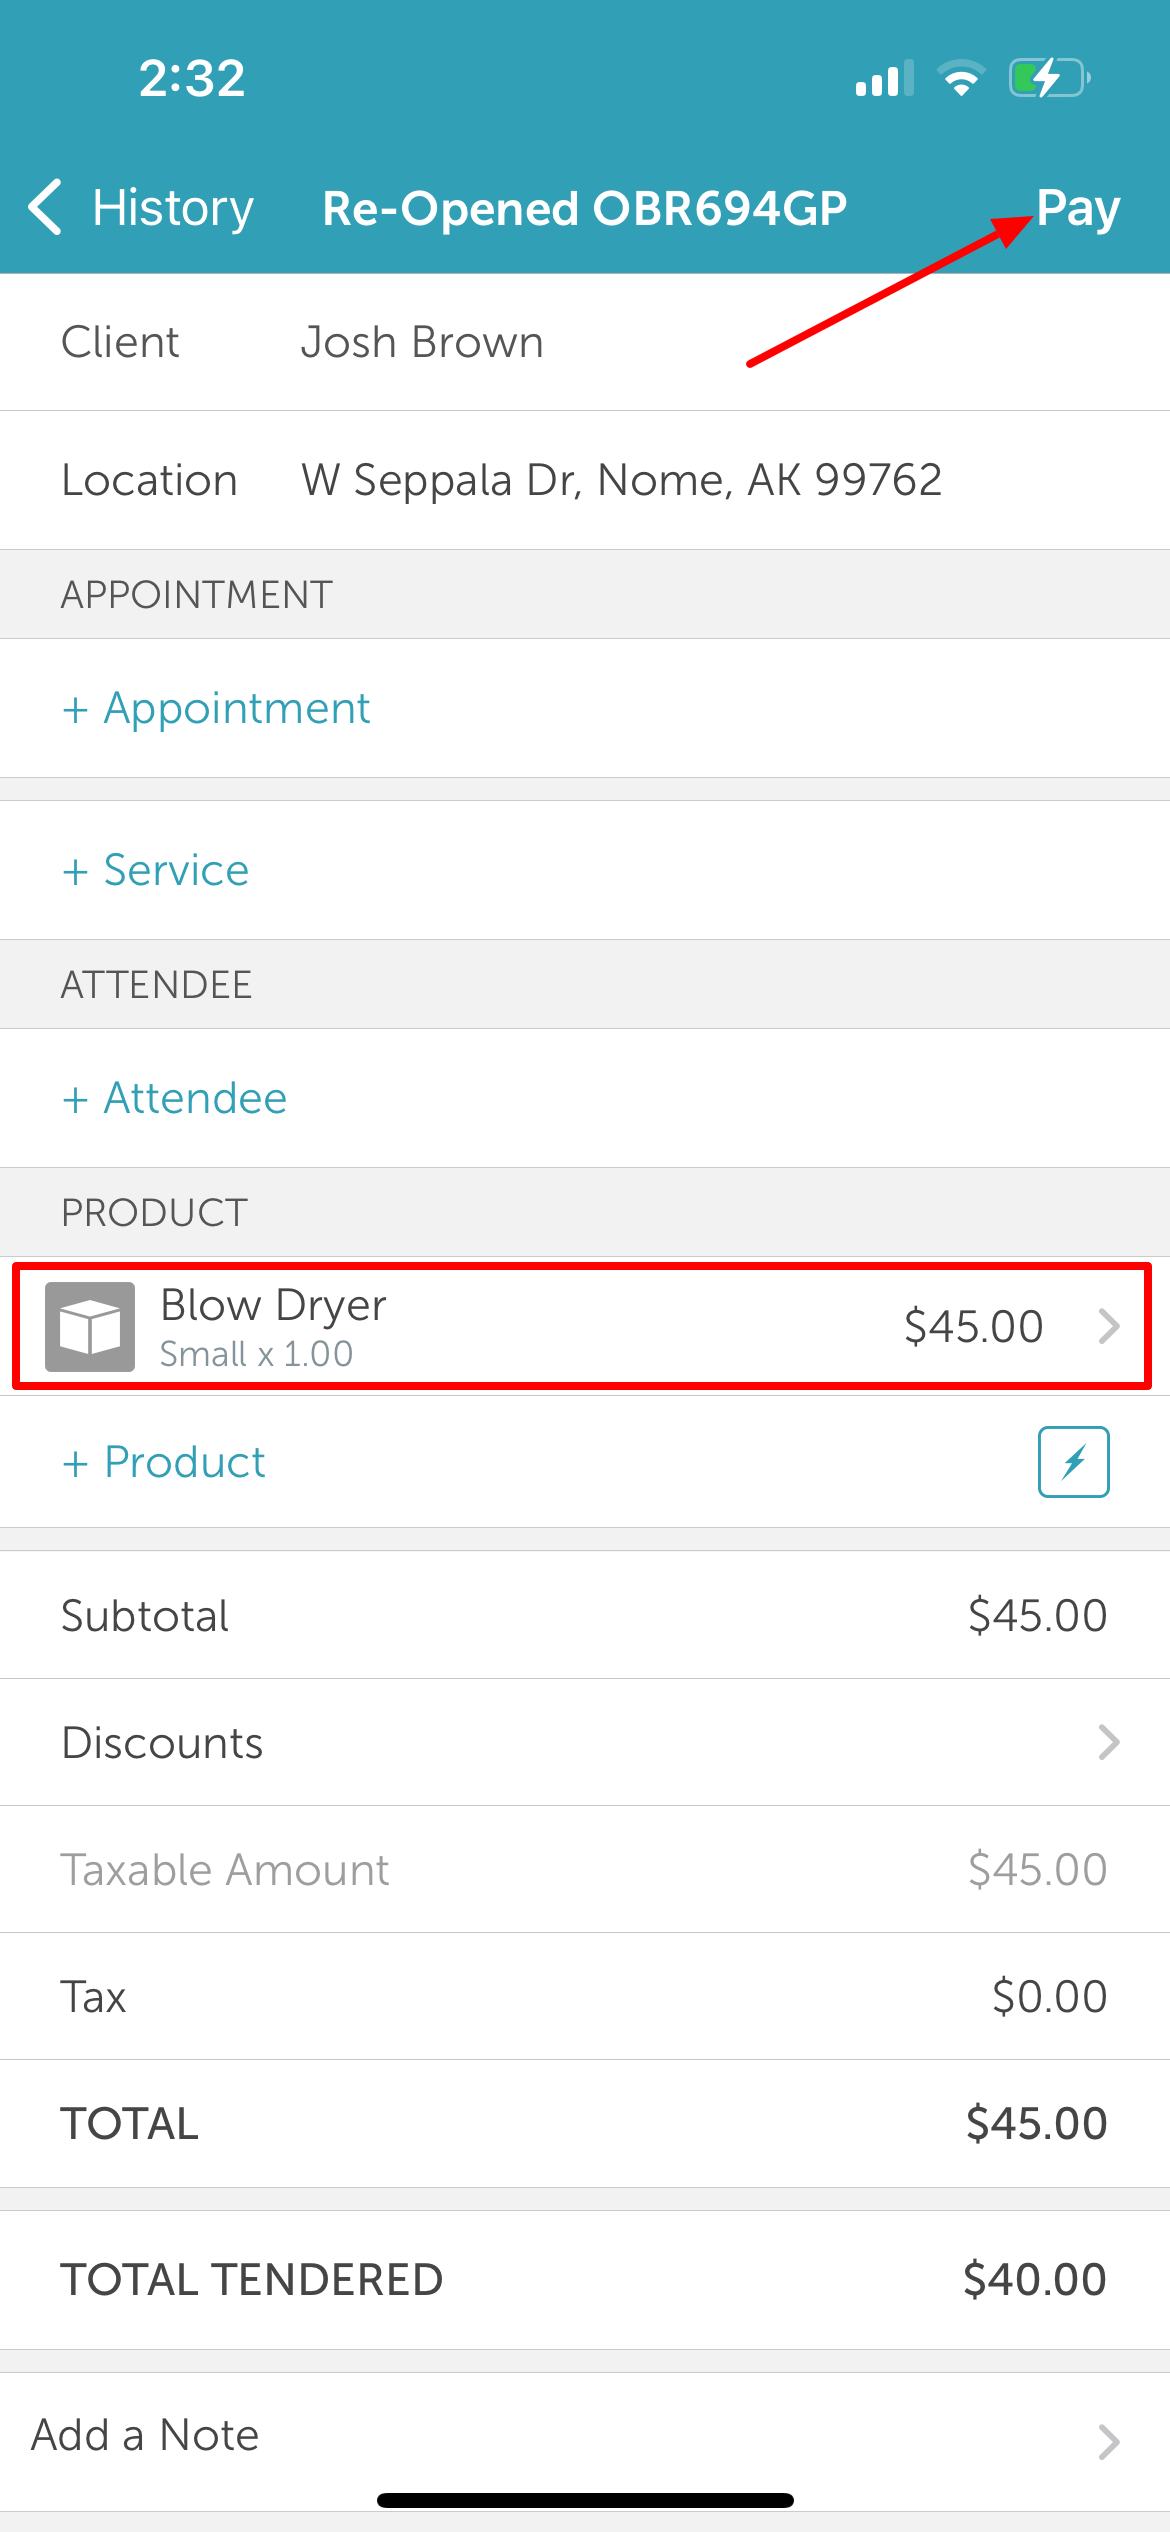
4. Process any required refund or collect additional payment
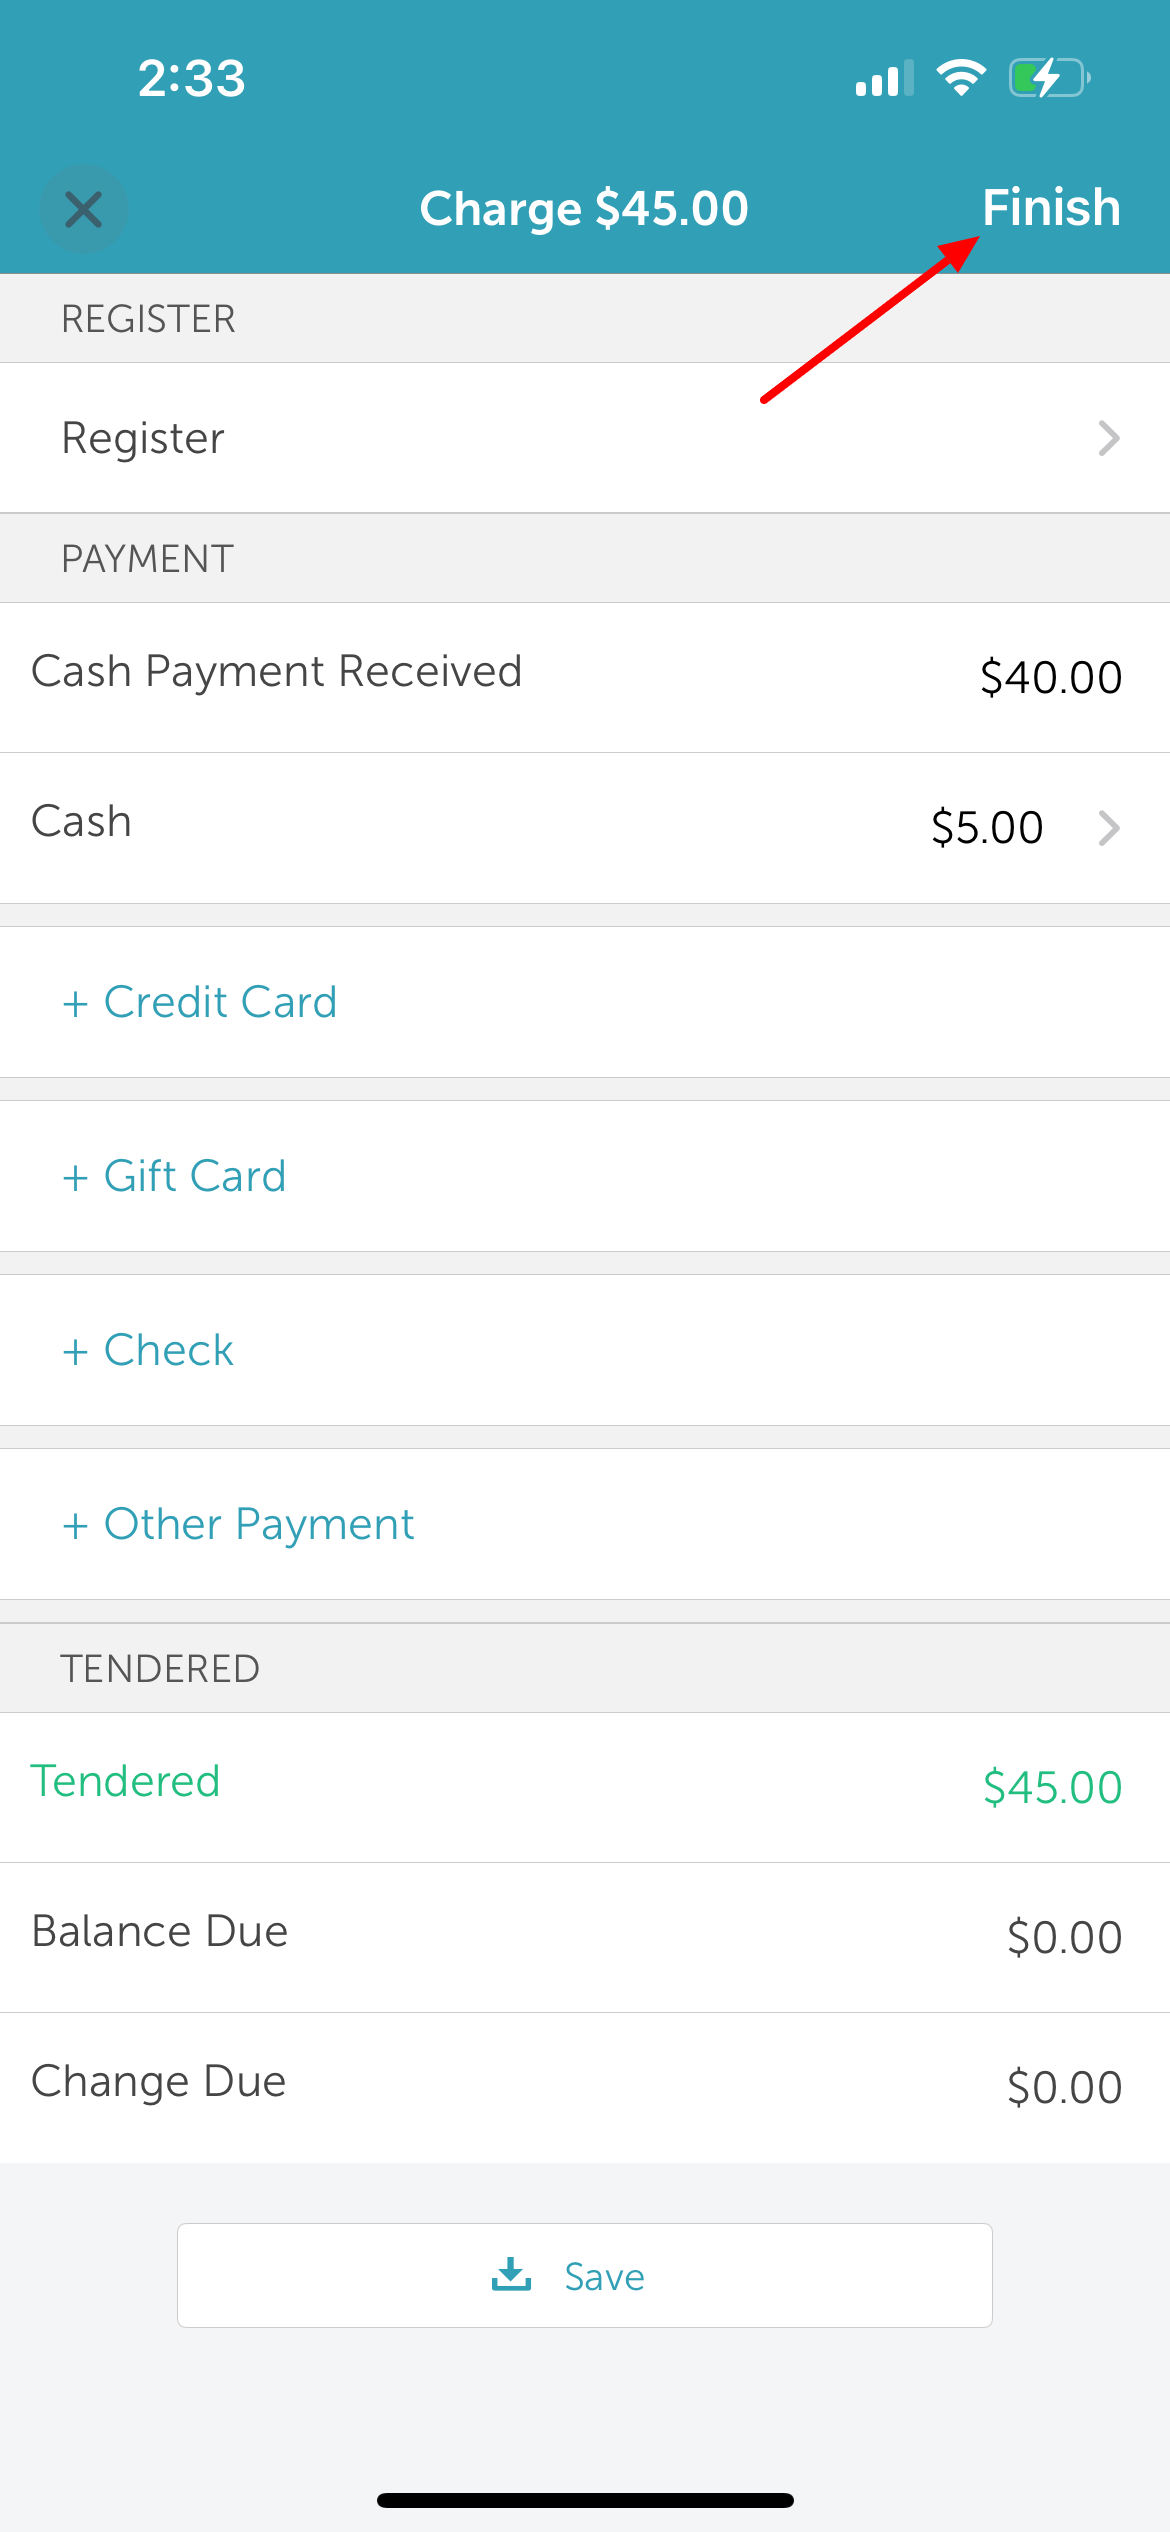
5. Tap Finish in the top right corner to save changes and close the ticket.
For more information, contact us at support@mytime.com.
Related Articles
Installing MyTime on Scheduler App (Android and iOS)
Signing into MyTime on Scheduler App (Android and iOS)
Refunding Appointments on Scheduler App
Was this article helpful?
That’s Great!
Thank you for your feedback
Sorry! We couldn't be helpful
Thank you for your feedback
Feedback sent
We appreciate your effort and will try to fix the article