Packages can be sold to clients directly through POS. This article provides a step-by-step guide on how to sell packages to clients in the POS on the scheduler app.
Things to Know:
- The ability to sell packages in POS on the scheduler app is controlled by the Creating Tickets access permission.
- To configure packages, learn more here
- The packages purchased will be stored on the client's profile and be reflected in the 'Packages Balance' report. For details on the package balances report, learn more here
- A commission does not need to be configured on a staff member’s profile for them to appear in the commission dropdown on the POS ticket. Service providers, location managers, support staff, and any custom roles can be selected to receive commissions for product, membership, package, or gift card sales in the POS. However:
- If the Track Compensation checkbox is not selected on their profile, they will not appear in compensation reports.
- If no commission rate is set on their profile, no commission amount will be calculated or displayed in the reports for that sale.
- In the POS, you can filter to different locations by using the filter location at the top of the page
- The locations shown in the location dropdown when creating a new ticket (to add a package) in POS are dependent on the following:
- Create Tickets for Their Location(s) and Block for All Locations access control enabled
- If the staff member is assigned to only one location, only that location will appear
- If the staff member is assigned to multiple locations:
- All associated locations will be displayed in the location filter
- The default location will be the one they last filtered to
- They can choose a different location if needed
- Block/Create Ticket for Their Location(s) and Create Ticket for All Locations in POS access control enabled
- All locations will be displayed in the location filter
- The default location will be the one the staff member last filtered to
To sell a package to a client in POS:
- Log into the app. For detailed instructions, learn more here
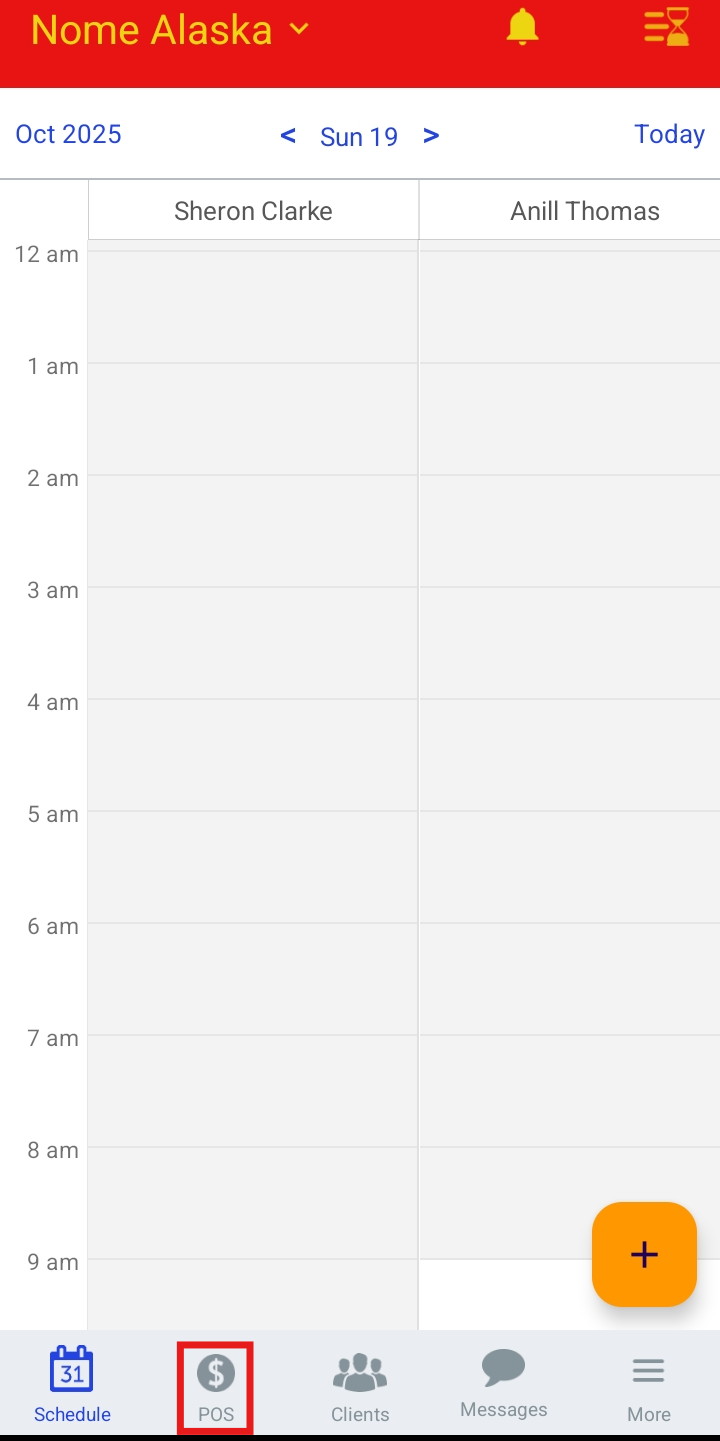
- Once signed in, you will be directed to the schedule by default
- Select the POS icon
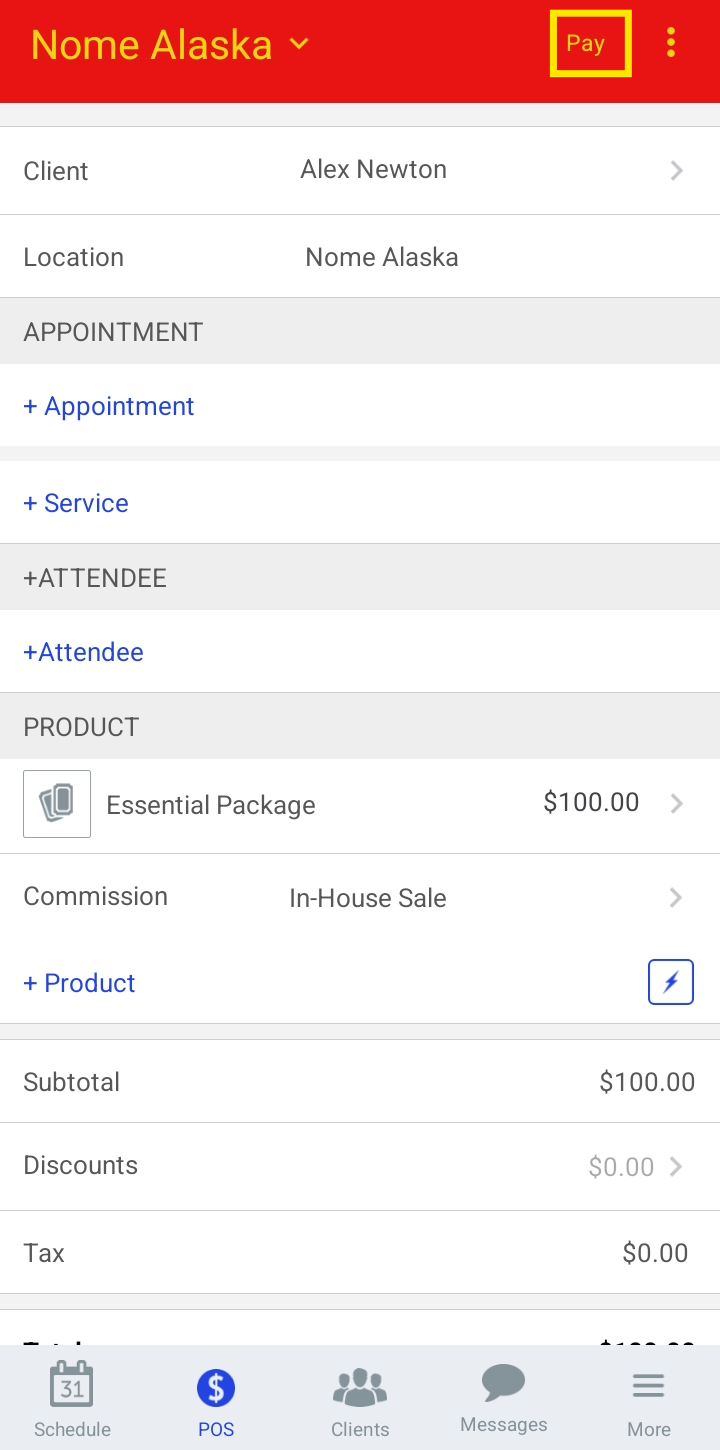
- Add a client to the ticket
- Click the "+ Product" hyperlink

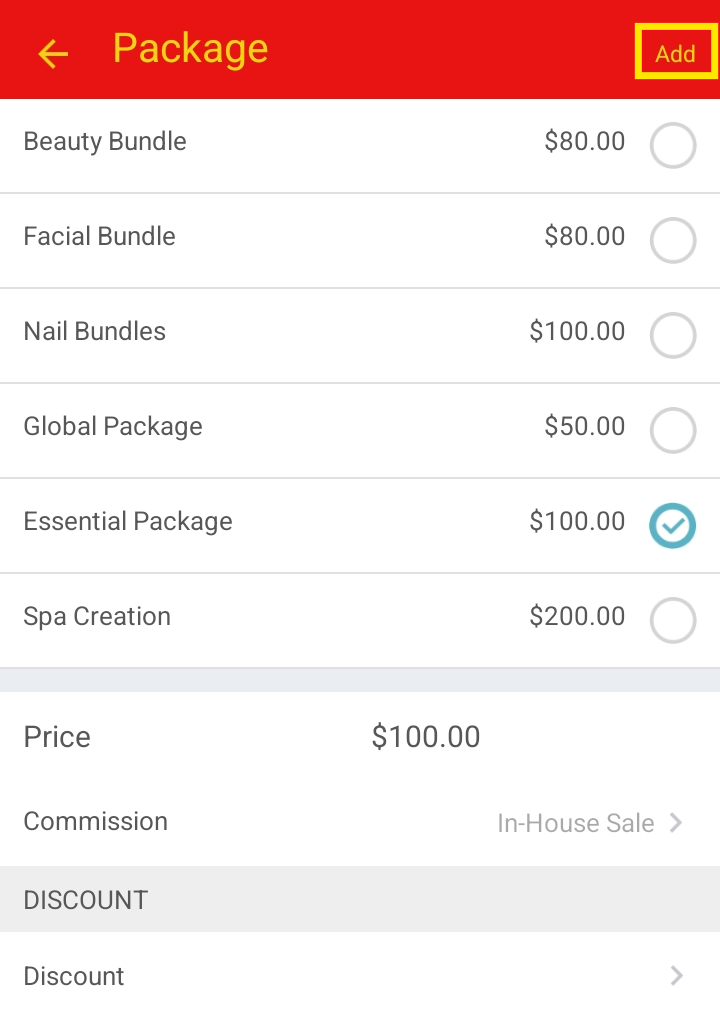
- Tap on "Package"

- Select the desired package
- Tap "Add"
- Tap "Pay"
- Select your preferred payment method and close the ticket
For more information, please contact our support team at support@mytime.com.
Related Articles:
- Selling Packages for Client in POS
- Selling Packages for Pets in POS
- Selling Packages for Family Members in POS
- Selling Packages Online through the Booking Widget and Express Checkout
- Purchasing Packages for Pets Online
- Purchasing Packages for Family Members Online
- Purchasing Packages for Pets Online
- Configure Packages for Clients
- Configure Packages for Pets
- Configure Packages For Family Members
- Package Balances Report
Was this article helpful?
That’s Great!
Thank you for your feedback
Sorry! We couldn't be helpful
Thank you for your feedback
Feedback sent
We appreciate your effort and will try to fix the article