You can update an appointment’s status at any time to reflect its current state. This article outlines the different appointment statuses and how they function.
Things to Know:
The ability to view or change appointment statuses is governed by the "Accessing Appointments" access control setting.
- The status of a future appointment cannot be changed to Checked In, No-Show, or Complete.
Status updates may trigger automated notifications to clients and staff, depending on your MyTime settings. Notifications:
Staff Notifications: Assigned staff can receive email, text, or push notifications when an appointment is booked or canceled by a staff member or client. However, they do not receive notifications for other status changes, such as check-ins or confirmations.
Client Notifications: Clients may receive notifications for status updates, including confirmations, reschedules, price changes, or cancellations, if the corresponding automated message templates are enabled
- When updating an appointment status for multi-pet/family appointments, you will be prompted to choose one of the following options:
- Current: Updates the status only for the currently selected appointment.
- All: Updates the status for all related appointments in the group.
- The setup option displayed in the top-right user menu depends on how you access the account and your assigned role:
- When navigating from the Parent Account (Location Management tab):
- Admin: Displays Business Setup when viewing the location account.
- Login As: Displays Location Setup when viewing the location account.
- When logged in directly at the Location Level:
- Location Owners & Location Managers: Display Location Setup.
- Service Providers & All Other Roles: Display Profile Setup.
Contents:
Appointment Statuses
Below is an overview of each appointment status and how it behaves, including what happens when an appointment is rescheduled.
- Booked: The appointment has been successfully scheduled. This can occur when:
- A client books online and the appointment is automatically accepted
- A pending appointment is accepted by the business
- Staff book the appointment directly in the Scheduler
- Note: Rescheduling a booked appointment does not change its status.
- Confirmed: The appointment has been confirmed by either the client via email or SMS, or a staff member manually updating the status. Rescheduling a confirmed appointment does not change its status.
- Checked-In: Indicates the client has arrived for their appointment. Staff can update this status manually from the Scheduler, or clients can check themselves in via the guest app or kiosk.
- Learn more about checking in from the guest app here
- Learn more about checking in via kiosk here
- Note: Rescheduling a checked-in appointment to a new time will not alter its status. The appointment will move to the new time slot on the calendar and remain marked as "Checked In."
- Checked-Out: Indicates the appointment is complete. This status is often used to track how long a service took based on check-in and check-out times. It is also commonly used in pet and auto businesses to indicate that a pet or vehicle is in the business's care, regardless of whether the service has started or ended. Note: When "Checked-Out" is selected, the appointment status automatically reverts to Booked. Rescheduling a checked-out appointment does not change its status from Booked.
- Completed: Marks the appointment as fully finished. How this status is applied depends on your "Change Status to Completed" setting:
- Automatically (based on service duration): Updates to Completed after the scheduled service time has elapsed
- Automatically (when the ticket is closed): Updates to Completed when the associated ticket is closed
- Manually: Remains unchanged until a user updates it
- No-Show: Indicates the client did not attend their appointment. Rescheduling does not change the appointment status.
- Return to Waiting: Used when a client is moved from the waitlist to in-service but needs to be placed back on the waitlist. Note: Once this status is selected, the appointment cannot be rescheduled.
- When managing appointments on your schedule, updating an appointment's status to 'Checked-In' or 'Checked-Out' triggers specific behaviors across both the scheduler and the POS ticket:
- Automatic Timestamps: Marking an appointment as checked in or checked out automatically records the exact timestamps inside both the appointment modal and the active POS ticket.
- Check-In vs. Check-Out Behavior: If an appointment is checked in but not yet checked out, the appointment status remains checked-in, and a dedicated "Checkout" link will display directly beneath the appointment details on the open POS ticket. Clicking this "Checkout" link inside the POS ticket overrides standard automated status settings—it instantly records the check-out timestamp and automatically marks the appointment status as Completed, regardless of your company settings configuration.
- Check-Out Status Cycle: If an appointment is marked as 'Checked-Out' from the schedule before payment is collected, the appointment status reverts to Booked. The status will update to Completed once the ticket is closed or the appointment is manually marked as completed.
Configure Appointment Completion Settings
- Navigate to Business Setup / Location Setup > Settings
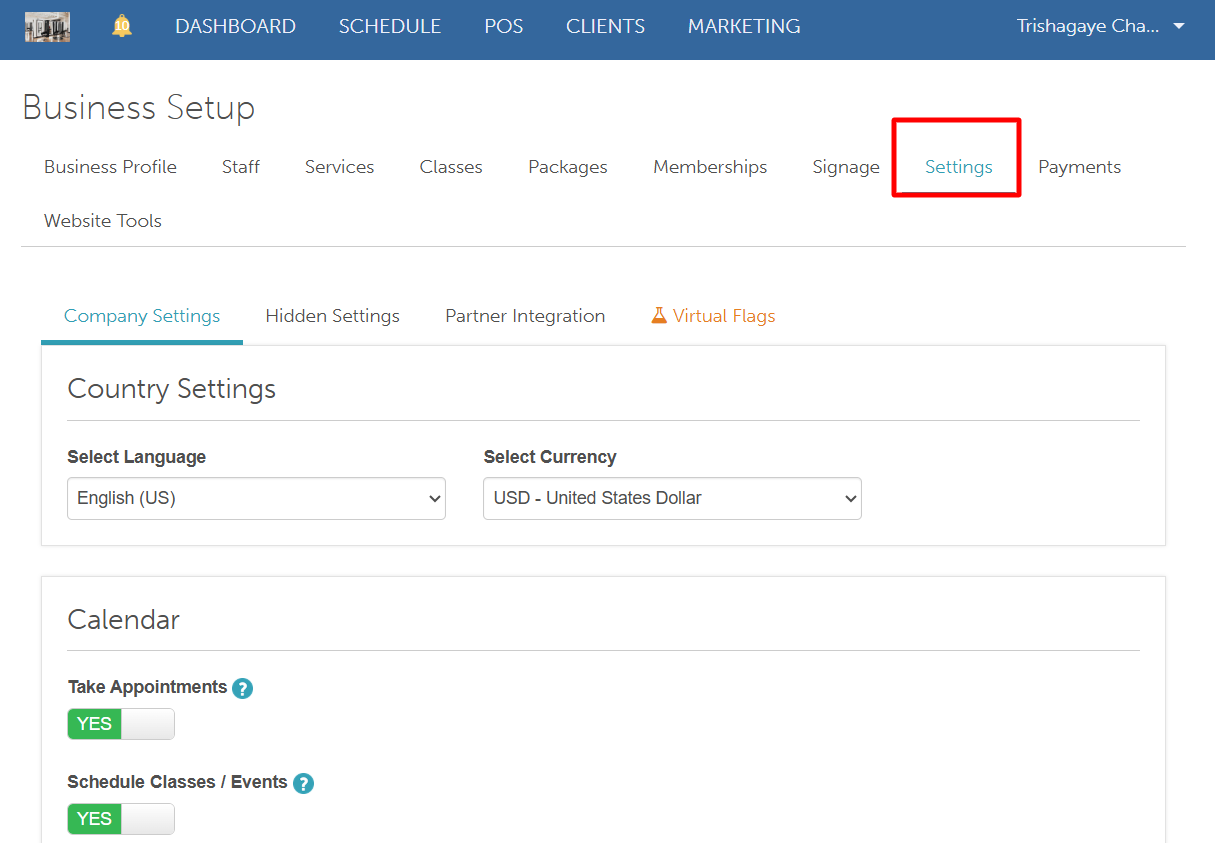
- Scroll to the Calendar section and locate the Change Status to Completed setting
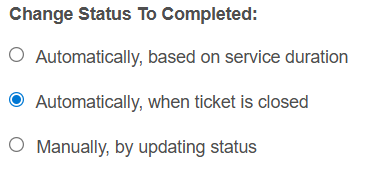
- Choose one of the following options:
- Automatically, based on service duration: Automatically marks the appointment as Completed once the scheduled time has passed.
- Automatically, when the ticket is closed: Automatically marks the appointment as Completed the moment the associated ticket is closed.
- Manually, by updating the status: Keeps the appointment status unchanged until you manually update it to Completed.
- Automatically, based on service duration: Automatically marks the appointment as Completed once the scheduled time has passed.
- Scroll to the bottom of the page and save your changes
Changing an Appointment Status
To change an appointment status:
- Locate the appointment you wish to update
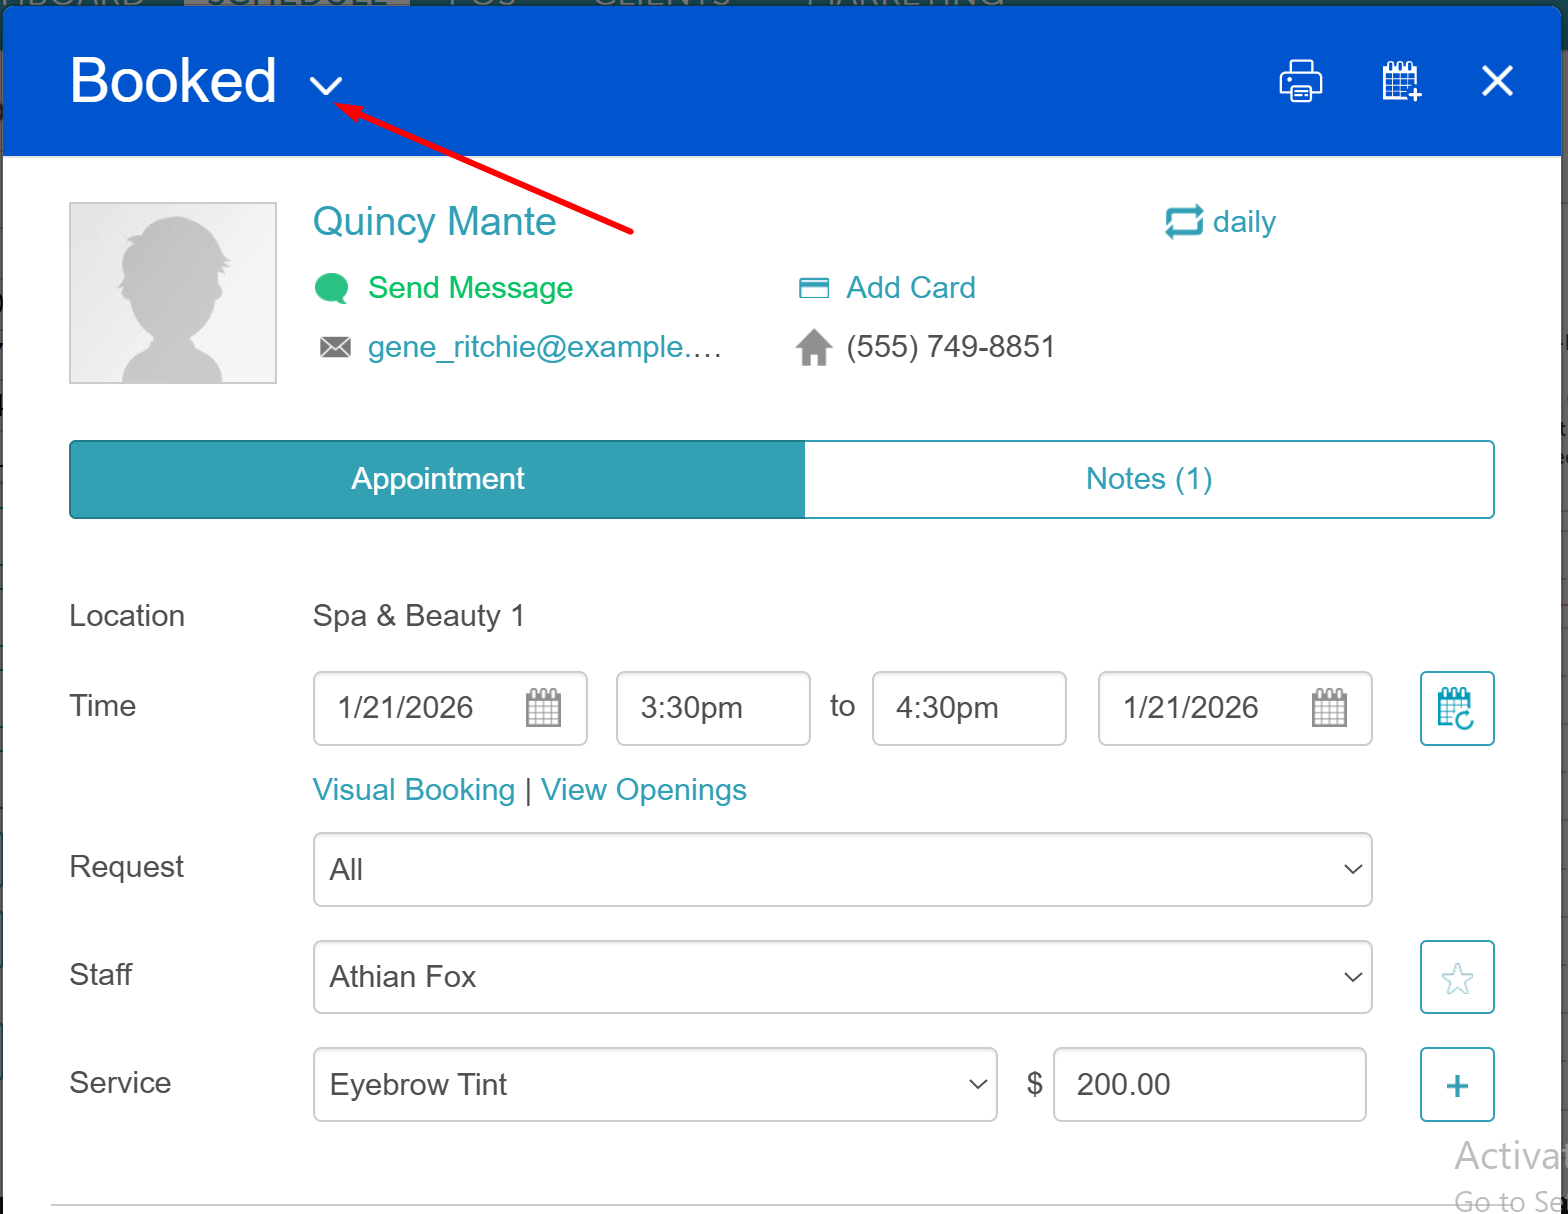
- Click on the appointment
- Select the dropdown menu at the top left of the appointment modal
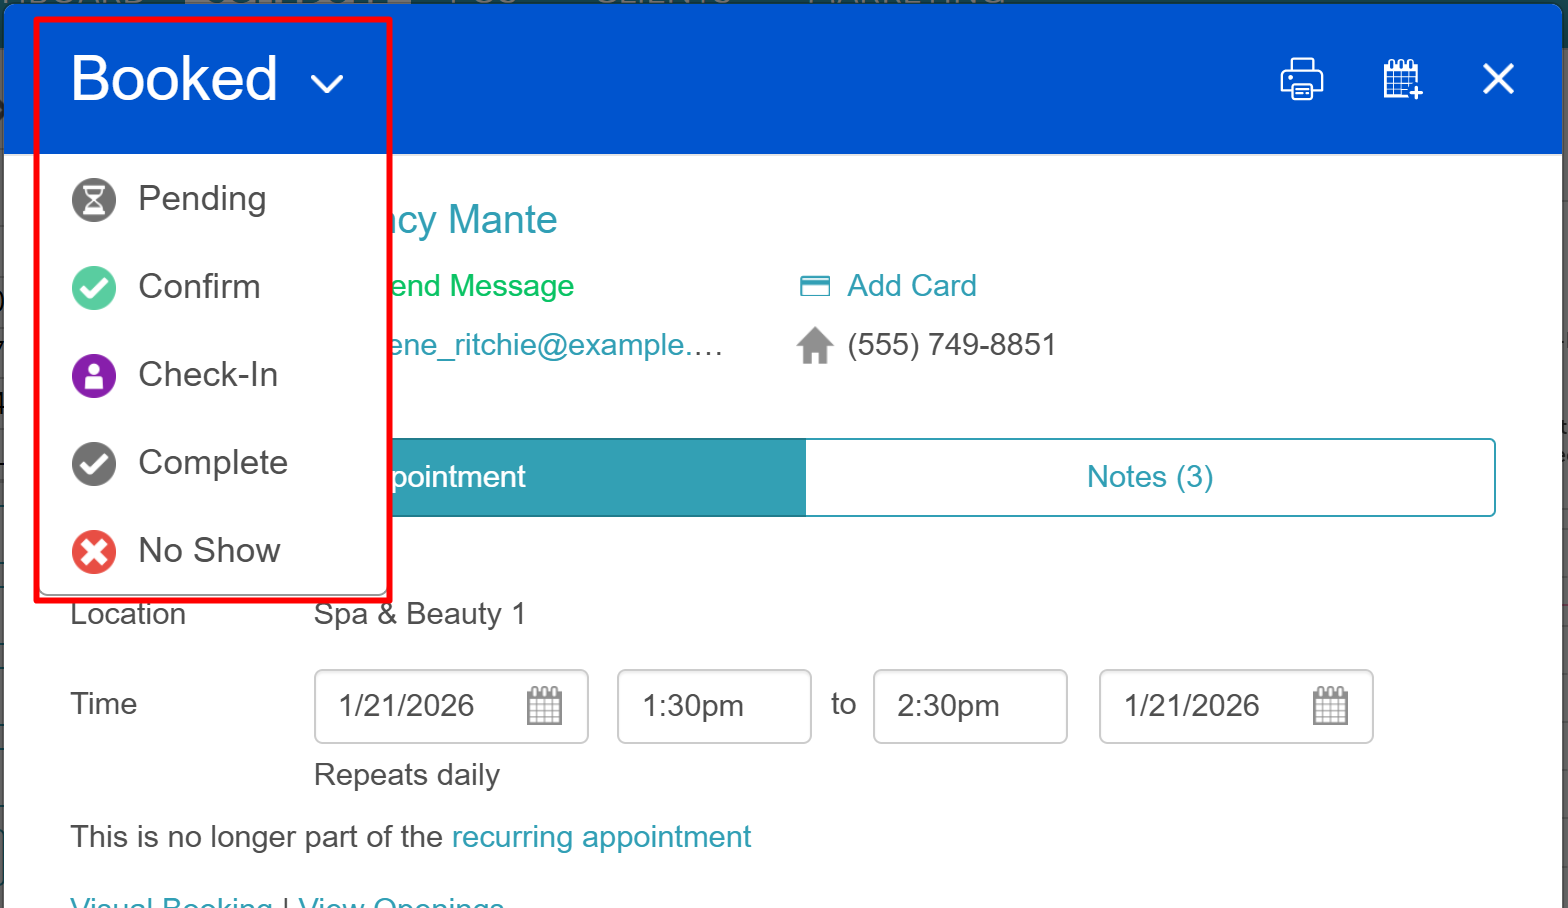
- Choose the desired status
- Save the appointment
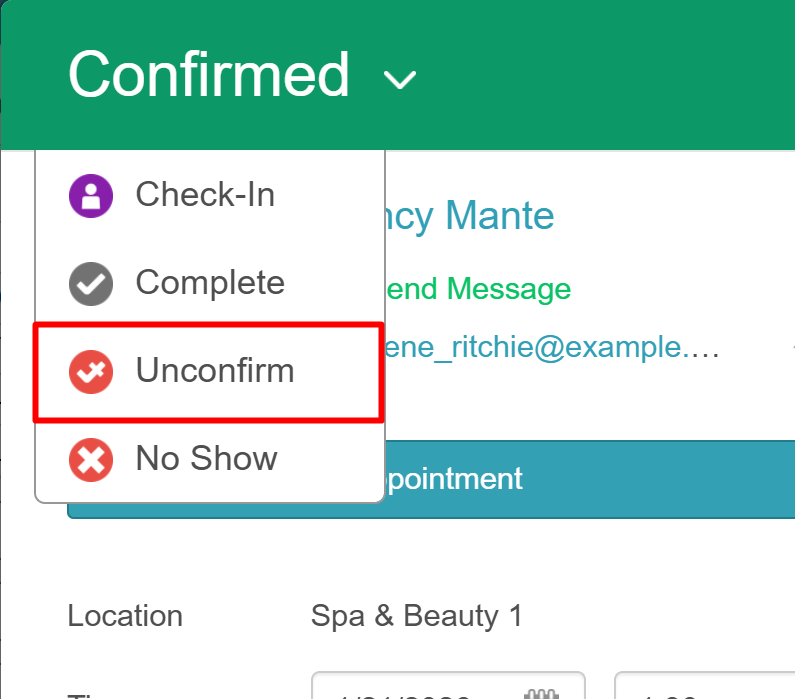
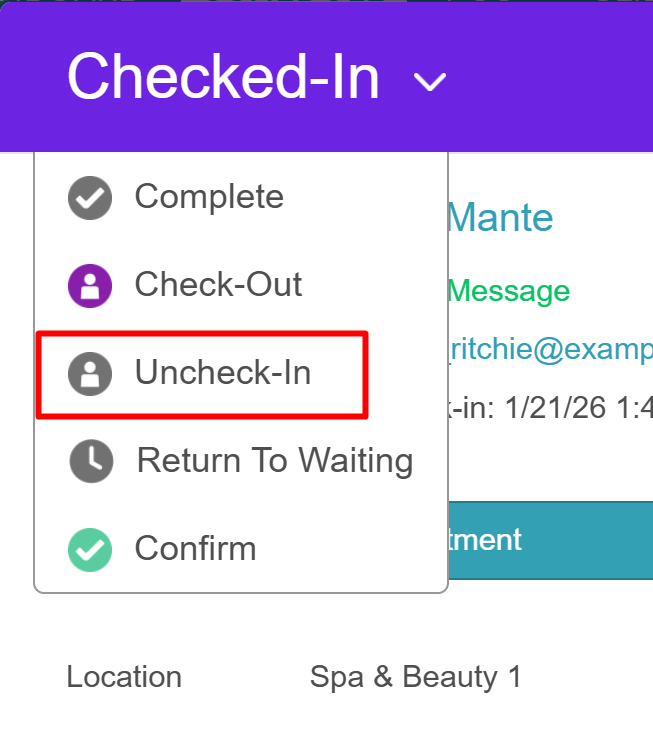
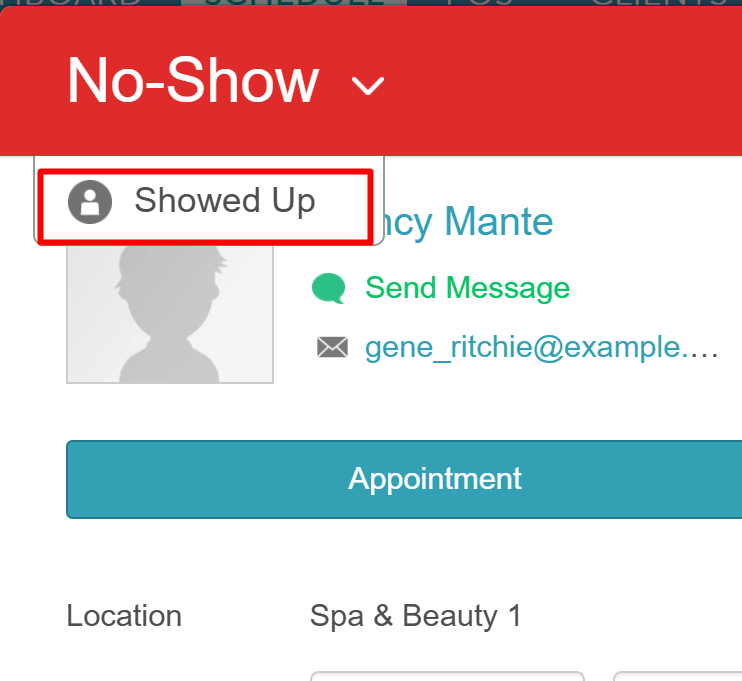
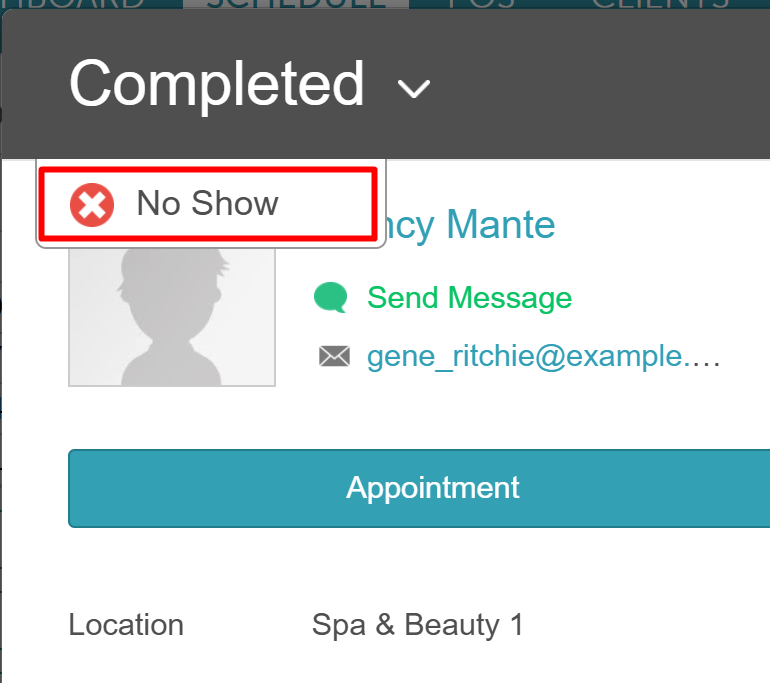
If you change the status of an appointment by accident, you can easily change the status back to the previous status. For example:
- Confirmed can be changed to Unconfirm
- Checked-in can be changed to Uncheck-In
- No-Show can be changed to Showed Up
- Completed can be changed to No-Show and then to Showed Up, which then places the appointment back in the "Booked" status
Related Articles:
Was this article helpful?
That’s Great!
Thank you for your feedback
Sorry! We couldn't be helpful
Thank you for your feedback
Feedback sent
We appreciate your effort and will try to fix the article