At MyTime, you can offer memberships for sale online through the booking widget, allowing clients to choose their preferred membership start date. This article will walk you through the steps to set up memberships for online purchasing via the booking widget.
Things to know:
- The ability to sell memberships online through the booking widget and express checkout page is governed by the "Accessing Website Tools" access control.
- To enable online purchases for memberships, the following steps must be completed:
- You must have an active membership subscription. For franchise businesses, please contact your account manager or email support@mytime.com for assistance.
- A payment account must be set up to process card payments. If you do not have a payment account, please email processing@mytime.com for help.
- Your account must be live.
- Online booking must be enabled. Learn more here
- In the membership template, ensure that "Yes" is selected for the "Enable Online Purchase" setting.
- When configuring the widget or express checkout, "Buy Memberships" must be selected.
- If you update the configuration, you must re-embed the widget on your website.
Contents:
- Configuring Memberships on the Booking Widget
- Configuring Memberships Using the Express Checkout Link
- Installing Membership's Widget as an Entire Page
Configuring Memberships on the Booking Widget
Navigate to Business Setup > Website Tools

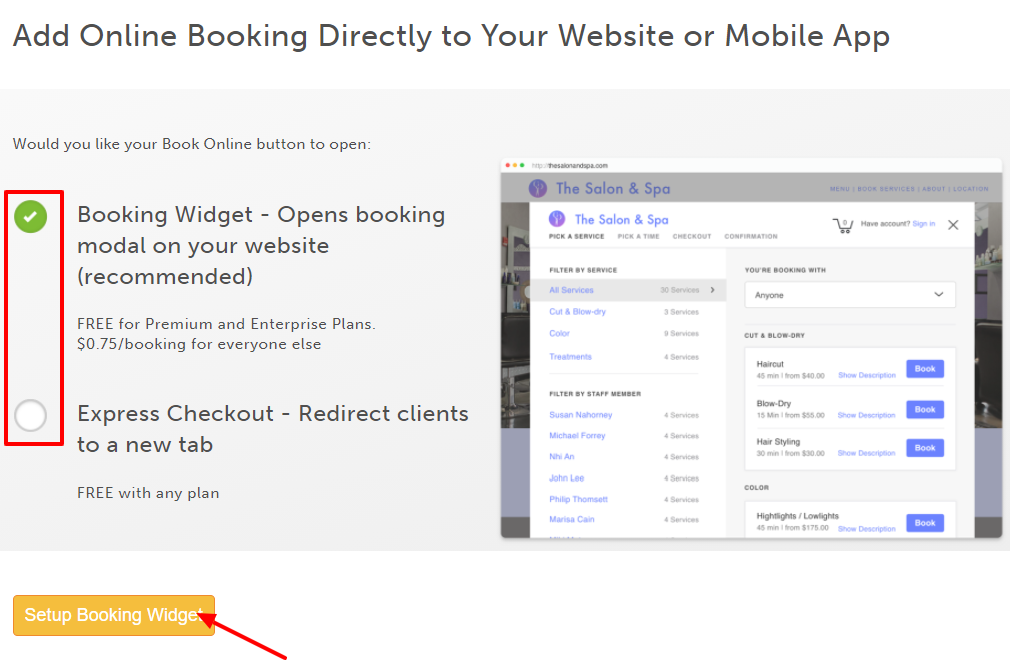
- Select the Setup button next to Add Appointment Booking & Purchases to Your Website

- You can choose to install a widget or express checkout link
- Express Checkout: Clients click the Book Now button and are redirected to your MyTime booking page. Available for free to all MyTime accounts.
- Booking Widget: Clients book directly on your website. A pop-up appears, allowing them to complete the booking.
- Free for Premium and Enterprise MyTime subscriptions.
- $0.75 per transaction for businesses without a Premium subscription.
- Customize Your Booking Widget
- Select the Booking Widget option then proceed to set up the widget
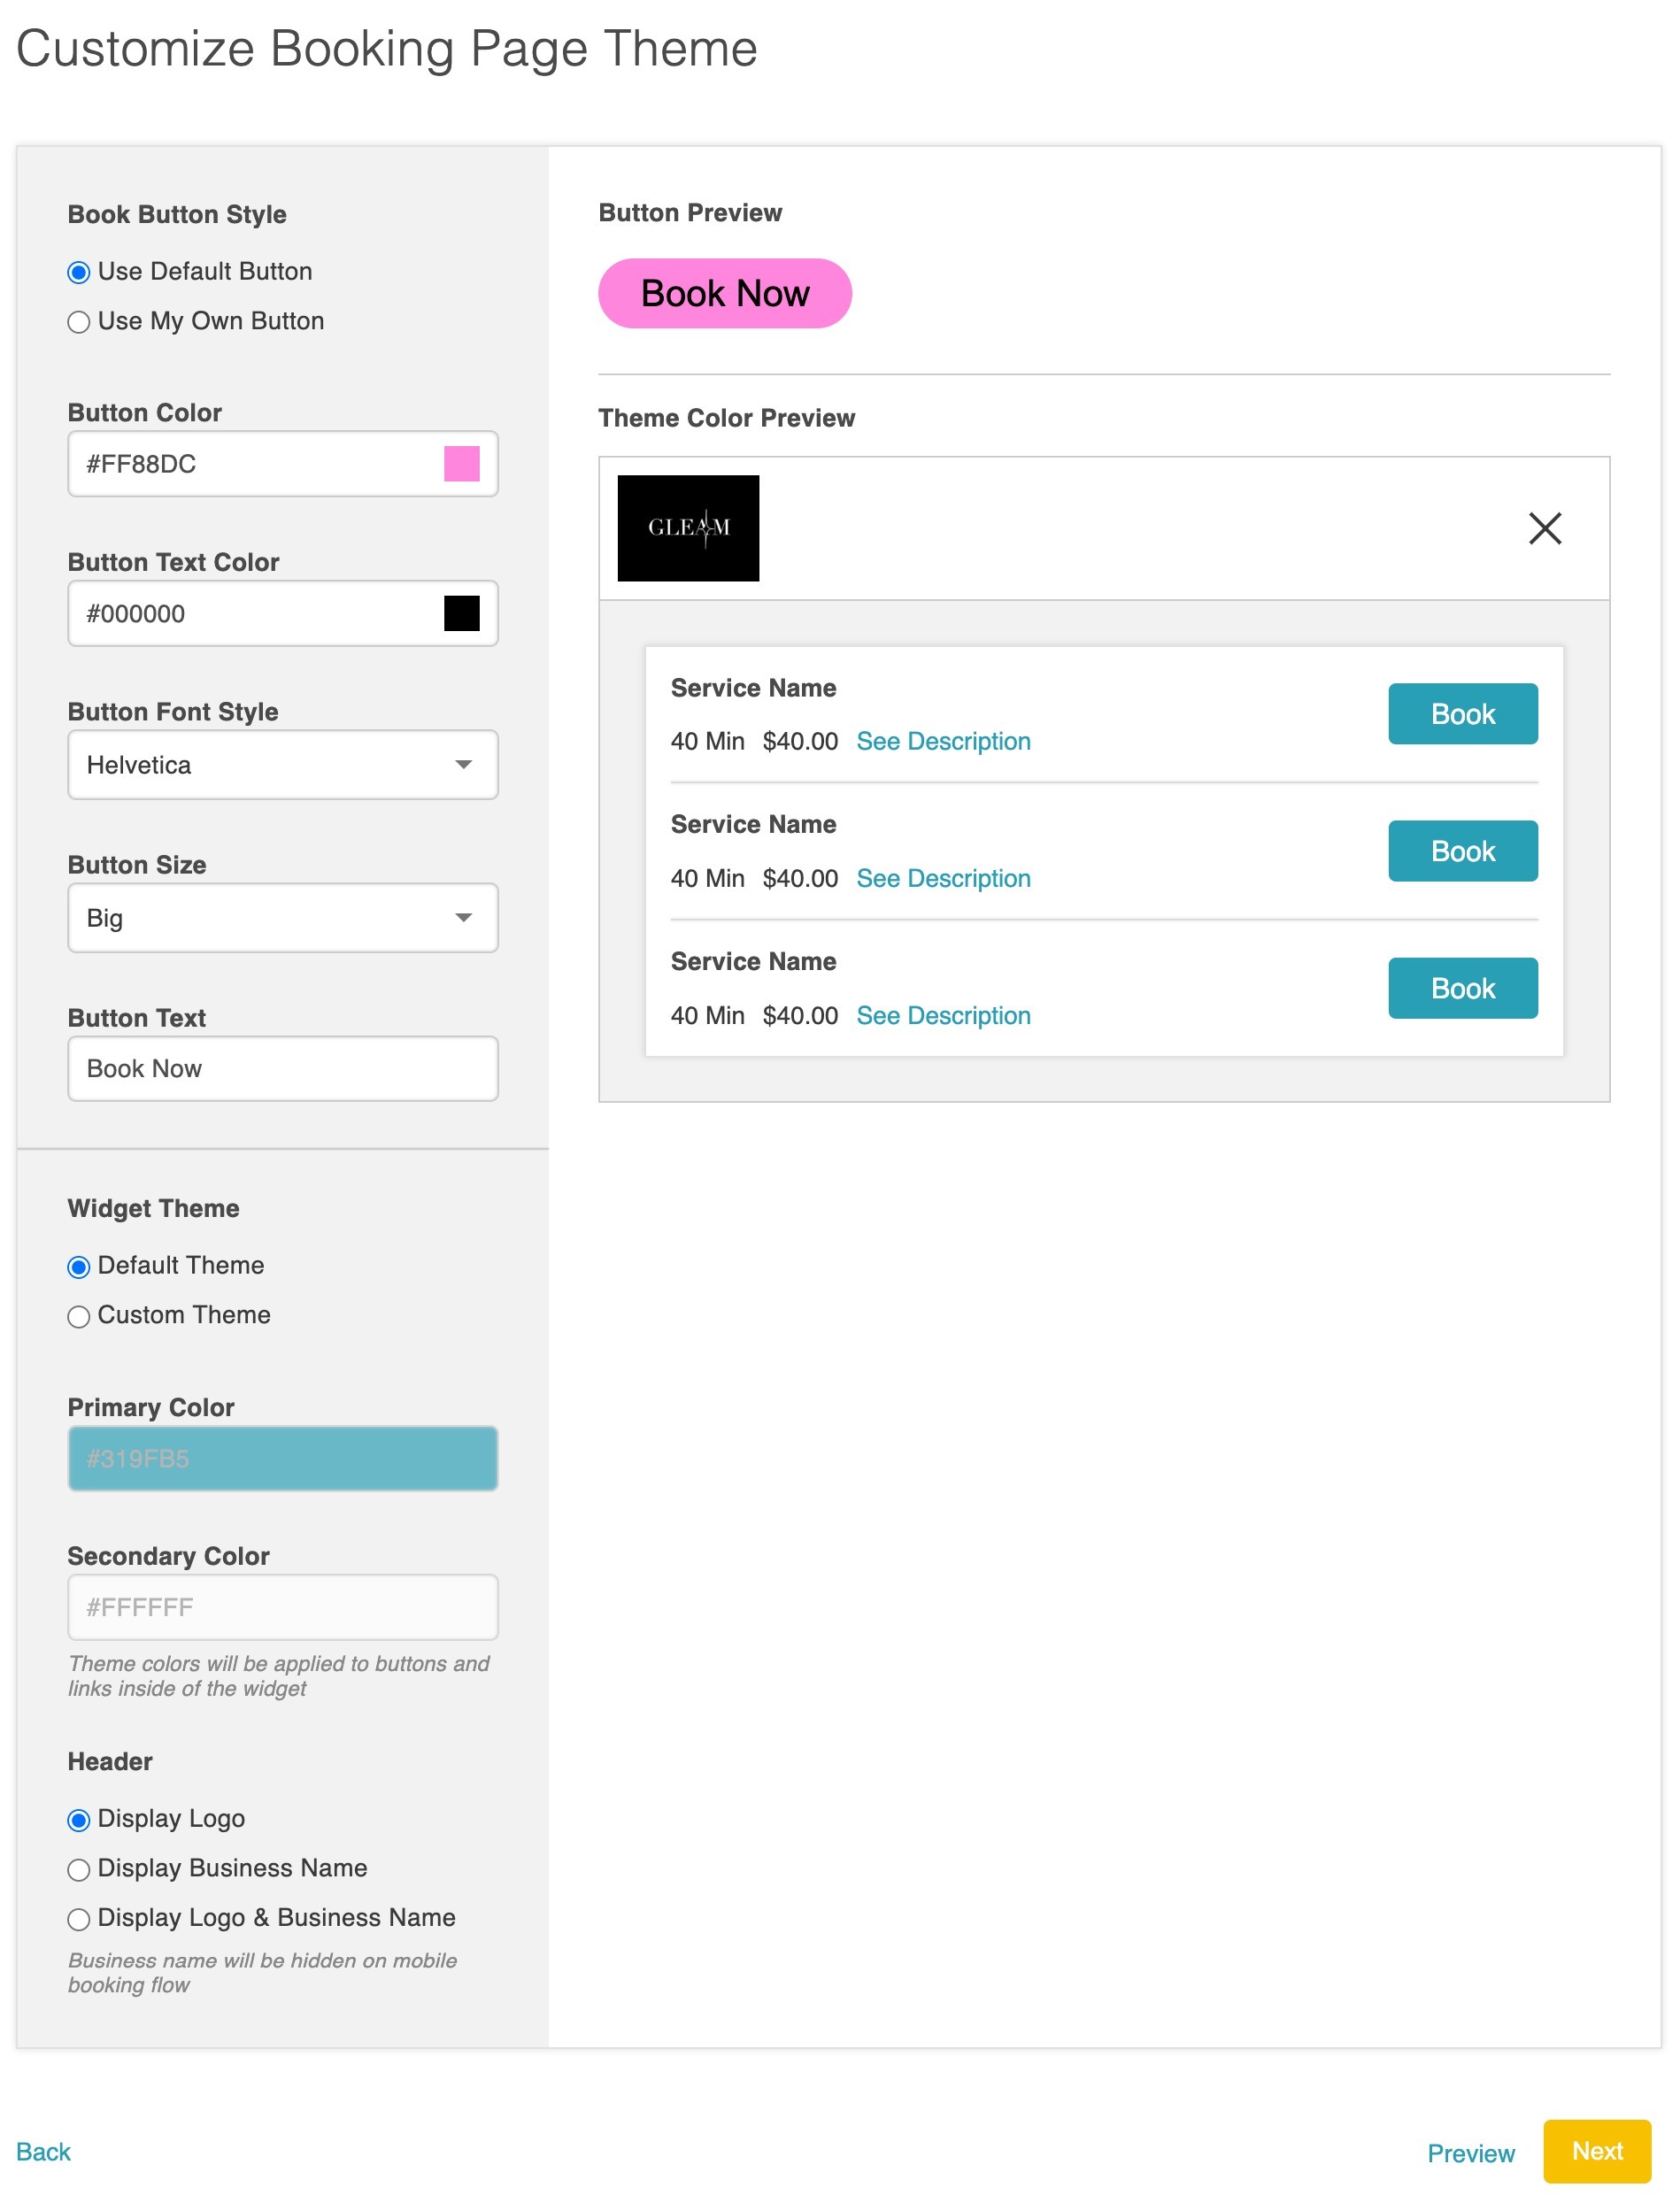
- On the Customize Booking Page Theme page, set up your button and widget theme, then select next to proceed to the installation page
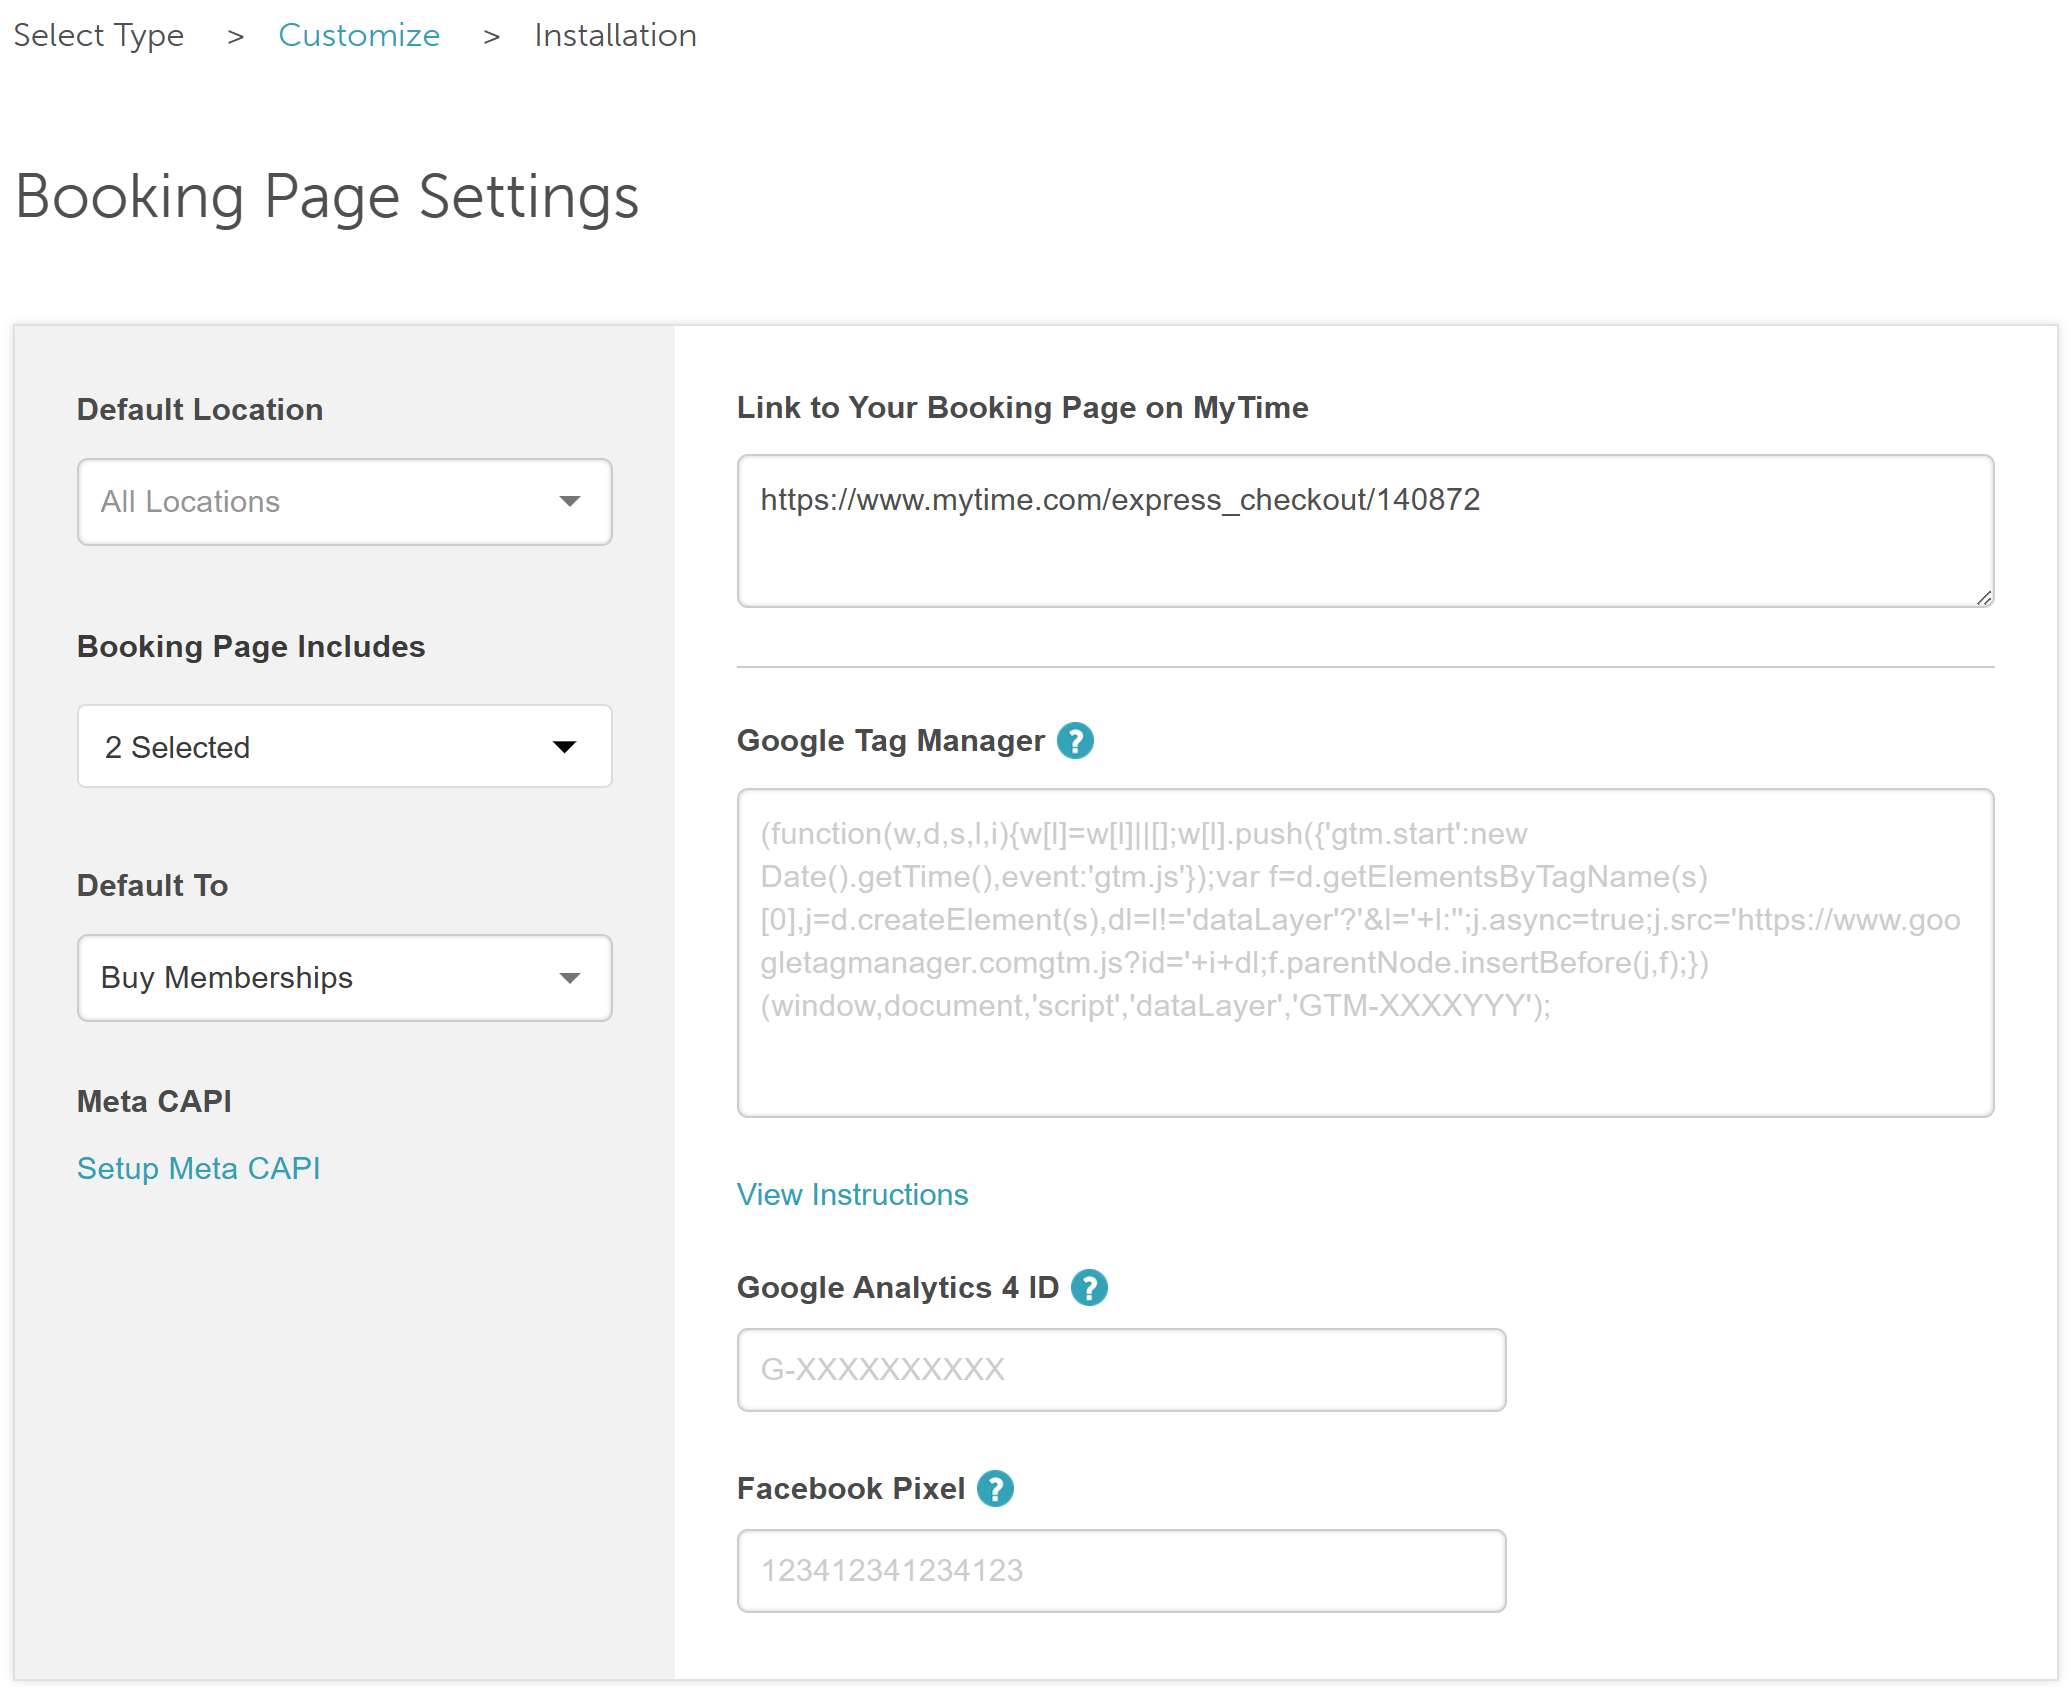
- From there, configure the following:
- In the left panel
- Default Location: For the membership embed flow to function, you must select either a specific location or “All Locations.” Locations are required to search for services correctly.
- If "All Locations" is selected, clients will be prompted to choose a location from the 'Pick A Location' page when accessing the embedded widget.
- If a single location is selected, the embedded widget will default to that location, and the 'Pick A Location' page will not appear.
- Widget Includes: Select “Buy Memberships” from the Widget Includes dropdown menu
- Default To: Select “Buy Memberships”
- Meta CAPI: Learn more here
- Default Location: For the membership embed flow to function, you must select either a specific location or “All Locations.” Locations are required to search for services correctly.
- Google Tag Manager: Learn more here
- Google Analytics 4 ID: Learn more here
- Facebook Pixel: Learn more here
- Custom CSS: Customize your widget by adding CSS instructions

- In the left panel
- Copy the code and embed it on your website
Configuring Memberships Using the Express Checkout Link
- Select Express Checkout, then proceed to the Booking Page Settings

- On the Booking Settings page, you can customize the booking page theme, set up your button and widget themes, and choose what you'd like the layout of your button to look like
- In the left panel
- Default Location: For the membership embed flow to work, you must choose a location. The location is required to search for the services correctly
- Widget Includes: Select “Buy Memberships” from the Widget Includes dropdown menu
- Default To: Select “Buy Memberships”
- Meta CAPI: Learn more here
- Google Tag Manager: Learn more here
- Google Analytics 4: Learn more here
- Facebook Pixel: Learn more here
- In the left panel
- Scroll down to the "Customize Booking Page Theme" section to adjust widget themes and specify what should be displayed in the header when purchasing a membership online

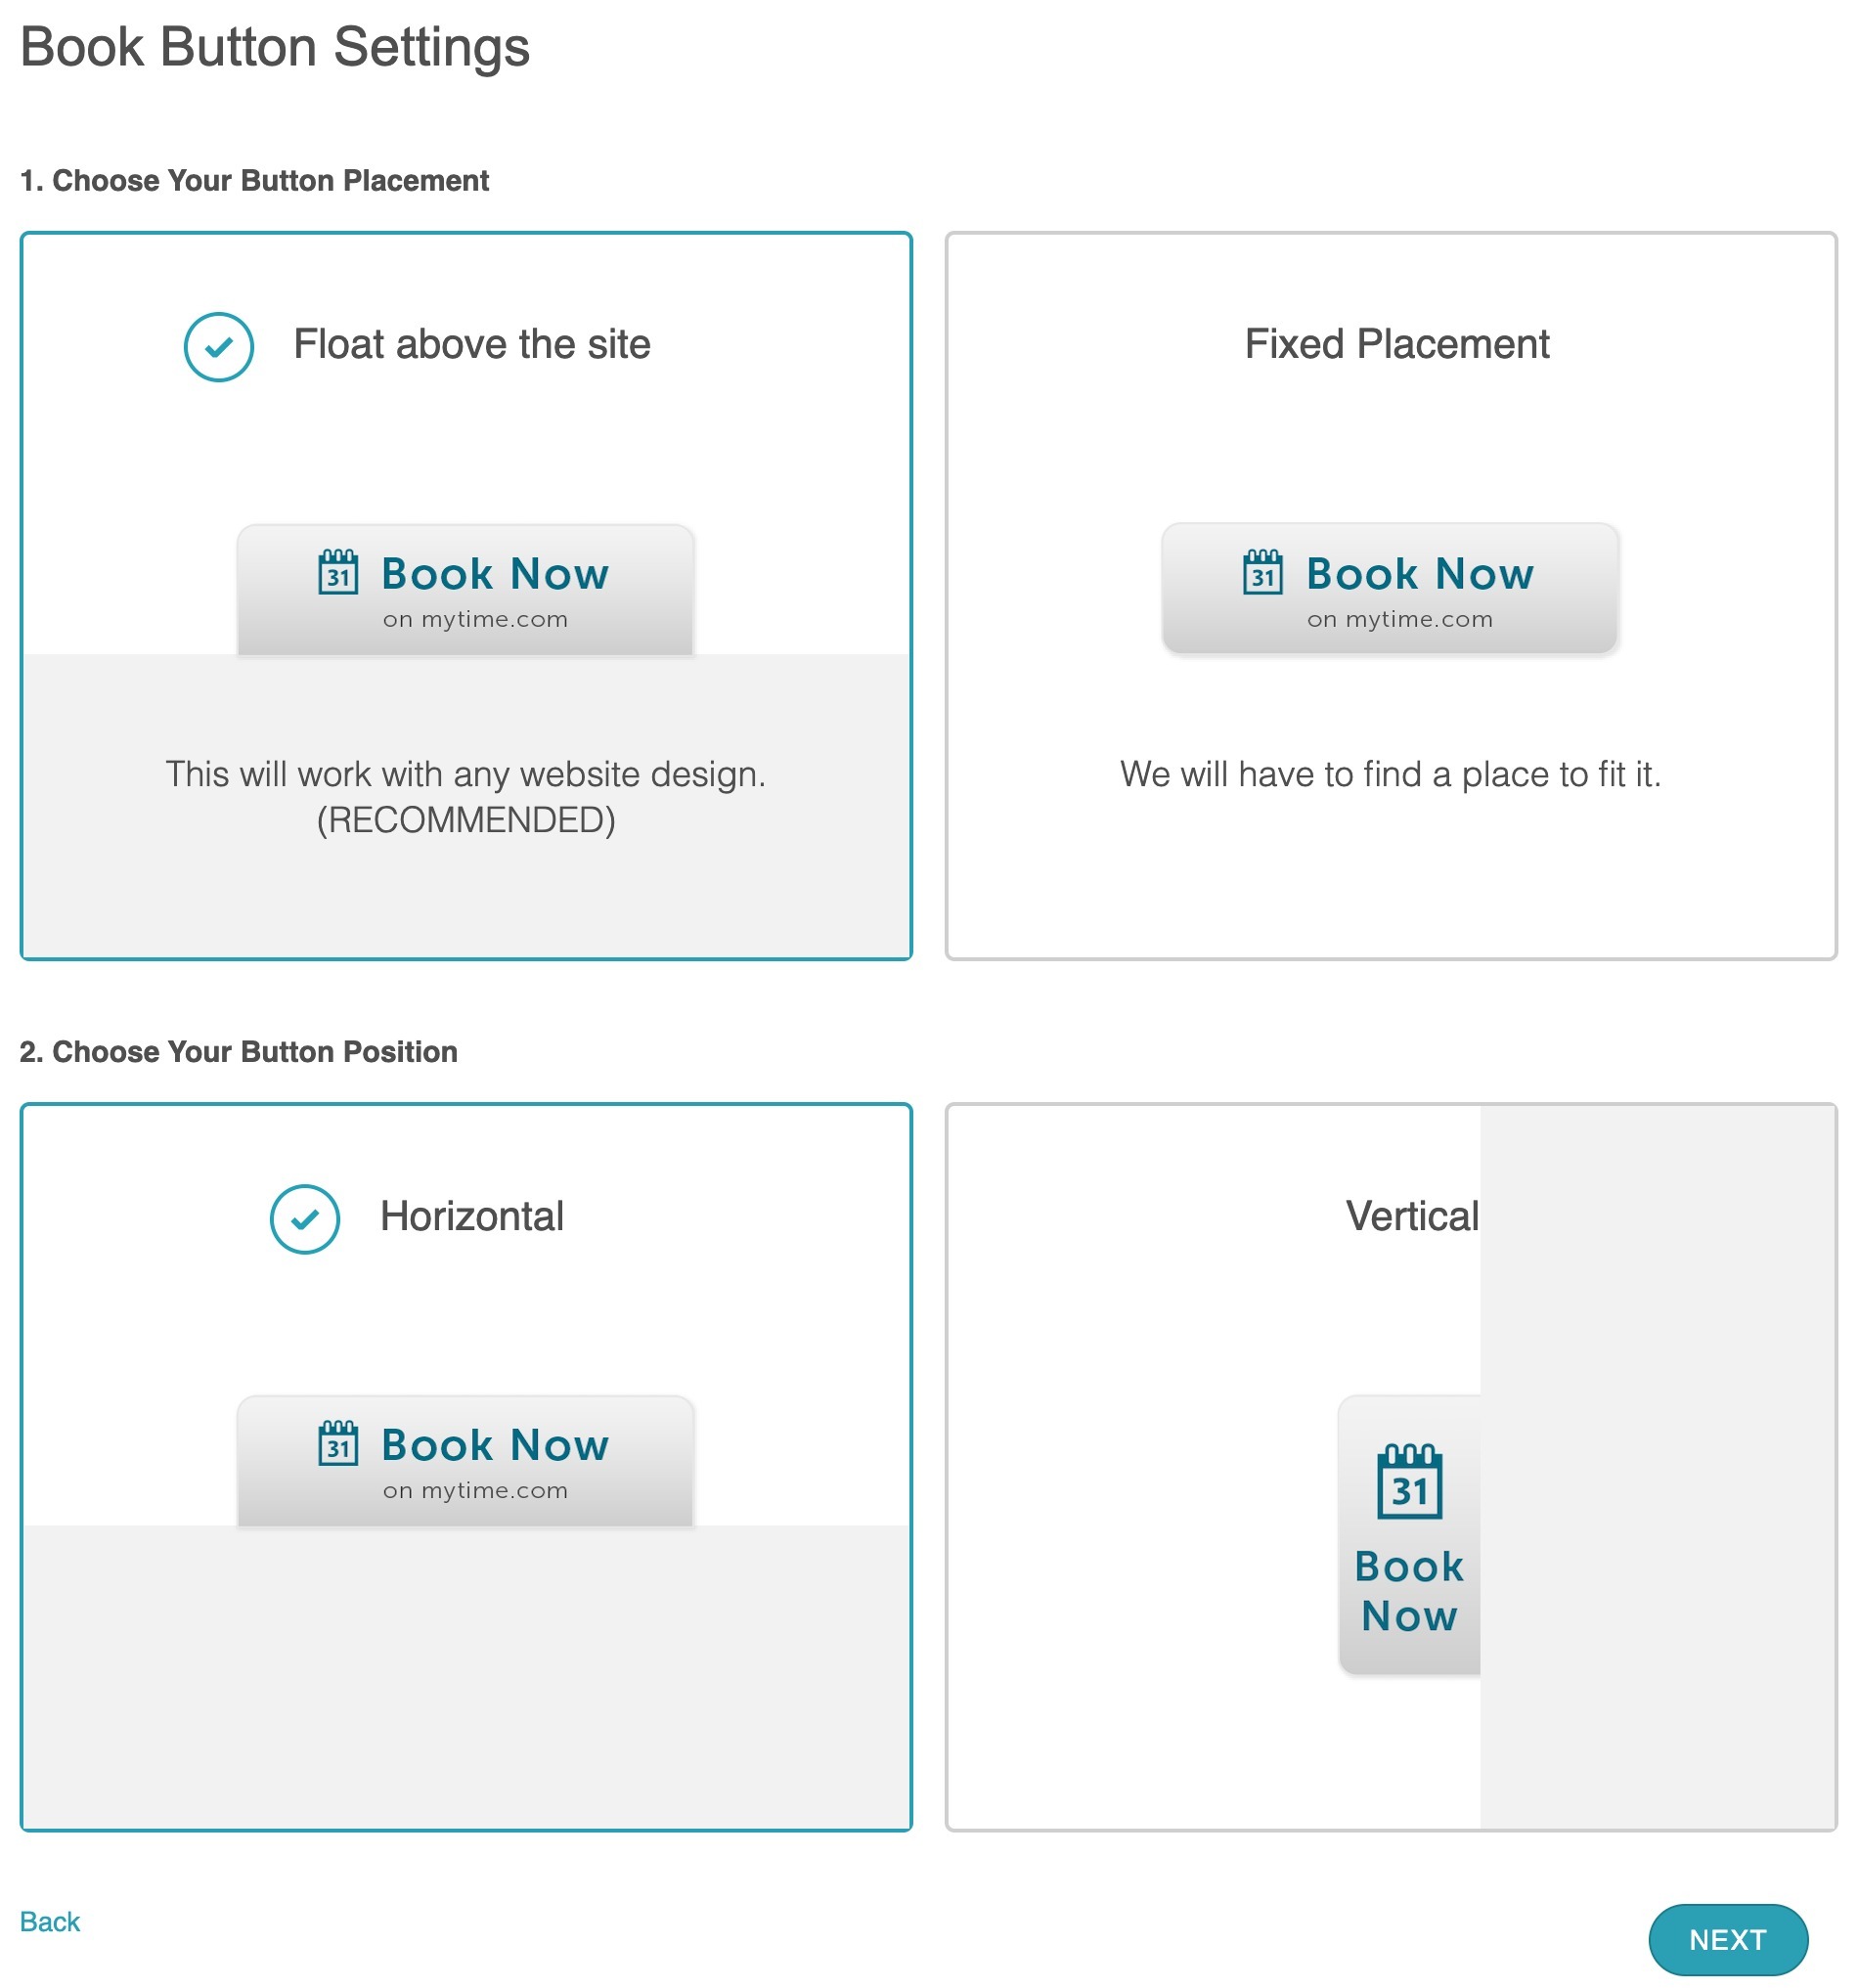
- Under the Book Button setting:
- Your button can hover over your website or have a fixed placement
- You can also choose the button position and it will appear either horizontally or vertically on your page
- You will also be able to choose the default location, then select next to proceed to the installation page.
- Copy the code and embed it on your website

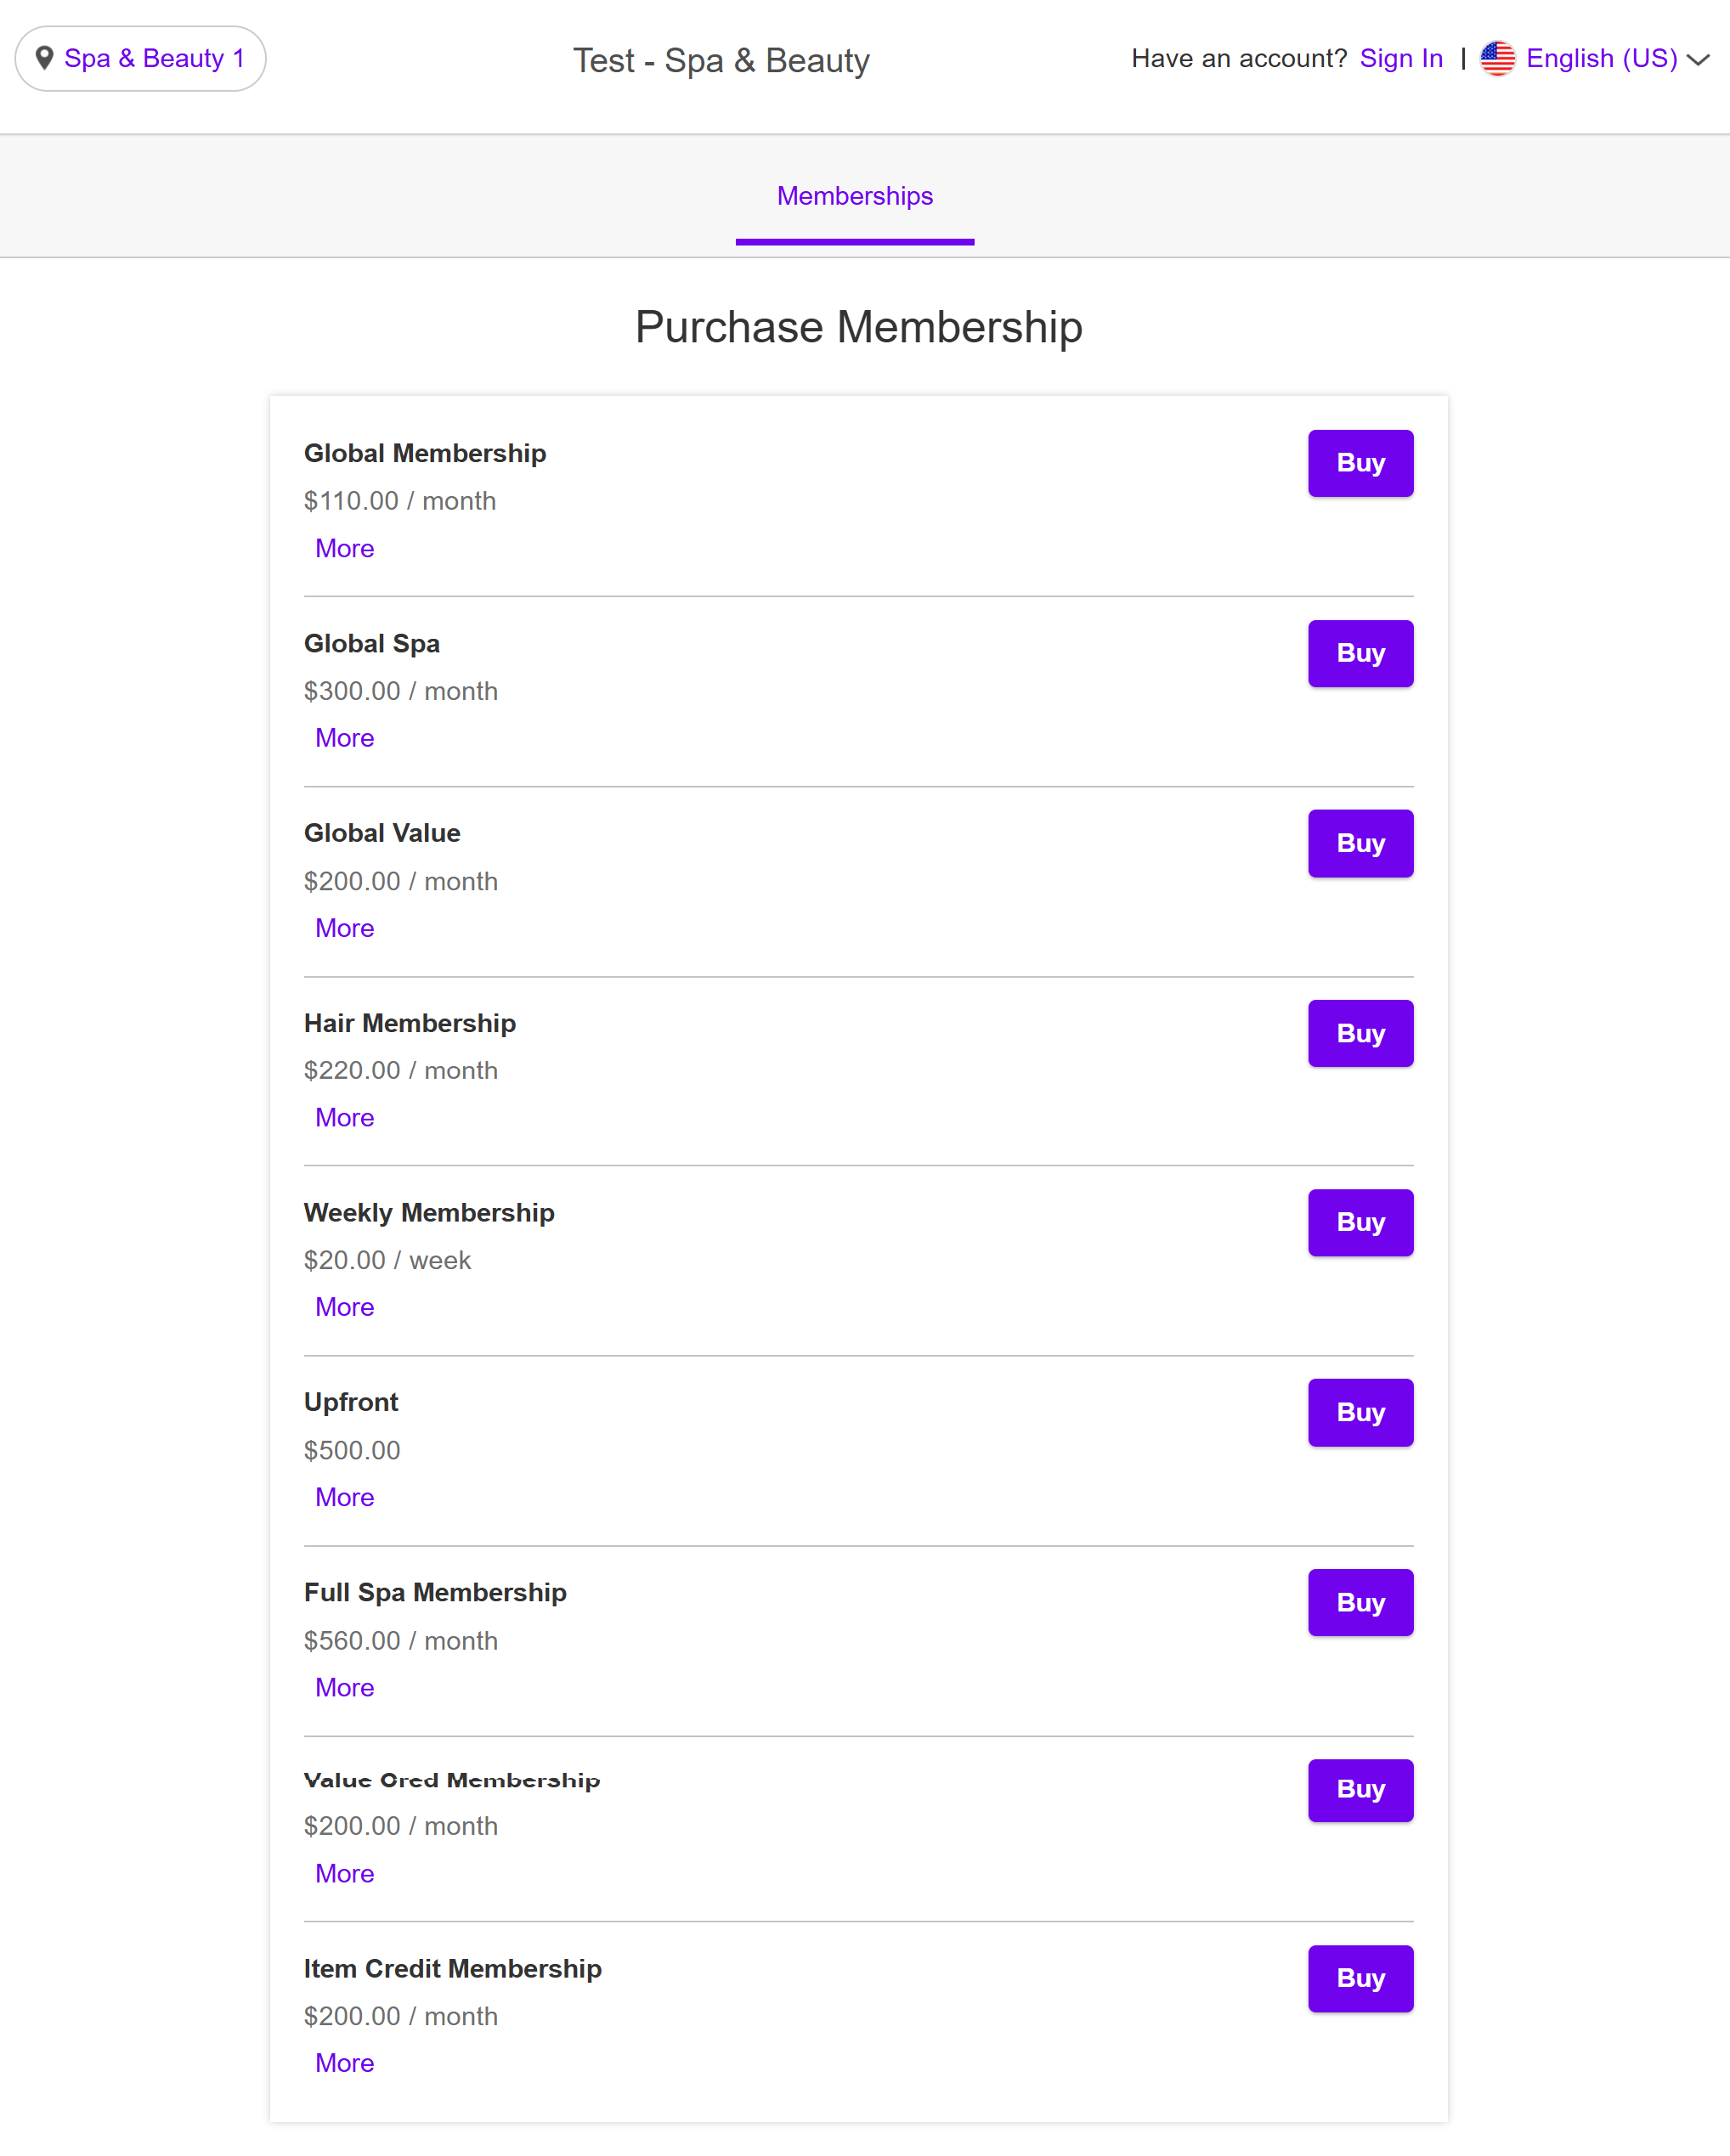
Congratulations, memberships are now available on your website!
**It is important to note that you will need to re-embed the widget on your website once you update the setting.**
Installing Membership's Widget as an Entire Page
Once configured, your membership purchases can be embedded on your website as a button or an entire page without a pop-up.
- Copy the generated embed code
- Paste the iframe code into your website’s HTML. You can add it to a dedicated booking page or within an existing page
- A web developer can help adjust size, width, or positioning to fit your site layout.
Display Notes:
On Desktop: The widget will display in a wide format.

On Tablet/Mobile: The widget automatically adjusts to fit narrower screen sizes.

If you update the widget settings later (e.g., add Google Analytics, Facebook Pixel, or Custom CSS), a new URL may be generated. In that case, you’ll need to re-embed the updated code.
Congratulations! Clients can now purchase your memberships directly from your website.
If you have any questions, feel free to contact our Support Team at support@mytime.com.
Related Articles:
Deep Linking Memberships on the Booking Widget & Express Checkout Page
Purchasing Memberships on the Booking Widget
Selling Memberships Online through Booking Widget and Express Checkout
Purchasing Client Memberships Online
Was this article helpful?
That’s Great!
Thank you for your feedback
Sorry! We couldn't be helpful
Thank you for your feedback
Feedback sent
We appreciate your effort and will try to fix the article