You can allow clients to book appointments directly on your website. The MyTime online booking experience includes a modern, responsive design that looks great on any device and helps maximize conversion rates, along with customization options for colors and styles to seamlessly match your website or mobile app.
Things to know:
- The ability to add appointment booking to your website is governed by the Accessing Website Tools access control setting.
- To enable online bookings for services, the following steps must be followed:
- A payment account must be set up to process card payments. If you do not have a payment account, please email processing@mytime.com for help.
- Your account must be live
- Online booking must be enabled. Learn more here
- Staff members must be assigned to services and have work hours set up.
- The "Book Services" option must be selected in the Widget Includes dropdown
- You can choose to install either a booking widget or an Express Checkout link, depending on how you want clients to book.
- Express Checkout: Clients click a “Book Now” button and are redirected to your MyTime booking page to complete their booking. Available for free on all MyTime accounts
- Booking Widget: Clients can book directly on your website without being redirected. A pop-up appears, allowing them to complete the booking seamlessly. This option is free for Premier and Enterprise subscriptions and costs $0.75 per transaction for businesses without a Premier subscription.
- If you update the booking widget configuration, you must re-embed the widget on your website for the changes to take effect. Changes made to Express Checkout are applied automatically and do not require re-embedding.
- When clients on an iPhone or iPad click Book Now on your embedded booking widget, the booking experience automatically opens in a new browser tab on mytime.com. This is enabled by default because Apple's authentication and payment flows require running outside of an embedded iframe due to iOS security restrictions.
- This behavior is controlled by the following company settings:
- Stripe accounts: Open embedded booking widget in a new tab on iOS to enable Apple Sign-In and Apple Pay
- Non-Stripe accounts: Open embedded booking widget in a new tab on iOS to enable Apple Sign-In
- Note: If this setting is disabled, Apple Pay and Sign in with Apple may not function for clients accessing your embedded booking widget on iOS devices.
- The setup option displayed in the top-right user menu depends on how you access the account and your assigned role:
- When navigating from the Parent Account (Location Management tab):
- Admin: Displays Business Setup when viewing the location account.
- Login As: Displays Location Setup when viewing the location account.
- When logged in directly at the Location Level:
- Location Owners & Location Managers: Display Location Setup.
- Service Providers & All Other Roles: Display Profile Setup.
Contents:
- Appointment Booking Configuration For the Booking Widget
- Appointment Booking Configuration For the Express Checkout Link
Appointment Booking Configuration For the Booking Widget
To configure your booking widget:
- Navigate to Business Setup / Location Setup > Website Tools
- Select the Setup button next to Add Appointment Booking & Purchases to Your Website
- Select the Booking Widget option, then proceed to set up the widget
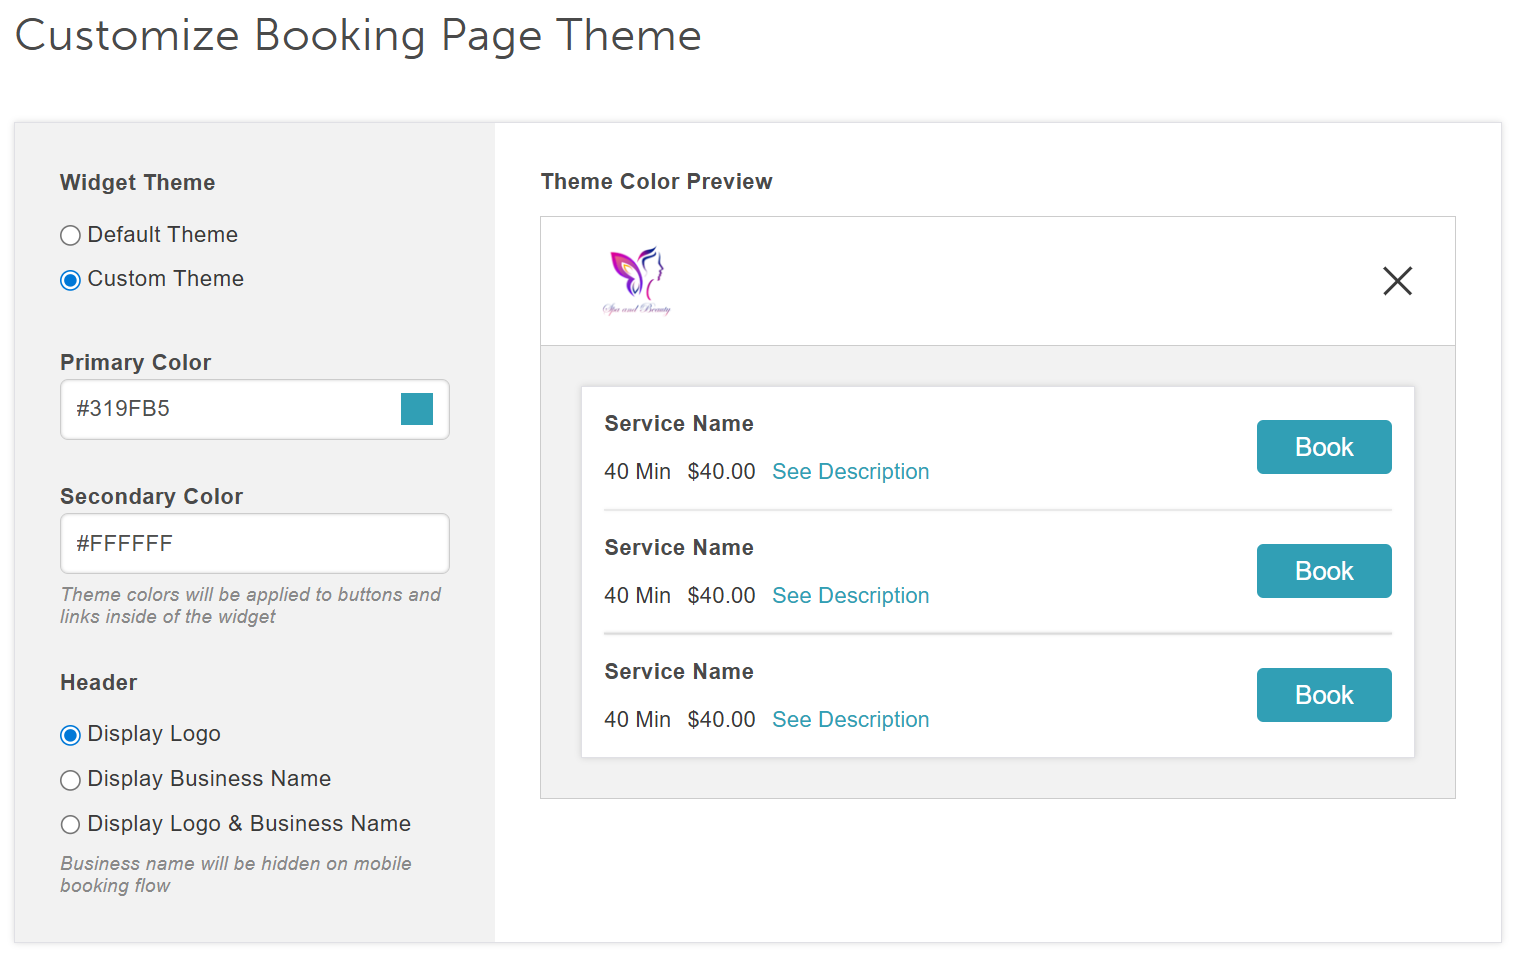
- On the Customize Booking Page Theme page, set up your button and widget theme, then select "next" to proceed to the installation page
- From there, configure the following:
- Enable Chat Widget: This setting controls whether the chat icon appears on your website during the booking process. Use the dropdown menu to select one of the following options:
- Yes: Displays the chat icon on your website, allowing clients to message your business directly. Once enabled, you can click "Customize" to configure settings such as your welcome message, brand colors, widget position, business hours, OTP verification, and auto-responder messages. For more details, see the chat widget configuration guide.
- No: Hides the chat icon. Clients will not be able to start a conversation with your business from the website.
- Create as: Choose how the booking flow will be displayed on your site:
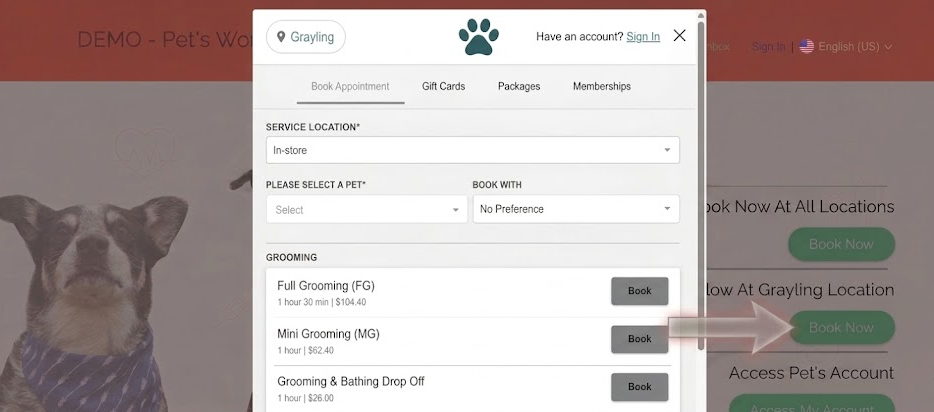
- Book Now Button: Opens the booking flow in a popup modal.
- Embedded iFrame: Displays the booking flow inline on your website
When "Embedded iFrame" is selected, two additional fields will appear, width and. Both fields default to 500 and accept either a numeric value (interpreted as pixels), or a unit-based value such as "100%" or "30em
Note: Access to this option is restricted to location owners and location managers
- Default Location: For the service embed flow to function, you must select either a specific location or “All Locations.” Locations are required to search for services correctly.
- If "All Locations" is selected, clients will be prompted to choose a location from the 'Pick A Location' page when accessing the embedded widget.
- If a single location is selected, the embedded widget will default to that location, and the 'Pick A Location' page will not appear.
- Widget Includes: Select “Services” from the Widget Includes dropdown menu; multiple selections can be made to include memberships, packages, gift cards, etc
- Default To: Select “Book Services”
- Meta CAPI: Learn more here
- Google Tag Manager: Learn more here
- Google Analytics 4 ID: Learn more here
- Facebook Pixel: Learn More here
- Custom CSS: Customize your widget by adding CSS instructions
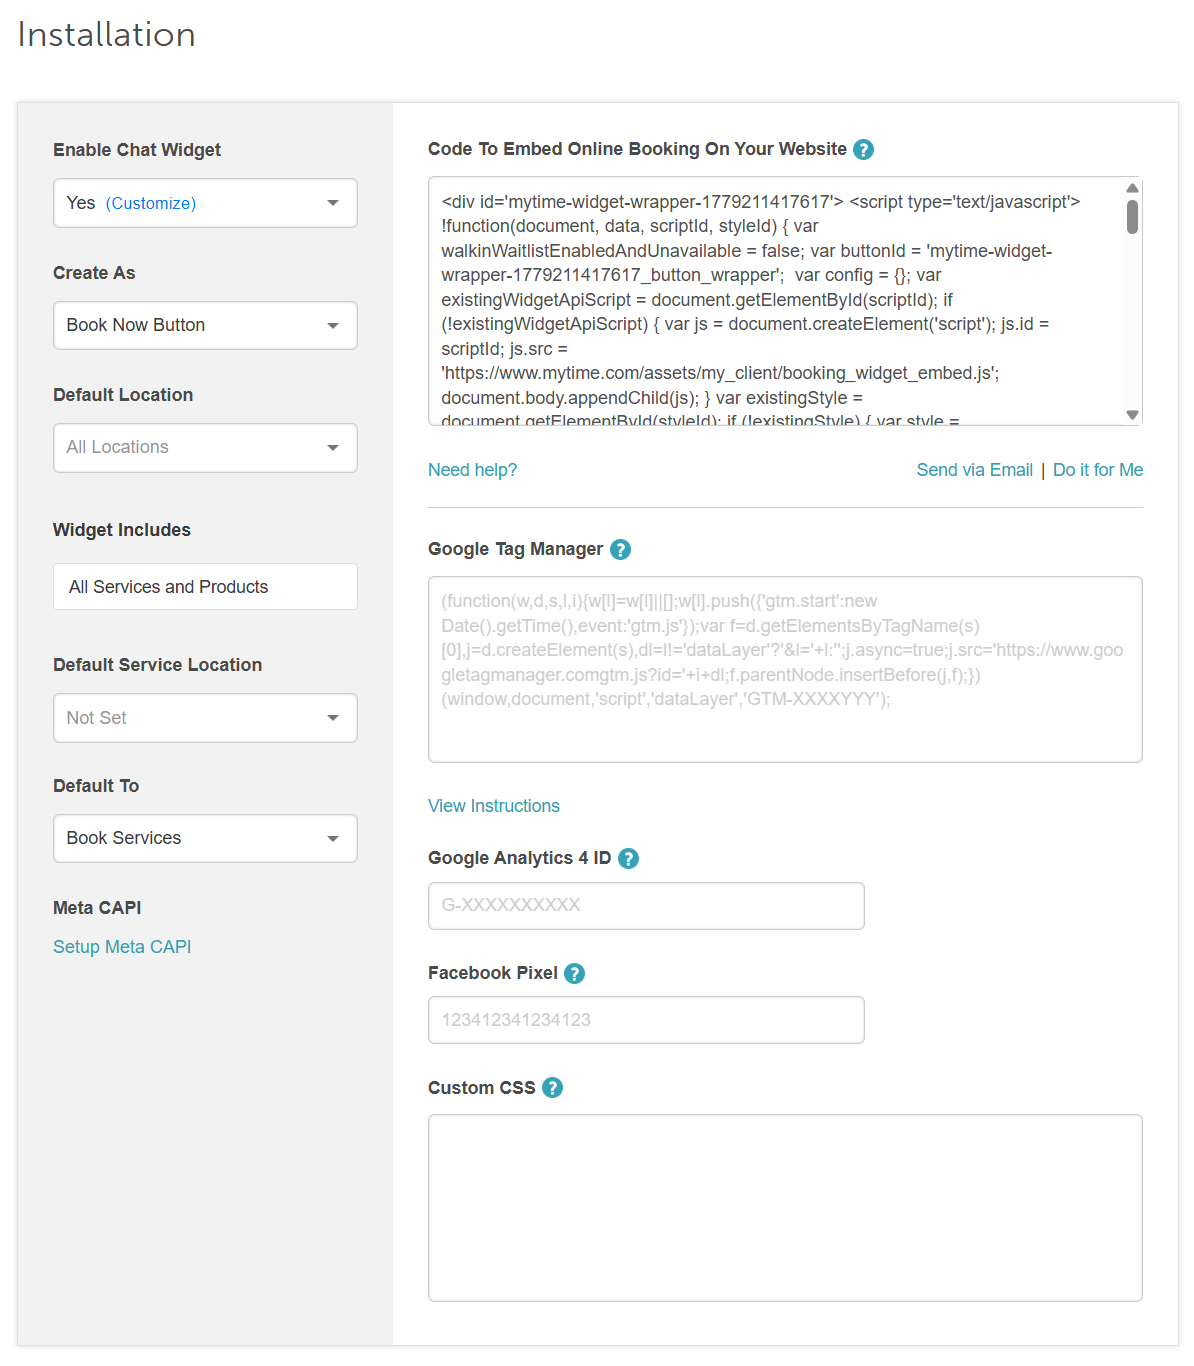
- Copy the code and embed it on your website


Example: “Book Now” Button Embed
Example: iFrame Embed 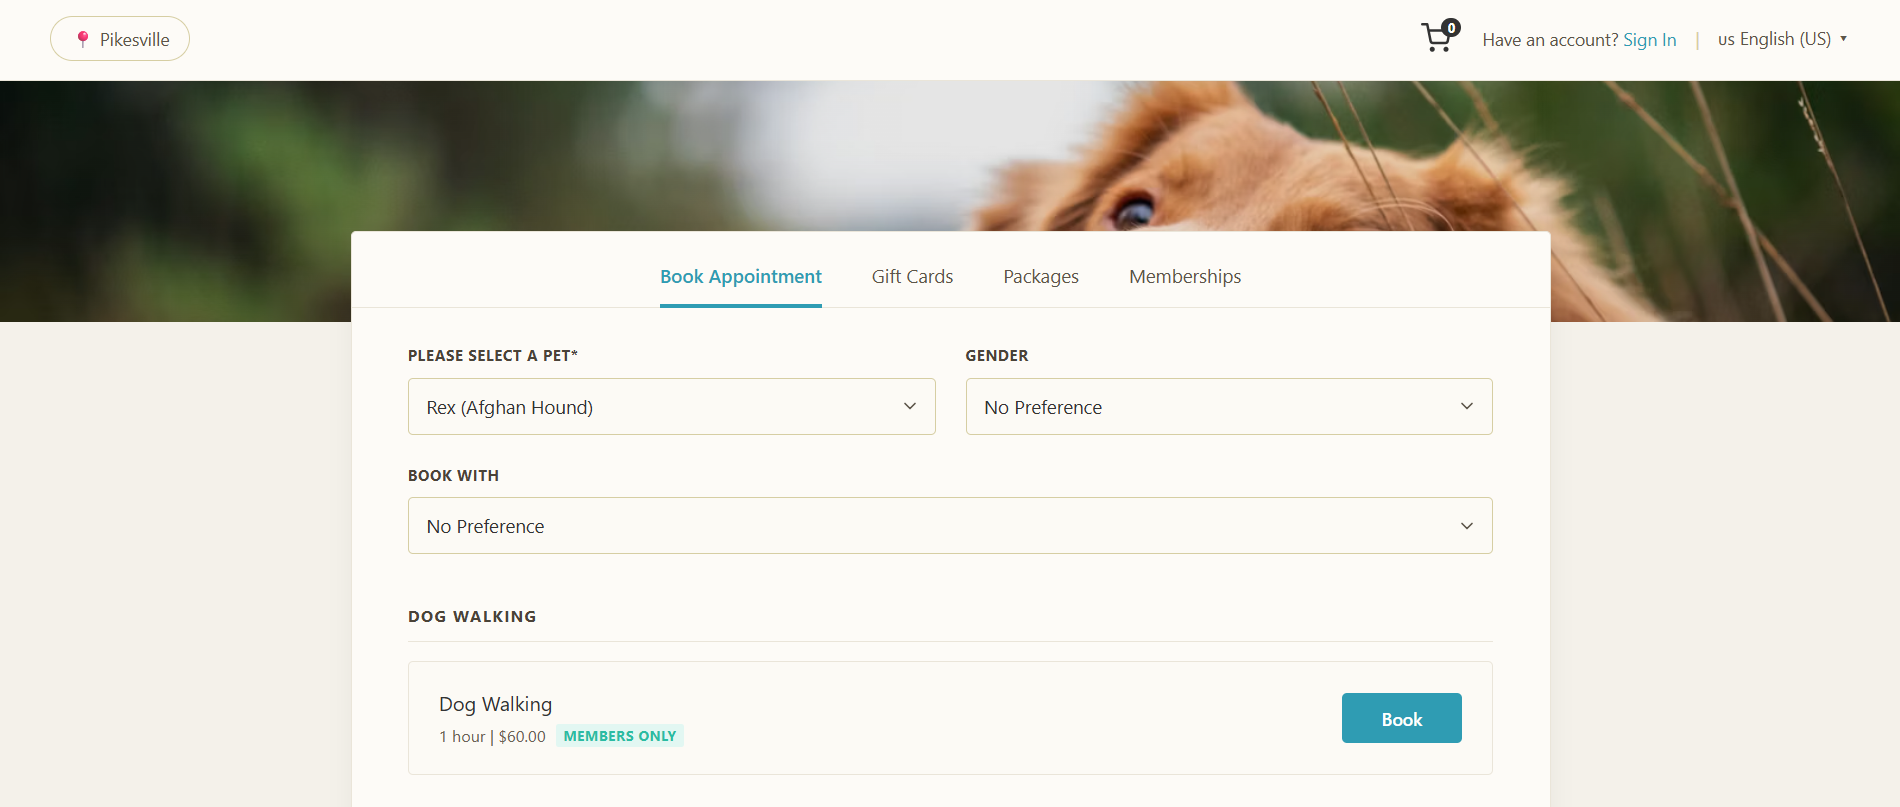
Appointment Booking Configuration For the Express Checkout Link
- Select Express Checkout, then proceed to the Booking Page Settings
- Under the Booking Page Settings section, customize the following:
- Enable Chat Widget: This setting controls whether the chat icon appears on your website during the booking process. Use the dropdown menu to select one of the following options:
- Yes: Displays the chat icon on your website, allowing clients to message your business directly. Once enabled, you can click "Customize" to configure settings such as your welcome message, brand colors, widget position, business hours, OTP verification, and auto-responder messages. For more details, see the chat widget configuration guide.
- No: Hides the chat icon. Clients will not be able to start a conversation with your business from the website.
- Default Location: For the service embed flow to work, you must choose a location. The location is required to search for the services correctly
- Booking Page Includes: Select “Services” from the Widget Includes dropdown menu; multiple selections can be made to include memberships, packages, gift cards, etc
- Default Service Location: You can then decide if the widget should default to in-store or the client's location
- Default To: Select “Services”
- Meta CAPI: Learn more here
- Google Tag Manager: Learn more here
- Google Analytics 4: Learn more here
- Facebook Pixel: Learn More here
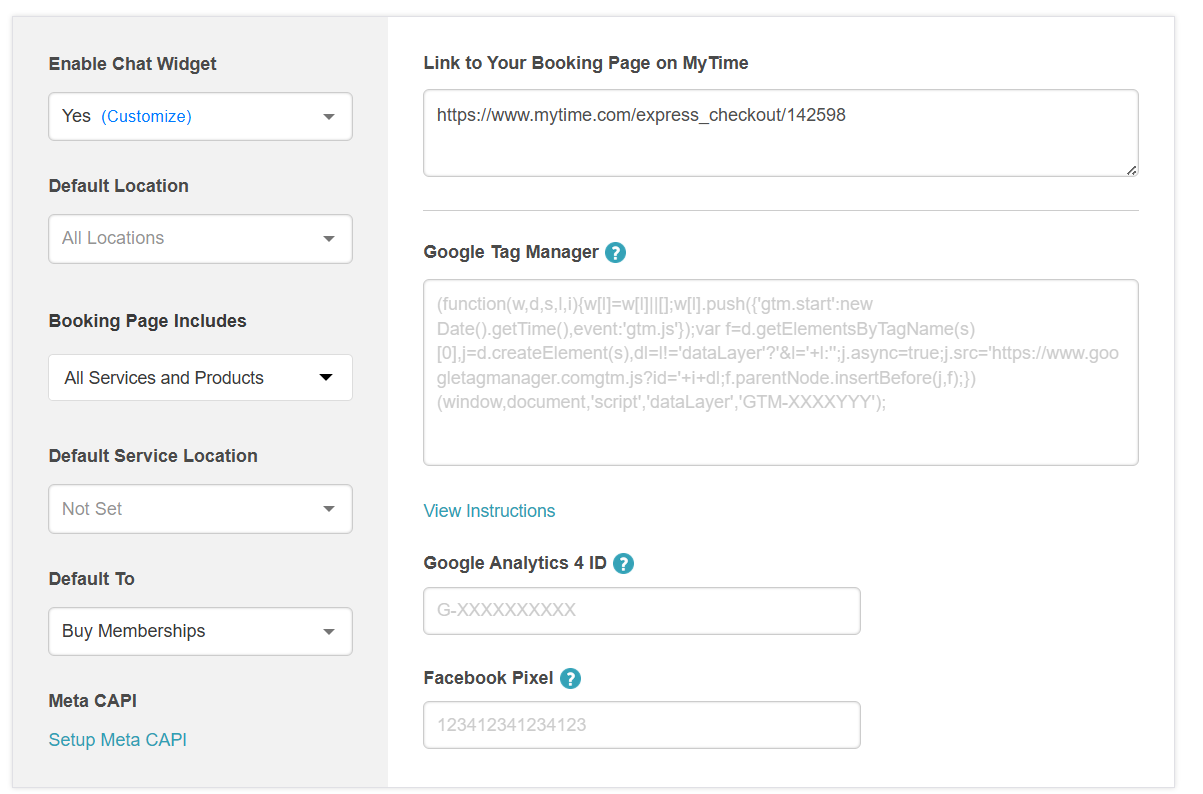
- Scroll down to the "Customize Booking Page Theme" section to adjust widget themes and specify what should be displayed in the header when booking an appointment online
- Under the Book Button setting:
- Your button can hover over your website or have a fixed placement
- You can also choose the button position and it will appear either horizontally or vertically on your page
- You will also be able to choose the default location, then select next to proceed to the installation page.
- Copy the code and embed it on your website.


Congratulations, appointment booking is now available on your website!
For more information, contact us at support@mytime.com.
Related Articles
Deep Linking Services on the Booking Widget & Express Checkout Page
Add My Account Management to Your Website
Add Class/Event Booking to Your Website
Add Walk-in Waitlist to Your Website
Was this article helpful?
That’s Great!
Thank you for your feedback
Sorry! We couldn't be helpful
Thank you for your feedback
Feedback sent
We appreciate your effort and will try to fix the article