MyTime offers the flexibility to create custom icons for pets to quickly view important attributes about appointment attendees. This article will guide you through the steps to configure and use icons for a personalized touch to profiles.
Things to Know:
- The "Manage Client Setup" access control setting governs the ability to customize custom fields
- For franchise businesses with global client sharing enabled, custom icons can be created at either the global (parent) level or the local (child) level.
- Users can either choose from predefined icons provided by MyTime or create their own using SVG (Scalable Vector Graphics) format
- After custom pet icons are configured, they will appear when editing pet details but will not be applied to the pet unless manually selected.
- Each profile can be associated with multiple icons, allowing for a diverse and personalized representation
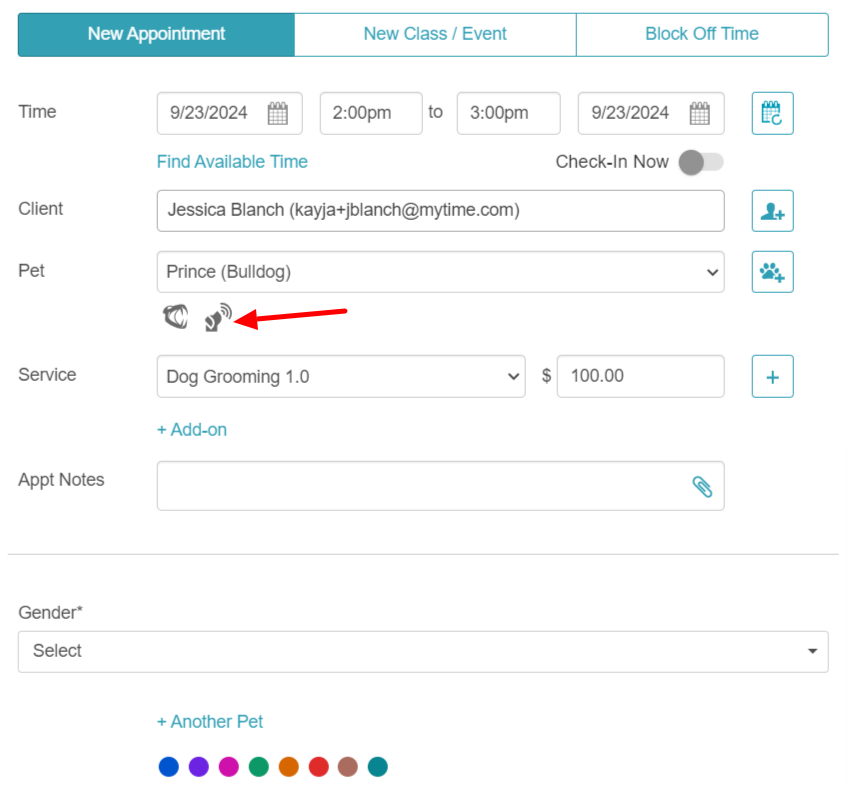
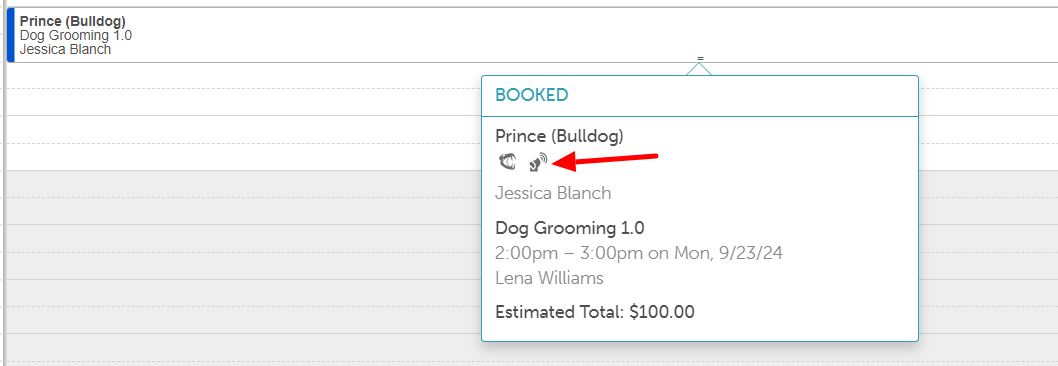
- Once icons are added to profiles, they will become visible on the appointment modal and appointment tooltip within the schedule
- The option to create custom icons is managed by the 'Enable Icon Custom Field' setting
- The setup option displayed in the top-right user menu depends on how you access the account and your assigned role:
- When navigating from the Parent Account (Location Management tab):
- Admin: Displays Business Setup when viewing the location account.
- Login As: Displays Location Setup when viewing the location account.
- When logged in directly at the Location Level:
- Location Owners & Location Managers: Display Location Setup.
- Service Providers & All Other Roles: Display Profile Setup.
Contents
Enable Icon Fields
Before adding icons, you must enable the feature on your account:
- Go to Business Setup / Location Setup > Settings
- Scroll to the Calendar section
- Toggle "Enable Icon Custom Field" to Yes
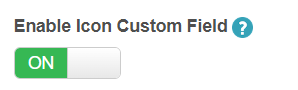
- Click Save at the bottom of the page
Create Custom Icon Fields
- Navigate to Clients > Manage Clients > Customize Client Fields
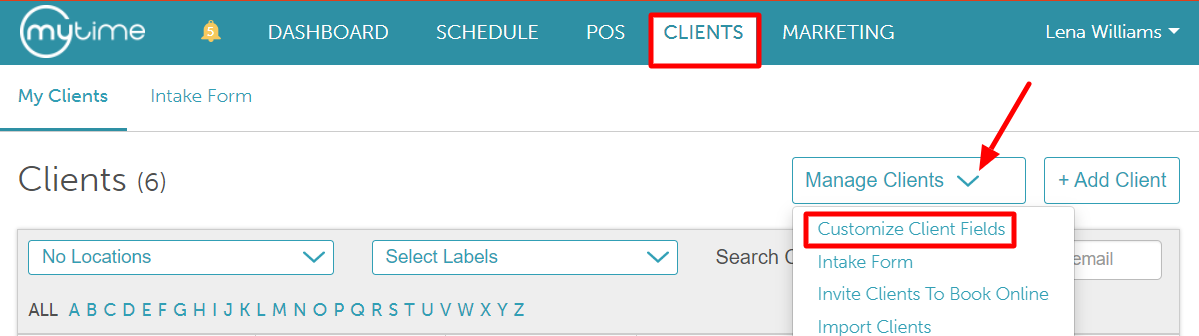
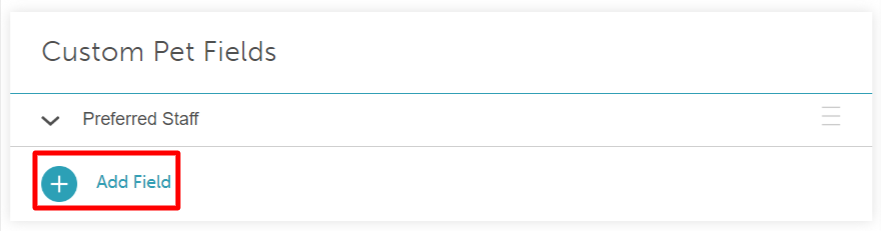
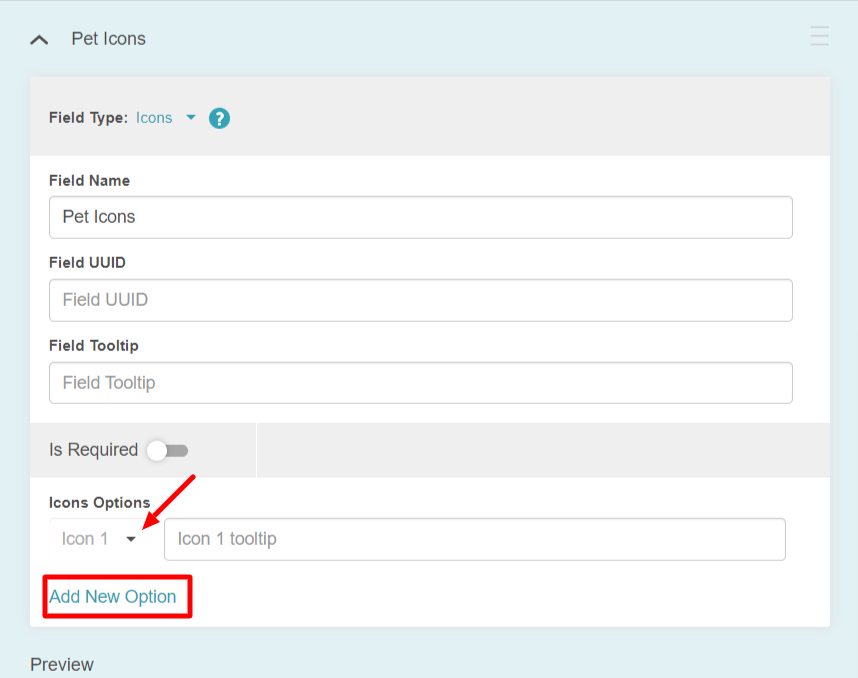
- Locate the Custom Pet Fields section and select "Add Field"
- Set the Field Type dropdown to Icons
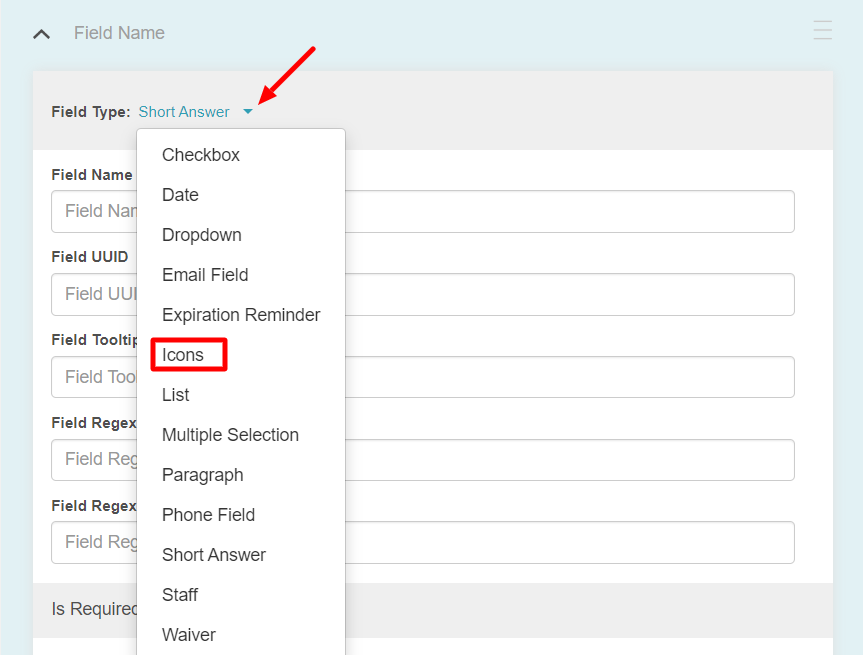
- Enter a Field Name (e.g., "Pet Icons")
- Add icons:
- Click the dropdown arrow to select from predefined icons
- Select "+Add New Option" to upload your own SVG files from your device
- Enter a tooltip for each icon so staff understand what the symbol represents when hovering over it
- Click Save
Assign Icons to Profiles
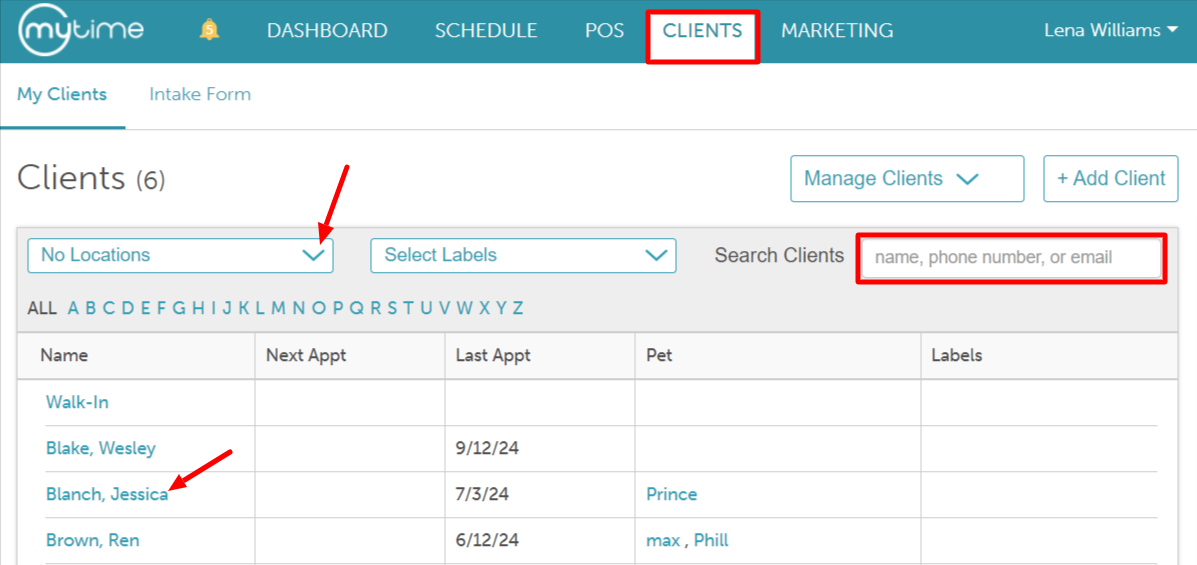
- Go to the Clients tab and filter by the correct location
- Search for and select the desired client
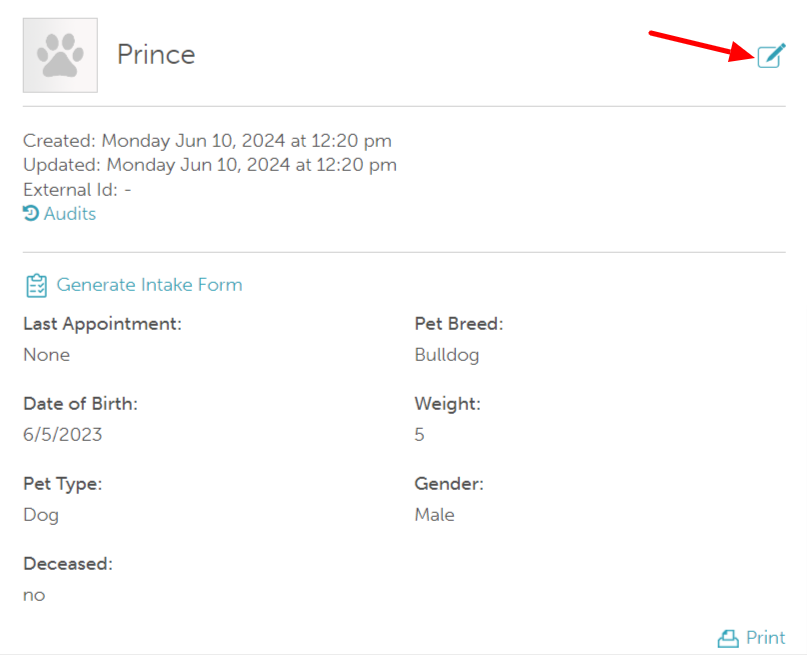
- Click the Edit (pencil) icon next to the specific pet's profile
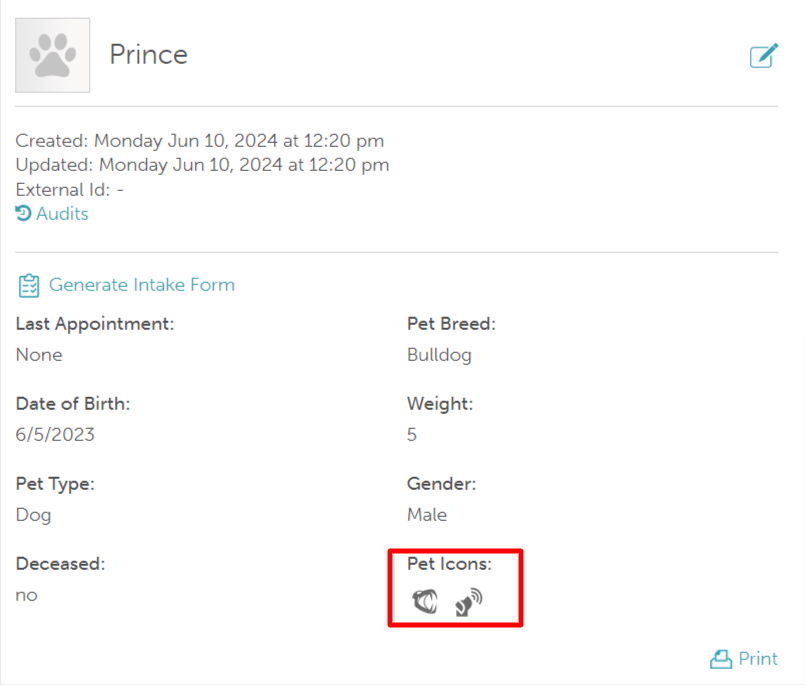
- Locate the pet icon field and select the applicable icon(s)

- Click Save. The icons will now be displayed within the profile editing interface
Where Icons Appear
Once assigned, icons are visible in the following areas:
- Pet Profile: Displayed directly on the pet's profile
- Appointment Modal: Visible when clicking an appointment on the Scheduler
- Appointment Tile: Visible when hovering over an appointment on the Scheduler
For more information, contact us at support@mytime.com.
Related Articles:
- Creating Custom Pet Fields
- Creating/Editing Pet Breeds
- Creating Pet Intake Forms
- Generating Pet Intake Forms
Was this article helpful?
That’s Great!
Thank you for your feedback
Sorry! We couldn't be helpful
Thank you for your feedback
Feedback sent
We appreciate your effort and will try to fix the article