Zapier helps automate repetitive tasks by connecting applications through webhooks and APIs—no coding required. When integrated with MyTime, Zapier can process data from external sources (e.g., Google Sheets) and automatically create family member or pet profiles. This article walks you through how to create a Zap to automate this process.
Things to know:
- For franchise businesses, webhooks and partner APIs must be enabled on both parent and child accounts
- API Key Usage When Connecting MyTime to Zapier:
- Triggers: Use the parent account API key to detect events across all locations
- Actions (e.g., search, update, or delete records):
- Use the parent account API key to apply actions across all locations, or
- Use a child location API key to apply actions only to a specific location.
- A Zap is an automated workflow that includes a trigger and one or more actions
- An Action is the task performed after the trigger event occurs.
To create a new Zap for a new family member/pet profile:
- On the Zapier home page, you can create a new Zap by:
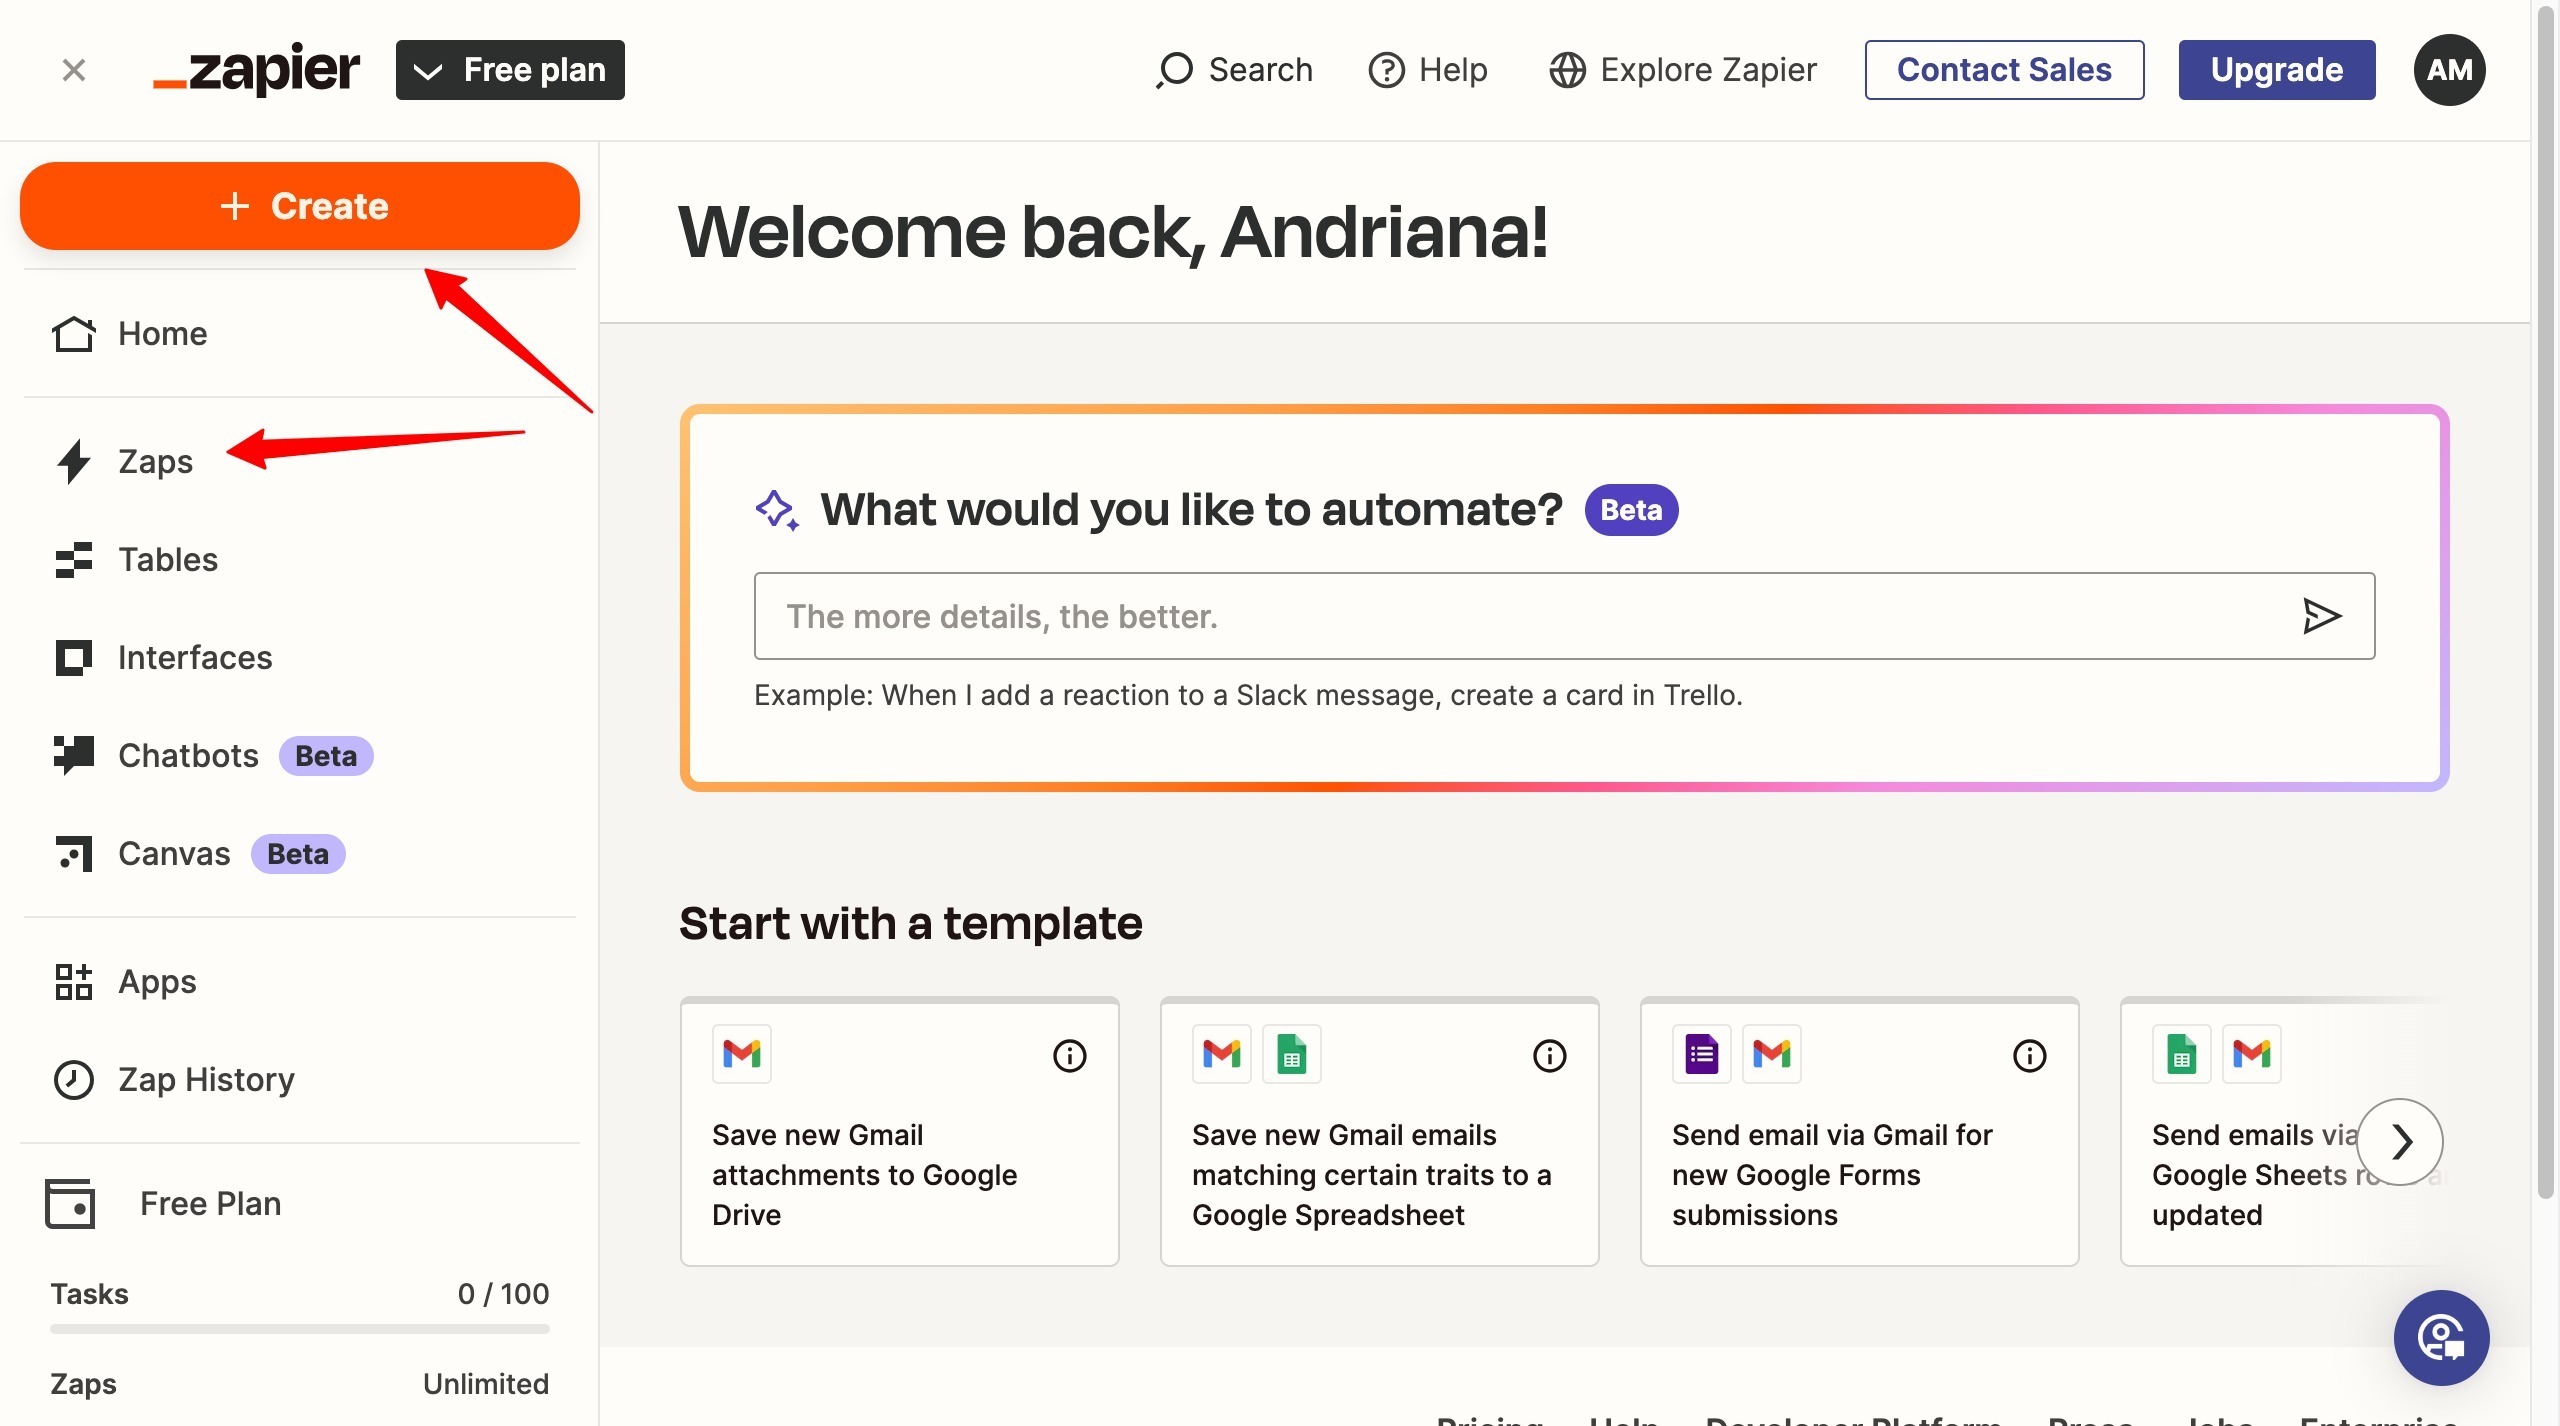
- Clicking + Create → Zaps, which takes you directly to the Zap creation page.
- Clicking Zaps in the left panel opens the “My Zaps” page, where you can add a new Zap.
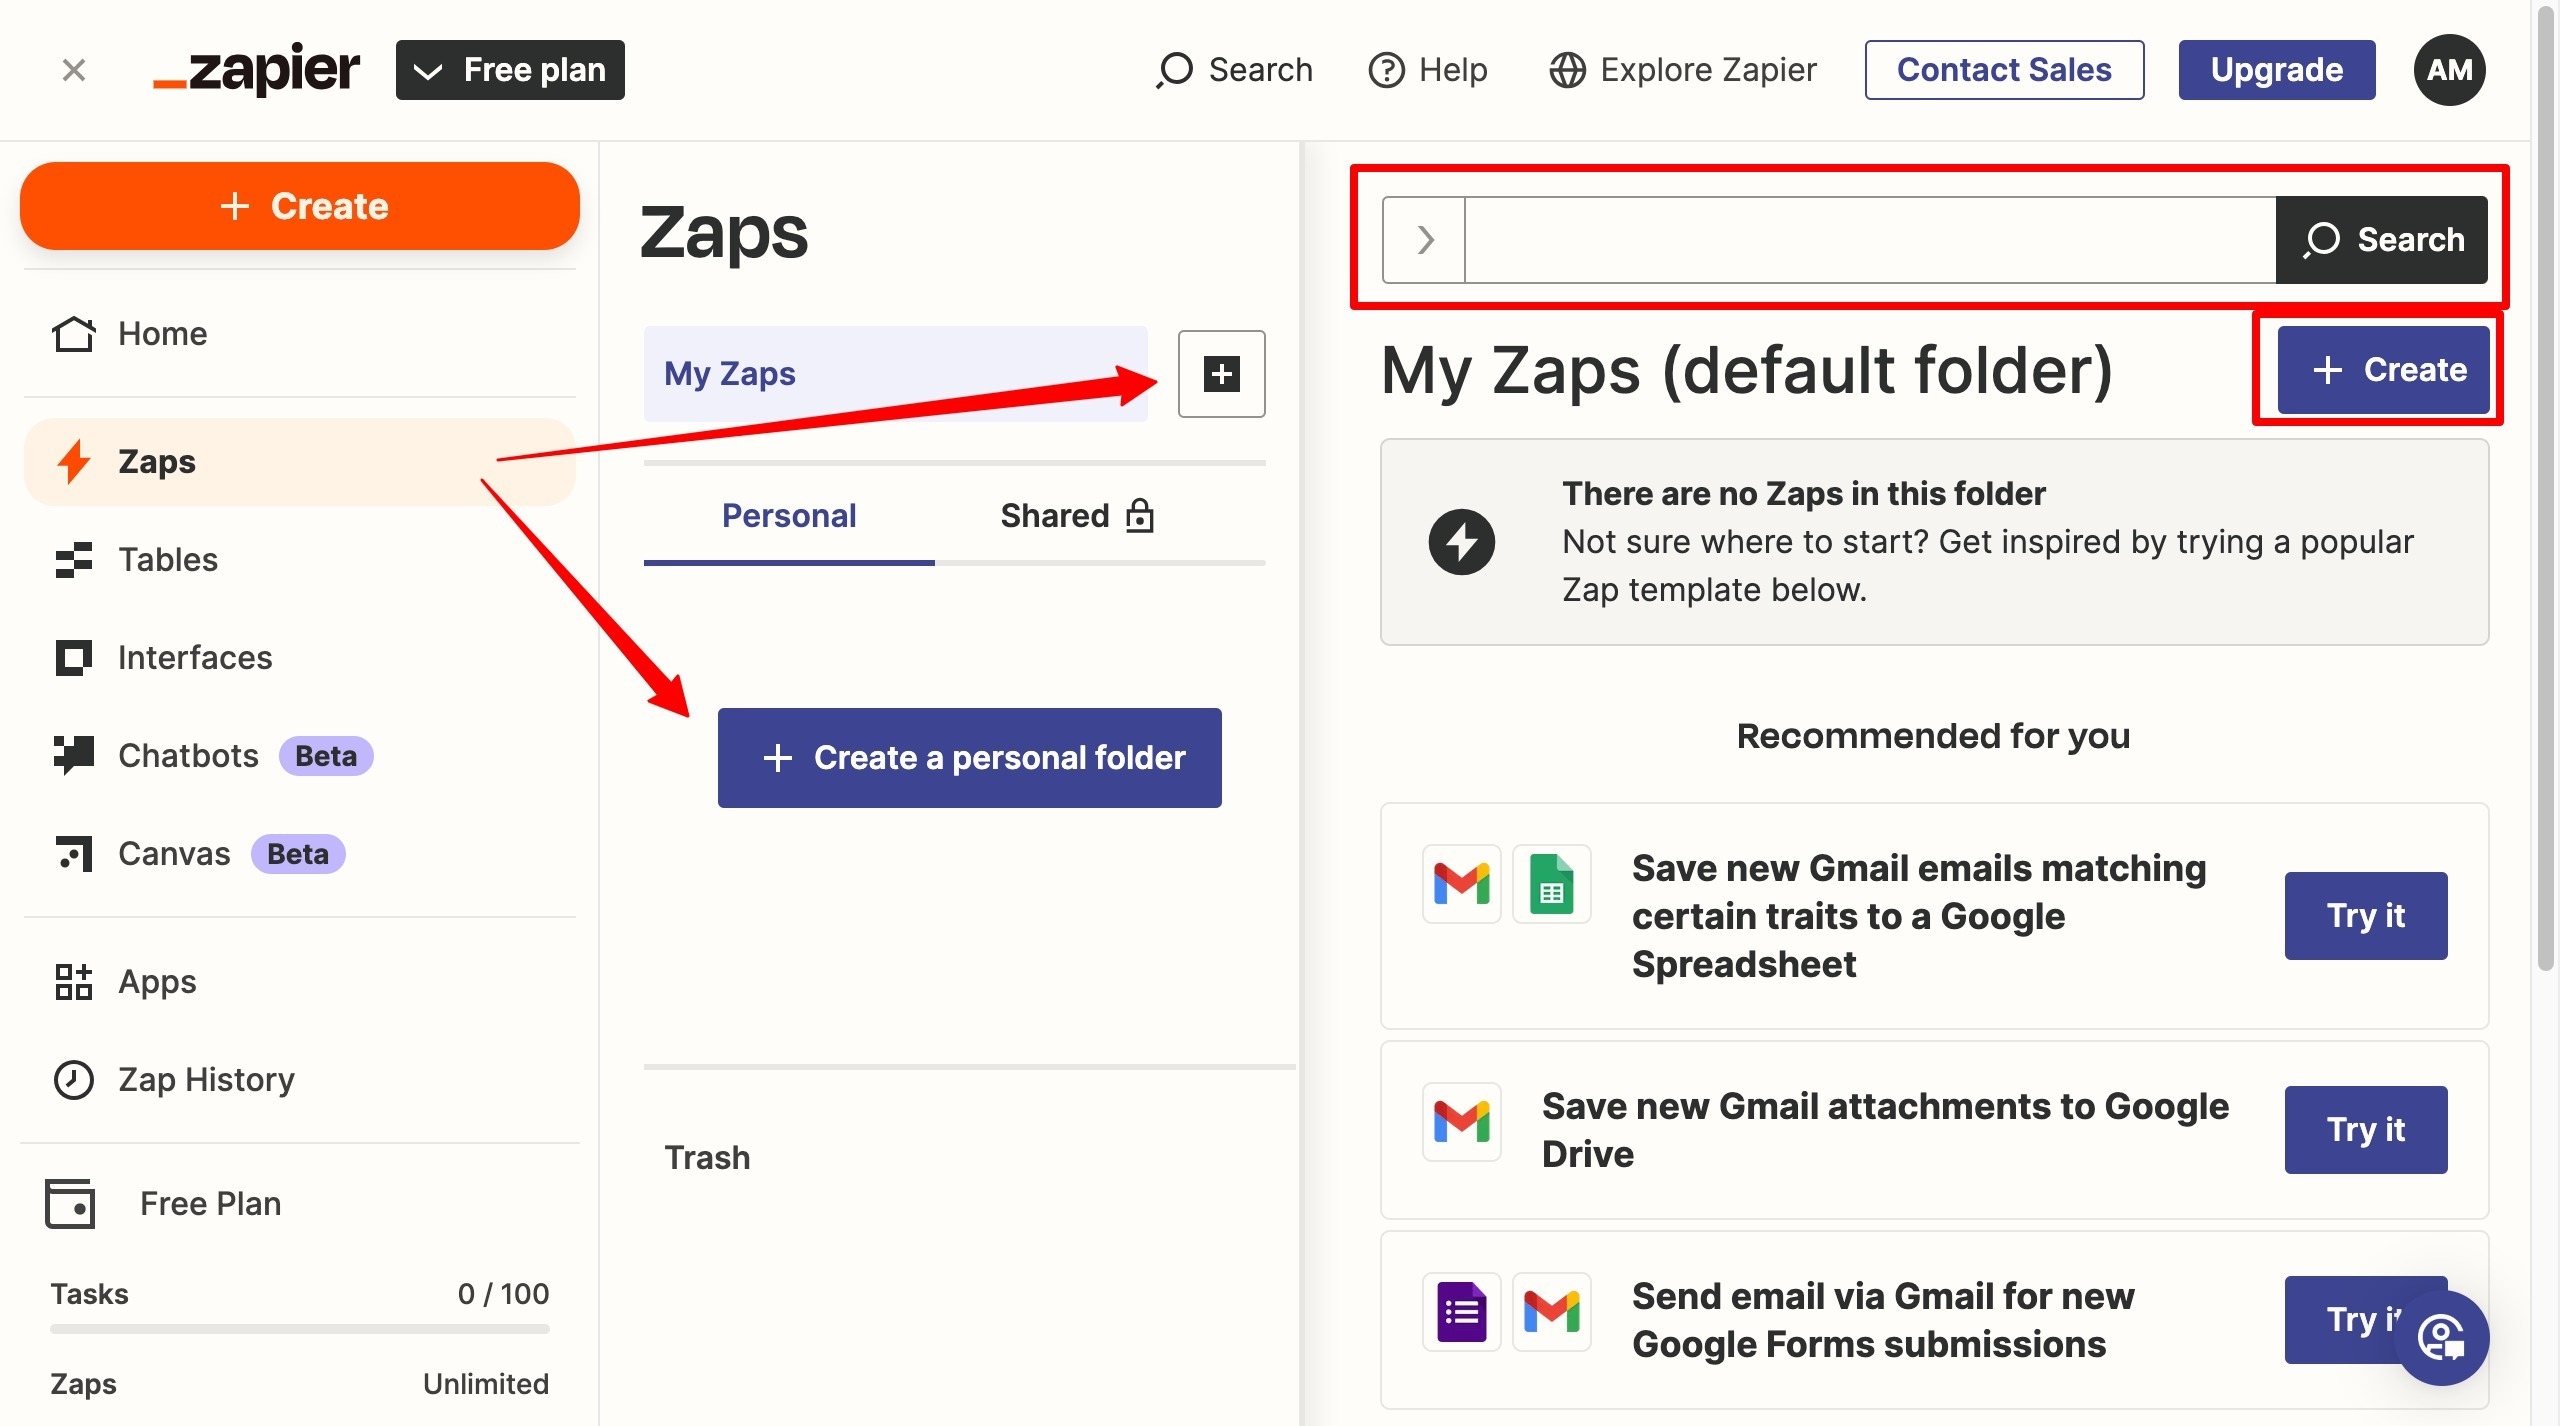
- Create a personal folder by clicking + Create a personal folder or the + next to My Zaps, entering a folder name, then clicking Done.

- Once done, choose any of the highlighted options on the screen to start creating a Zap.
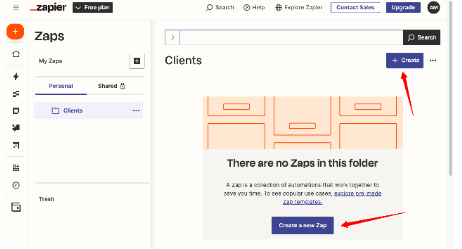
- Create a personal folder by clicking + Create a personal folder or the + next to My Zaps, entering a folder name, then clicking Done.
- Clicking + Create → Zaps, which takes you directly to the Zap creation page.
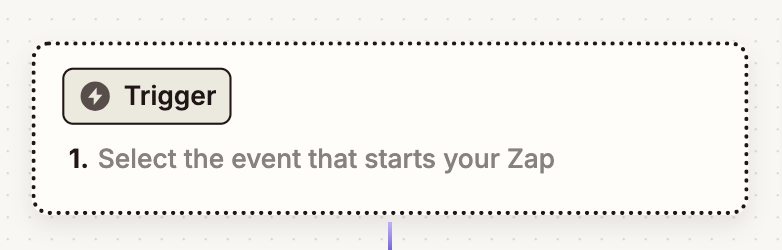
- On the “Untitled Zap” page, click the dropdown at the top to name your Zap.
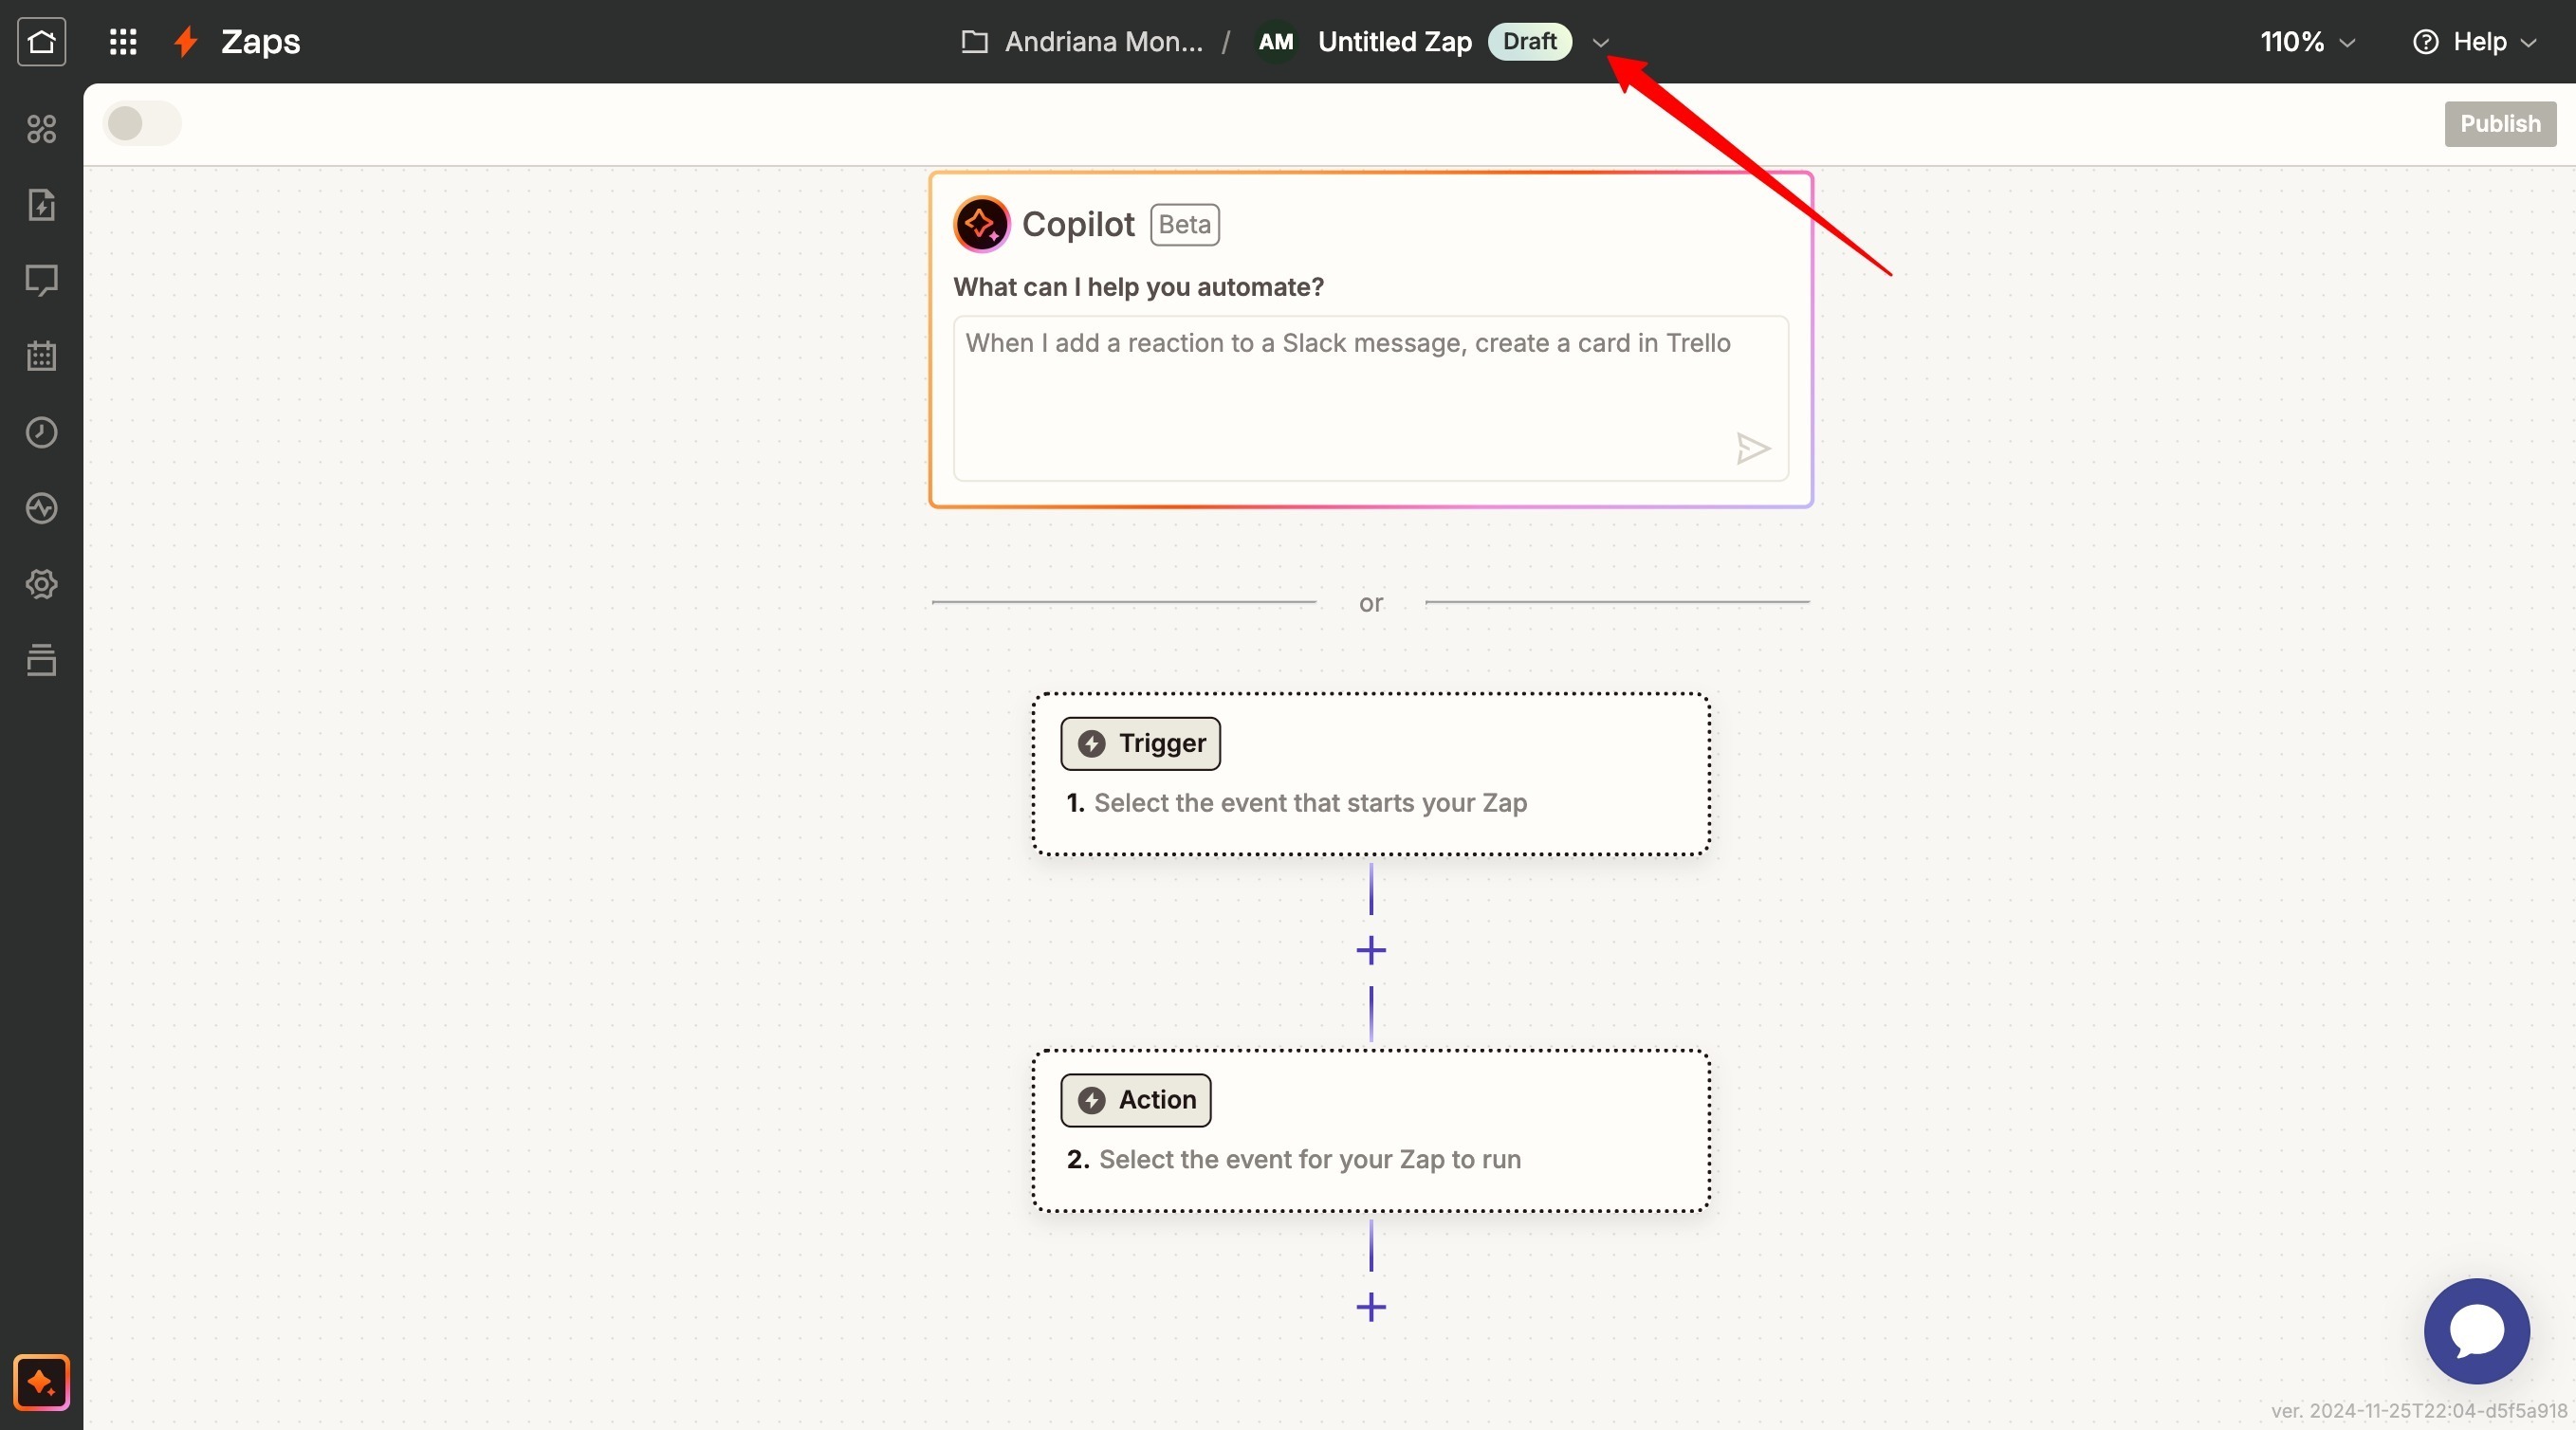
- Click 'Trigger' to add a trigger event.
- Select 'Google Sheets' from the list of apps.

- Search for a trigger event in the Trigger Event dropdown. In this case, select the 'New or Update Spreadsheet Row' option
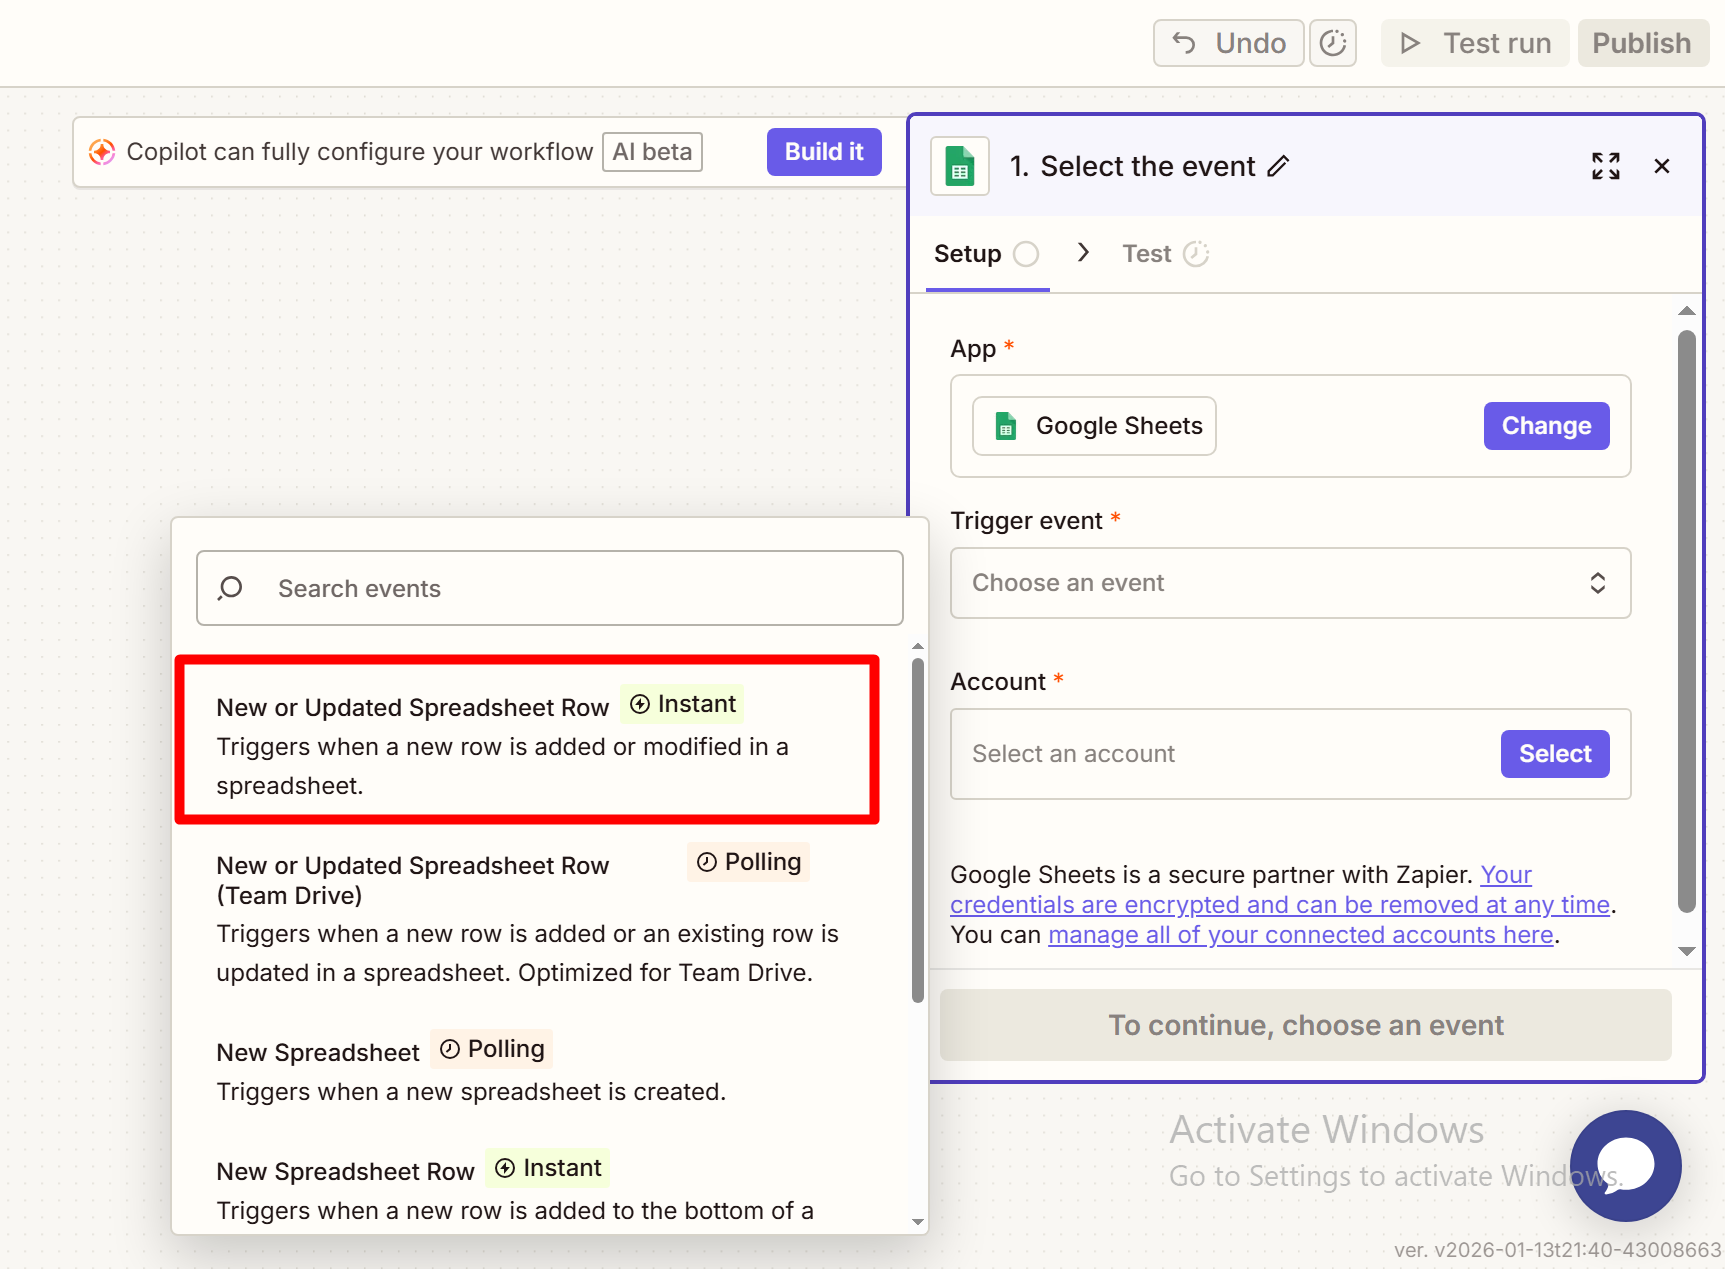
- Select an account to connect in the account section
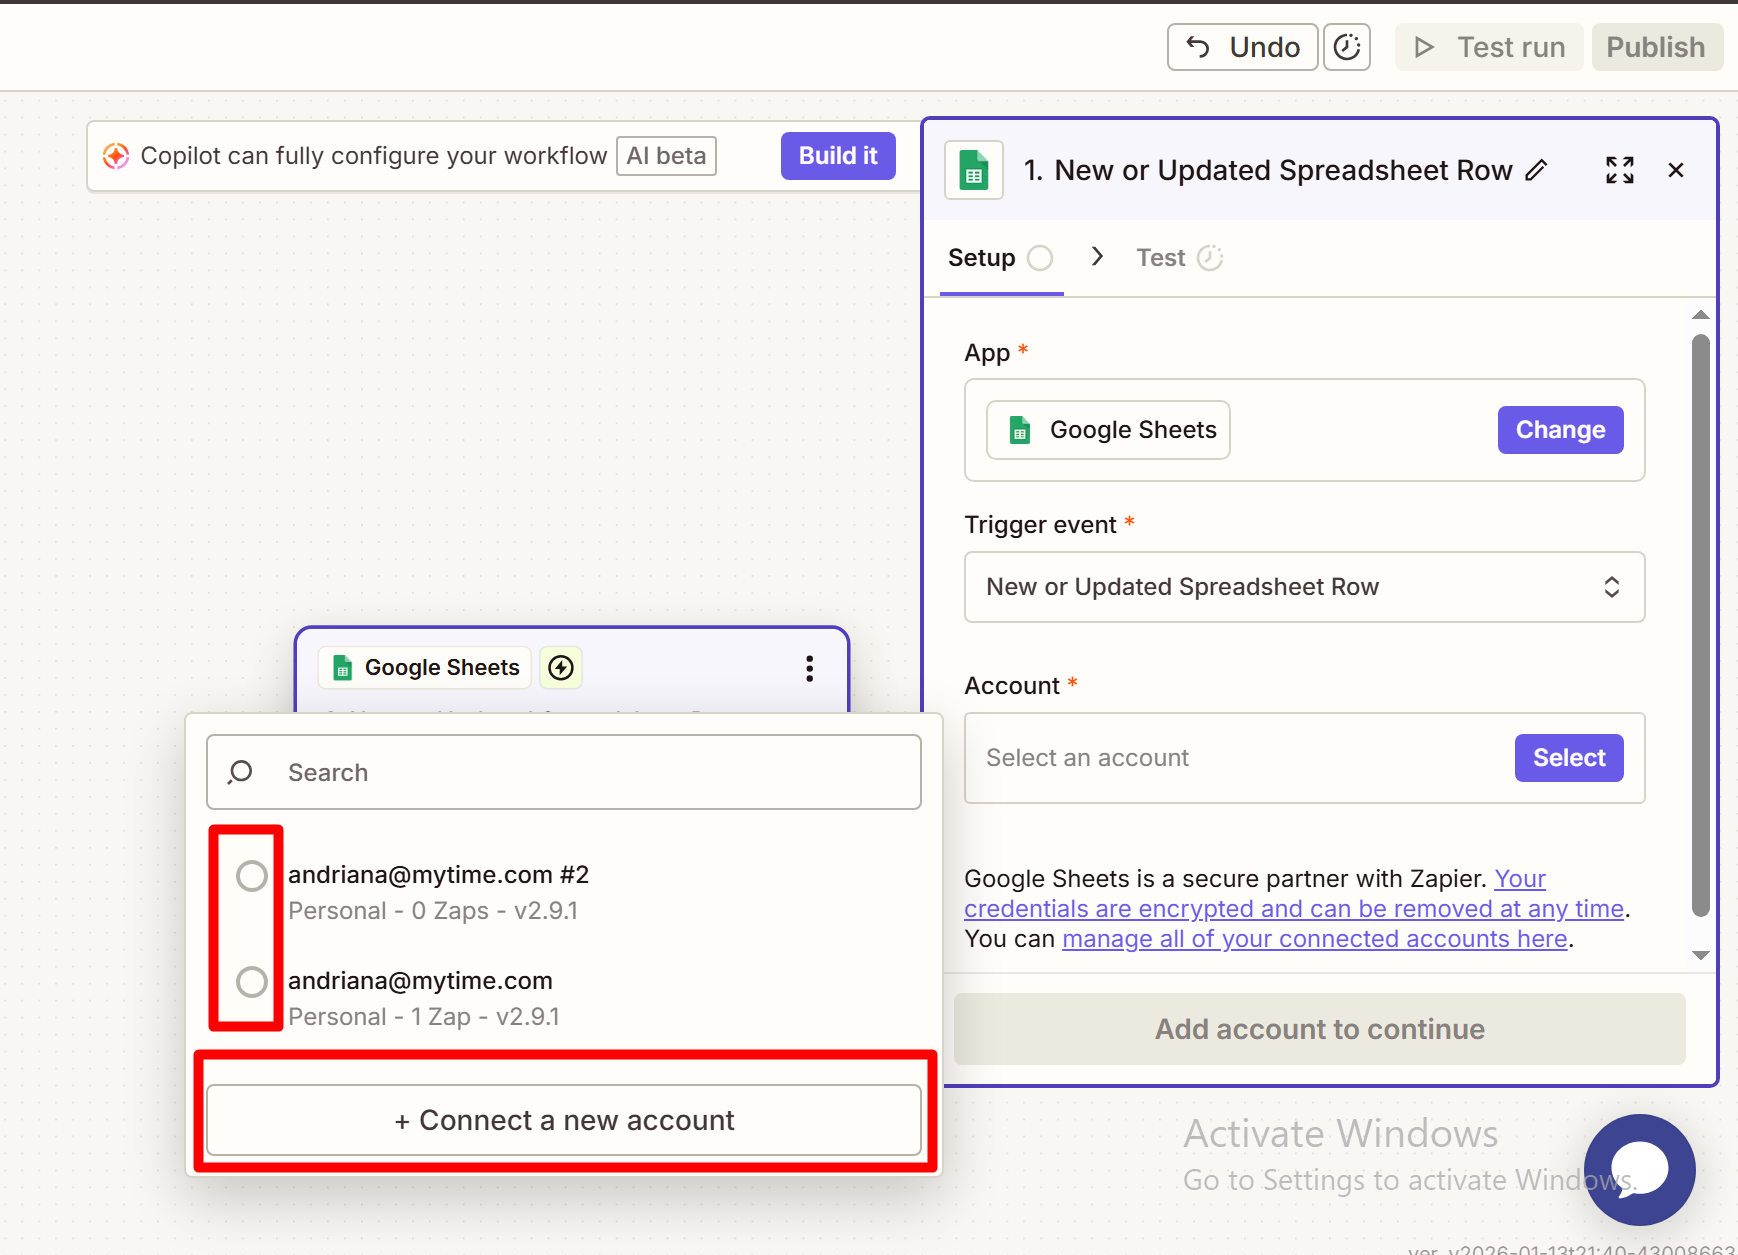
- If you have never connected a MyTime account, click 'Connect a new account' and a new page will open. Enter your MyTime login credentials then click the 'Yes, Continue to MyTime' button
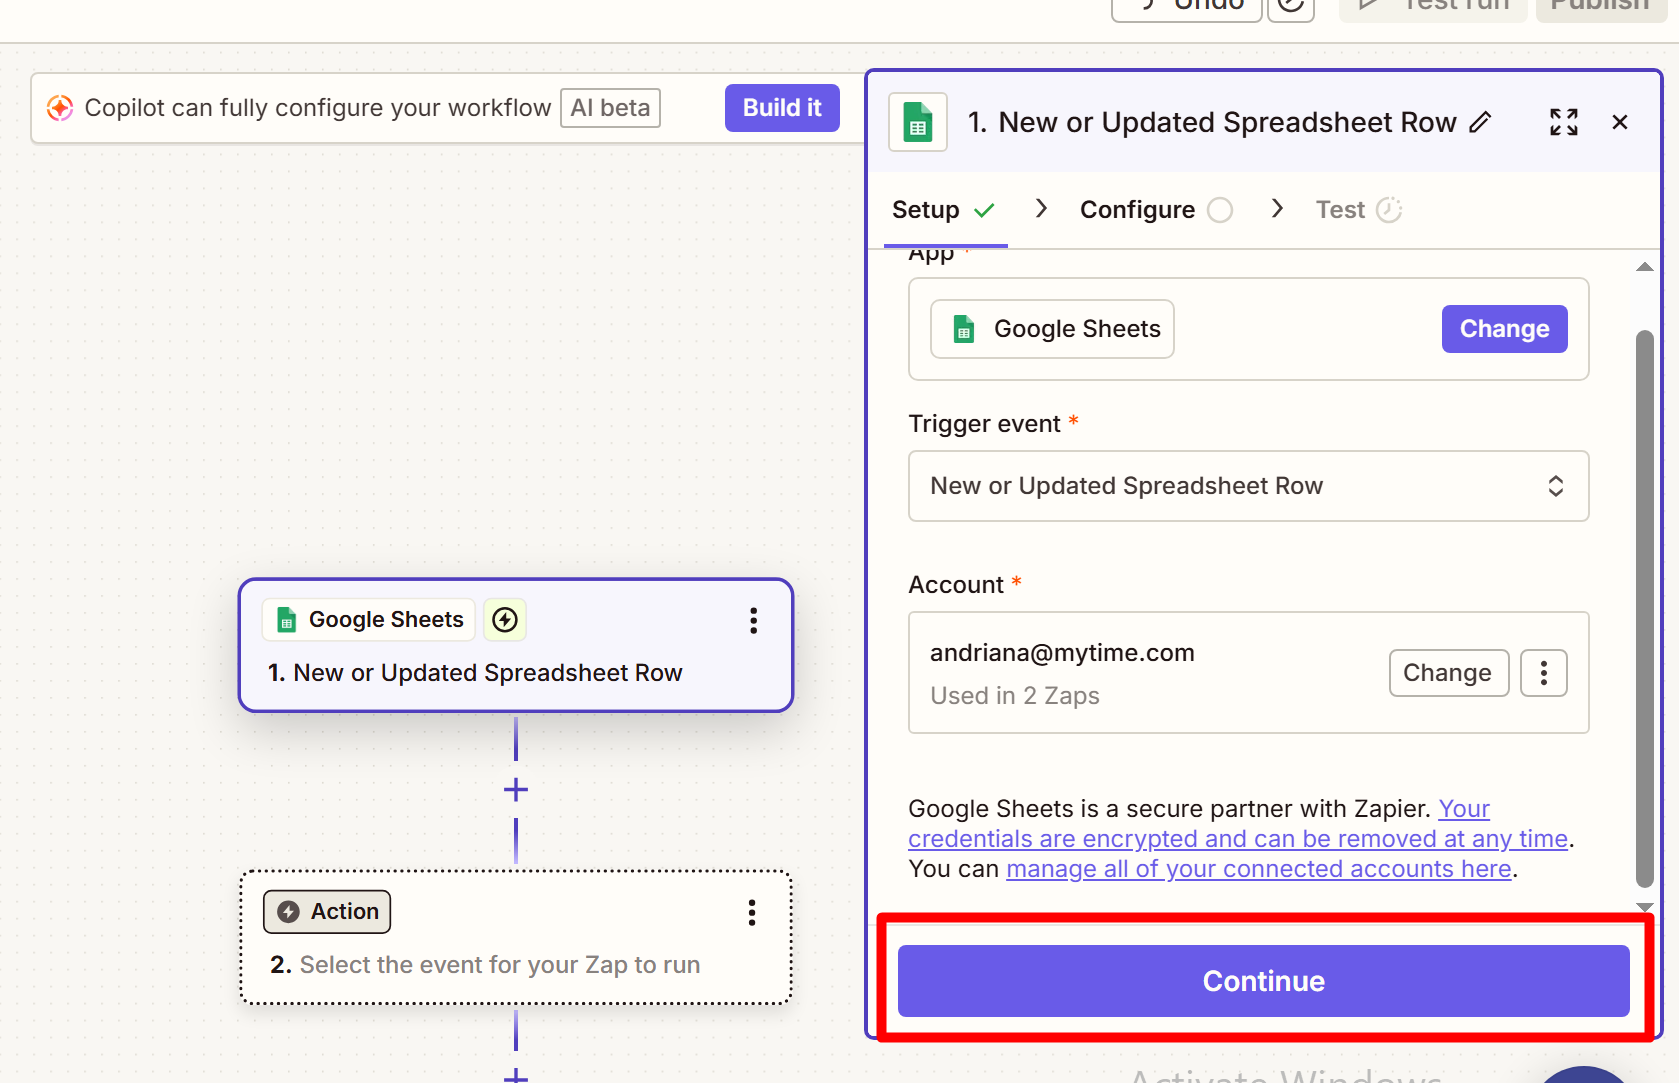
- Back in Zapier, click Continue
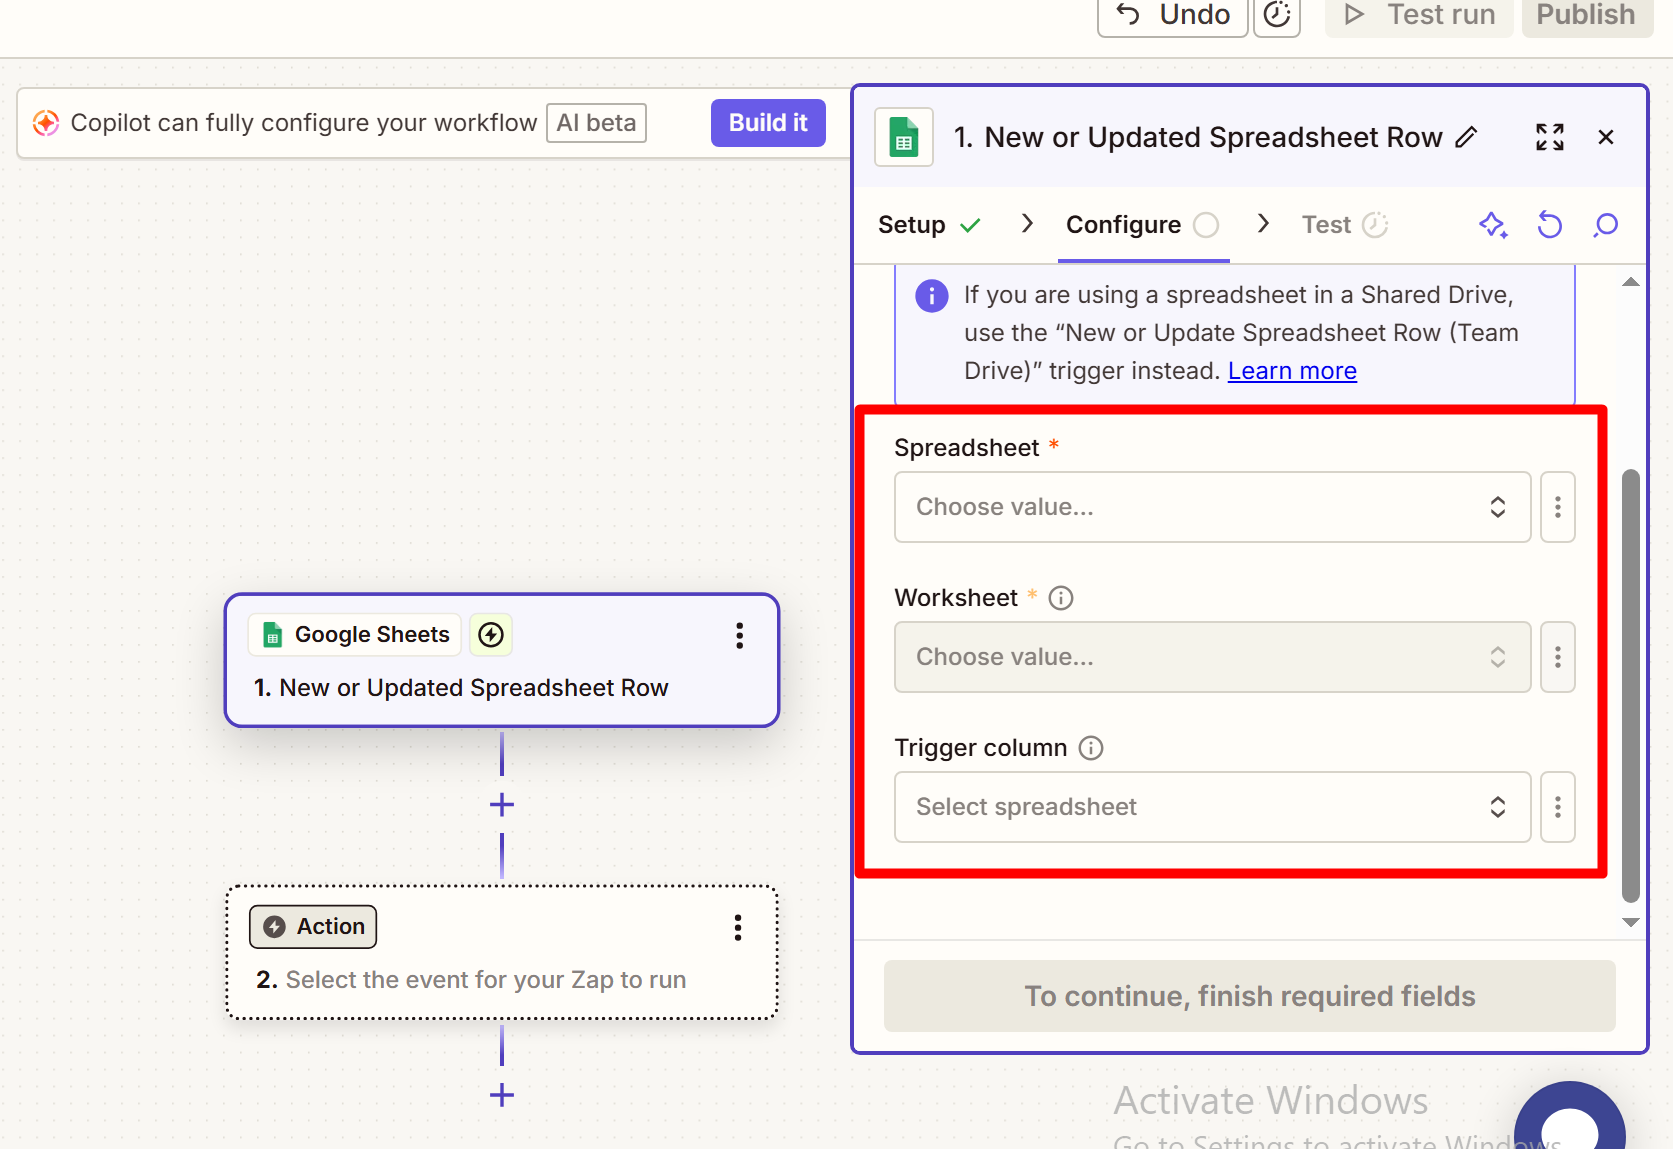
- Next, configure the trigger to match your Google Sheet:
- Spreadsheet: Select the Google sheet from your list of created Google Sheets
- Worksheet: Select the worksheet present on your Google Sheet
- Trigger Column: Select the column on the worksheet that should trigger the creation of the new family member/pet
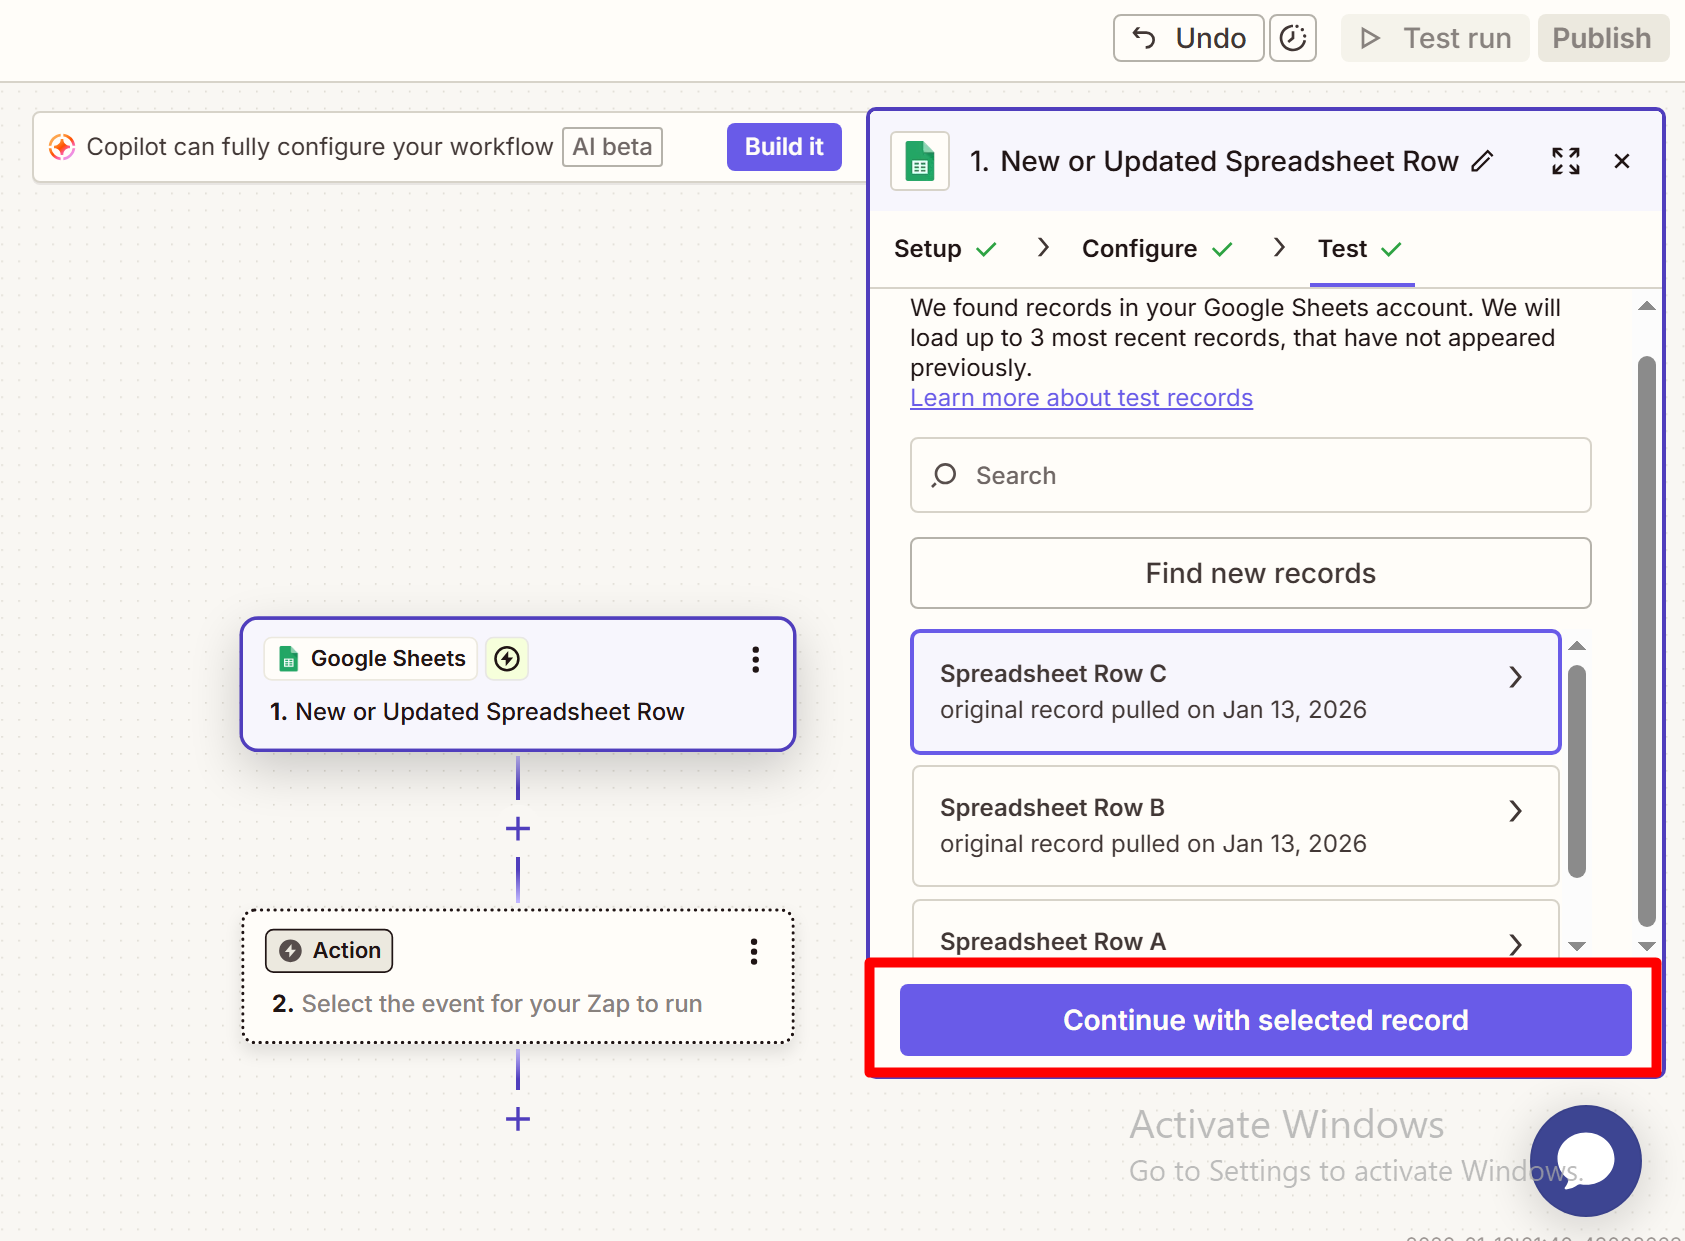
- Click 'Continue' then click Test Trigger.
- Zapier will pull sample data from your Google sheet. You can search for a specific client(s) you wish to use using the search bar
- Select a record and click 'Continue with selected record.'
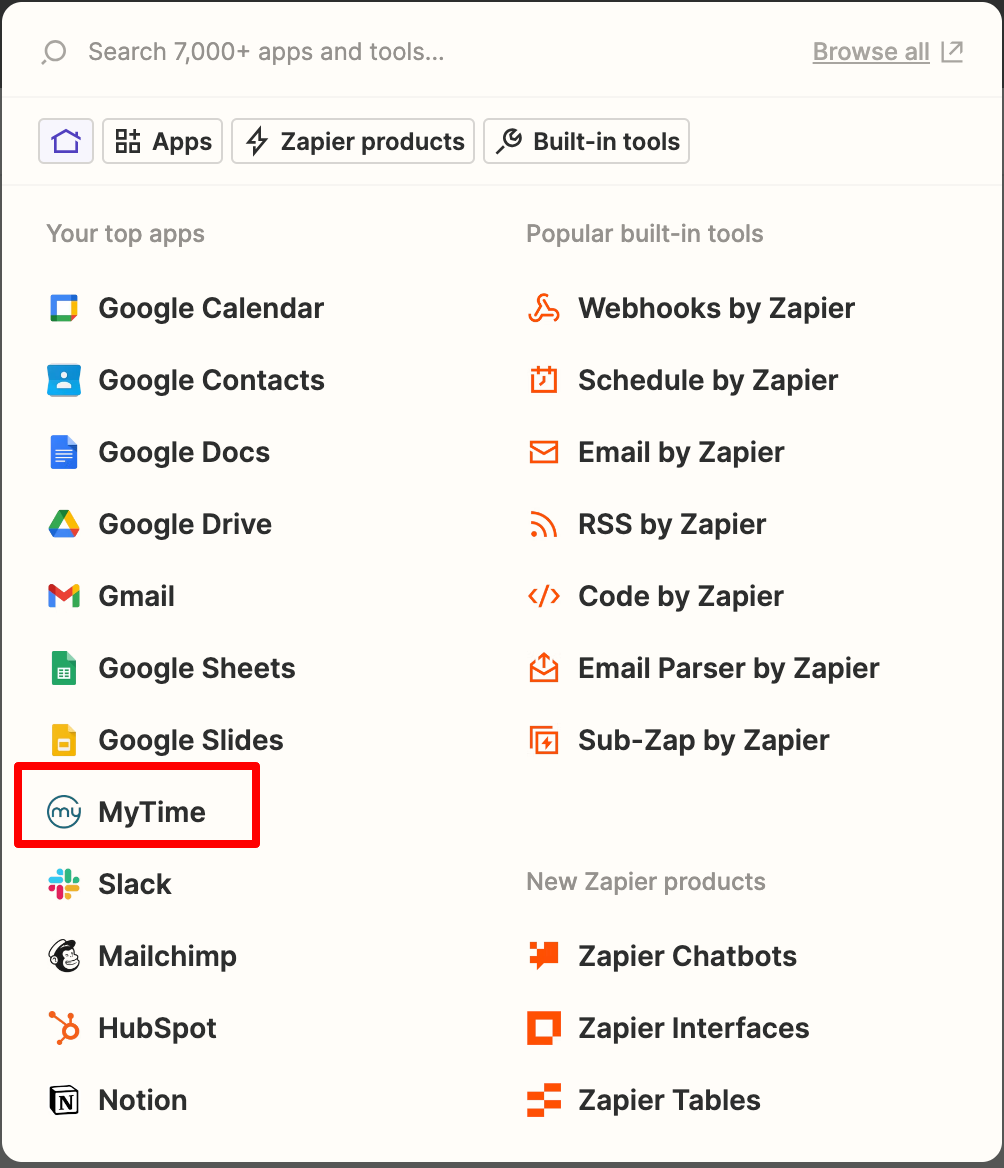
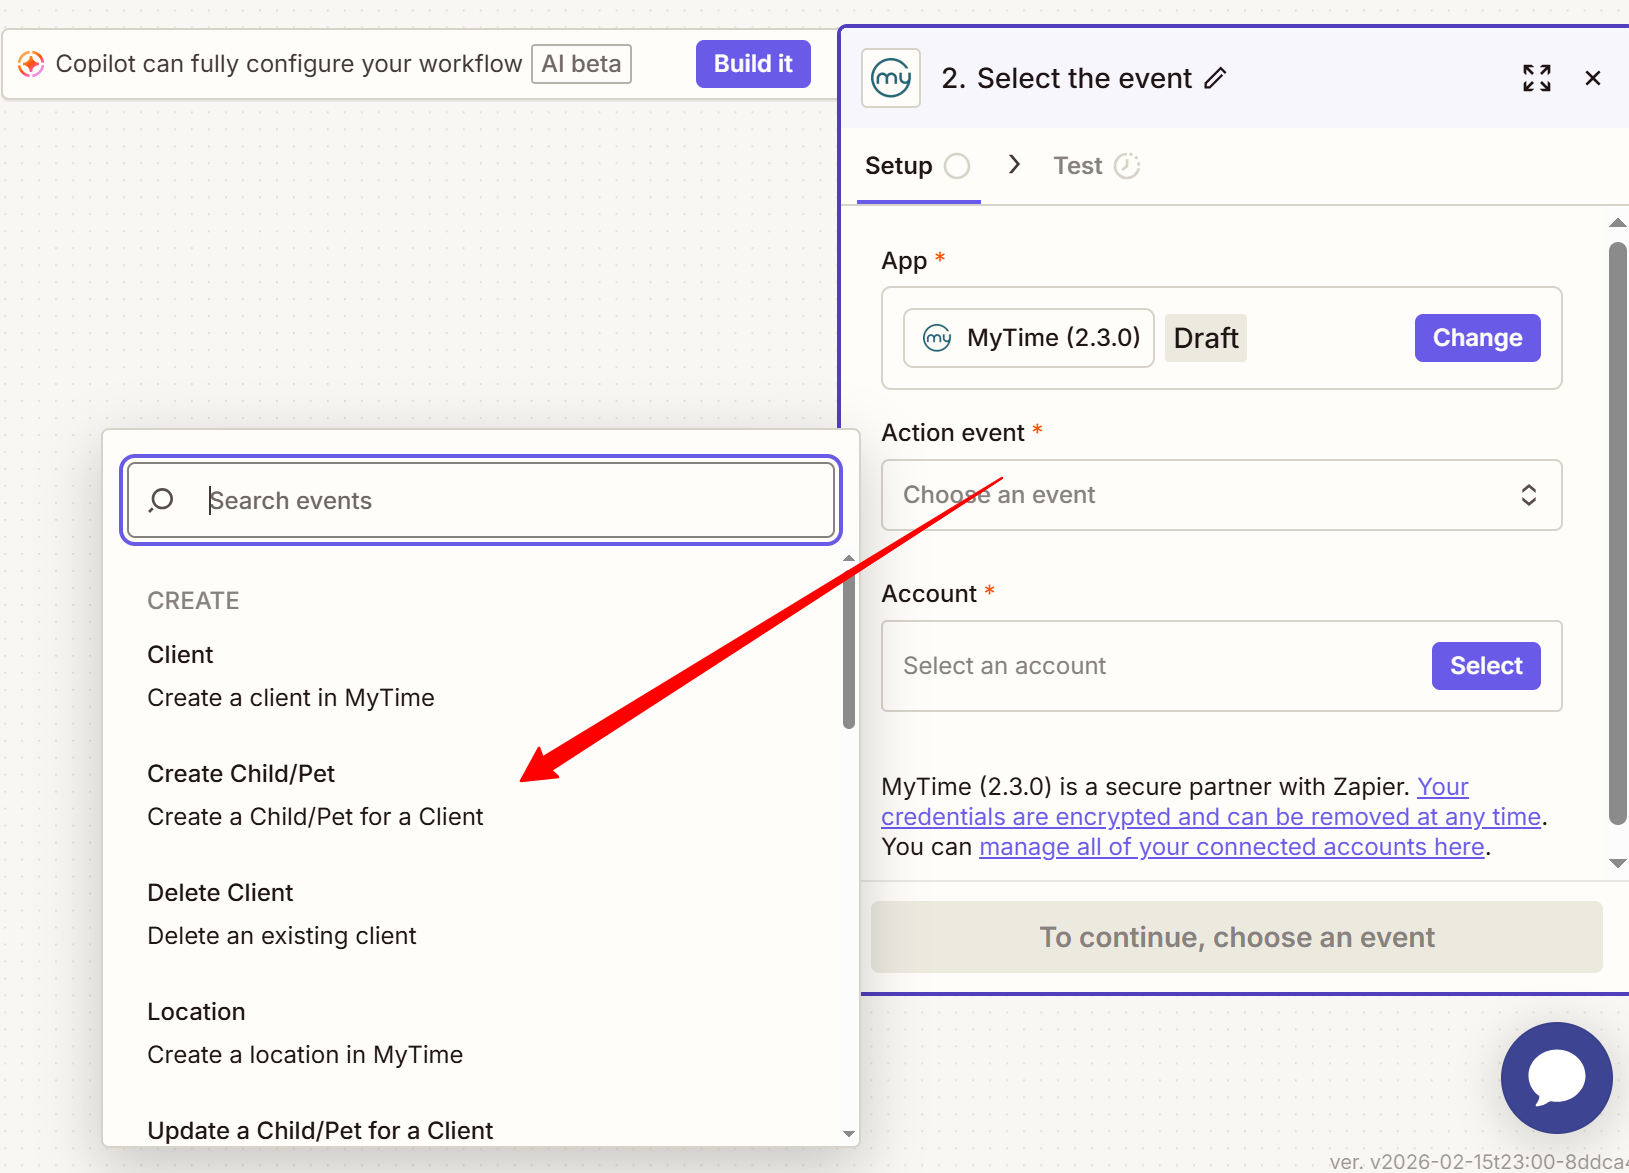
- Zapier will now prompt you to select an app for your action.
- Select the 'Client' action event
- Select your account
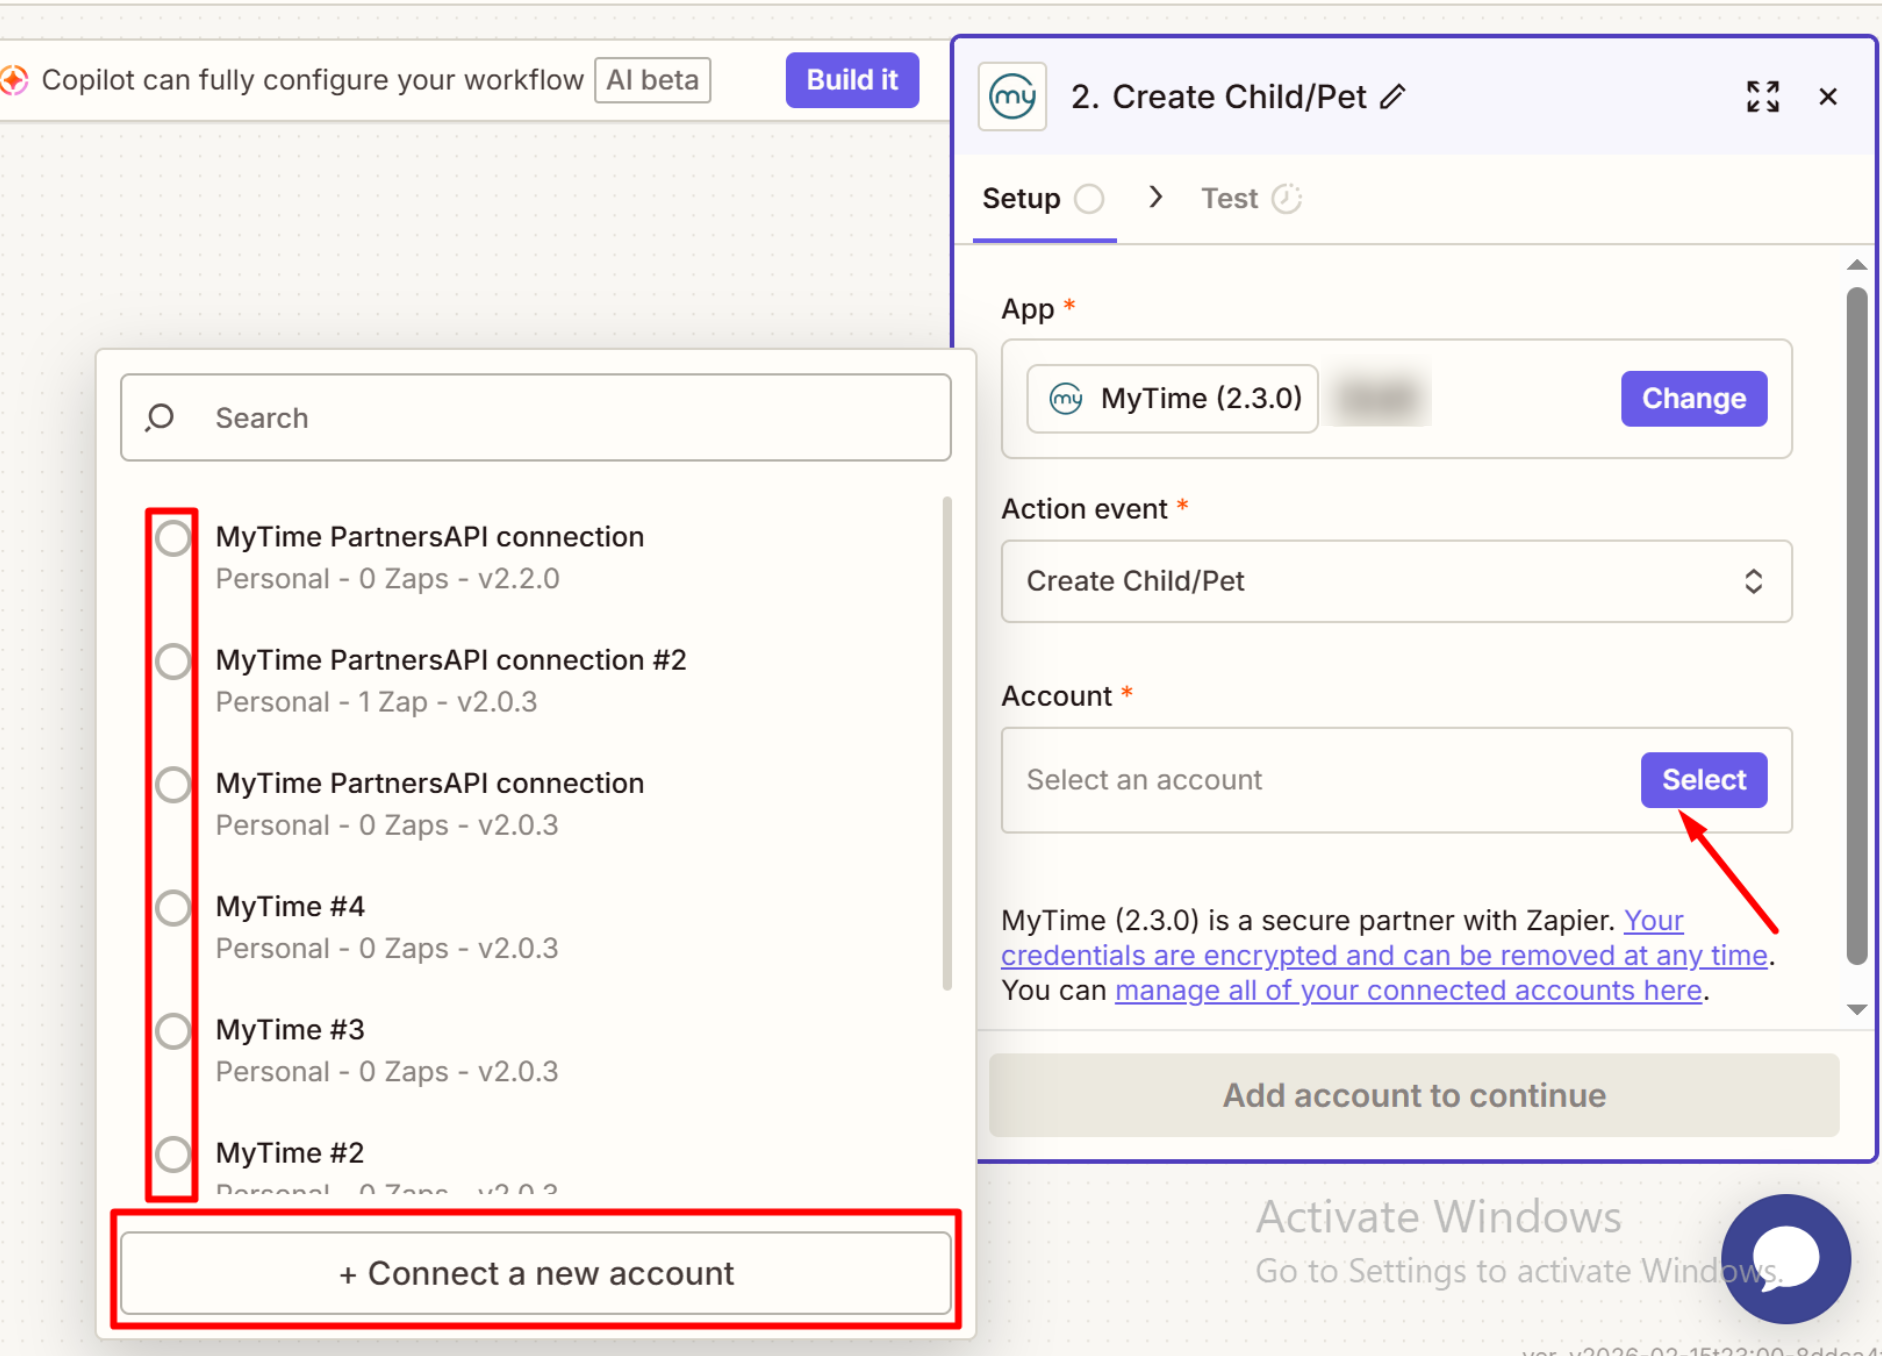
- If you have never connected a MyTime account, click 'Connect a new account,' and a new page will open. Enter your MyTime API partner key. Click the 'Yes, Continue to MyTime' button to connect your MyTime account.
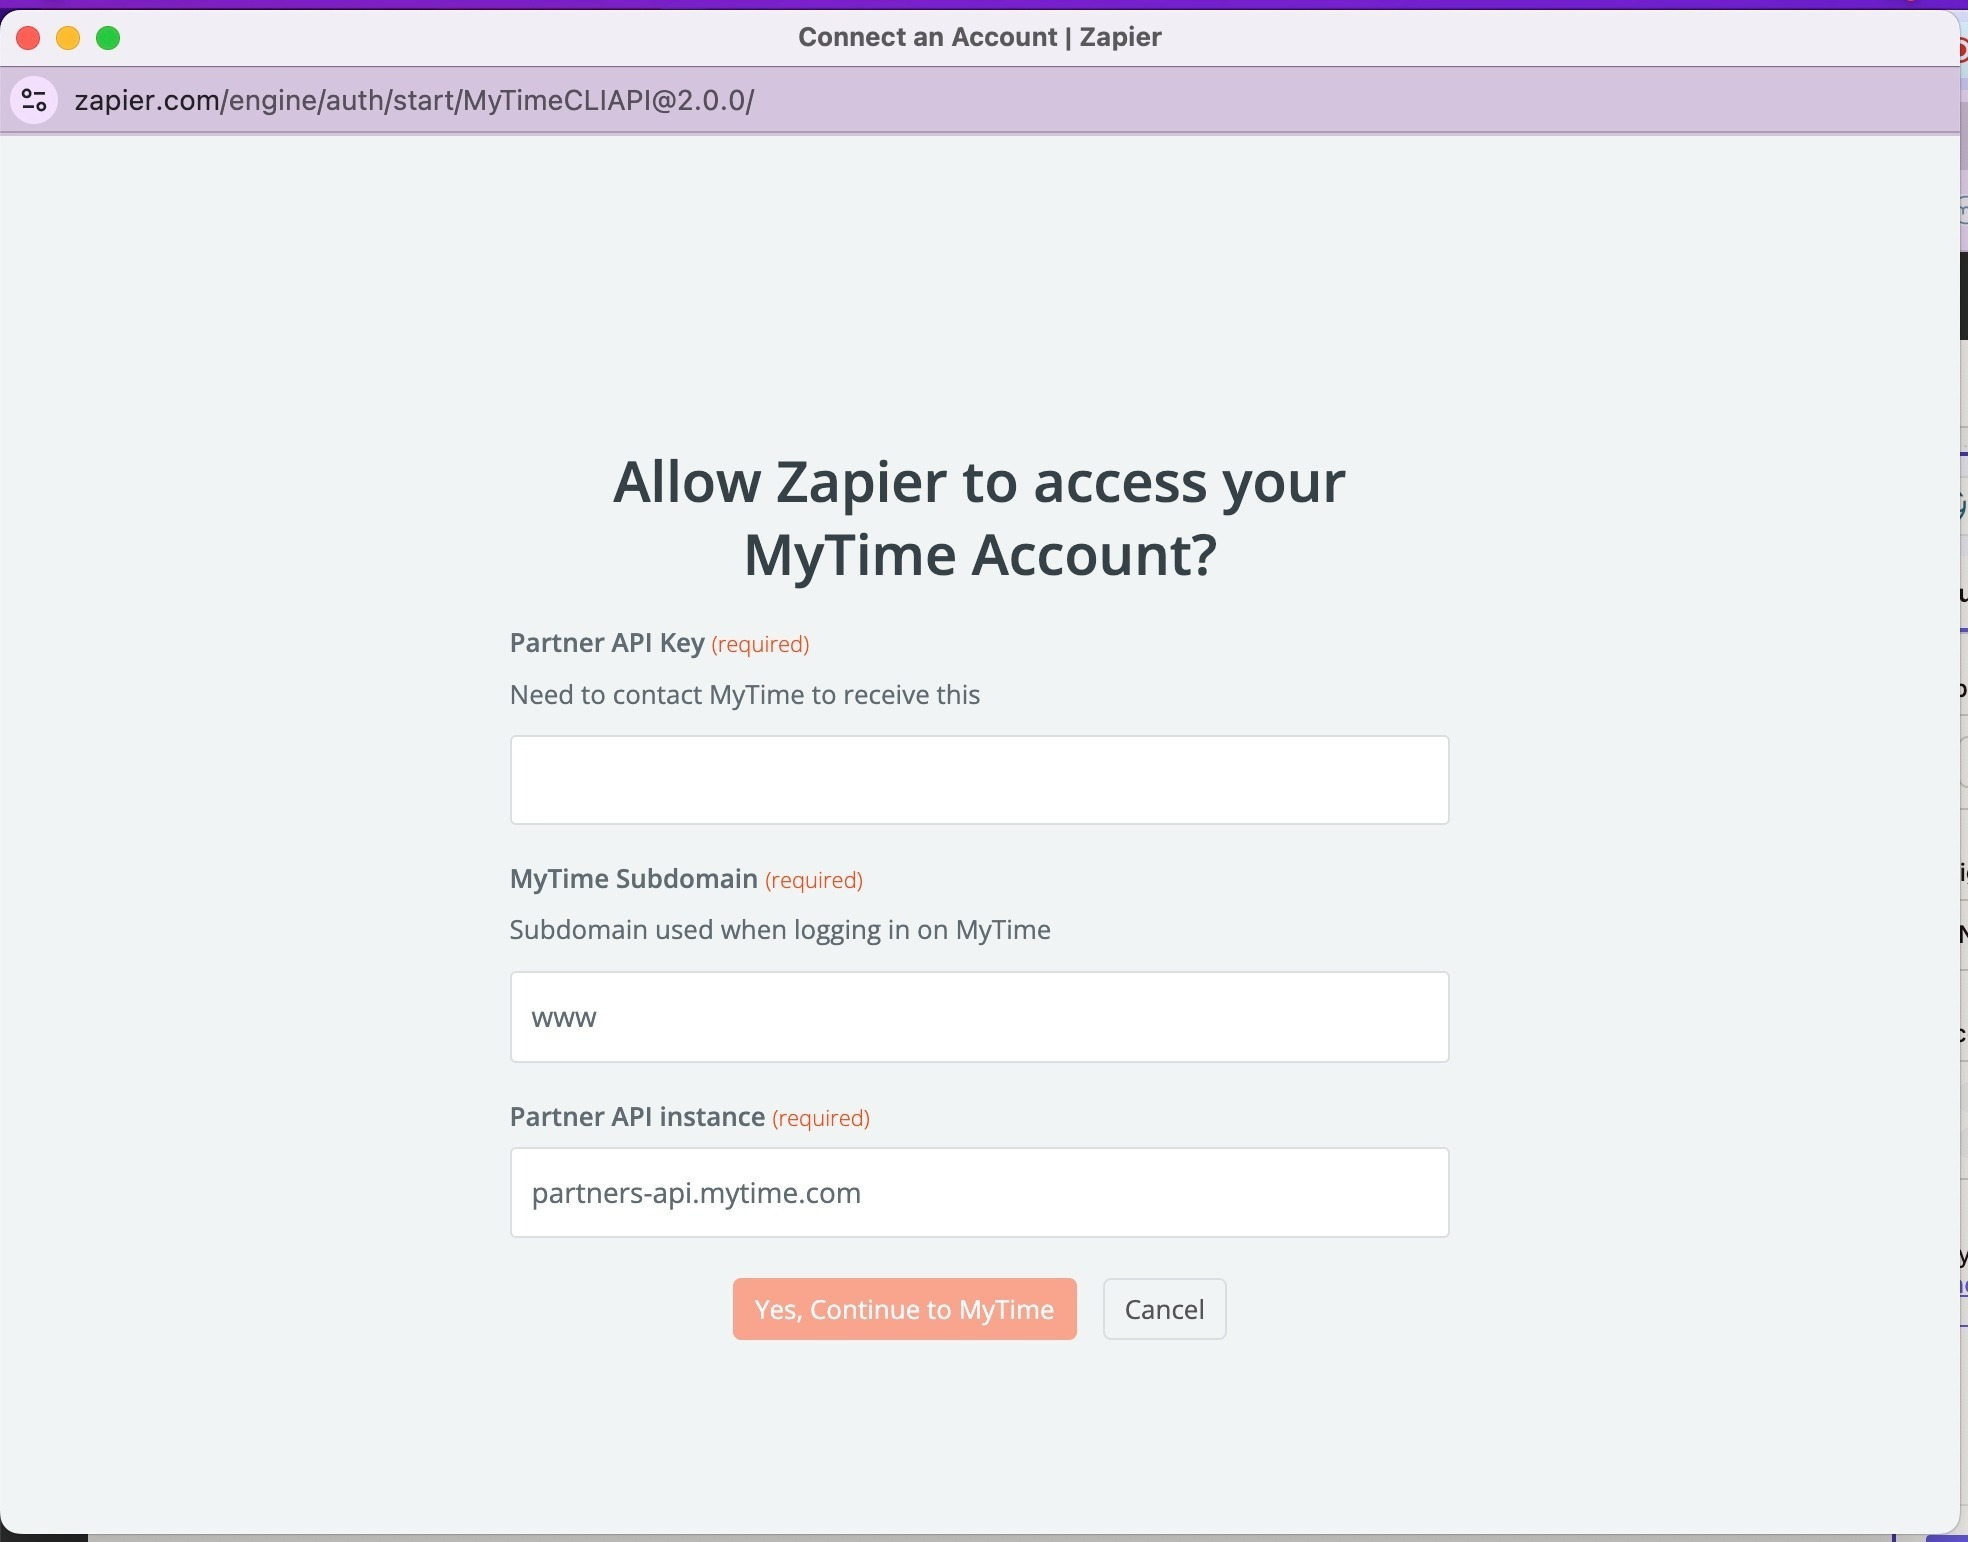
- If you have never connected a MyTime account, click 'Connect a new account,' and a new page will open. Enter your MyTime API partner key. Click the 'Yes, Continue to MyTime' button to connect your MyTime account.
- Back in Zapier, click 'Continue'
- Enter the data tags you want Zapier to populate in each of your family member/pet profiles:

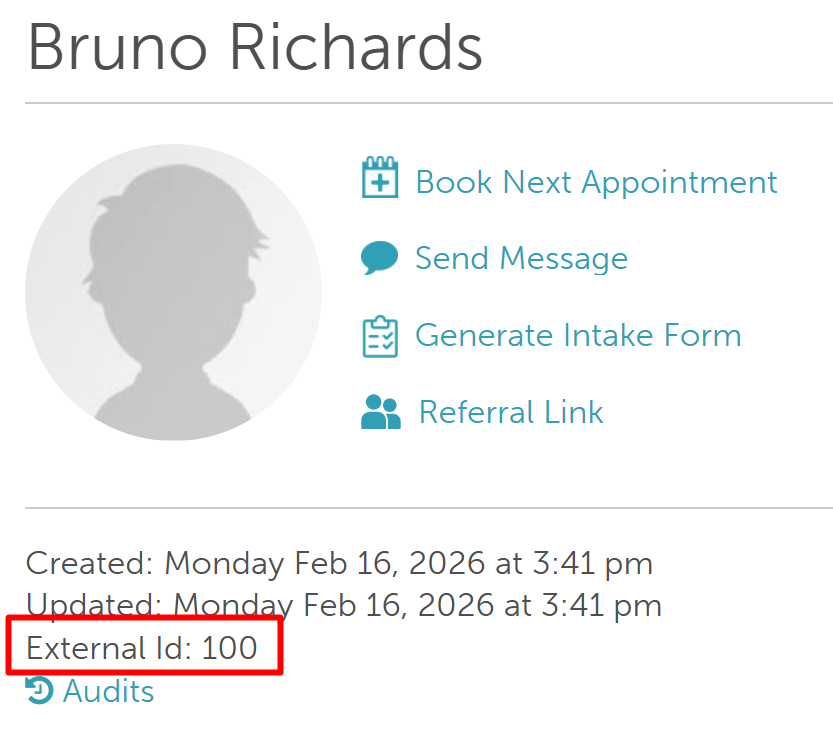
- Client Partner ID: This is the external ID of the client configured when importing clients in MyTime.
- Client MyTime ID: This is the internal ID of the client found in the URL of the client profile.

- Click the '+' sign next to the field to expose the data options to the left. Select the corresponding data
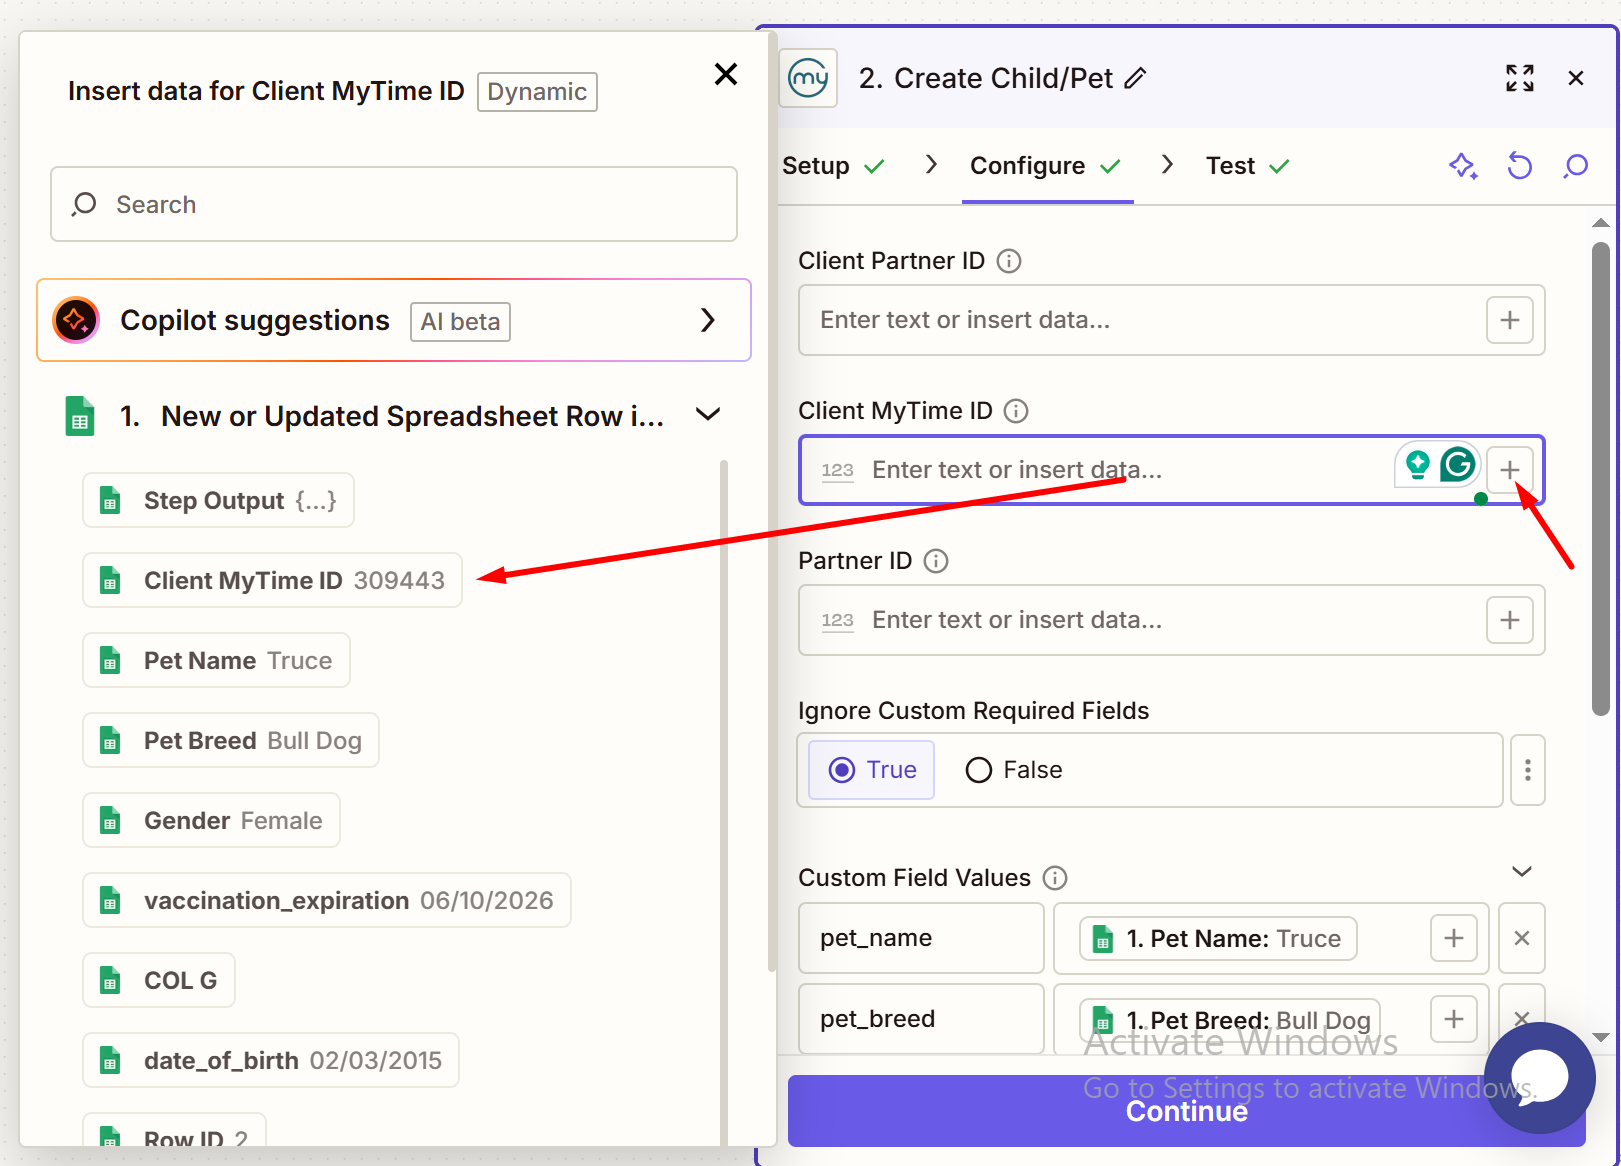
- Click the '+' sign next to the field to expose the data options to the left. Select the corresponding data
- Ignore Custom Required Fields: This should be kept at 'True'
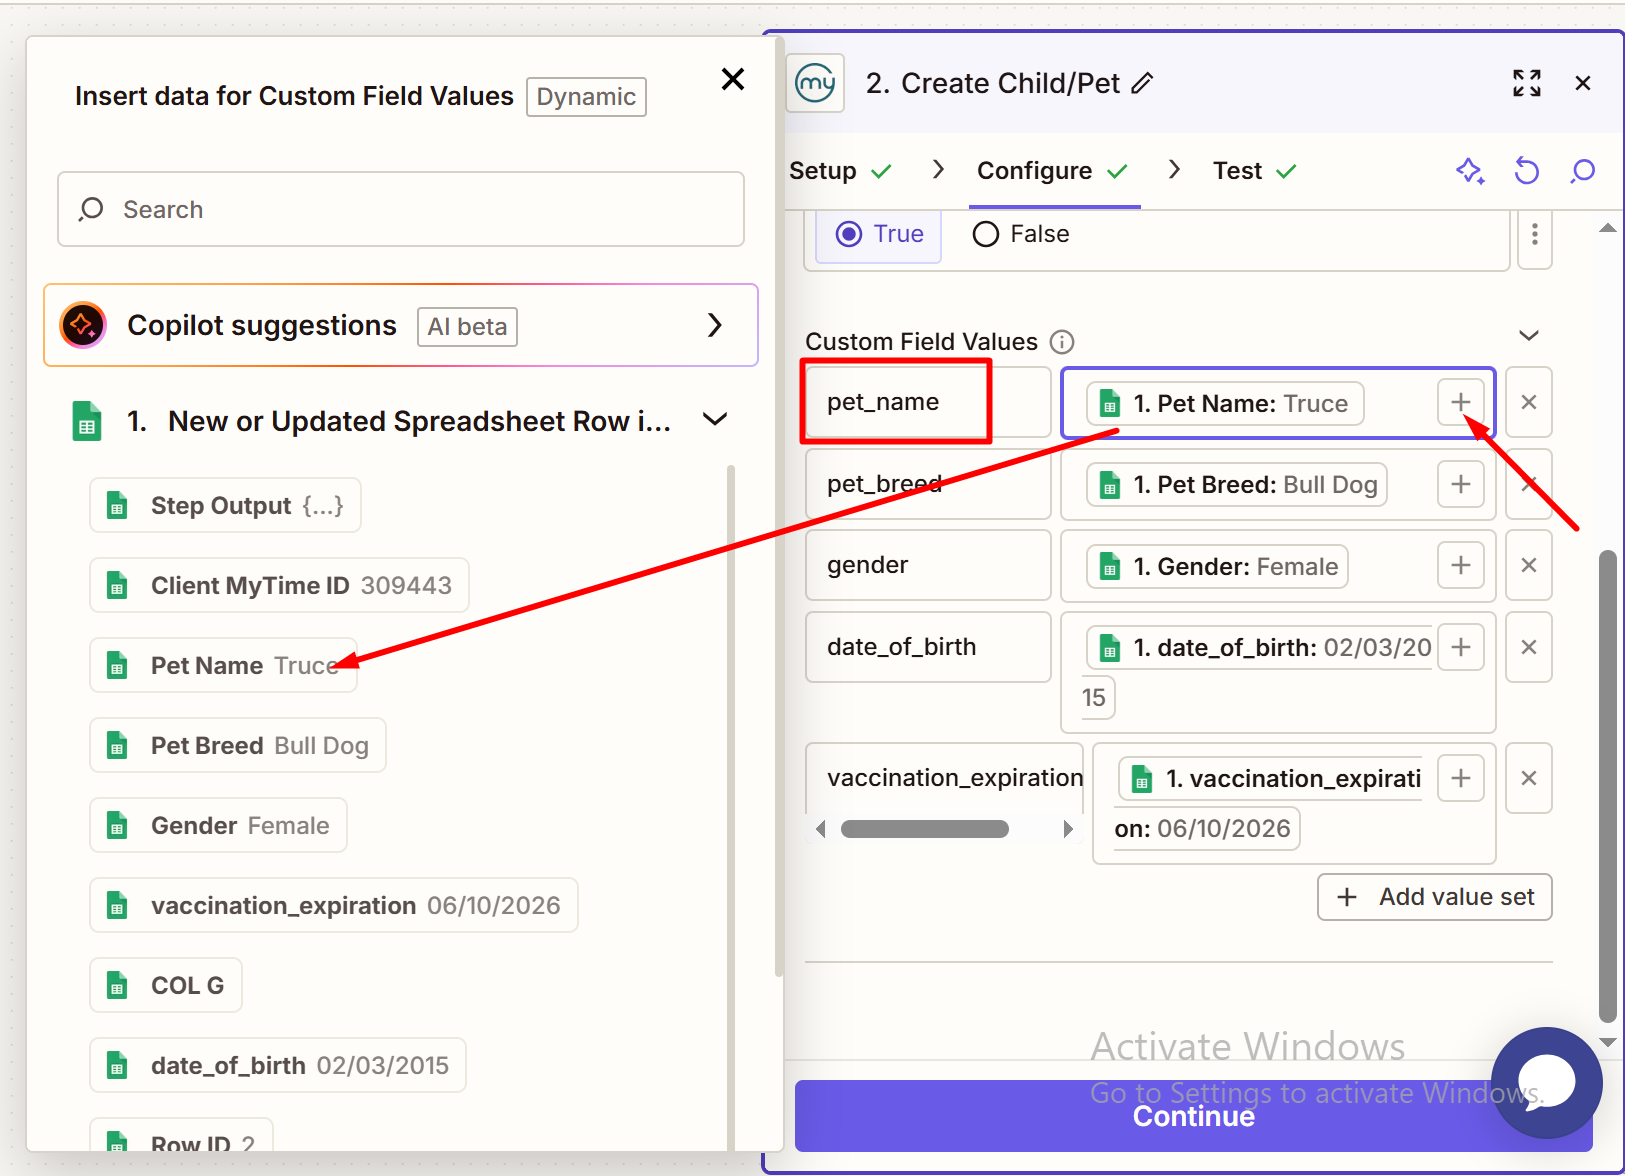
- Custom Field Value: Complete the additional fields by
- Enter the UUID for the custom fields. For details on how to extract these fields using Zapier, learn more here
- Click the '+' sign next to the field to expose the data options to the left. Select the corresponding data to match the field
- Client Partner ID: This is the external ID of the client configured when importing clients in MyTime.
- Click 'Continue.'
- Zapier will display the data in detail. Click Test Step, or skip the test if preferred.
- Click 'Publish' to activate the Zap
Once the Zap is active, data will automatically transfer between Google Sheets and MyTime without the need to maintain servers or write code.
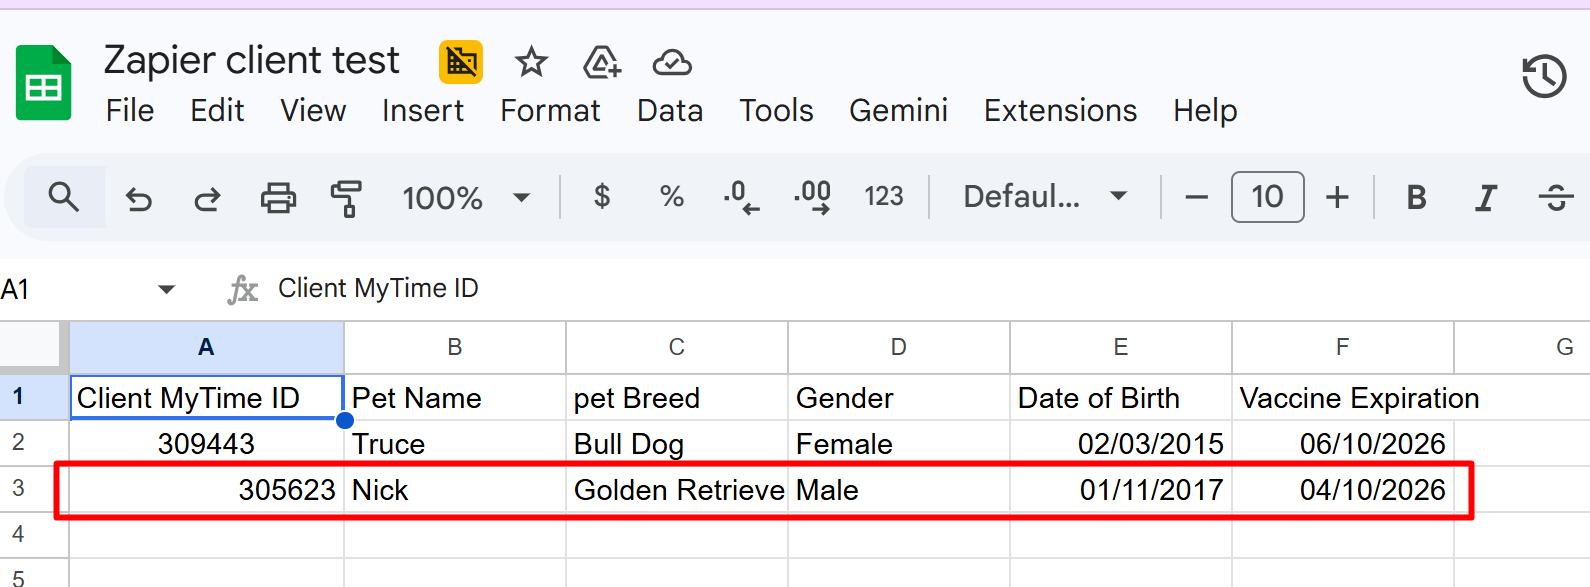
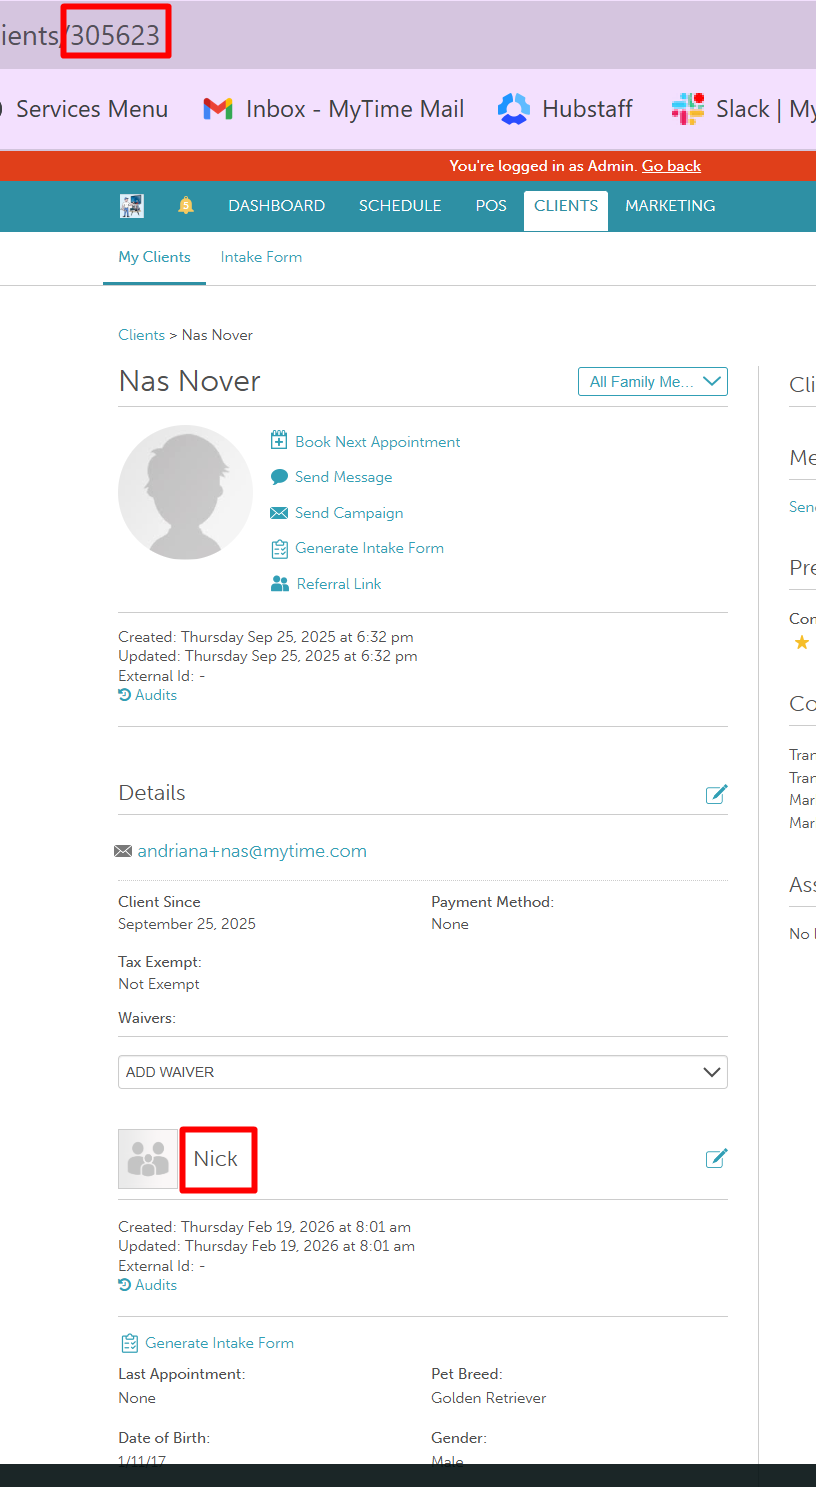
In the example above, newly added rows with client data on the Google Sheet linked to the Zap will create a new family member/pet profile for the corresponding client in MyTime automatically.
Google Sheet
MyTime Family Member/Pet Profile
For more information, contact us at support@mytime.com or (385) 233-6964.
Related Articles:
Was this article helpful?
That’s Great!
Thank you for your feedback
Sorry! We couldn't be helpful
Thank you for your feedback
Feedback sent
We appreciate your effort and will try to fix the article