In this article, we will walk through the steps your clients will take to book service groups on the guest app. For details on how to configure service groups, learn more here.
Things to know:
- Online booking must be enabled
- A staff member must be assigned to a service and work hours must be set
- A client must either sign in with their current MyTime account, Facebook, or Apple login, or create a new one.
- When a client starts the booking flow from the home screen by tapping “Book Appointment,” our app automatically pre-selects a default location for clients to make booking as fast as possible. Clients can still easily change the selected location at any time before completing their booking.
- For Returning Clients: The app automatically pre-selects the location from their most recent past completed appointment.
- If a Past Appointment Was Canceled: The app will skip it and look further back to pre-select the location from their last non-canceled past appointment.
- For New Clients (No Past History): If a client has never visited a location, or if all of their past appointments were canceled, no location will be pre-selected. They will be prompted to choose a location from the full list.
- If a client has no past appointment history but has upcoming appointments booked, the app will pre-select the location of the last booked appointment.
- Example:
- July 13: A client books an appointment at Location A for July 16.
- July 14: They open the app to book a second appointment for August 2. Location A will be pre-selected.
- If they manually switch that second appointment to Location B during booking, then Location B will become the new pre-selected default the next time they open the booking flow.
- When a client books a service group online, and some or all of the services are covered by a membership or package, the system will display the following labels:
- "In Package" or "In Membership" – All services in the group are fully covered.
- "Partially in Package" or "Partially in Membership"—Only some of the services are covered. Hovering over the label will reveal which specific services are included in the package or membership.
- These labels appear throughout the booking process to help clients clearly understand what’s included.
- By default, when using the "Book Again" button, appointments are prefilled with information from previous bookings. However, the option to disable this automatic prefilling is controlled by a hidden setting that can only be configured by the MyTime team. To enable this setting, please contact support at support@mytime.com.
- During checkout, if a client is not signed into their account, they will be prompted to log in. If they do not have an account, they can click the "Sign Up" link to create one.
Once service groups and promotions are configured, clients can book a service group and automatically receive the discount through the guest app. To do this, they can:
1. Download the guest app from either the Google Play Store (for Android users) or the Apple Store (for iOS users)
2. Upon downloading, navigate to the home screen and tap on the account icon located in the top right corner, tap sign in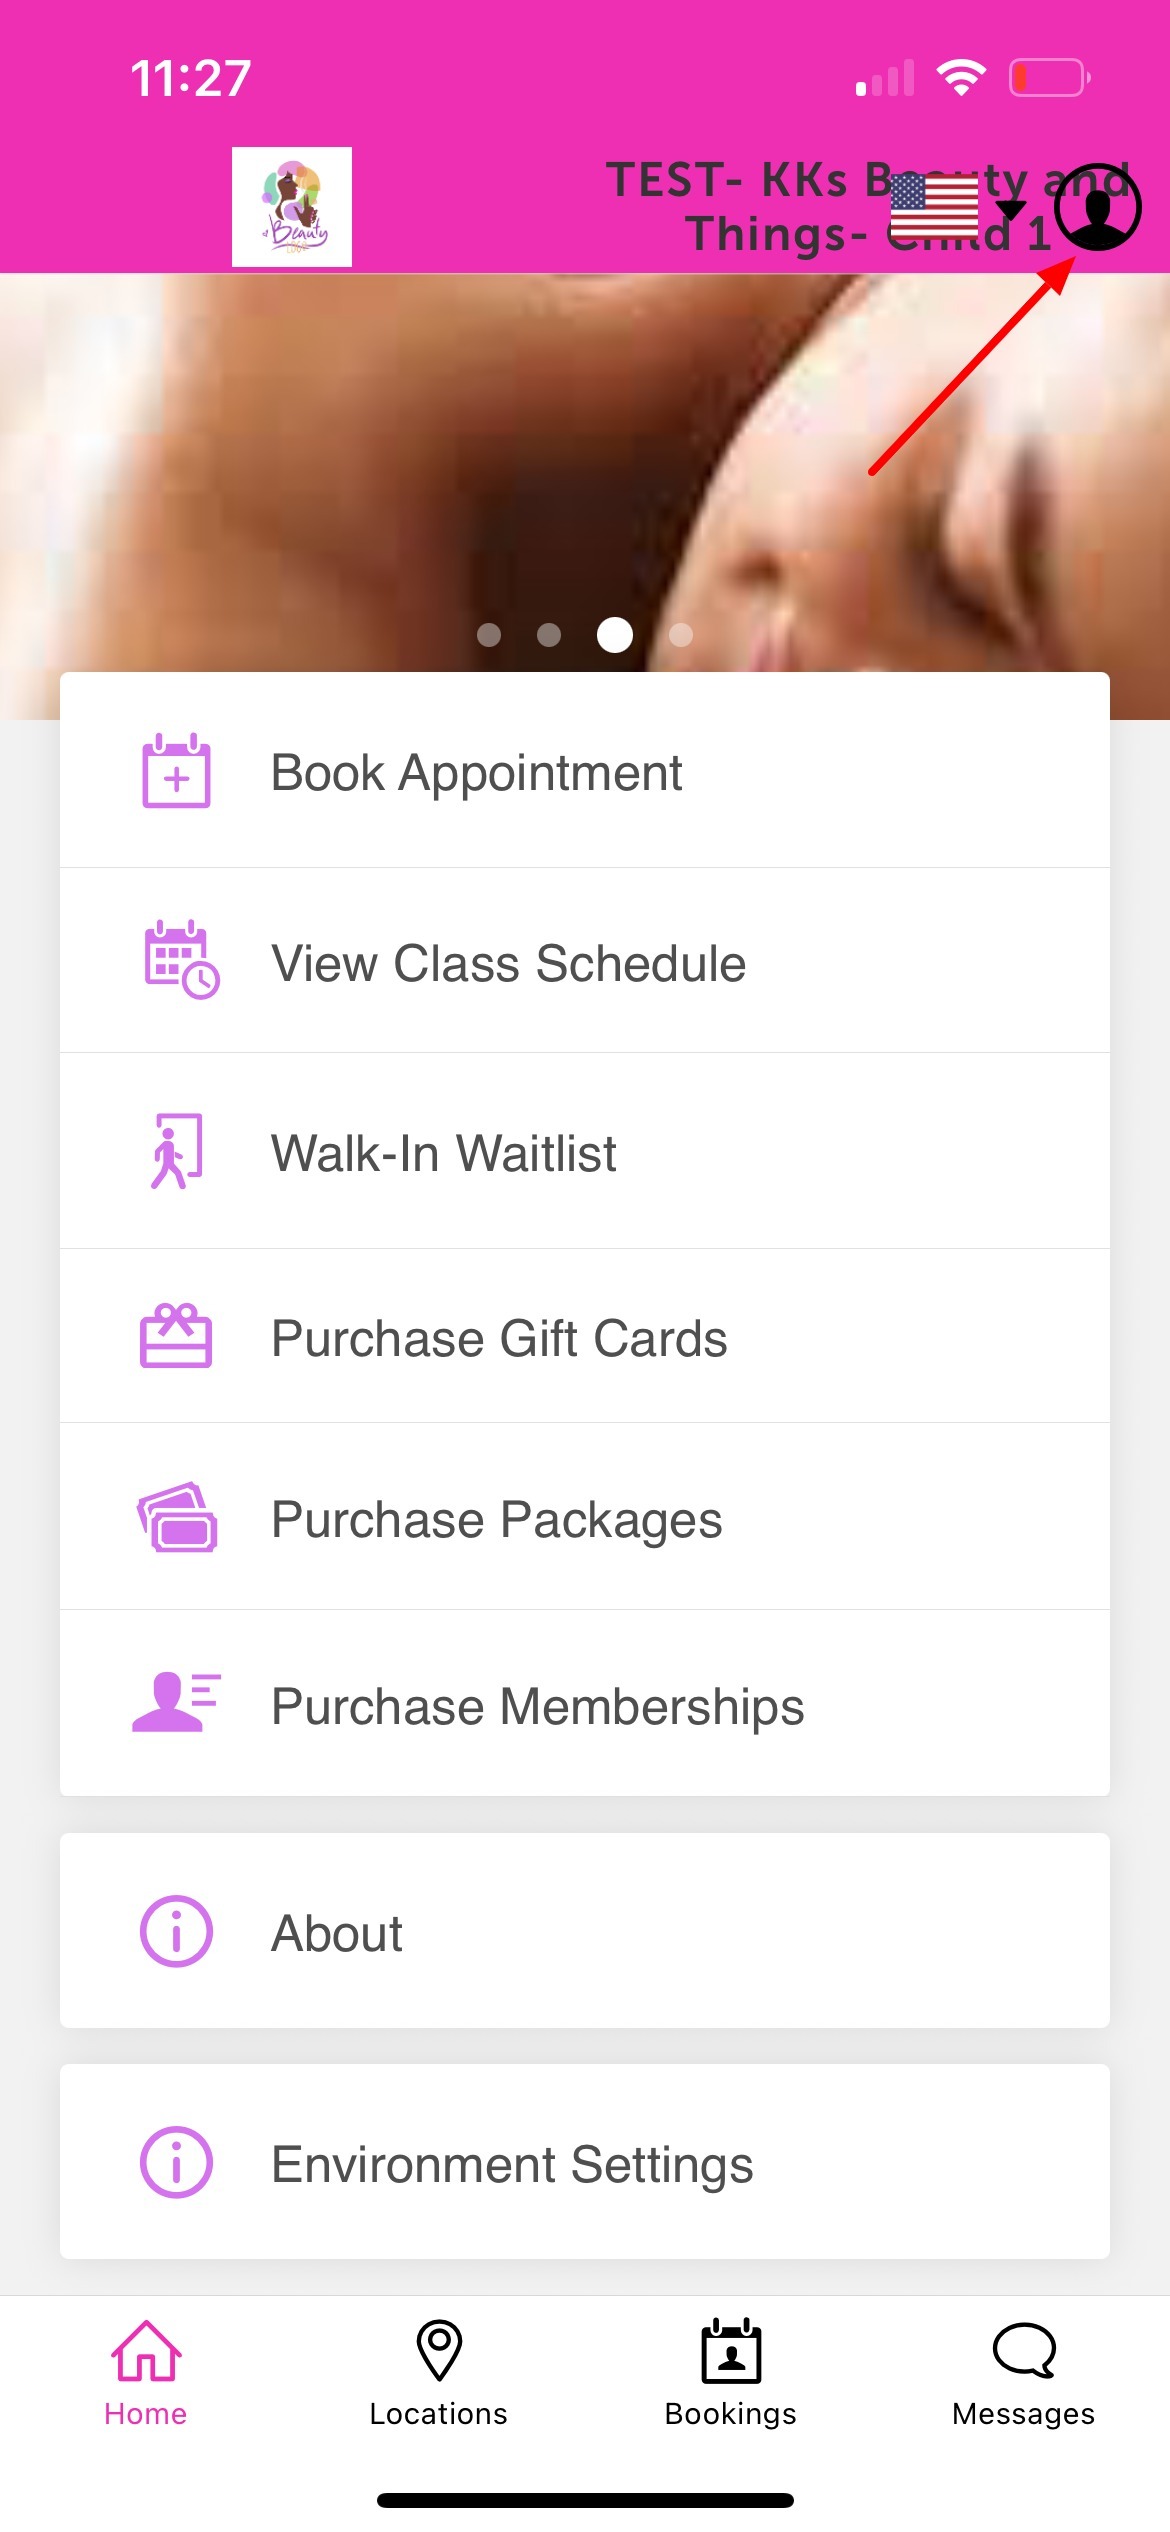
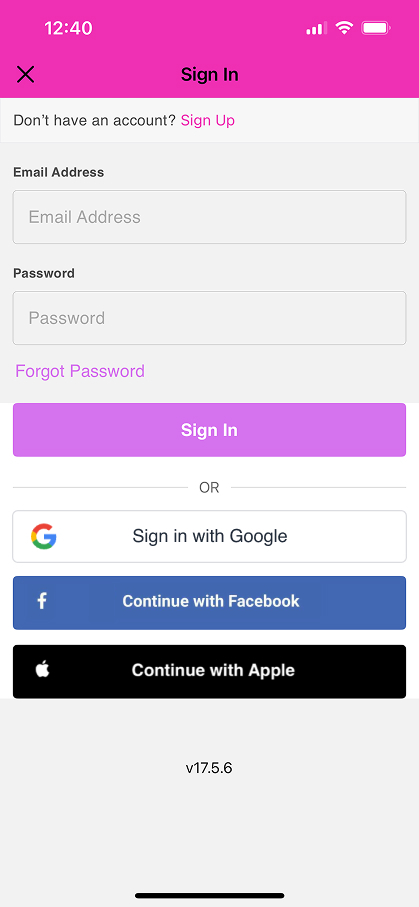
3. Choose their login method:
- Standard: Enter their registered email address and password, then click 'Sign In'.
- Social Login: Select 'Continue with Google,' 'Continue with Apple,' or 'Continue with Facebook' to use their existing social media credentials.
4. Tap 'Book Appointment' 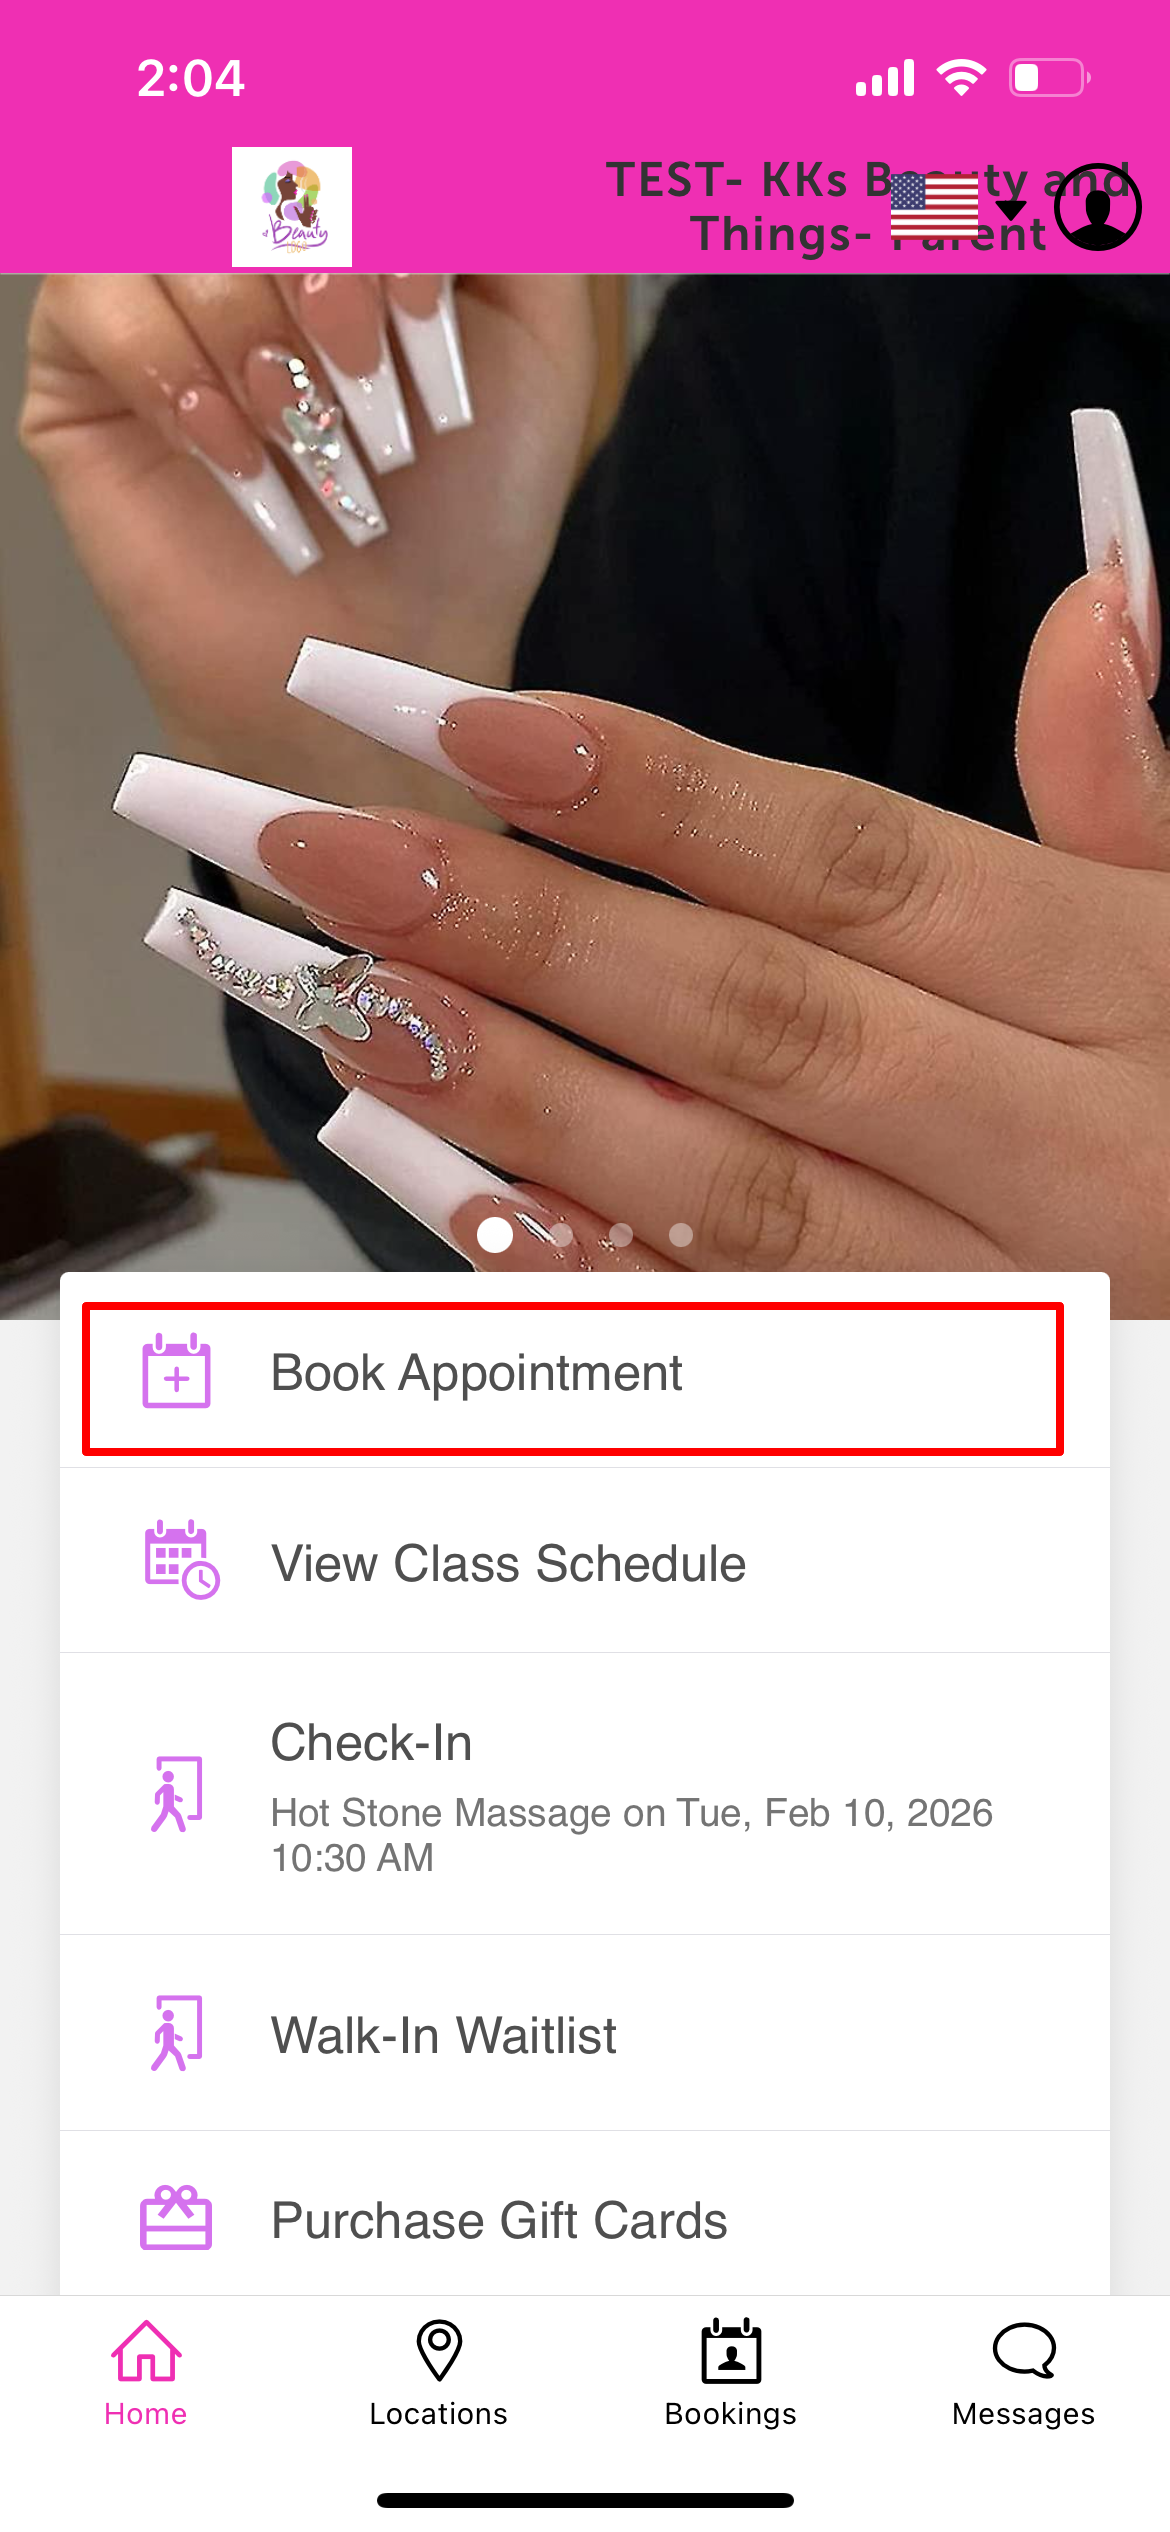
5. Select the desired location 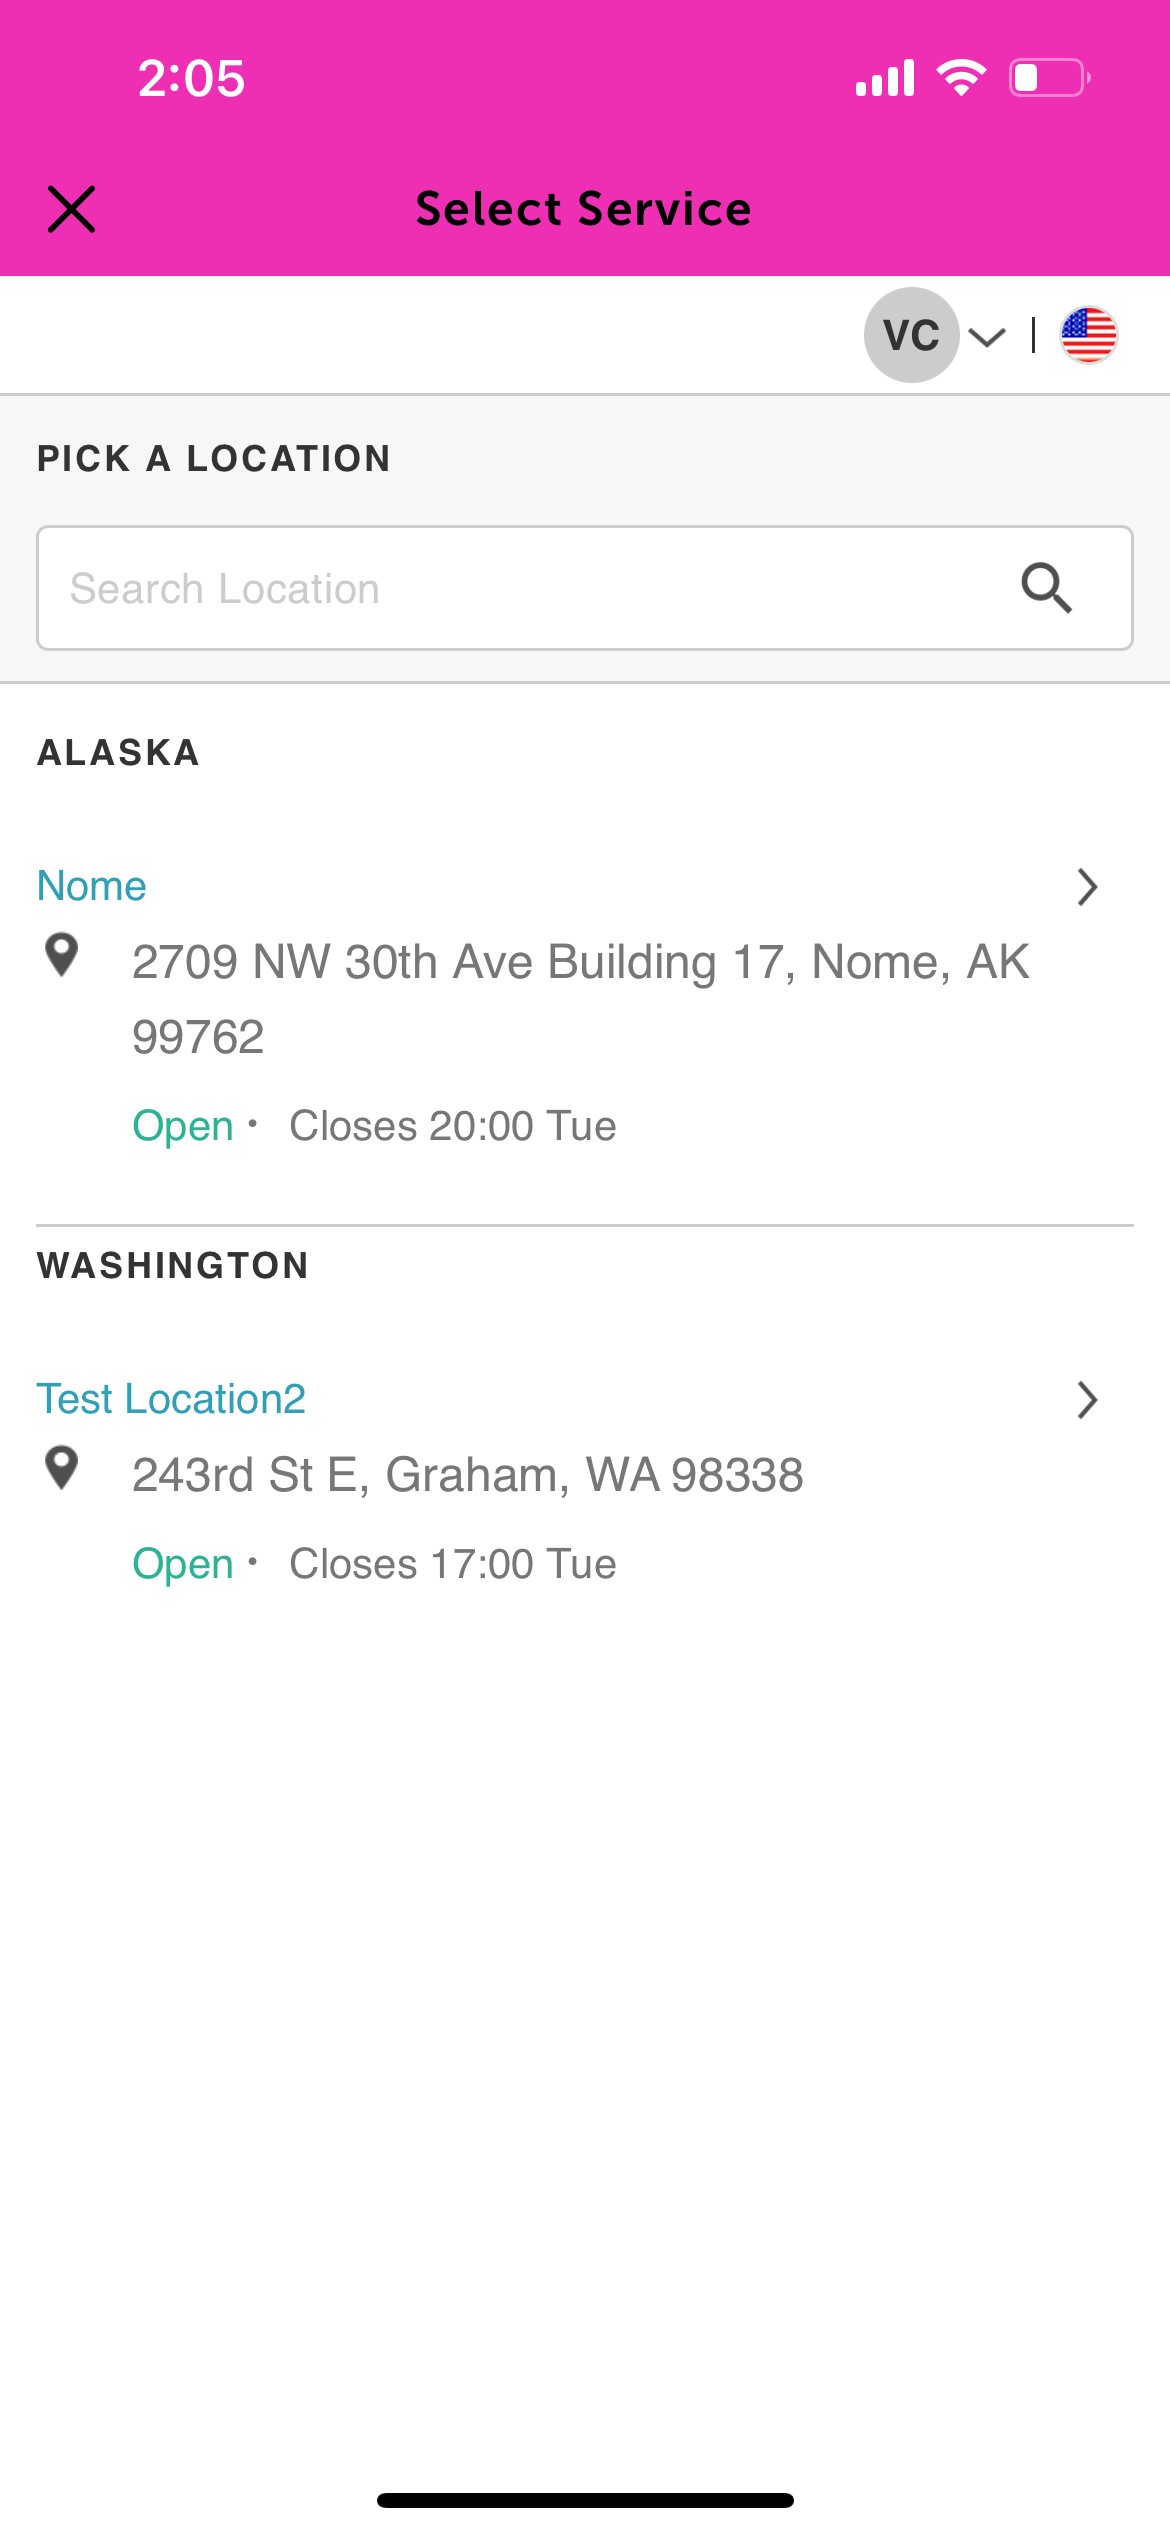
6. Find the service group and tap 'Book' next to the desired service 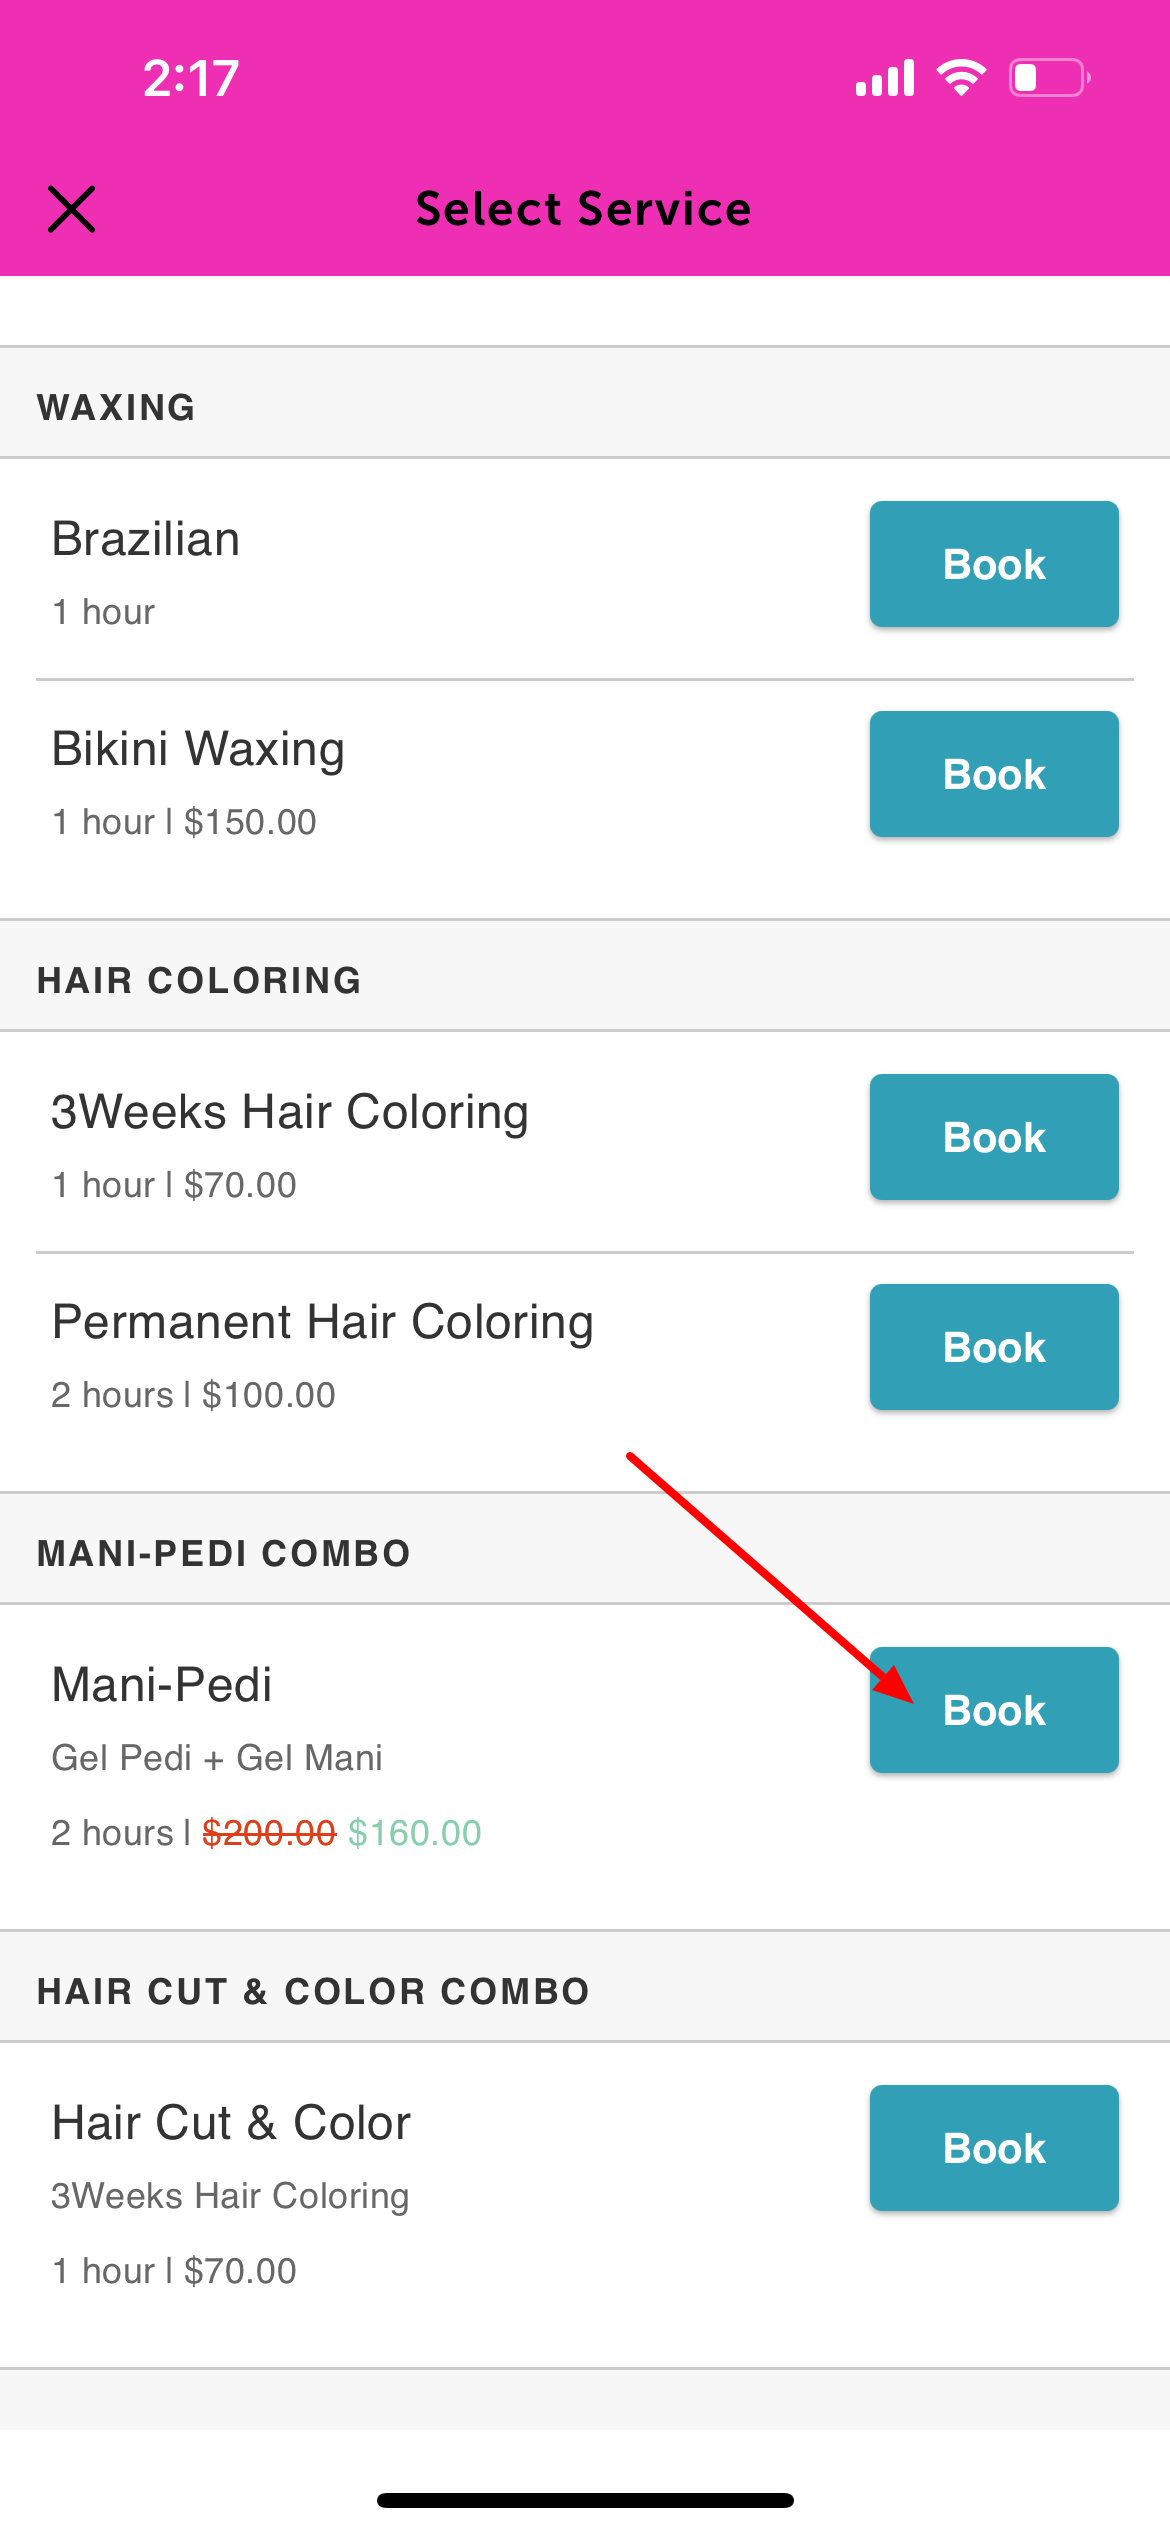
7. Tap 'Select Time' at the bottom of the screen 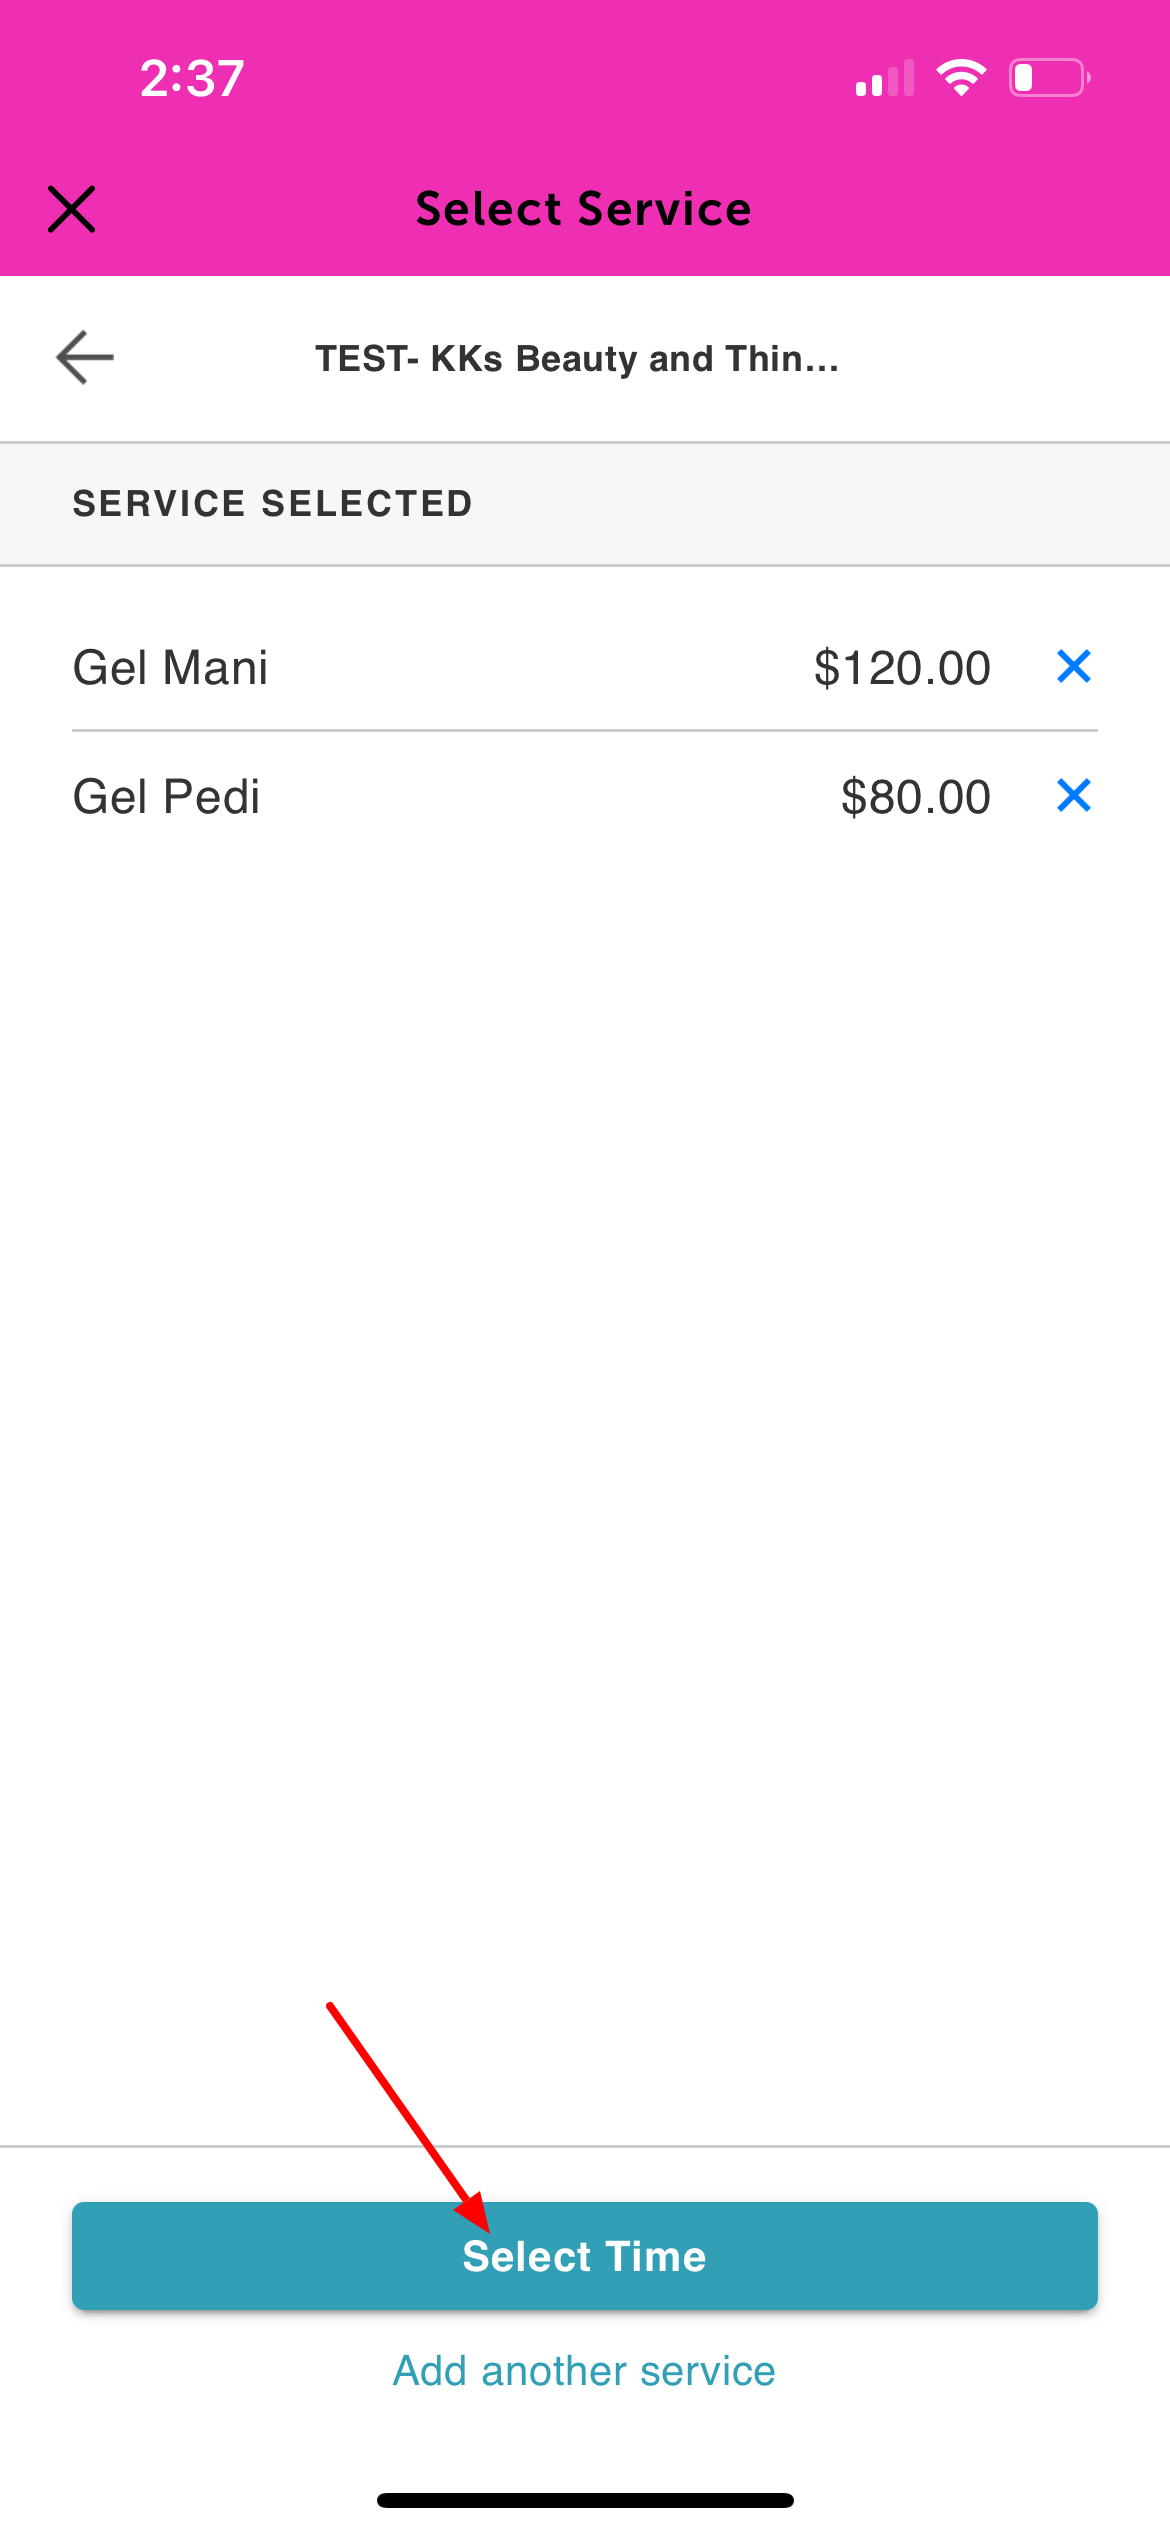
8. Choose a date and time 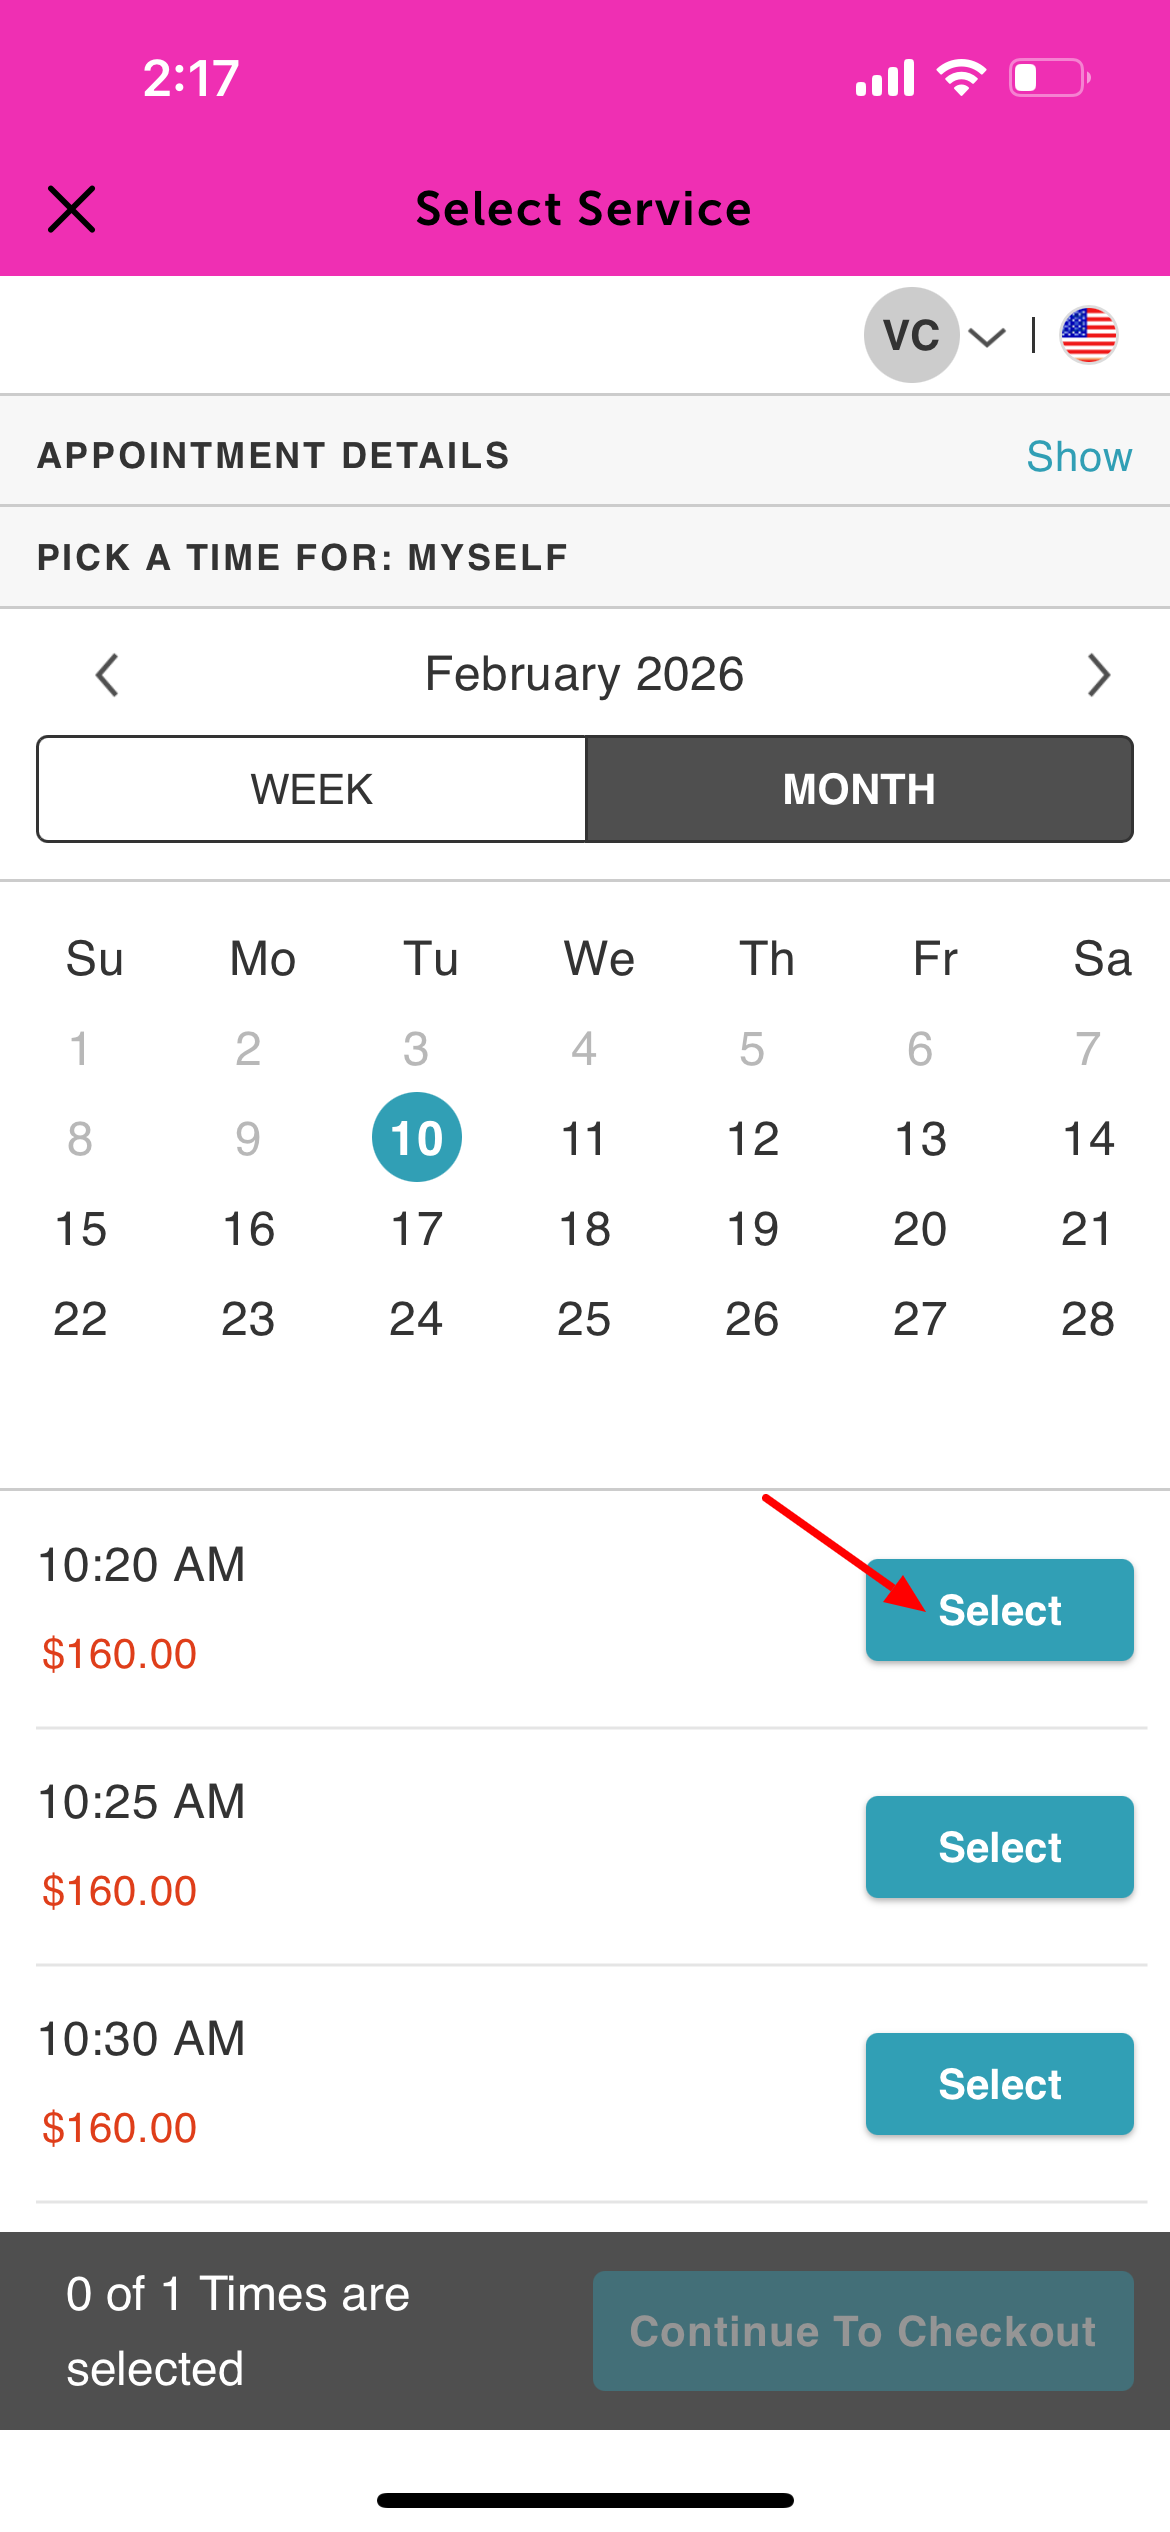
9. Complete the intake form and card details if required, then finalize the booking 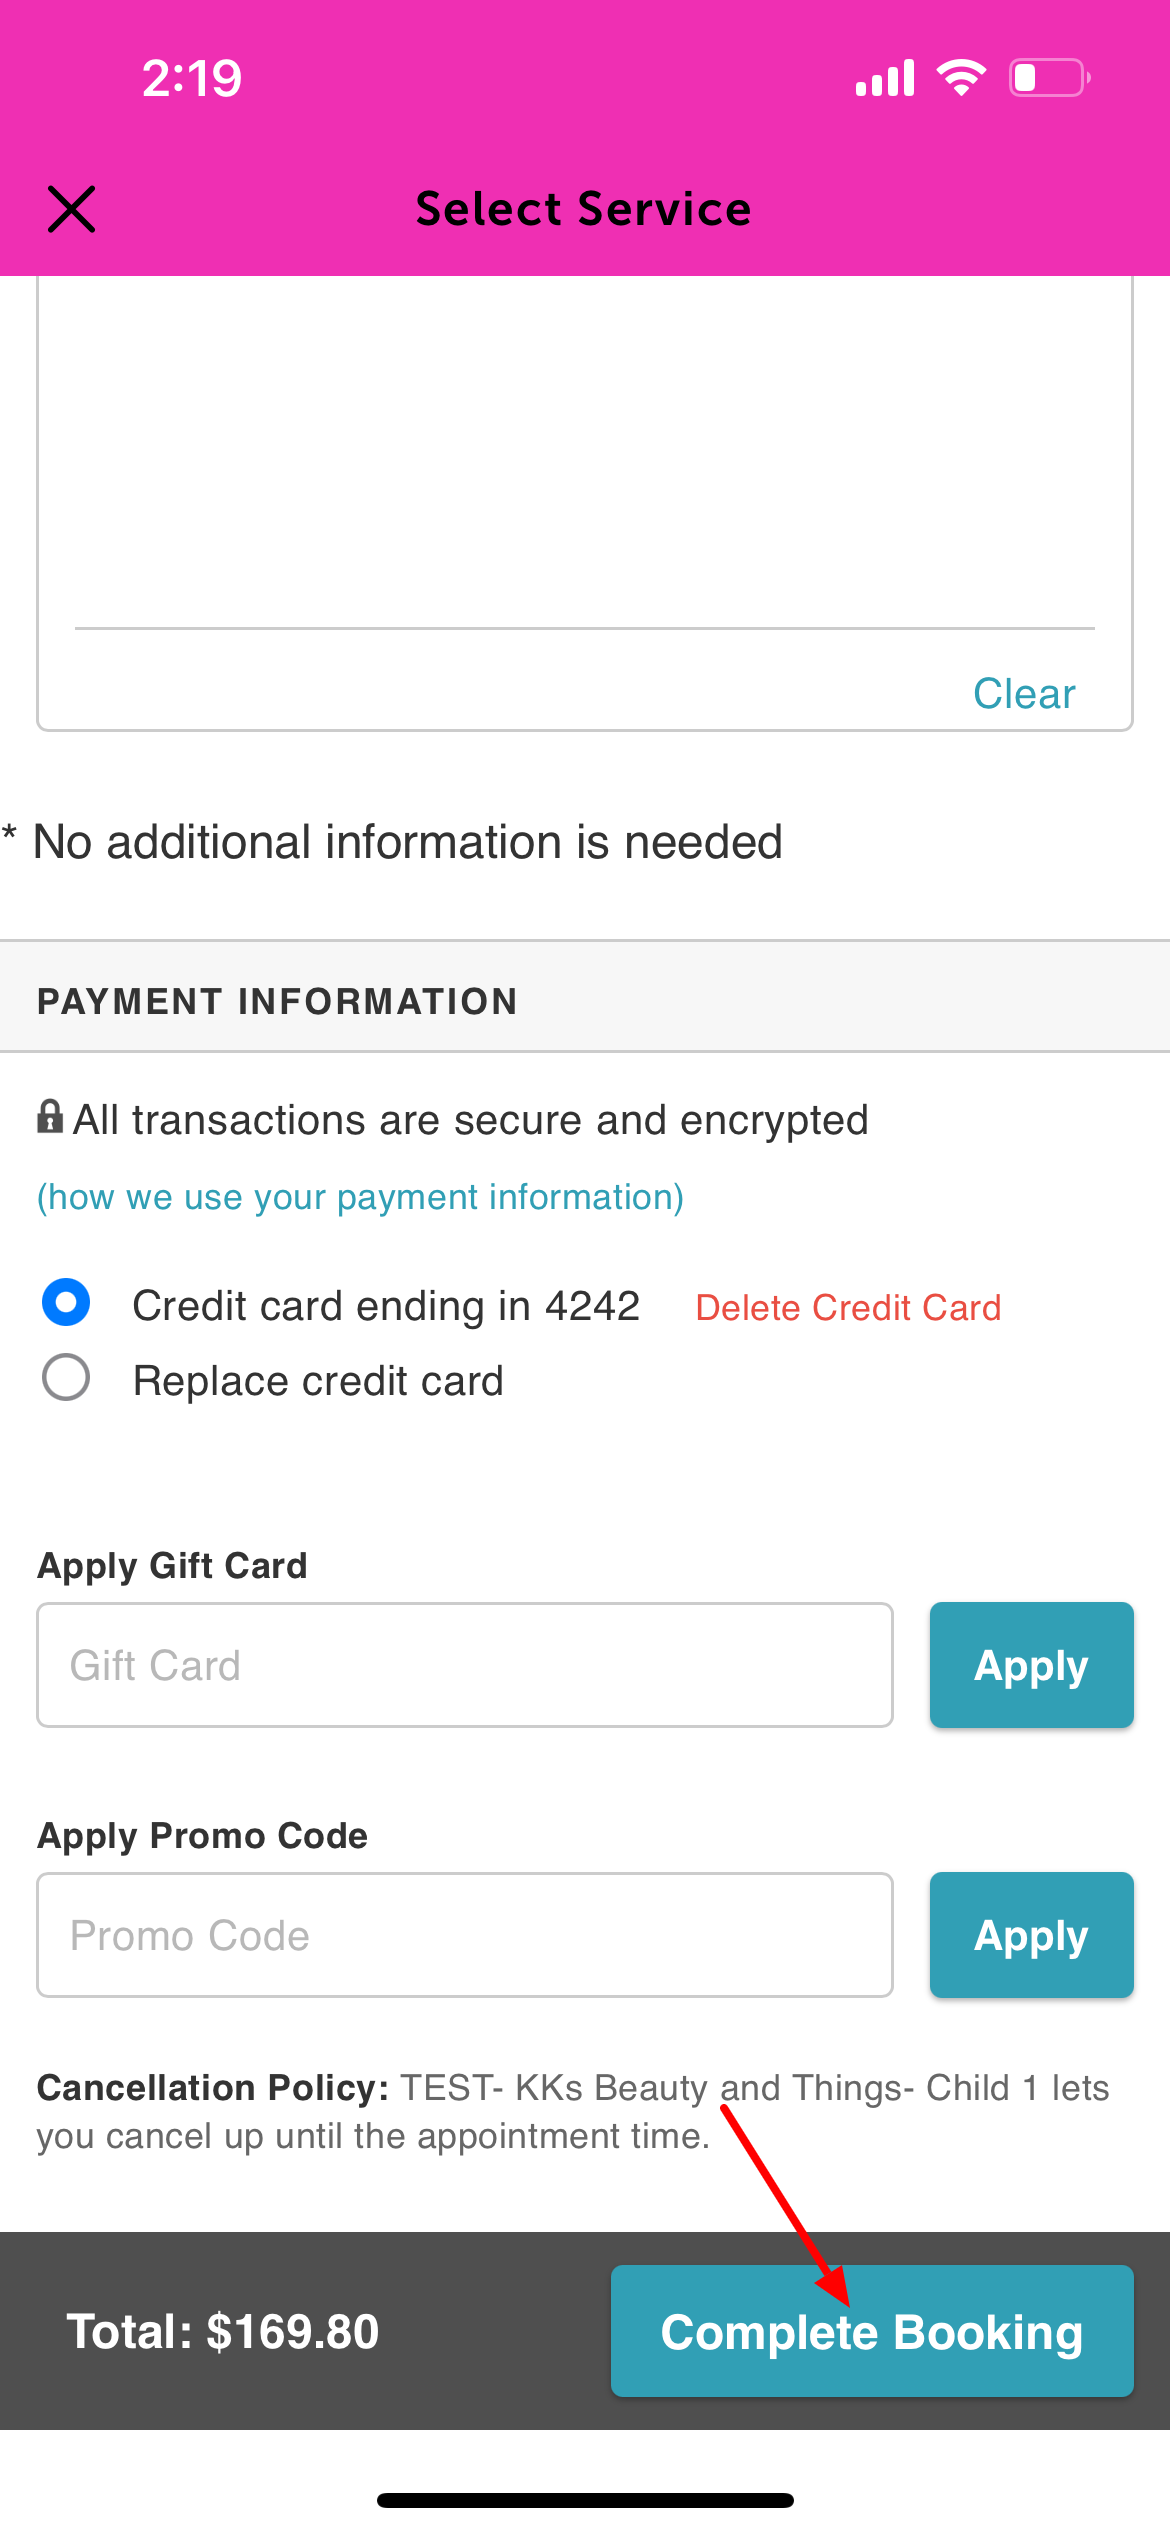
10. The confirmation screen will appear once booking is complete 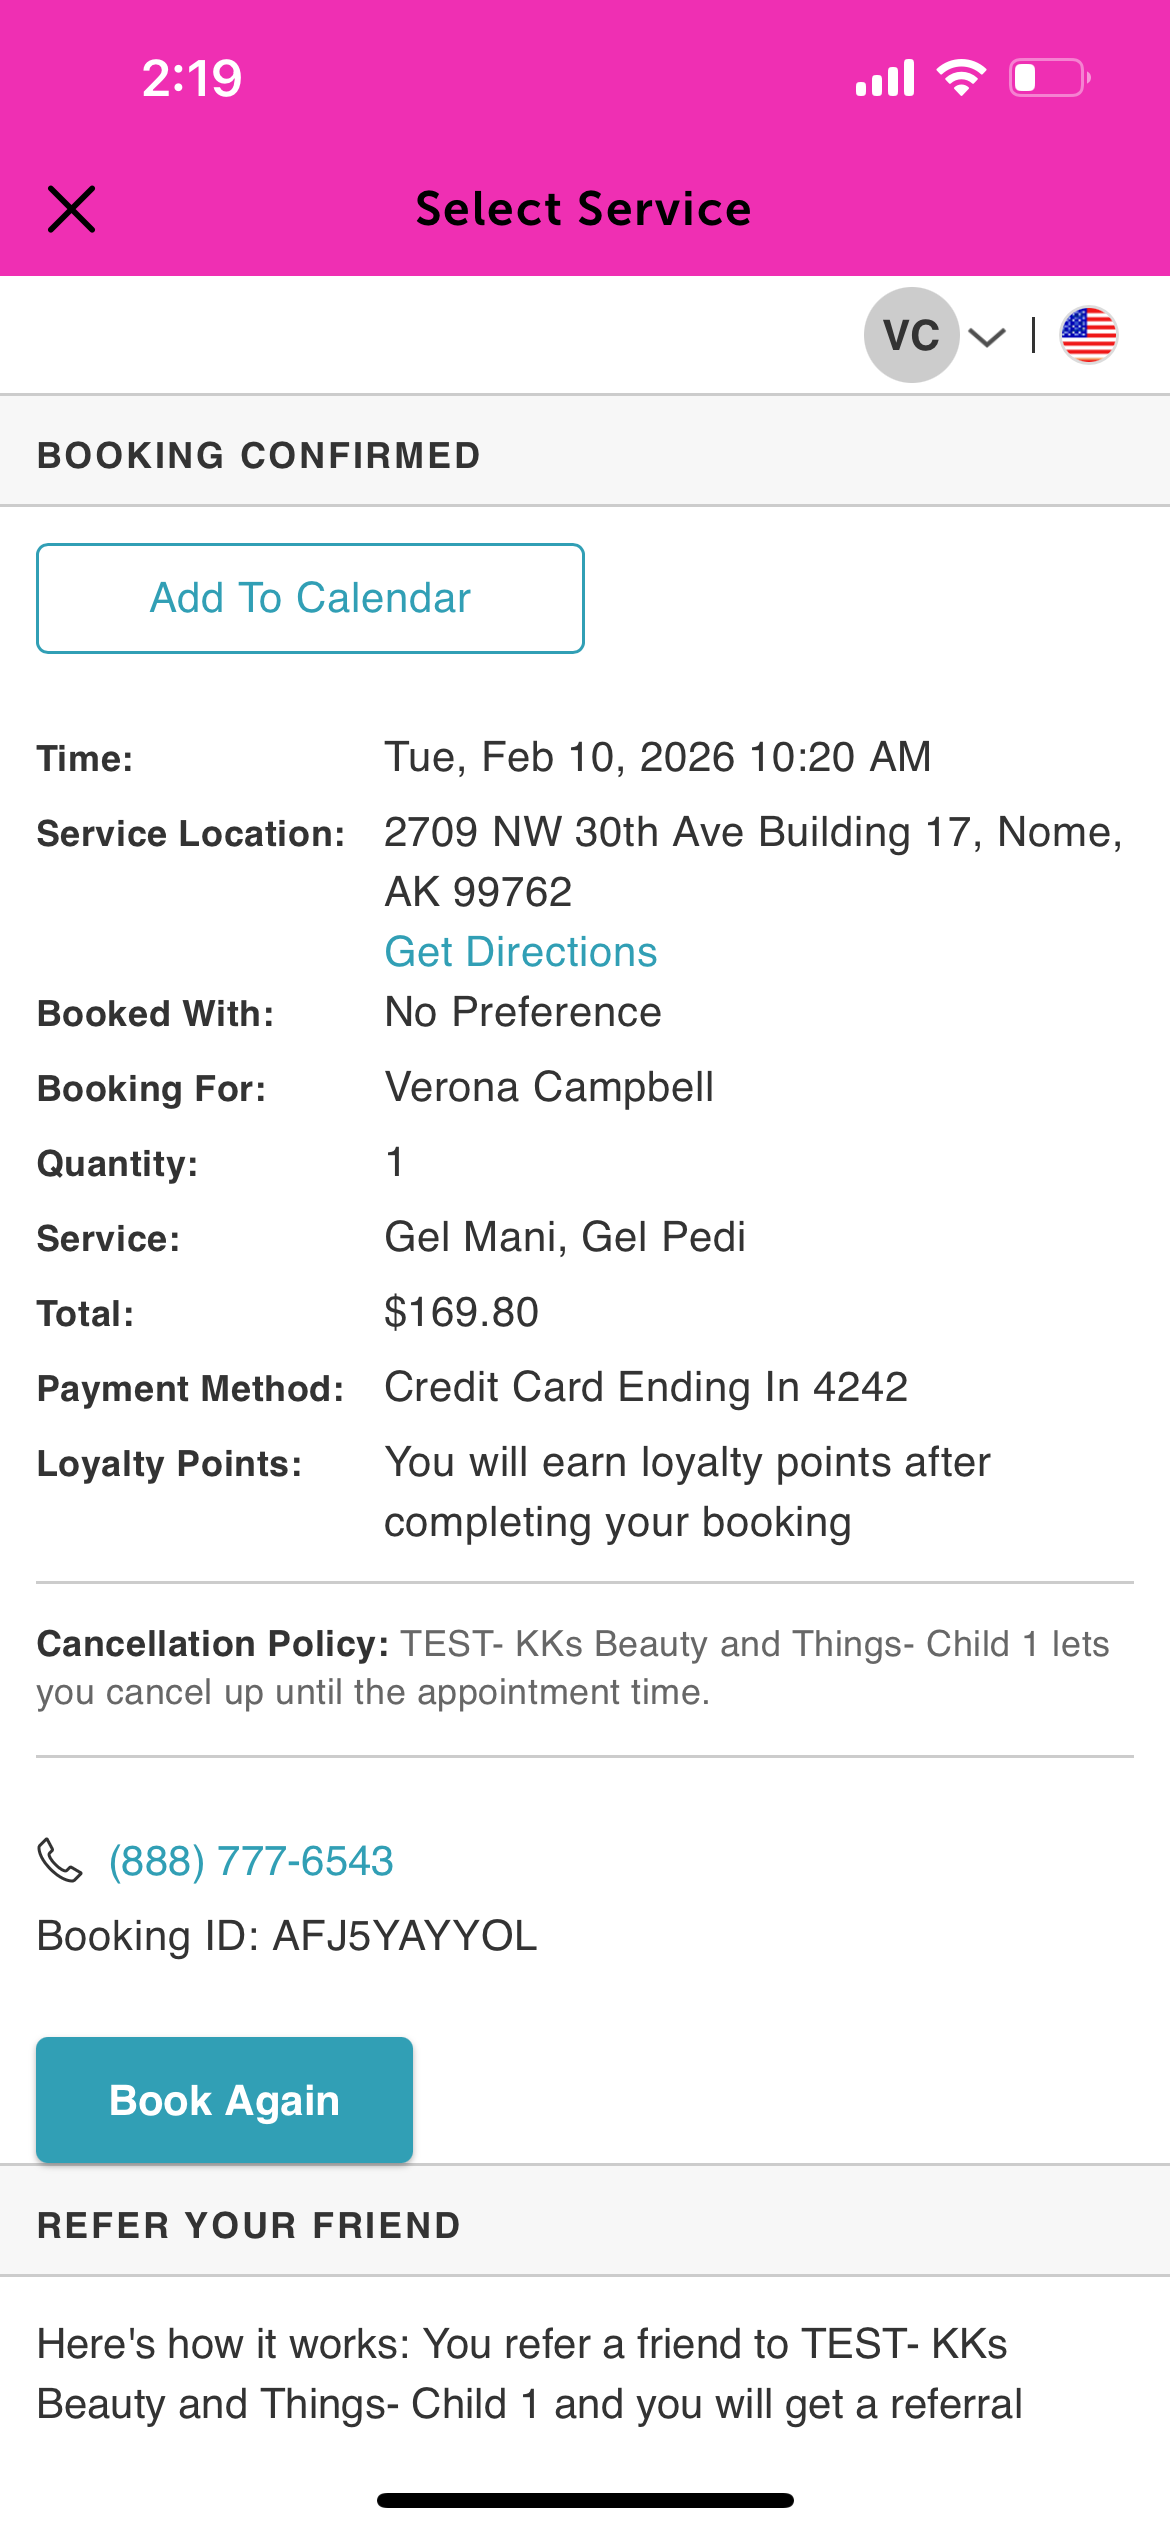
For more information, contact us at support@mytime.com.
Related Articles:
Account Management on Guest App
Booking Appointments on Guest App
Booking Appointments for a Single Family Member on Guest App
Was this article helpful?
That’s Great!
Thank you for your feedback
Sorry! We couldn't be helpful
Thank you for your feedback
Feedback sent
We appreciate your effort and will try to fix the article