In this article, we will guide you through the process of adding work hours and assigning locations to staff profiles.
Things to know:
- The ability to add or edit location and hours on a staff profile depends on the "Accessing Staff & Availability" and "Assigning Work Hours to Staff Members" access control permissions.
- Clients cannot book online with a staff member unless that provider has standard work hours or custom hours configured.
- If a staff member has both standard work hours and custom hours configured for the same day, the custom hours will take precedence and override the standard schedule.
- Staff members must be assigned to at least one location to be visible on the schedule and have services allocated to them.
- A location assignment and schedule hours are also required for staff members to utilize the system's clock-in and clock-out features.
- Support staff and employees with custom roles must be assigned to a location to appear in the ticket compensation dropdown and the POS split-tip modal.
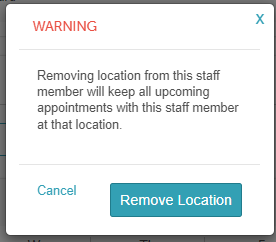
- If you unassign a location from a staff member's profile, the system will safely preserve:
- All existing upcoming appointments for that provider at the unassigned location.
- All historical scheduled hours on the calendar.
- The times displayed on the online location-picker page represent the overall business operating hours, not the shift hours of individual staff members. Learn more here.
- The setup option displayed in the top-right user menu depends on how you access the account and your assigned role:
- When navigating from the Parent Account (Location Management tab):
- Admin: Displays Business Setup when viewing the location account.
- Login As: Displays Location Setup when viewing the location account.
- When logged in directly at the Location Level:
- Location Owners & Location Managers: Display Location Setup.
- Service Providers & All Other Roles: Display Profile Setup.
Contents:
Adding Work Hours and Assigning Locations
To assign a location and hours to a staff member simply:
- Navigate to Business Setup / Location Setup > Staff & Availability
- Locate and select the staff member to whom you wish to assign a location and add work hours
- When the staff member profile opens, scroll to the Location and Hours section
- A location is automatically assigned to staff members based on the location you selected while adding the staff member.
- You can either proceed to add work hours for the staff member or remove the location and choose a different one to assign to the staff member.
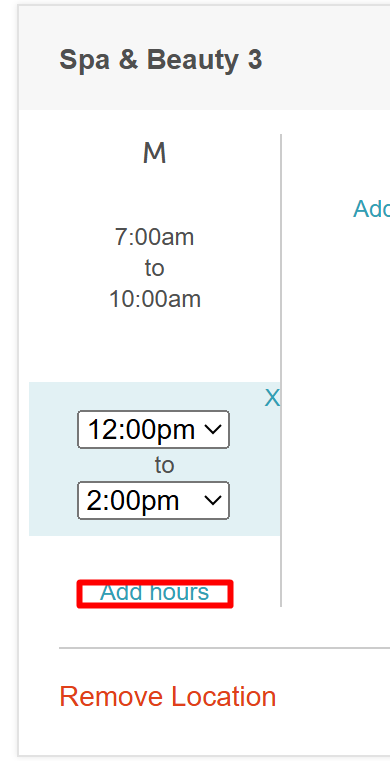
- To add work hours, click on the "Add Hours" hyperlink on the specific days you would like the staff member to work
- Each time you click the "Add Hours" hyperlink, the system will automatically populate a start and end time for you. By default, clicking the "Add Hours" hyperlink will display a work time of 9:00 AM to 5:00 PM.
- You can modify the start and end time by selecting different values from the dropdown menu for the staff member's shift.
- You can also stagger shift times by clicking the "Add hours" link multiple times within a single date. This allows you to configure multiple, distinct working intervals for a staff member throughout the day
- Once you’re finished, scroll to the bottom of the page and click "Save."


Removing a Location from a Staff Member Profile
To remove a location from a staff member profile:
- Navigate to Business Setup / Location Setup > Staff & Availability

- Locate and select the staff member
- Scroll to the Location and Hours section
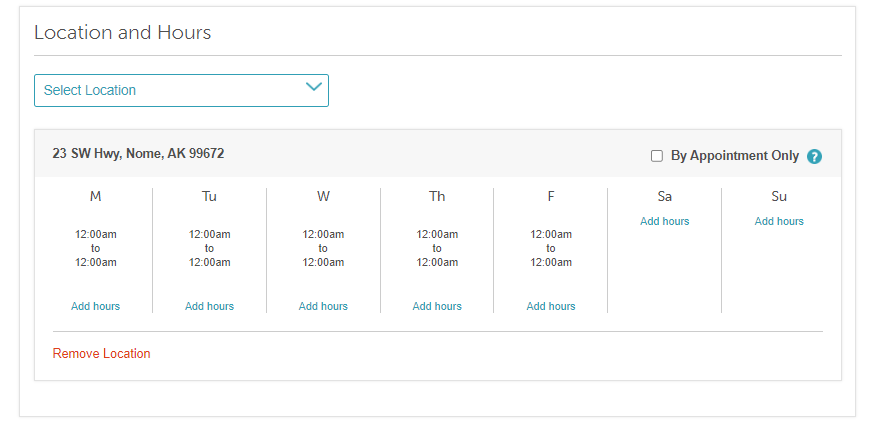
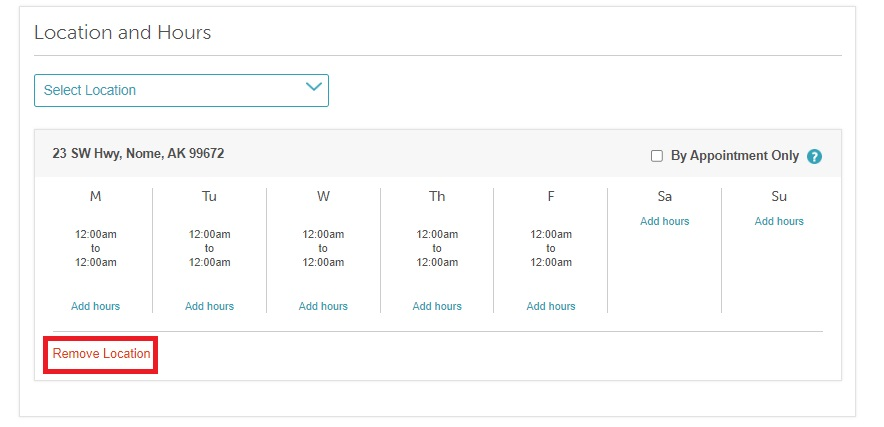
- Click "Remove Location" for the assigned location
- Confirm in the pop-up by clicking "Remove Location"
- The staff member profile will no longer display work hours for that location

For more information, contact us at support@mytime.com.
Related Articles:
Creating / Editing Custom Work Hours
Historical Data for Working Hours In Reports
Was this article helpful?
That’s Great!
Thank you for your feedback
Sorry! We couldn't be helpful
Thank you for your feedback
Feedback sent
We appreciate your effort and will try to fix the article