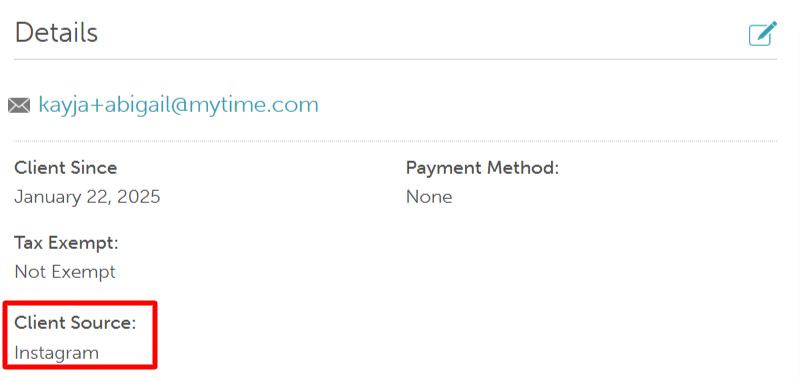
MyTime enables you to track a client's source when creating their profile via the clients tab, appointment modal, or POS. Once added, the client source is automatically saved in their profile details. This article outlines the steps to add and manage client sources.
Things to Know:
- This feature is controlled by the "Track Client Source" company setting.
- For franchise businesses, this setting must be enabled at both the parent and child levels to function properly.
- The client source field is customizable at the parent level, allowing you to add and manage default options.
- When a new client source is entered through the appointment modal, POS, or client profile, it is automatically added to the custom client source list for future use.
- If a new client books an appointment online, the client source field in their profile and appointment notes is automatically populated based on the booking source. Example: If a client books through your Google listing, their profile and reports will show Google as the source.
- When a lead is converted to a client, the system retains the original lead source and automatically assigns it as the client source.
CONTENTS
- Activate Client Source Tracking
- Customizing Client Source Custom Field
- Adding Client Source From Client Profile
- Adding Client Source from the Schedule
- Adding Client Source from POS
Activate Client Source Tracking
From the parent level:
1. Go to Business Setup > Settings
 2. Navigate to the "Clients" section
3. Toggle the "Track Client Source" setting to YES

4. Save changes
5. Once saved, log in to the child level and repeat the steps above to enable the setting at the child level.
Customizing Client Source Custom Field
Once the setting is enabled, you can add and manage different client sources in the client source custom field at the parent level.
1. Go to Clients > Manage Clients > Customize Client Fields

2. From the 'Custom Client Fields' section, select 'Client Source'

3. Once expanded, you can customize this custom field and add sources by clicking on the 'Add New Option' hyperlink 
4. Enter the name of the source option and select 'Save'

Adding Client Source From Client Profile


Adding Client Source from the Schedule
1. Go to the Schedule
2. Filter by the desired date, staff, and location
3. Click on an open time slot of a service provider OR select the + New Appointment button from the sidebar

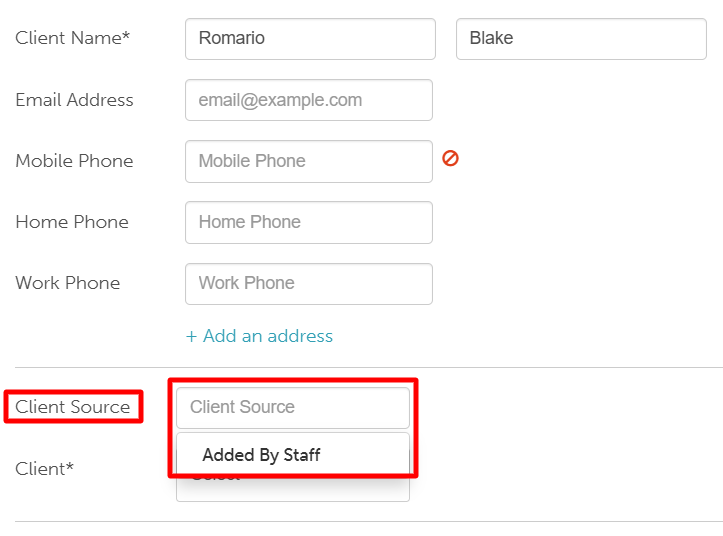
4. From the appointment modal, select the 'Add Client' icon

5. Enter the client details to the appropriate fields
6. In the 'Type Client Source' field, you can select a source from the list or type a new one and press Enter to add it


Adding Client Source from POS


Related Articles:
Was this article helpful?
That’s Great!
Thank you for your feedback
Sorry! We couldn't be helpful
Thank you for your feedback
Feedback sent
We appreciate your effort and will try to fix the article