Astro Loyalty is a rewards platform specifically designed for pet retailers. This integration allows MyTime to sync client data and product purchases directly with Astro Loyalty for seamless reward tracking and redemption.
Things to know:
- Eligibility: This feature is exclusively available for pet-focused businesses.
Requirements: You must have an active Astro Loyalty plan. For franchise organizations, Astro is configured at the child account level. Learn more about Astro Loyalty plans here. - POS Workflow: When a product is added to a POS ticket, an Astro Loyalty link appears. Clicking this opens the Astro Loyalty checkout page in a new tab, automatically transferring client info, items, and totals.
- Redemptions: To use loyalty redemptions as a payment method, MyTime Support must first enable a hidden backend setting. Contact support@mytime.com to request this.
- Once the hidden setting is active, you must enable the "Apply Astro Loyalty Redemptions Post-Tax" company setting to see Astro as a payment option on the Take Payment page.
- If the hidden setting is enabled but the "Post-Tax" setting is not, loyalty points will only apply pre-tax via a sync button on the New Ticket page.
Contents:
- Adding Astro Loyalty Credentials on MyTime
- Sending Ticket Details to Astro Loyalty in POS
- Astro Loyalty As a Payment Method
Adding Astro Loyalty Credentials on MyTime
- Log in to your MyTime account and select Location Setup from the menu under your name
- Navigate to the Settings page and select the Partner Integrations tab.
- Contact Astro Loyalty for the API credentials.
- Filter by the desired location and enter your Astro Loyalty API username and password. Note: If you have multiple locations, you must enter credentials for each one individually.
- Click Save at the bottom of the page


Sending Ticket Details to Astro Loyalty in POS
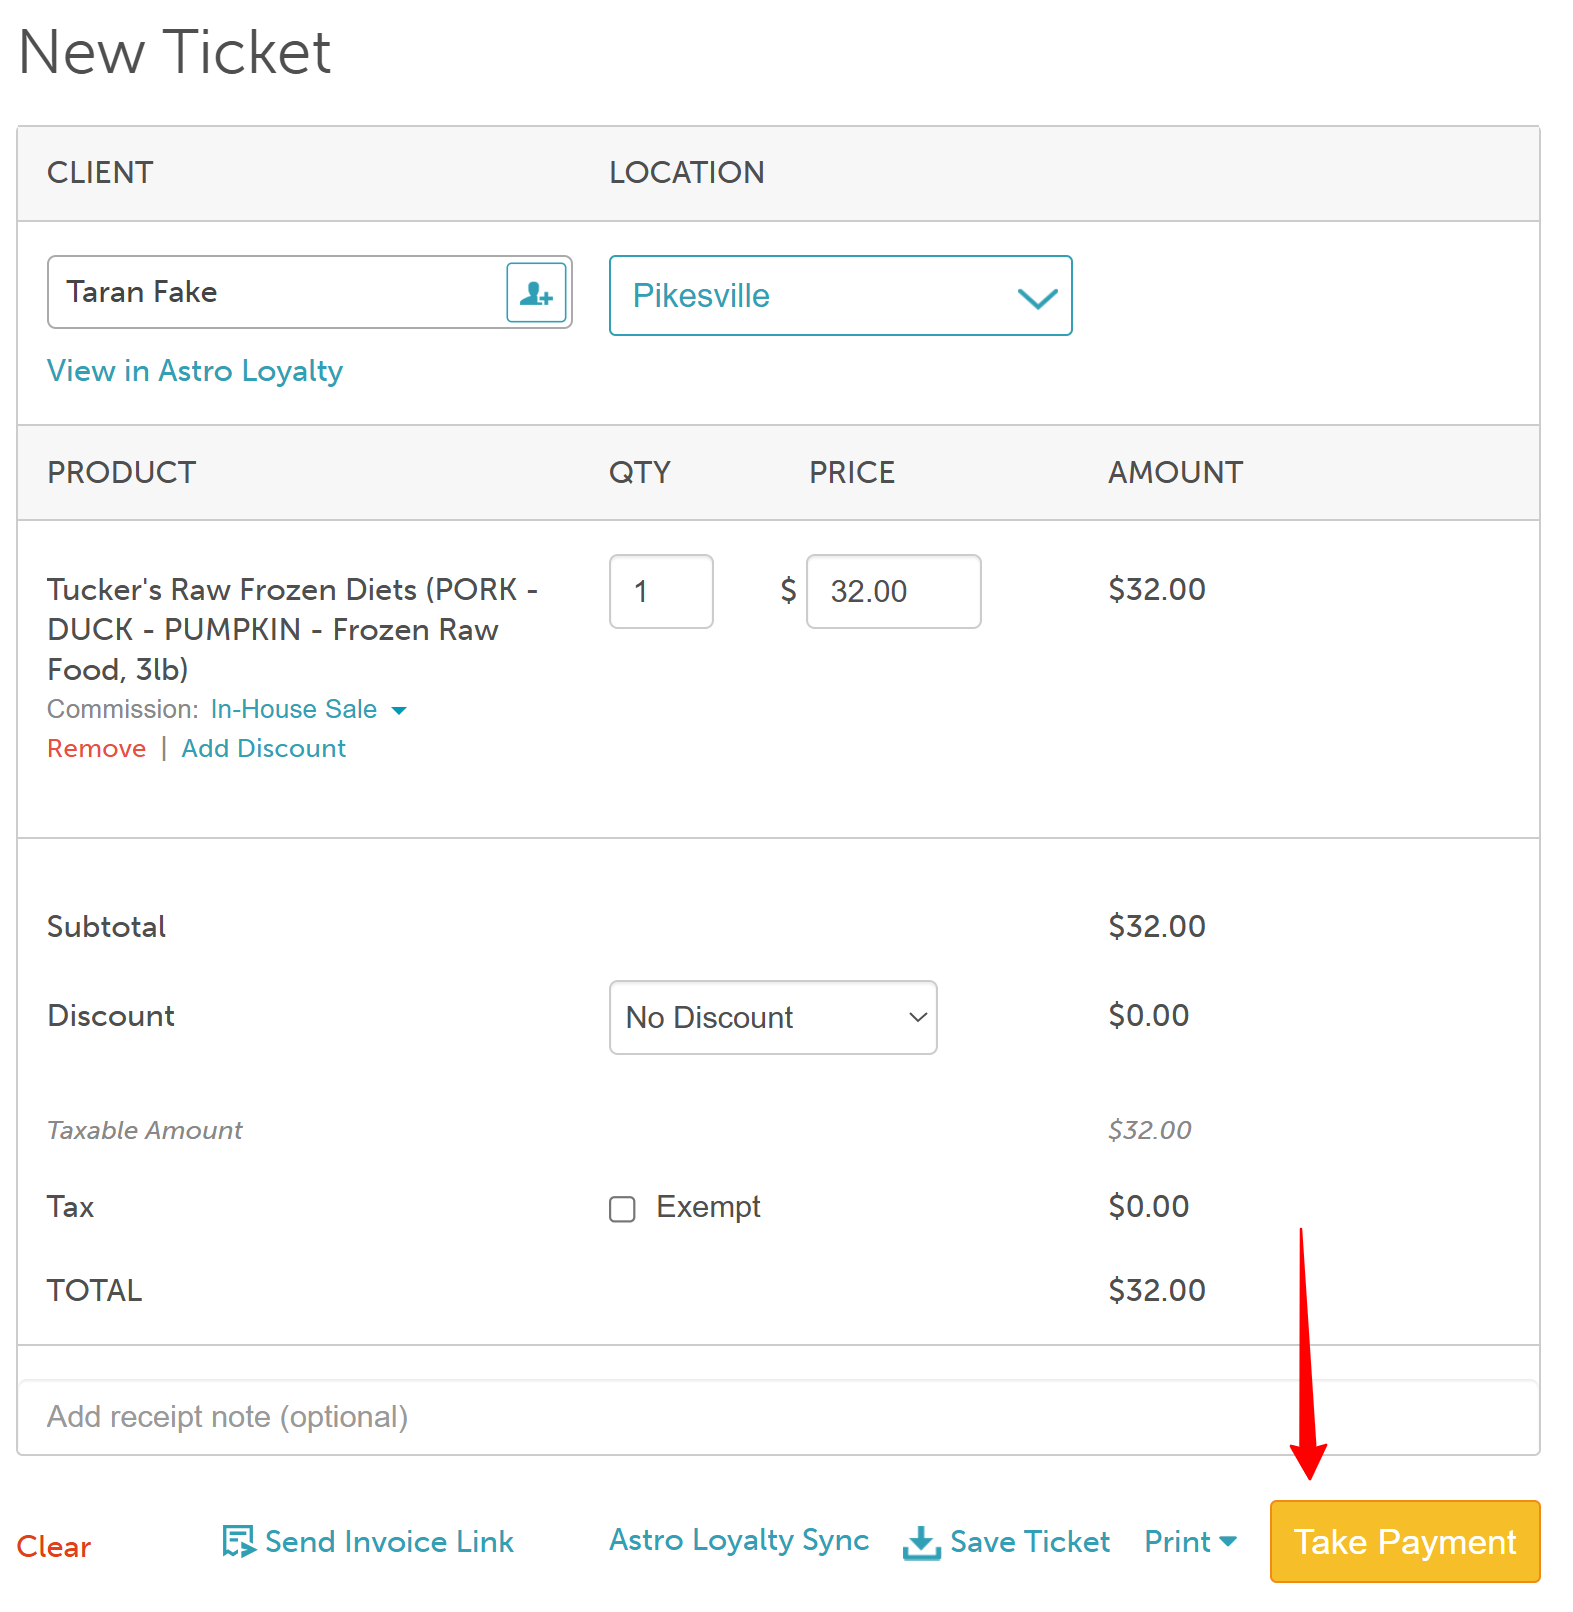
- Navigate to POS > New Ticket and select your client
- Under the Products tab, search for and add the desired items to the ticket.
- Click the Astro Loyalty hyperlink at the bottom of the page.
- A new tab will open, routing you to the Astro Loyalty checkout page.
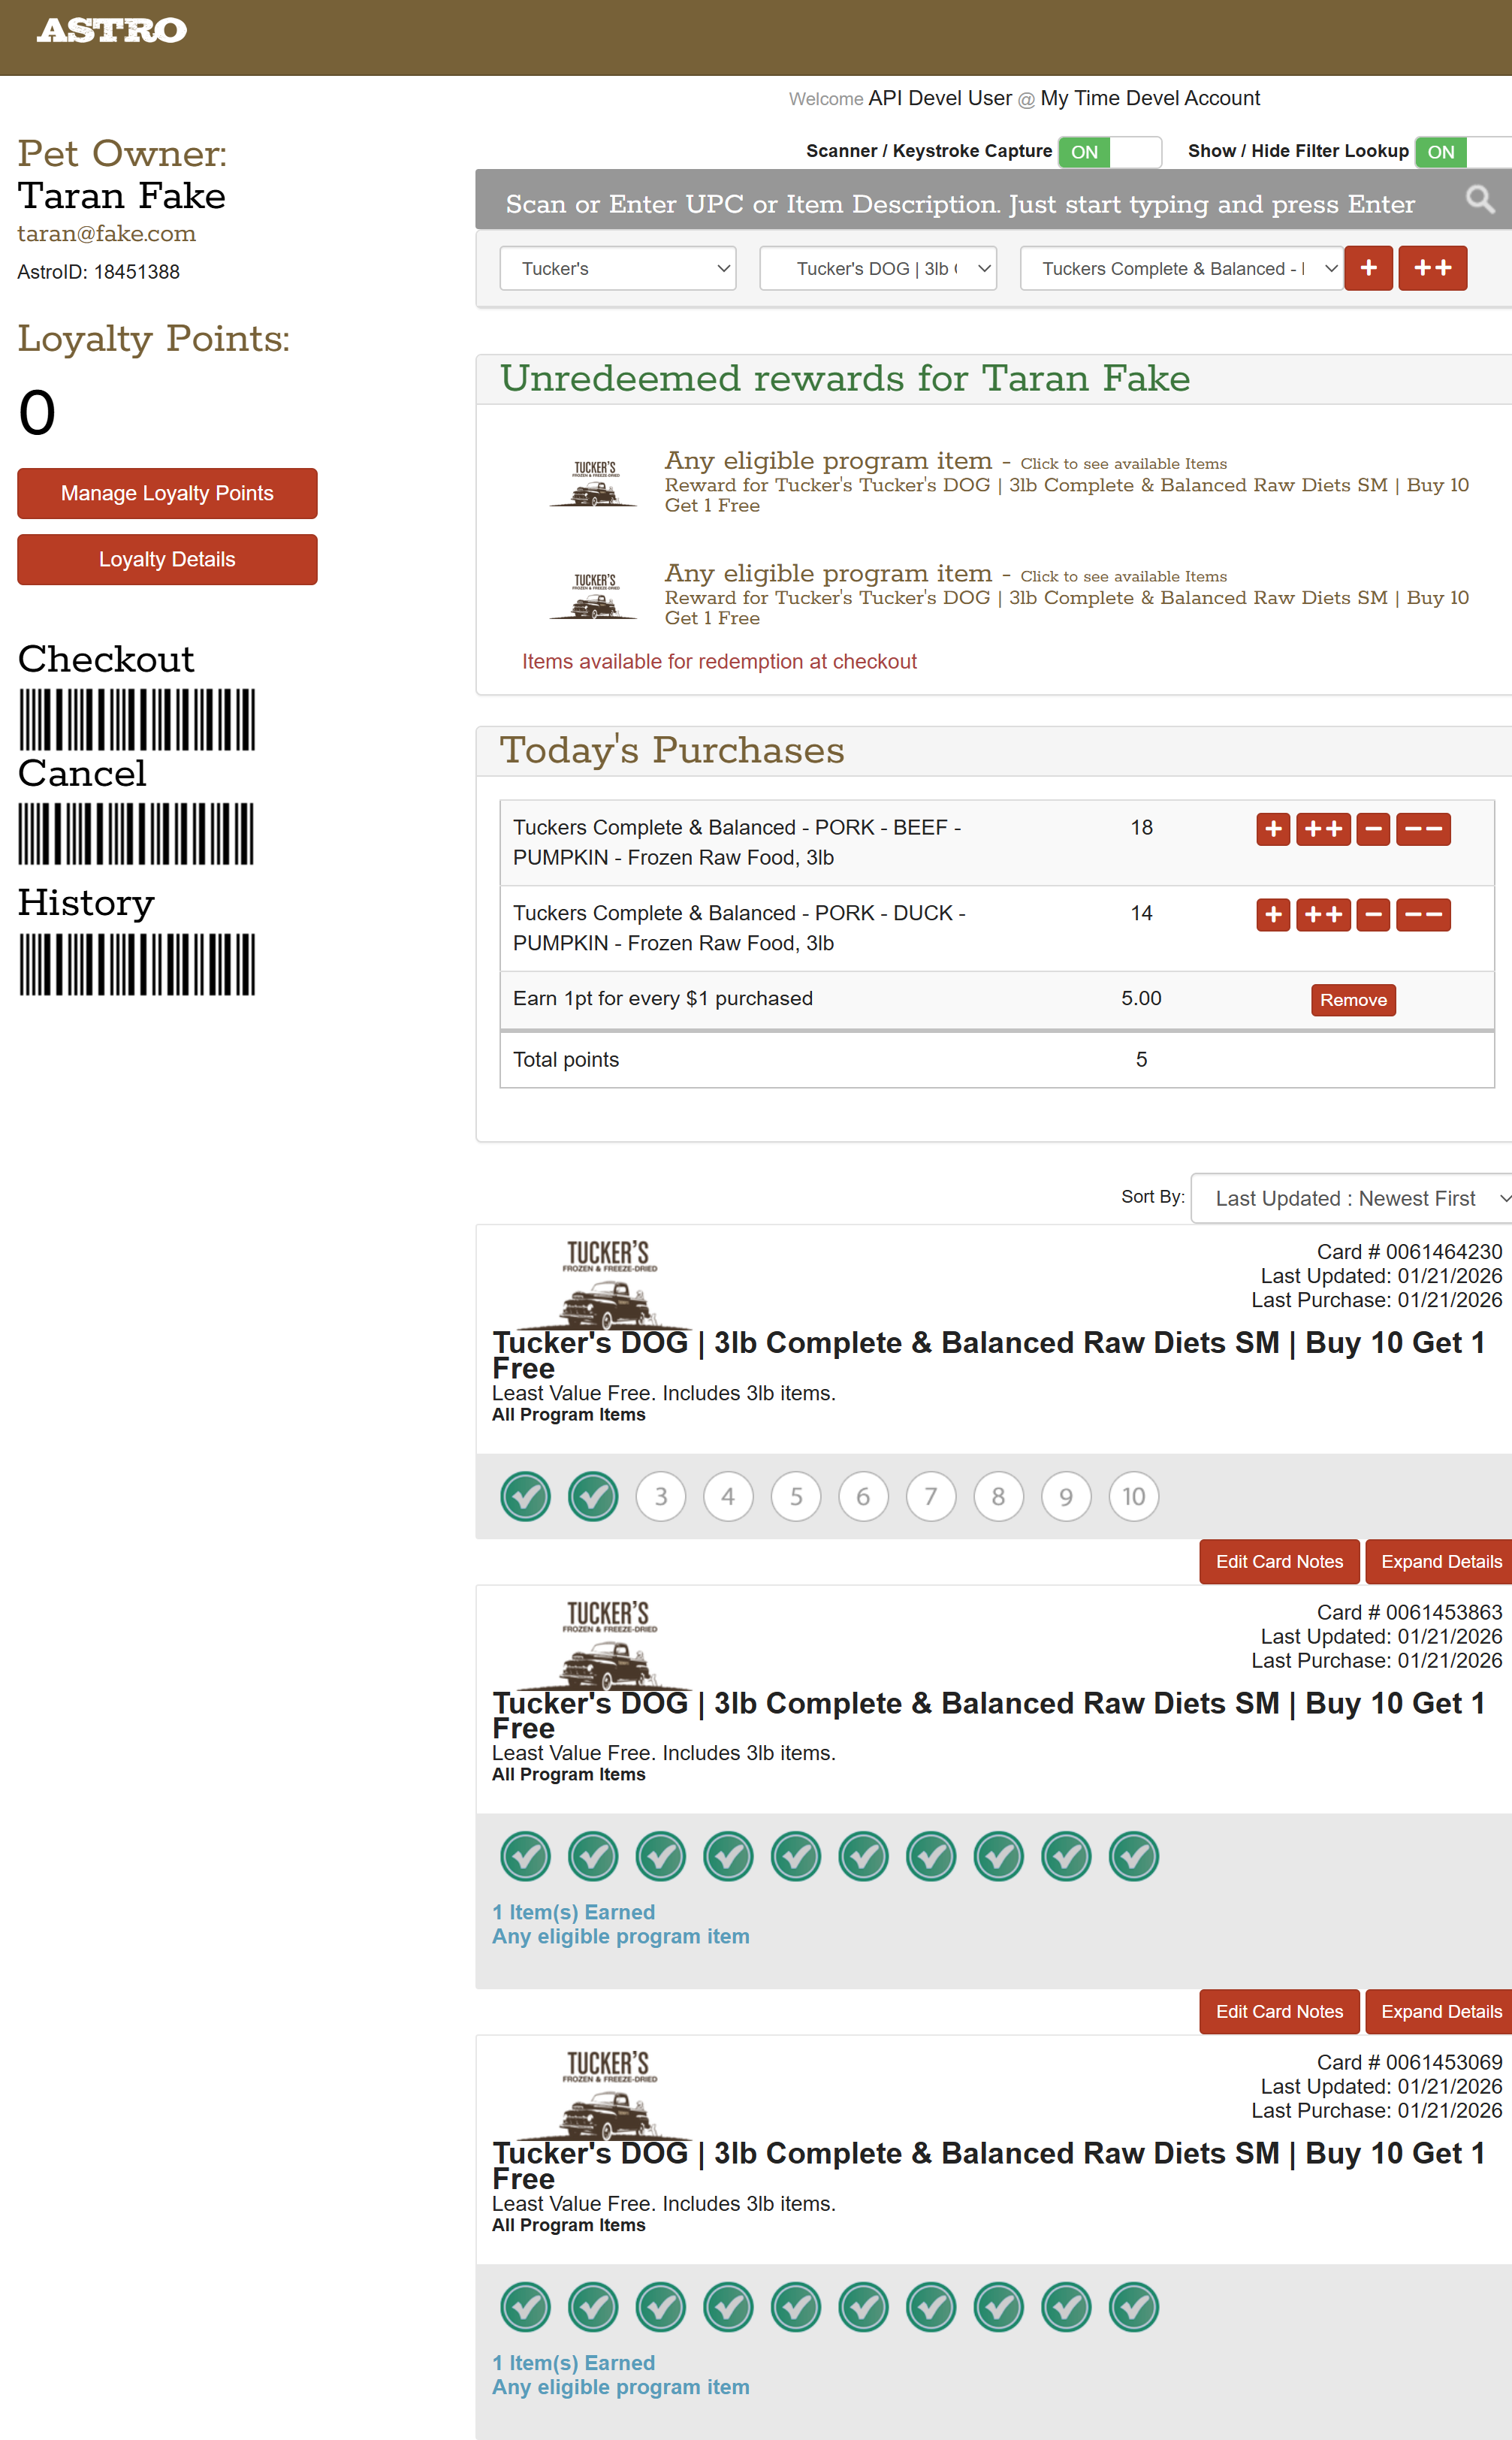
- The client will be automatically linked (or you will be prompted to add them if they are new).
- If the client is not found, you will be prompted to add the client to Astro Loyalty
- All products will appear under "Today's Purchases."
- Return to the MyTime POS tab and click Take Payment.
- Finalize the transaction and close the ticket


Astro Loyalty As a Payment Method
A. Configuring Post-Tax Redemption
To ensure that Astro Loyalty redemptions are available as a payment option and calculated correctly after tax:
- Navigate to Business Setup > Settings
- In POS section, locate the 'Apply Astro Loyalty Redemptions Post-Tax' setting
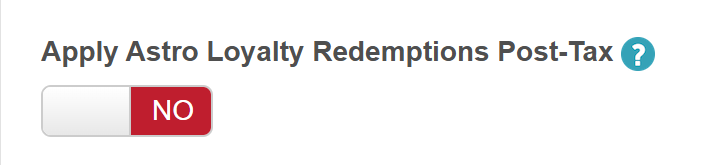
- Toggle to 'Yes' and save changes
B. Checking Out With Astro Loyalty Redemptions
- Navigate to POS > New Ticket and add products
- Click 'Take Payment'
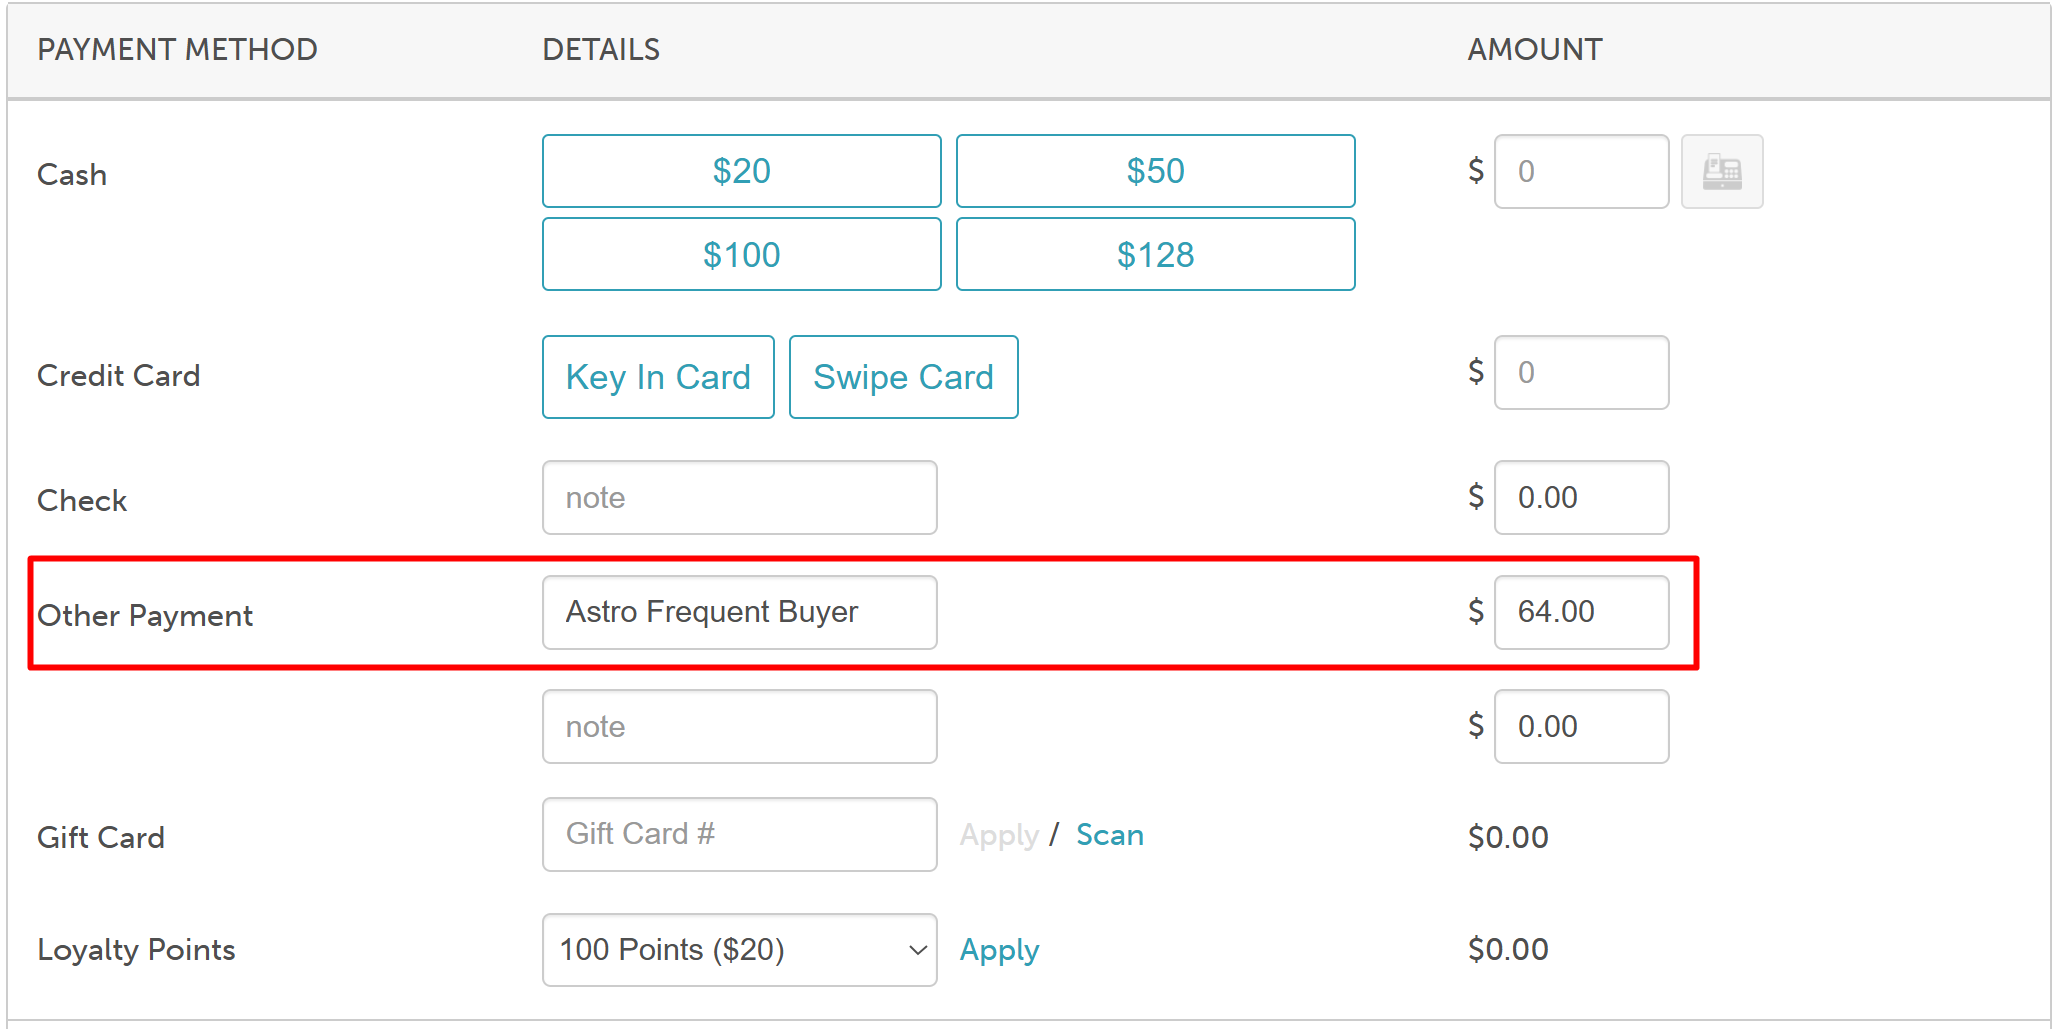
- On the payment screen, you will see two options:
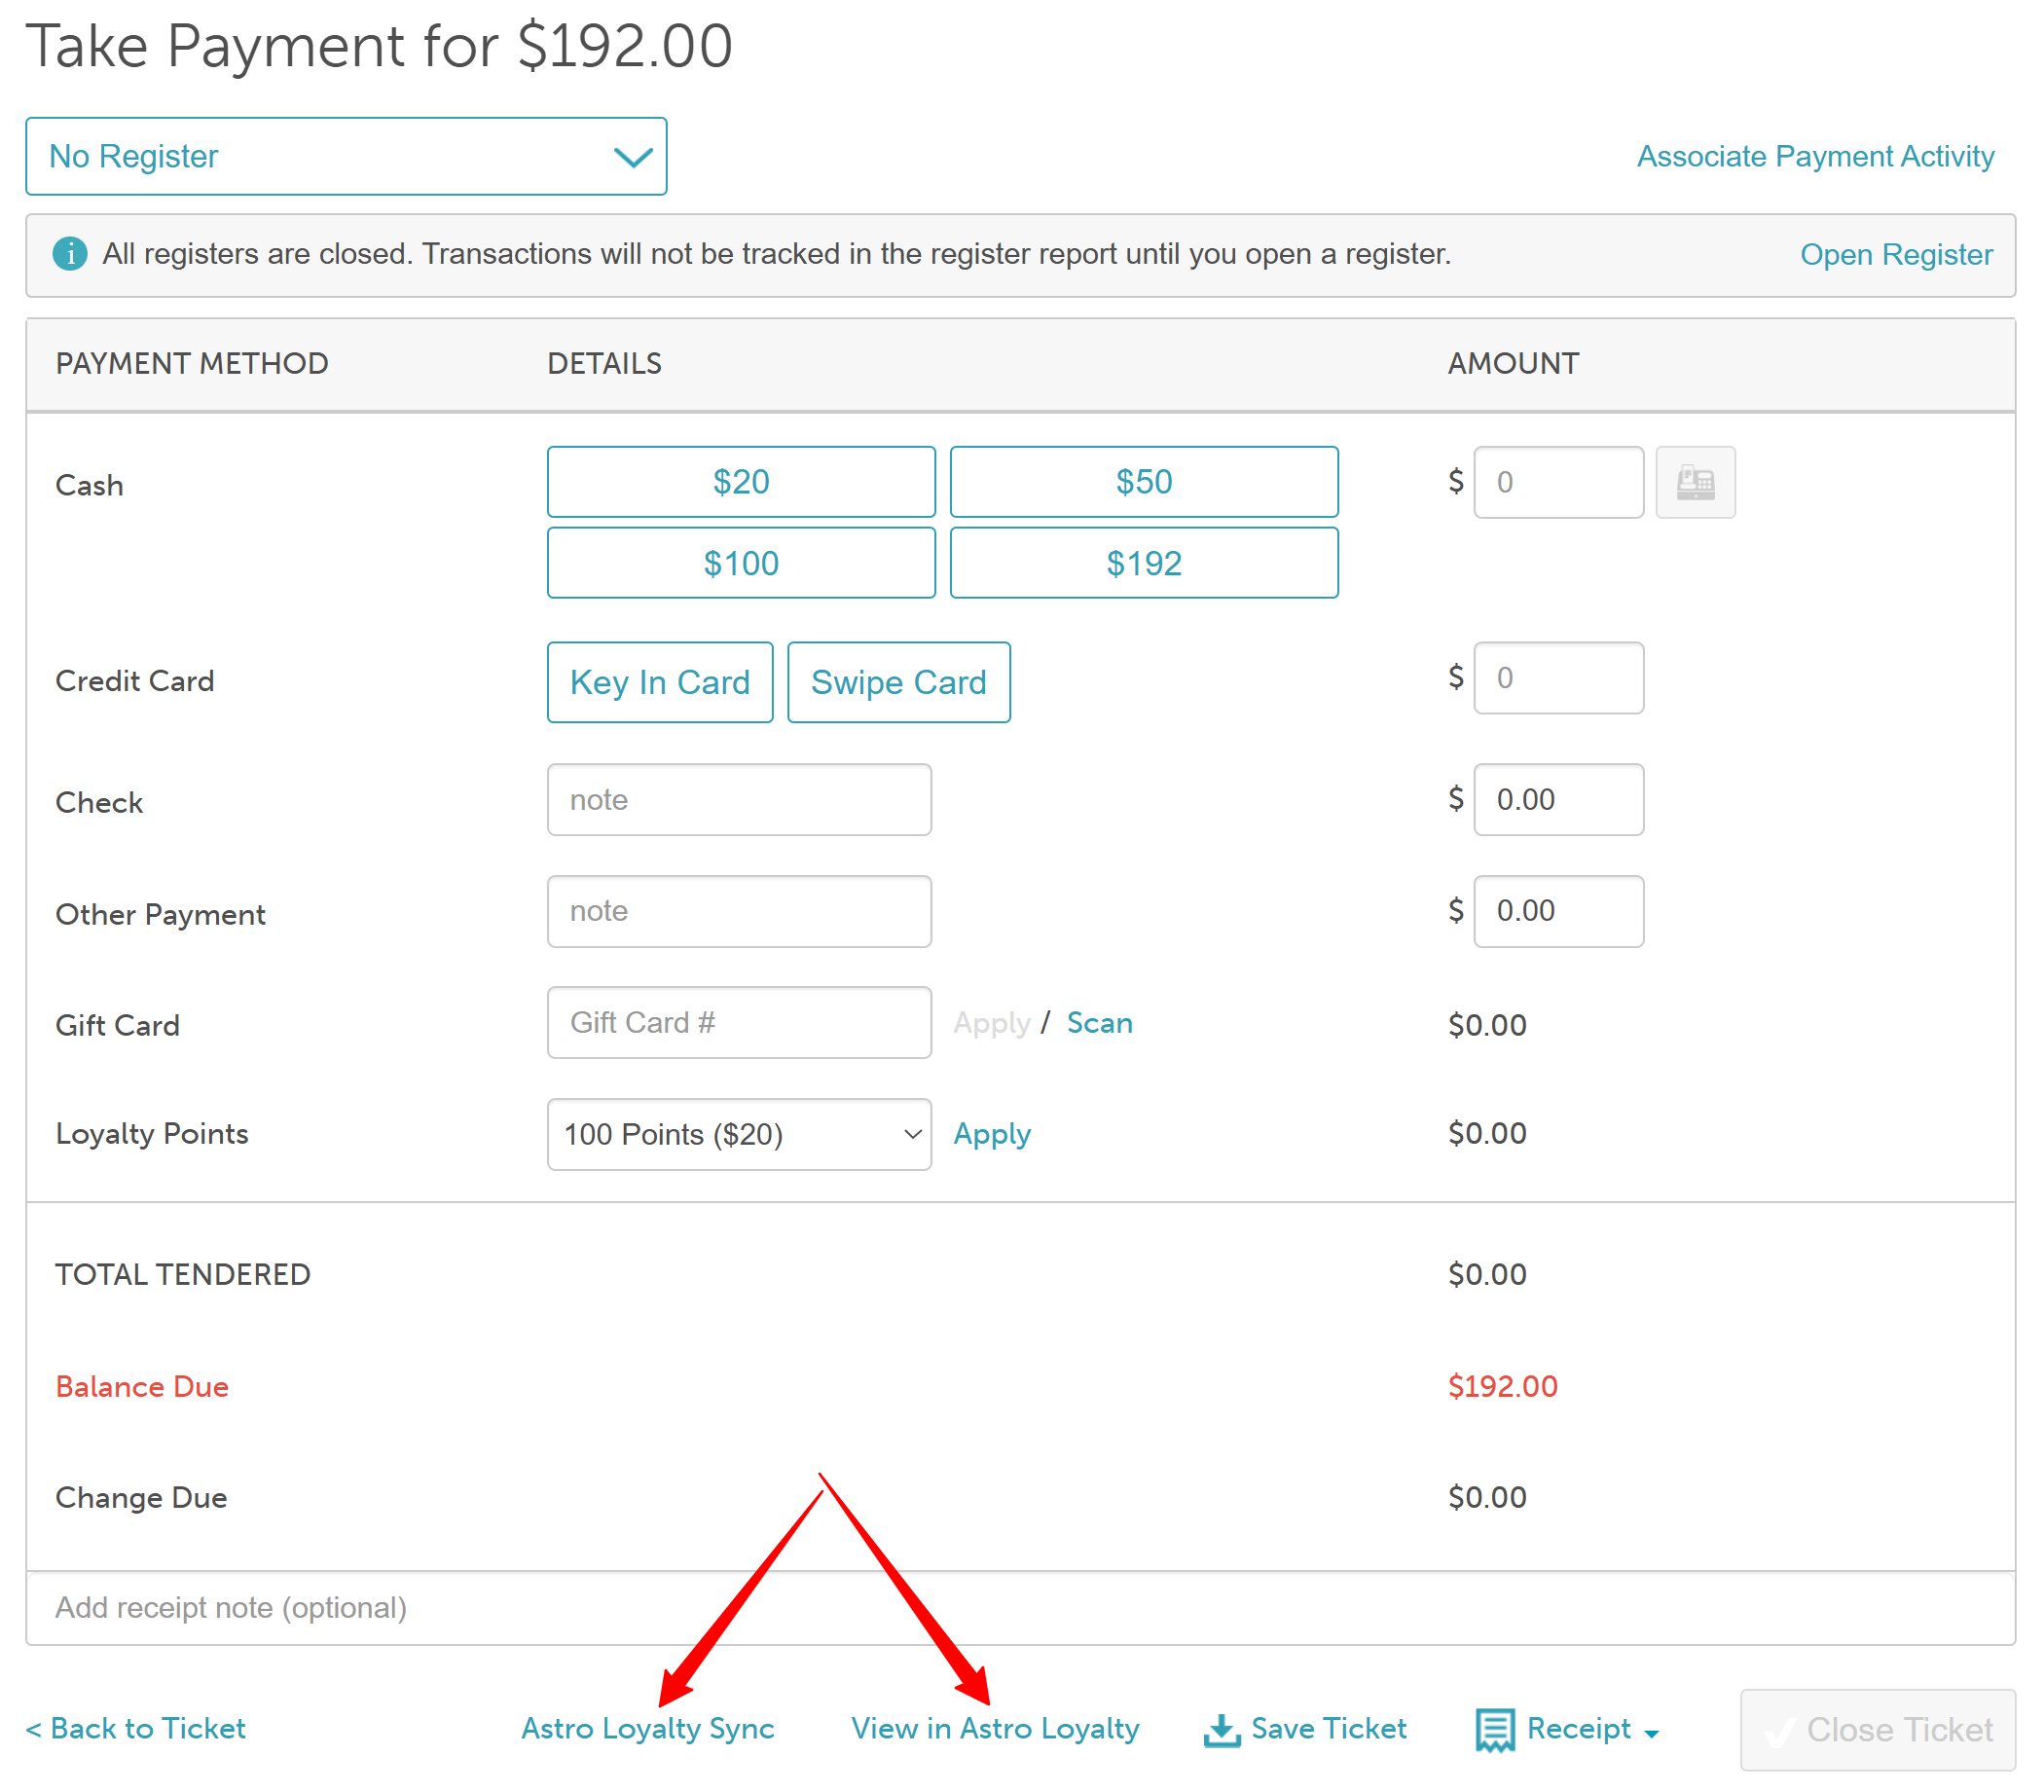
- Astro Loyalty Sync: Refreshes the page. If the client has available points, they will appear under the Other Payment section.
- View in Astro Loyalty: Opens the Astro site to view the client's detailed rewards history.
- Astro Loyalty Sync: Refreshes the page. If the client has available points, they will appear under the Other Payment section.
- Apply the redemption from the Other Payment section to reduce the balance.
- Collect any remaining balance and close the ticket.
For more information, contact us at support@mytime.com or (385) 233-6964.
Was this article helpful?
That’s Great!
Thank you for your feedback
Sorry! We couldn't be helpful
Thank you for your feedback
Feedback sent
We appreciate your effort and will try to fix the article