Items added to POS tickets can be displayed to clients on the screen of Stripe credit card terminals. Some jurisdictions may even legally require this. This ensures that the price of each item the client must pay is clearly presented as interpreted by the system. In this article, we will guide you through how to accomplish this.
Things to know:
- This feature is available only to merchants who have a Stripe payment account and use Stripe terminals.
- When a ticket is adjusted, a display prompt showing the description, price, and quantity of each item will appear. Taxes, discounts, and the total will be displayed separately.
- When the ticket is closed, or you navigate away from the point of sale, the terminal will automatically clear the display.
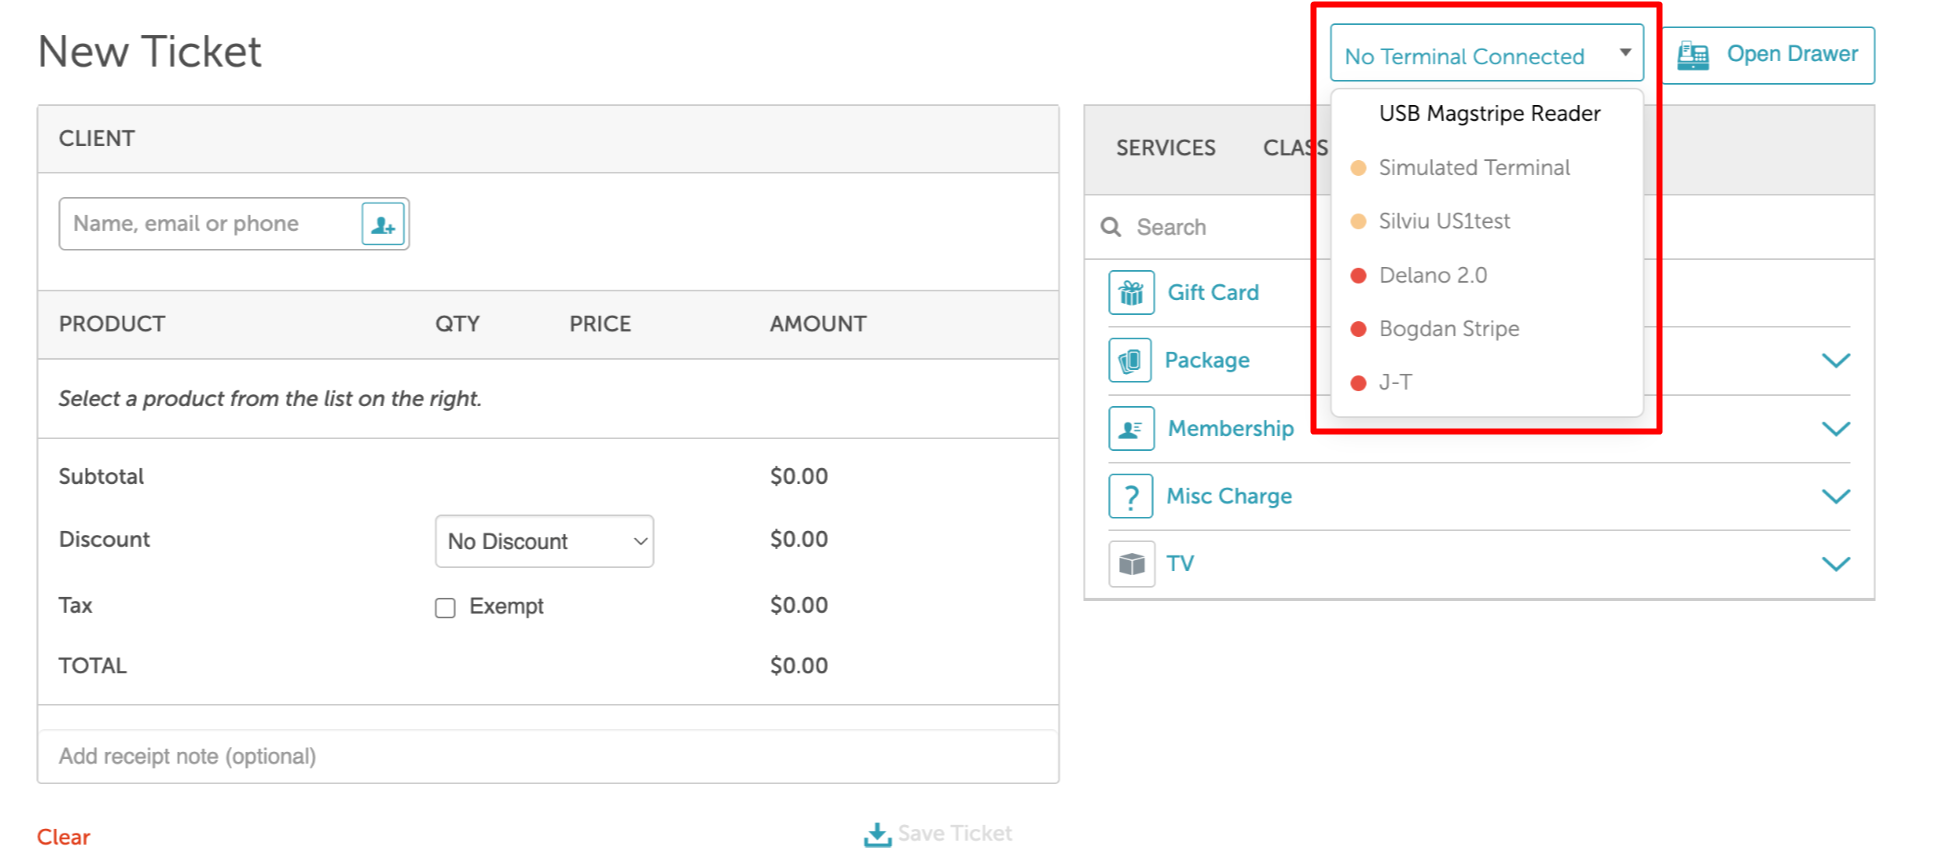
- Live Payment Terminal Status Indicators:
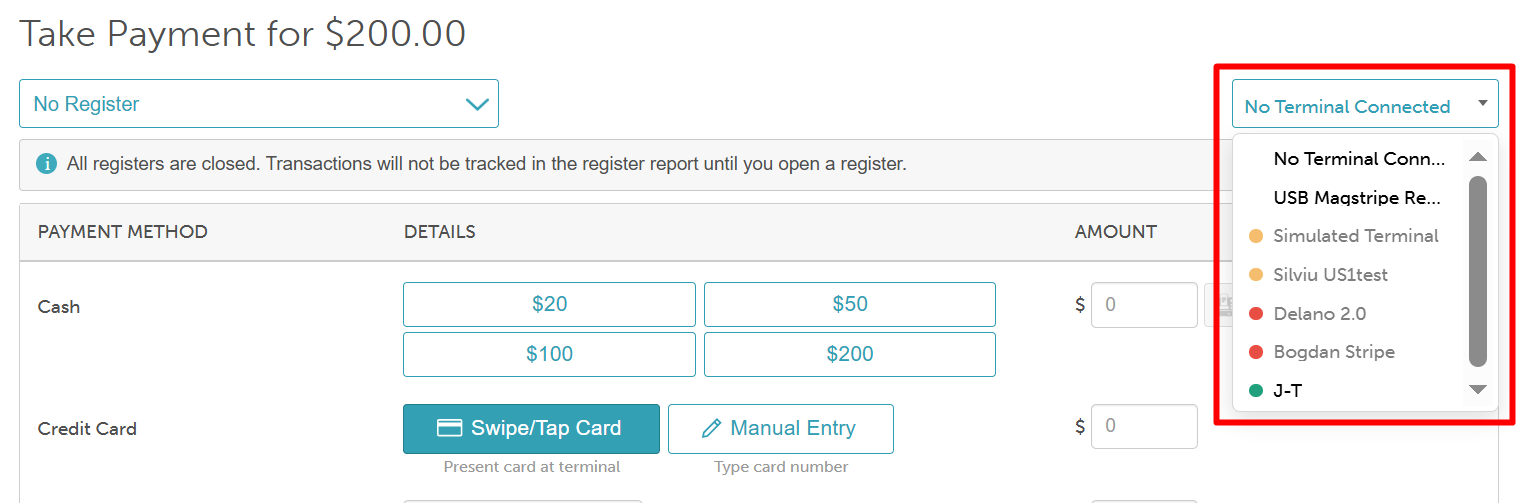
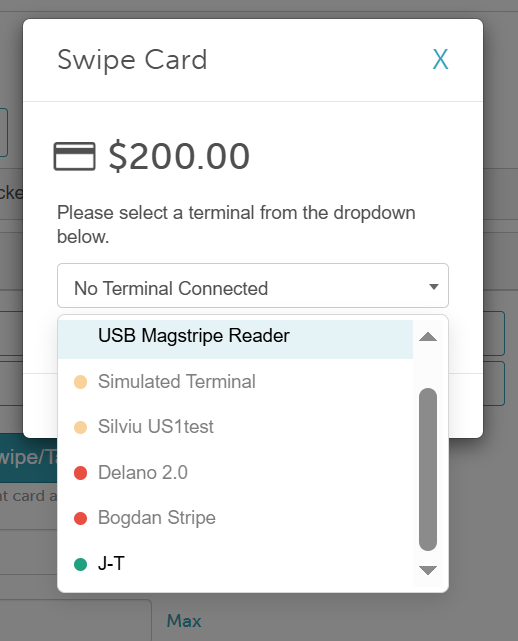
- When selecting a payment terminal in POS, a live status dot appears next to the selected terminal and within the terminal dropdown. Statuses refresh automatically every minute, giving staff immediate visibility into whether a device is reachable before initiating a charge.
- Green (Online): Terminal is connected and reachable.
- Orange (In Use): Terminal is in use with another register.
- Red (Offline): Terminal status is offline or unreachable.
- Note: If the terminal is in use or offline, the staff member is prevented from selecting these terminals. If a terminal drops offline or is mid-transaction, the payment is held rather than lost, and once the terminal becomes available, the transaction resumes automatically without requiring the cashier to reselect the device.
- When selecting a payment terminal in POS, a live status dot appears next to the selected terminal and within the terminal dropdown. Statuses refresh automatically every minute, giving staff immediate visibility into whether a device is reachable before initiating a charge.
Contents:
Enable Display Card Details Stripe Terminals Setting
- Navigate to Business Setup > Settings
- Scroll to the POS section and locate the "Display Cart Details On Stripe Terminals" setting
- Toggle to 'Yes'
- Save

Display Card Details on Stripe Terminals
- Navigate to POS > New Ticket
- Select your desired location
- Add items to the ticket
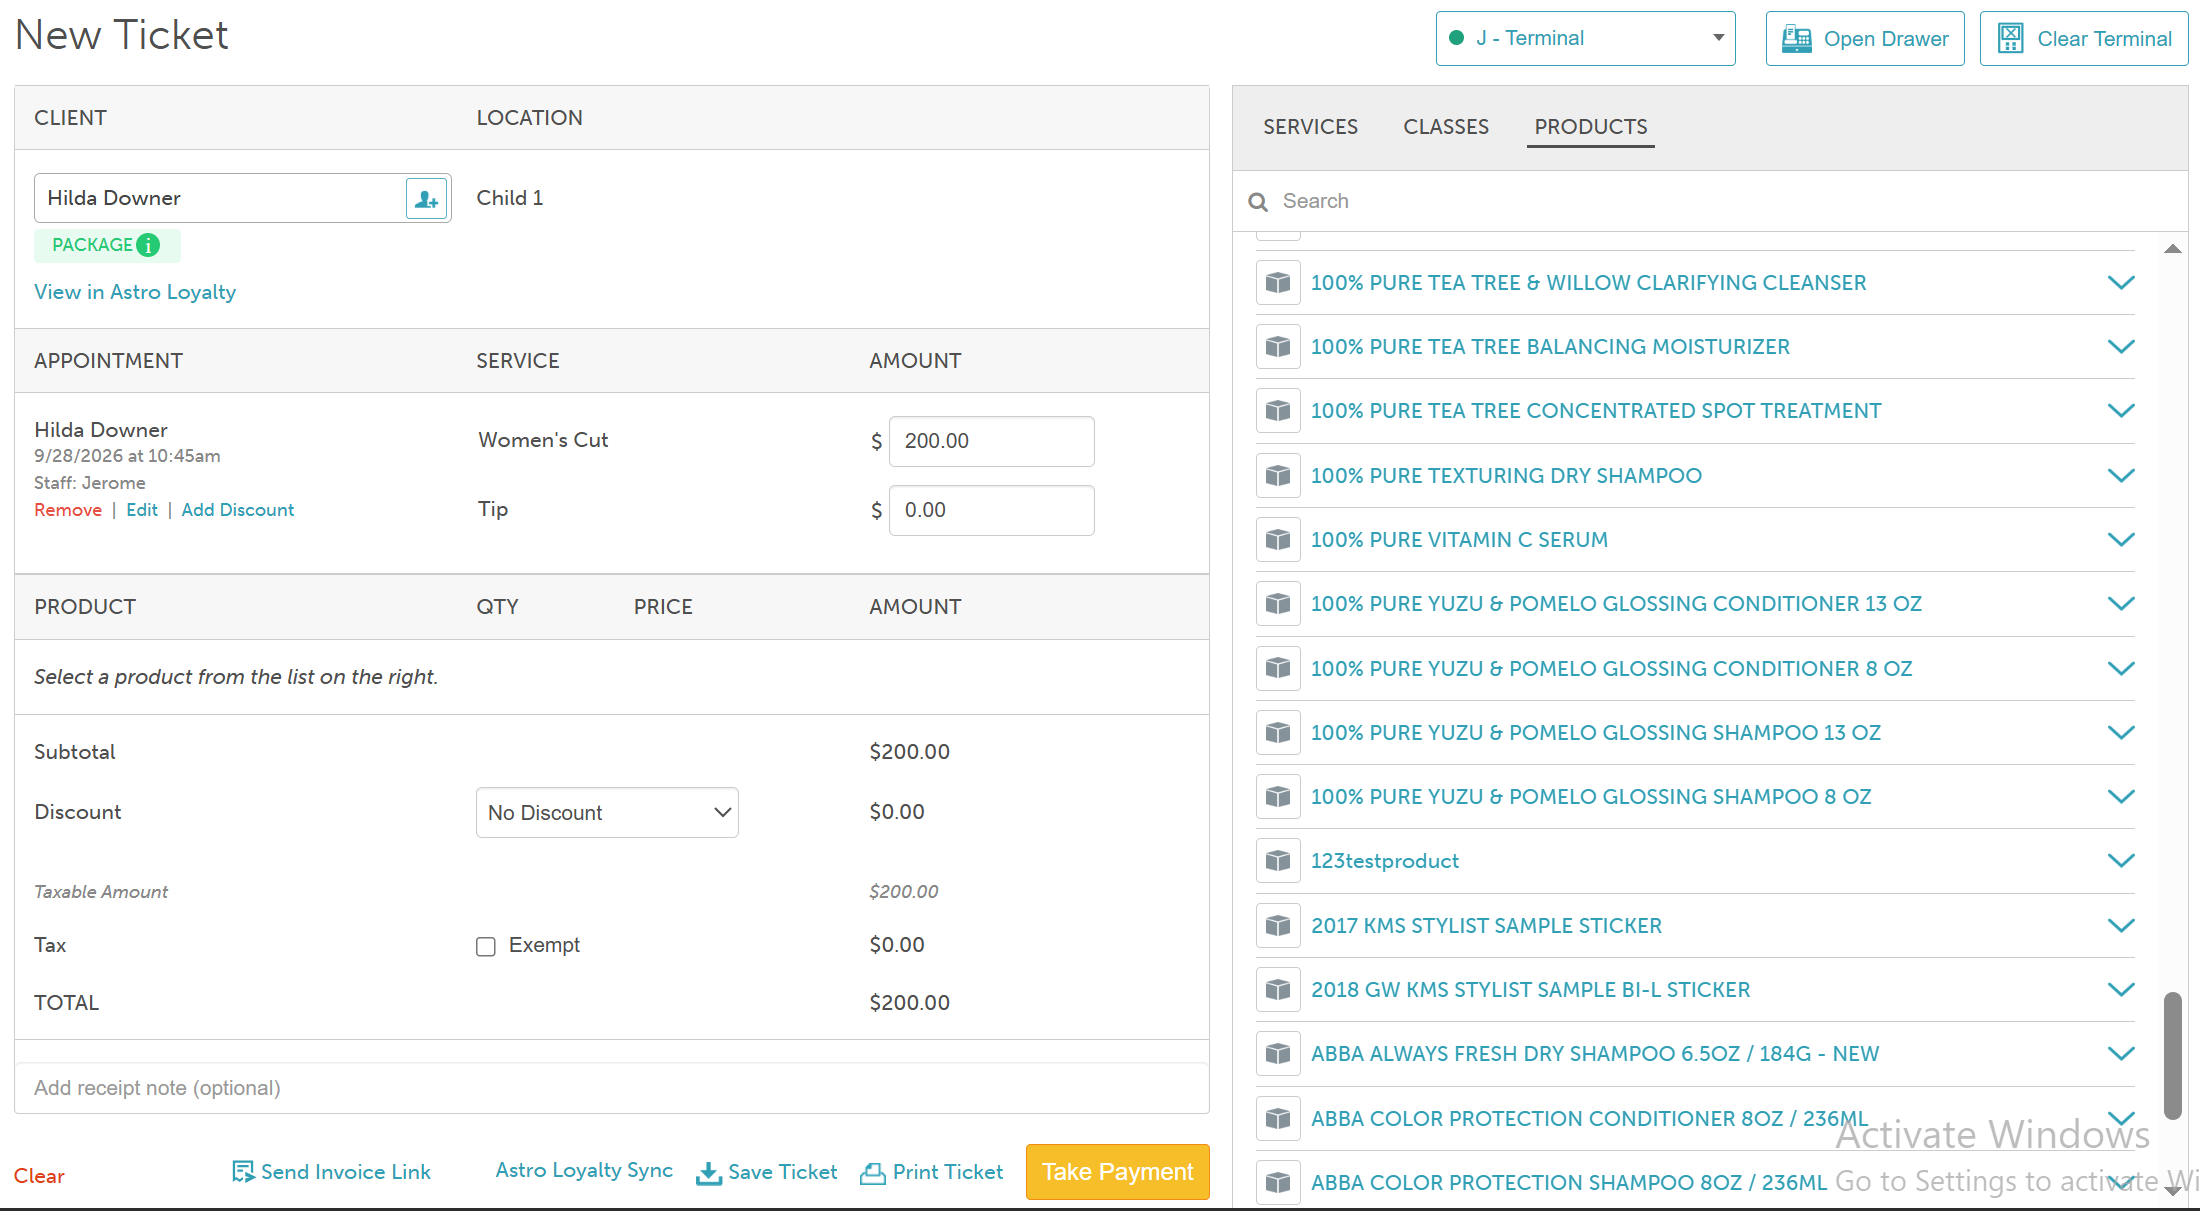
- Select your desired terminal using any of the three methods below. A status indicator appears next to each terminal name:
- On the new ticket page by expanding the terminal dropdown menu in the upper right-hand corner of the page
- On the 'Take Payment' page by expanding the terminal dropdown menu in the upper right-hand corner of the page
- Clicking the 'Swipe/Tap Card' button > On the 'Swipe Card" modal
- On the new ticket page by expanding the terminal dropdown menu in the upper right-hand corner of the page
- Select the 'Take Payment' button
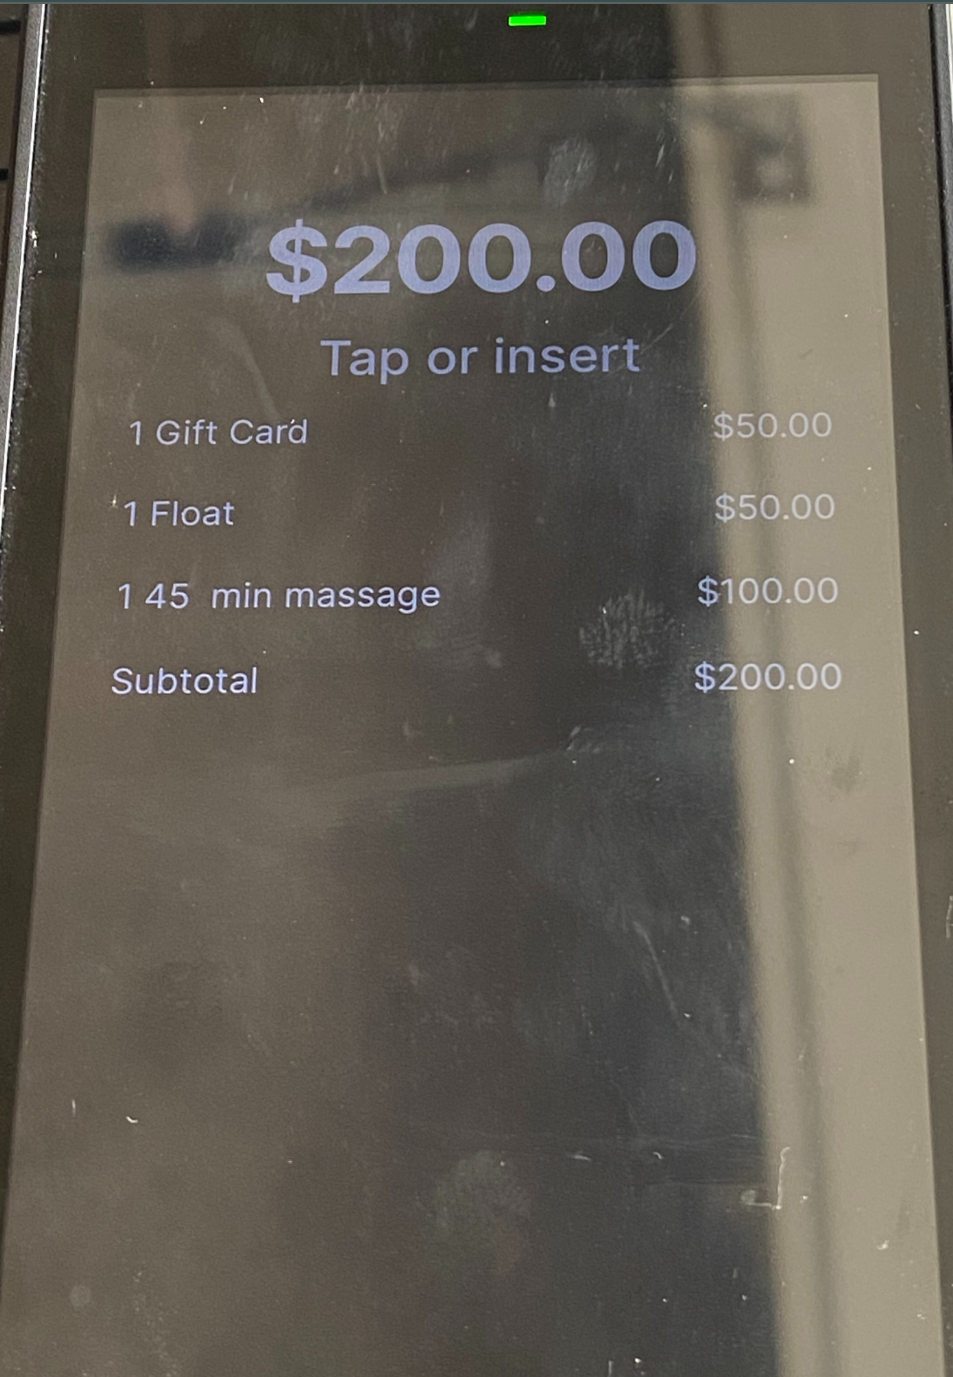
- A prompt on the terminal will display the description, price, and quantity of each item. Taxes, discounts, and the total will be shown separately
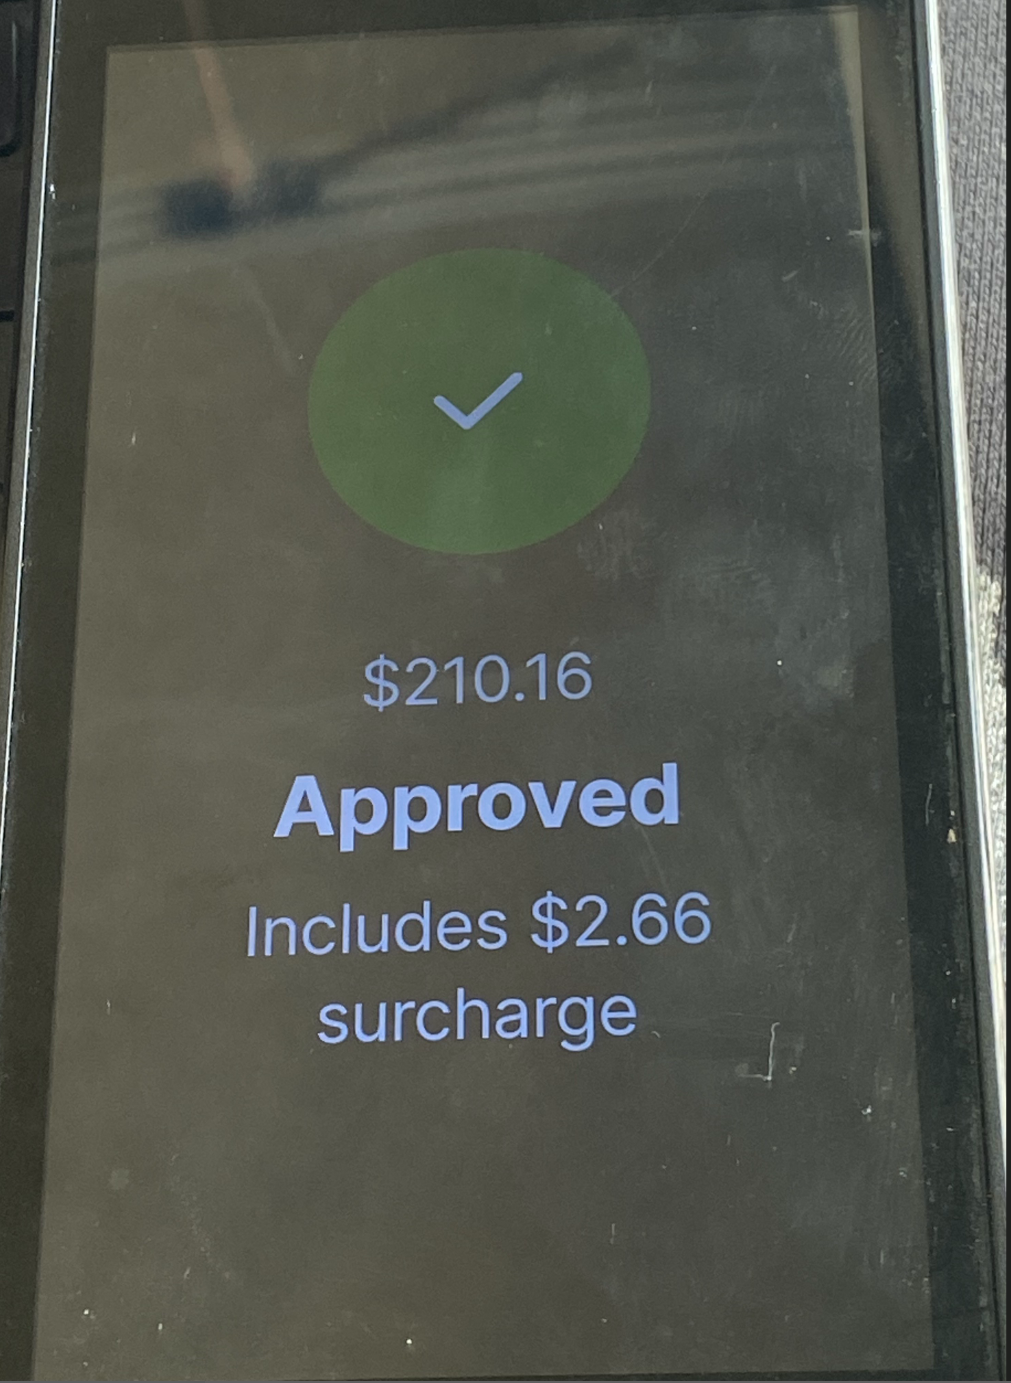
- Once the card is swiped or tapped, the approval notice will be presented on the screen
- In POS, you can close the ticket
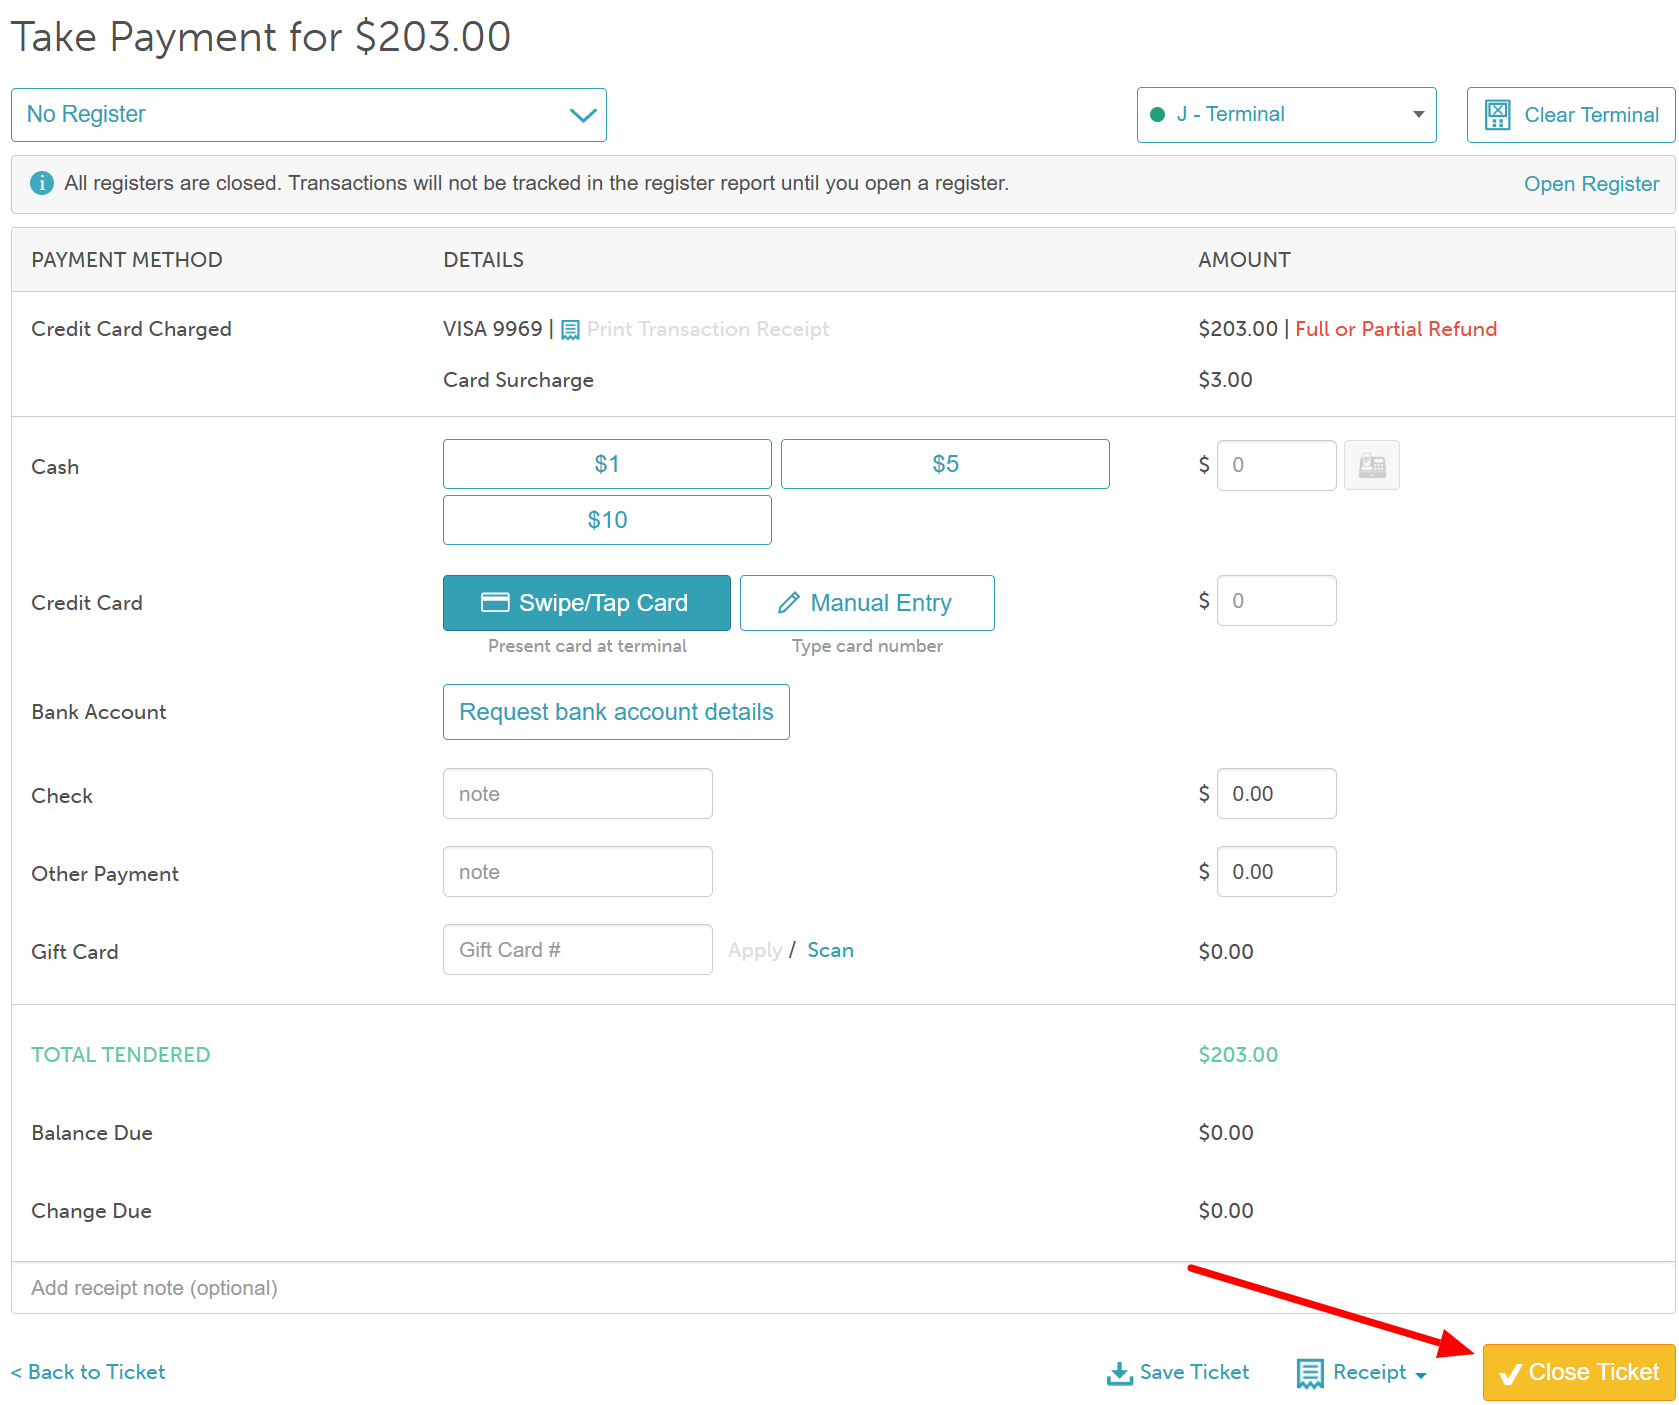
Whenever you navigate away from the POS or the ticket is closed, the terminal will automatically clear.
For more information, contact us at support@mytime.com.
Related Articles:
Was this article helpful?
That’s Great!
Thank you for your feedback
Sorry! We couldn't be helpful
Thank you for your feedback
Feedback sent
We appreciate your effort and will try to fix the article