Self Pay allows clients to review and pay for completed appointments directly from their mobile devices. Once a service is marked as completed, the client automatically receives a text message or email containing a secure link to view and pay their invoice.
Things to know:
- Both Client Invoicing and Self-Pay must be enabled on your account for clients to use self-checkout. Learn more about invoicing here, self-checkout here
- Clients can add tips if the "Allow clients to leave tips?" setting is enabled.
- Clients can pay using a card saved on file or enter a new card during checkout.
- Invoices display prices in your business's selected currency and automatically calculate any configured credit card surcharges. Learn more about surcharges here.
- Multiple stackable promo codes can be applied. If an invalid code is entered (e.g., Can be used for Online Bookings and Purchases is disabled), the system displays the specific reason for the failure. Learn more here
- Clients can select their preferred language on the invoice from any languages enabled in your company language settings.
- When an invoice is paid in full, staff receive a push notification on the Scheduler mobile app ("[Client Name] has paid in full for Ticket #[Ticket Number]"). Tapping it opens the closed ticket directly.
- Membership value credits are displayed based on the amount used, regardless of whether the 'Apply Membership Value Credits' setting is configured to apply before tax or after tax.
- Invoices for prepaid appointments show a $0 balance and include any relevant in-package or in-membership labels.
- If the "Change Status to Completed" option is set to either "Automatically Based on Service Duration" or "Manually by Updating Status", the system will automatically mark the appointment as completed and generate a ticket once the service time has ended or when the appointment is manually marked as completed.
- When a client enters a promotional code that cannot be applied, the system displays the specific reason for the failure. Example: If the "Can be used for Online Bookings and Purchases" restriction is unchecked on the promotion, the client will see the following error message: "The X promo code cannot be used for online payments."
Once the settings are enabled and the template is activated, and an appointment containing a configured service is marked as completed, the client will receive the self-checkout notification via their active delivery method (Email or SMS)
Contents:
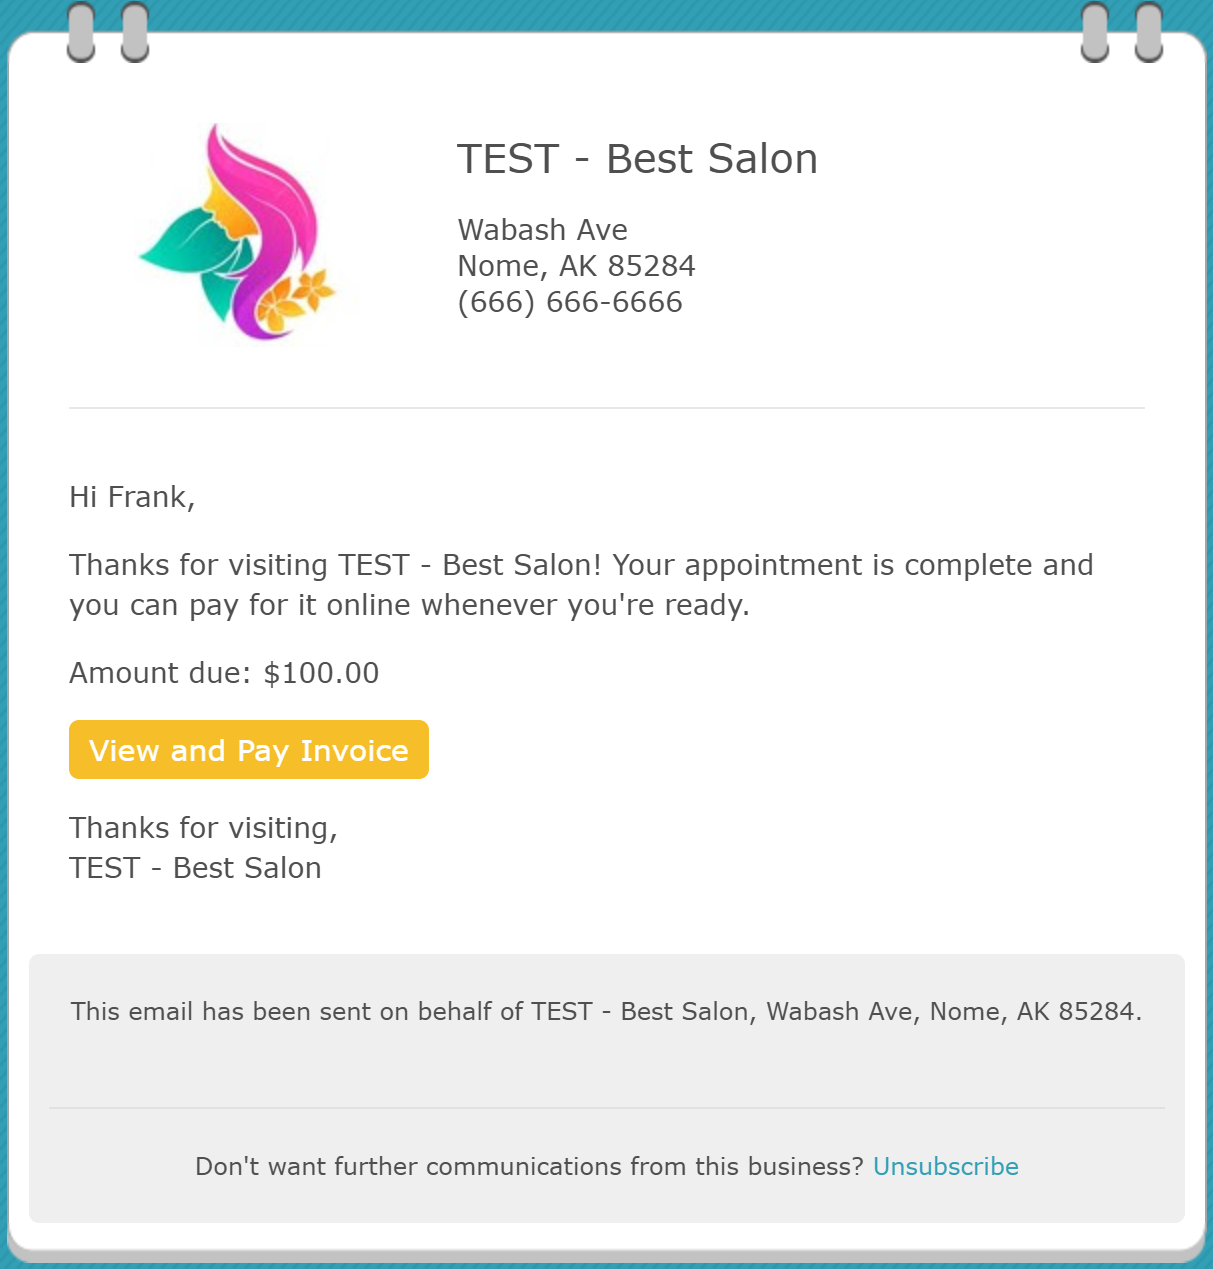
Paying via Email
- Open the email notification and tap the "View & Pay Invoice" button
Review the itemized charges in the browser window that opens
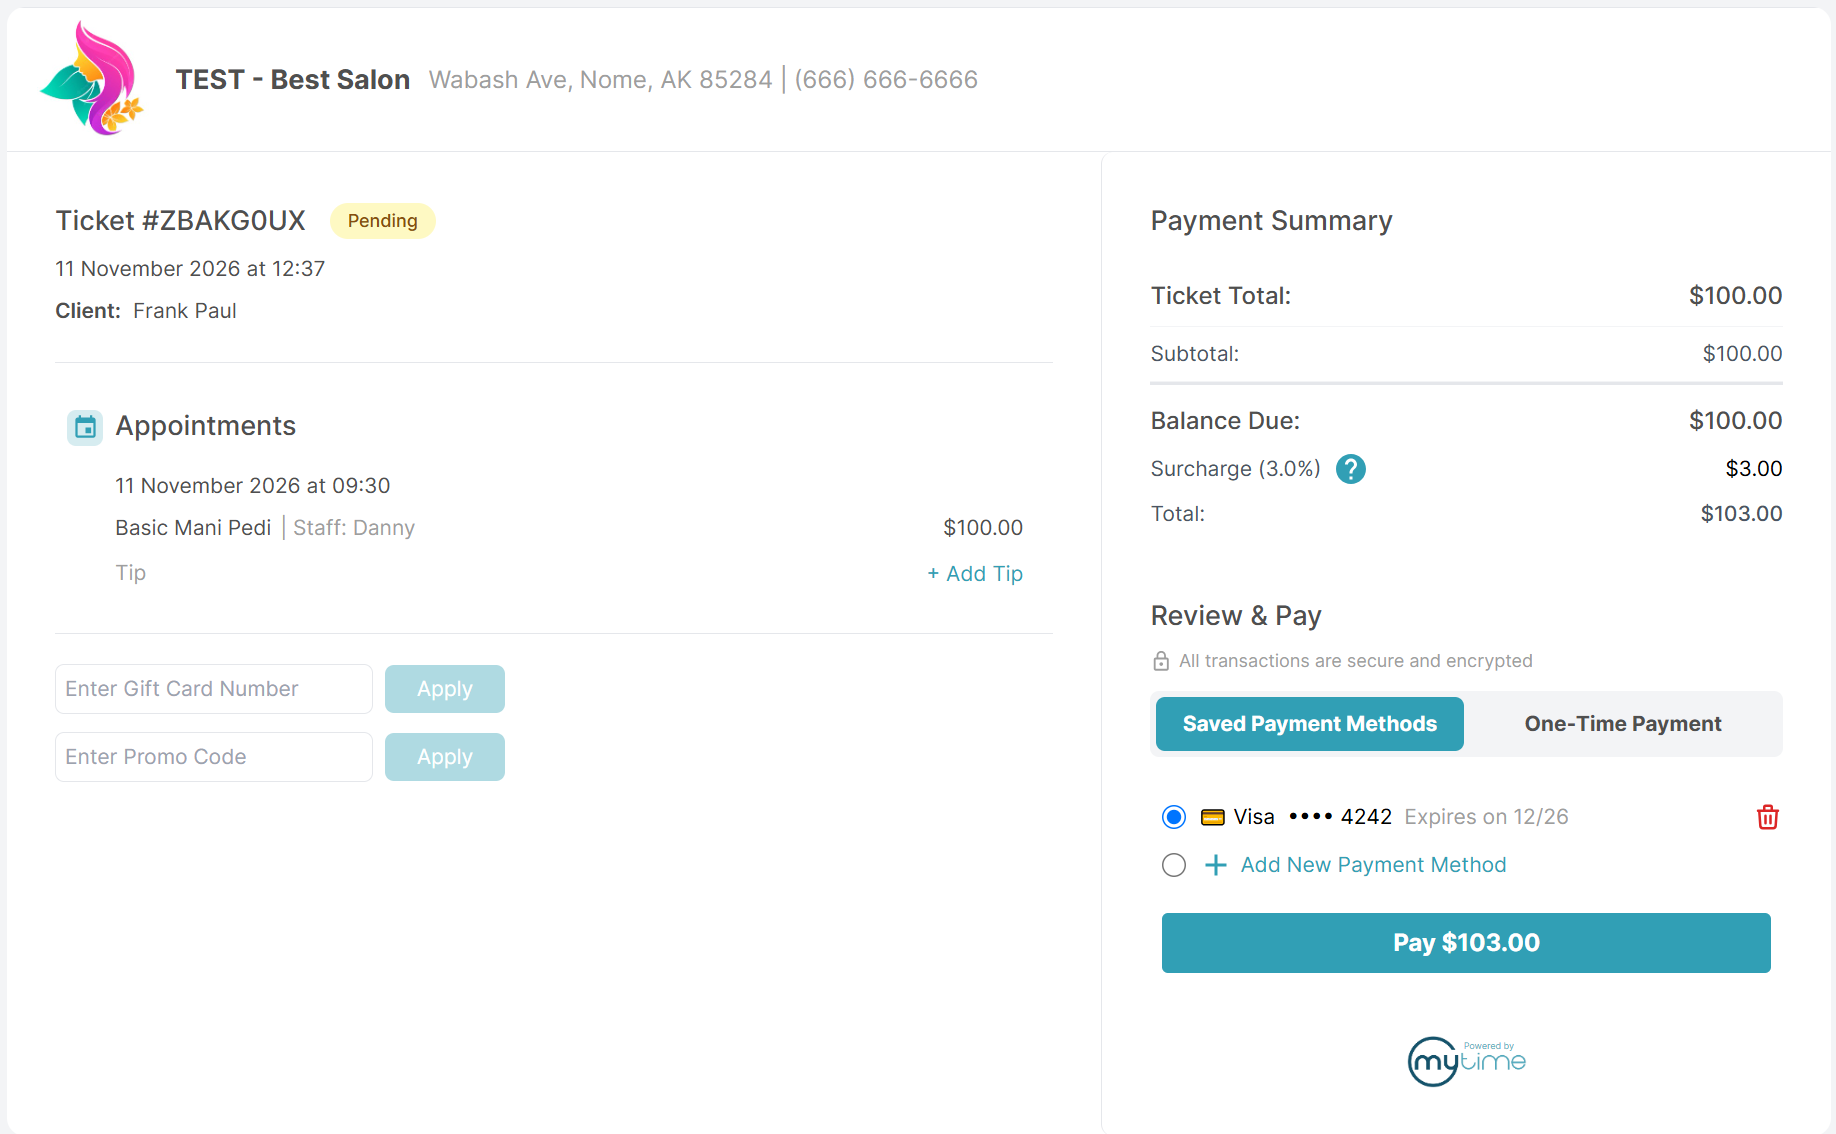
Select an optional tip, enter any promo codes, and select or add a payment method
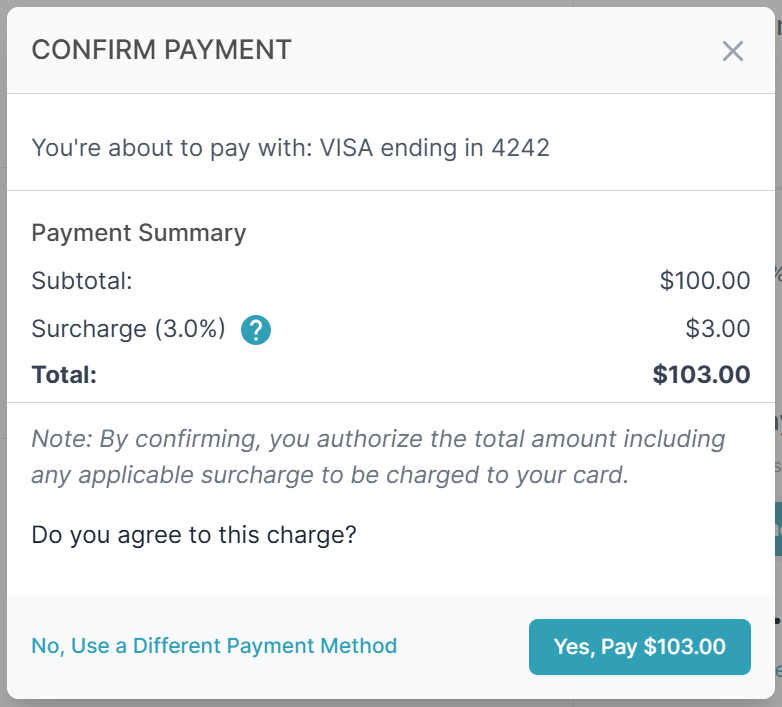
Accounts with a surcharging fee: A "Confirm Payment" pop-up will appear. Click "Yes, Pay $XX" to complete the transaction
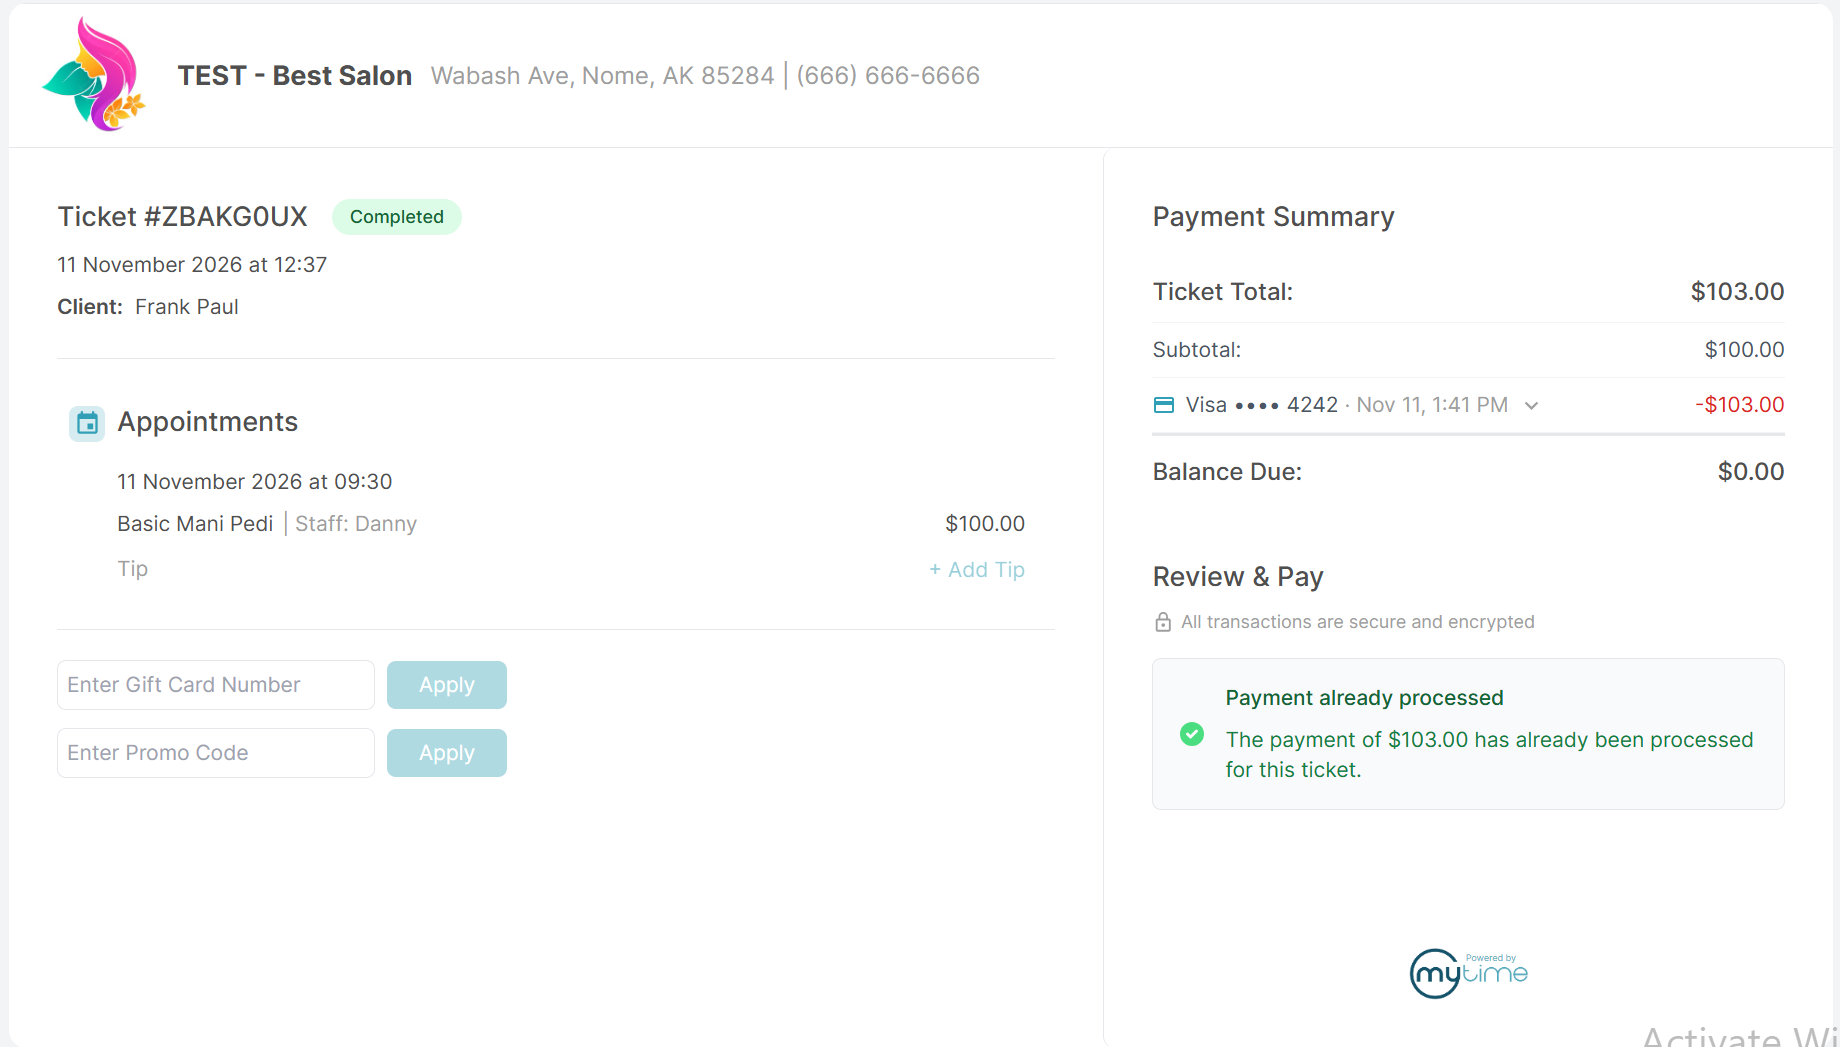
- View the confirmation screen
Paying via SMS
- Open the email notification and tap the payment link
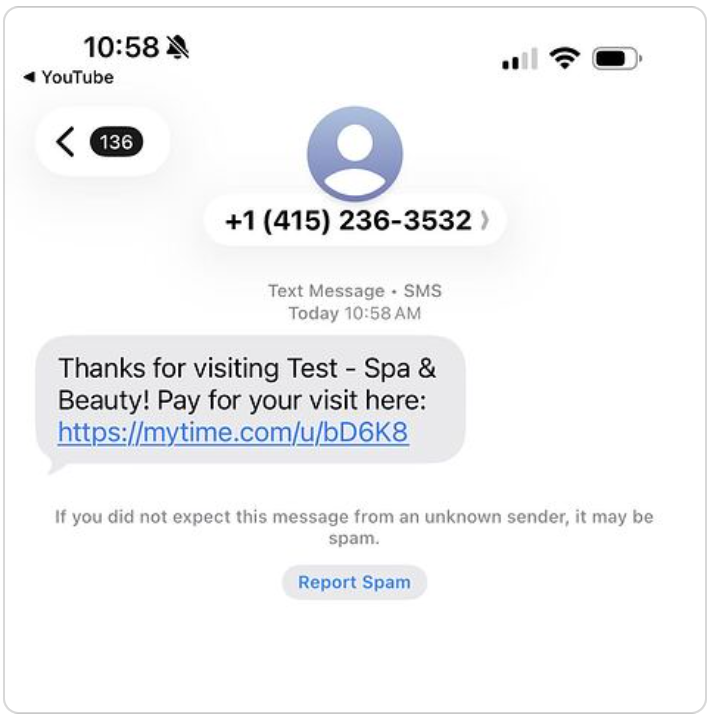
Review the itemized charges in the browser window that opens
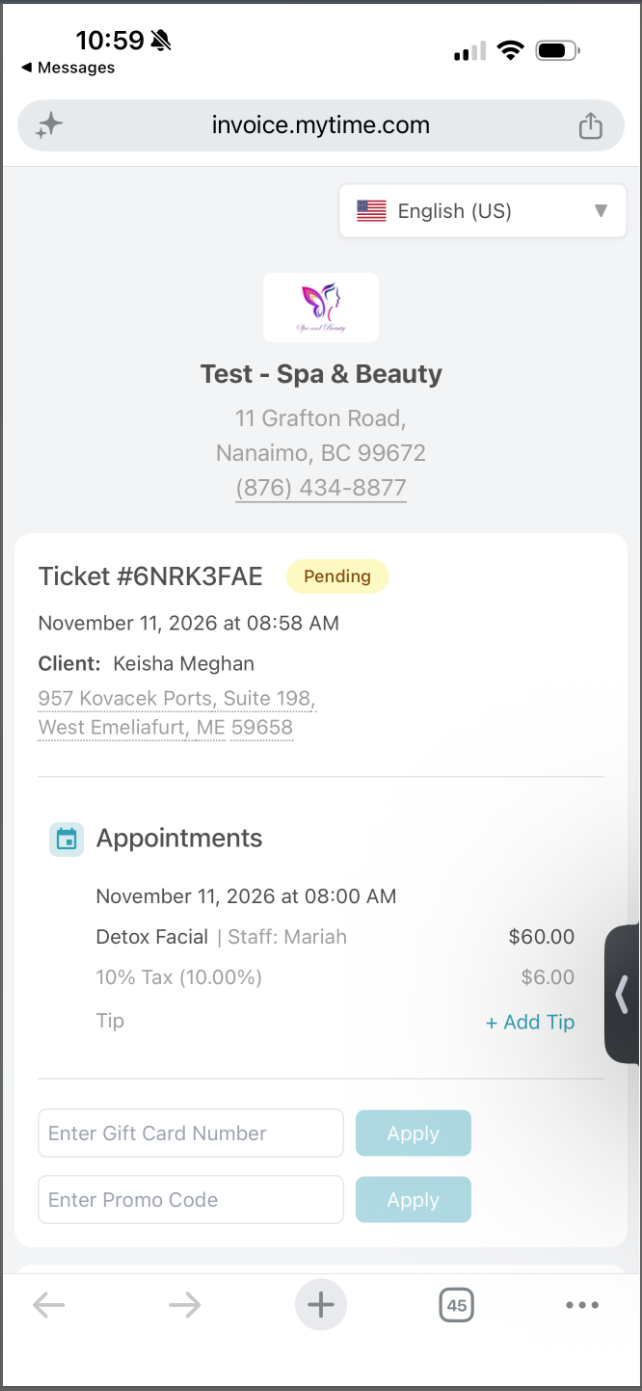
Select an optional tip, enter any promo codes, and select or add a payment method
- Tap "Pay" to complete the transaction and view the confirmation screen
For more information, contact us at support@mytime.com or (385) 233-6964.
Related Articles:
Was this article helpful?
That’s Great!
Thank you for your feedback
Sorry! We couldn't be helpful
Thank you for your feedback
Feedback sent
We appreciate your effort and will try to fix the article