Expiration reminder fields allow clients to upload compliance records such as vaccinations, certifications, or medical documents directly during online booking, ensuring your team has valid, up-to-date documentation before an appointment.
Things to know:
- Expiration reminder custom fields monitor dates automatically and update status badges as deadlines approach or pass. To learn how to configure them, learn more here.
- Once an expiration field is added to an intake form and linked to a service, class, or membership, it displays seamlessly across both the booking widget, express checkout page and your branded guest app.
- Visual badges update automatically relative to the recorded expiration date. Only one badge displays at a time:
- Expires Soon (Orange): Appears when a document's expiration date falls within your designated advance-notice window.
- Expired (Red): Appears automatically once the recorded expiration date has passed.
- Note: These badges are mutually exclusive and will never display together.
- When the "Allow Attachment" setting is enabled for the field, clients can upload verification documents (such as PDF, PNG, or JPEG files) alongside the expiration date during booking.
- All entered dates and uploaded documents save directly to the associated Client, Pet, or Family Member profile for easy ongoing reference and staff audits.
Clients can complete expiration records and submit documentation during booking by following these steps:
- Navigate to your booking page using the booking URL or book button on your website
- Select the desired location (if the account has multiple locations)
- Click the "Sign In" button at the top of the page
- Choose their login method:
- Standard: Enter their registered email address and password, then click 'Sign In'
- Social Login: Select 'Continue with Google,' 'Continue with Apple,' or 'Continue with Facebook' to use their existing social media credentials
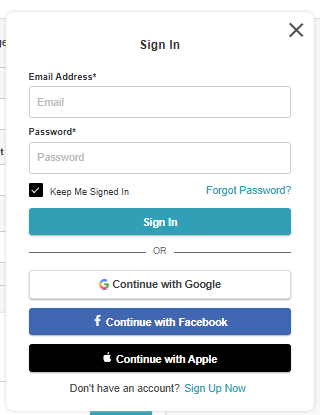
- Once their credentials or social accounts are authenticated, they will be instantly logged into the booking widget and can proceed with scheduling appointments.
- Select who the booking is for (client, family member, or pet), pick the desired service, and add any optional add-ons.
- Choose an appointment slot and select a preferred staff member
- On the checkout screen, locate the expiration reminder fields within the intake form section.
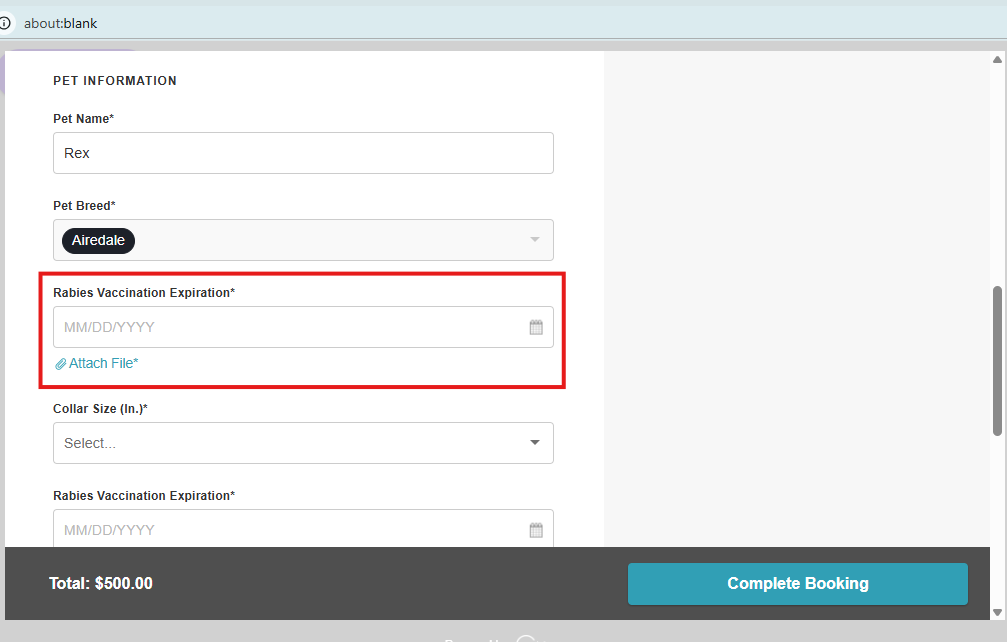
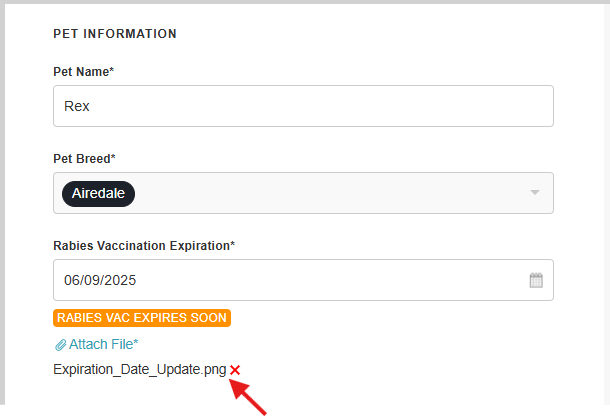
- Select the date picker to input the document's expiration date. A status tag will automatically update based on the chosen date:
- Expires Soon (Orange): Appears if the date falls within the designated advance warning period.
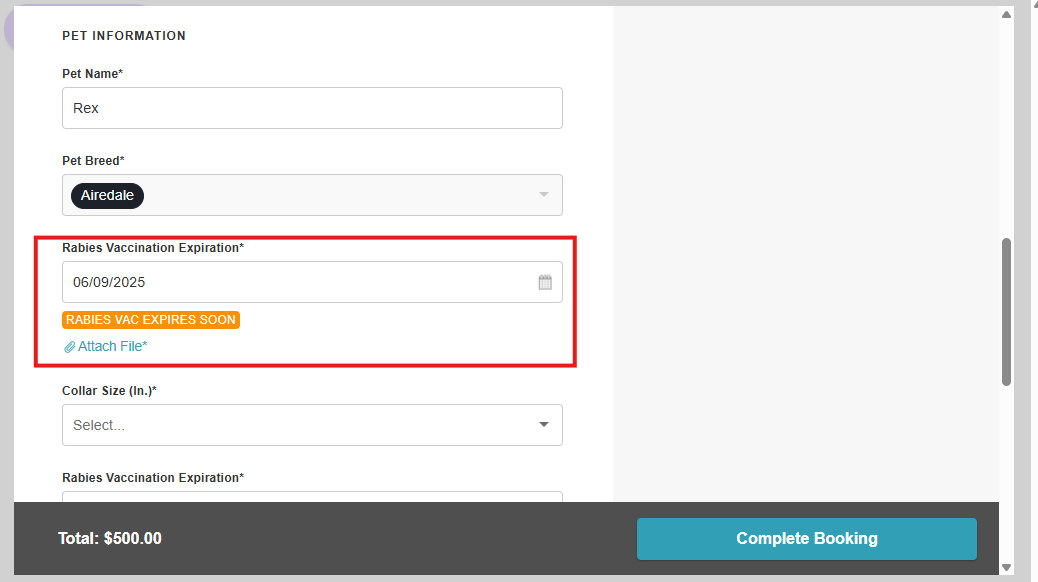
- Expired (Red): Appears if the date selected has already passed.
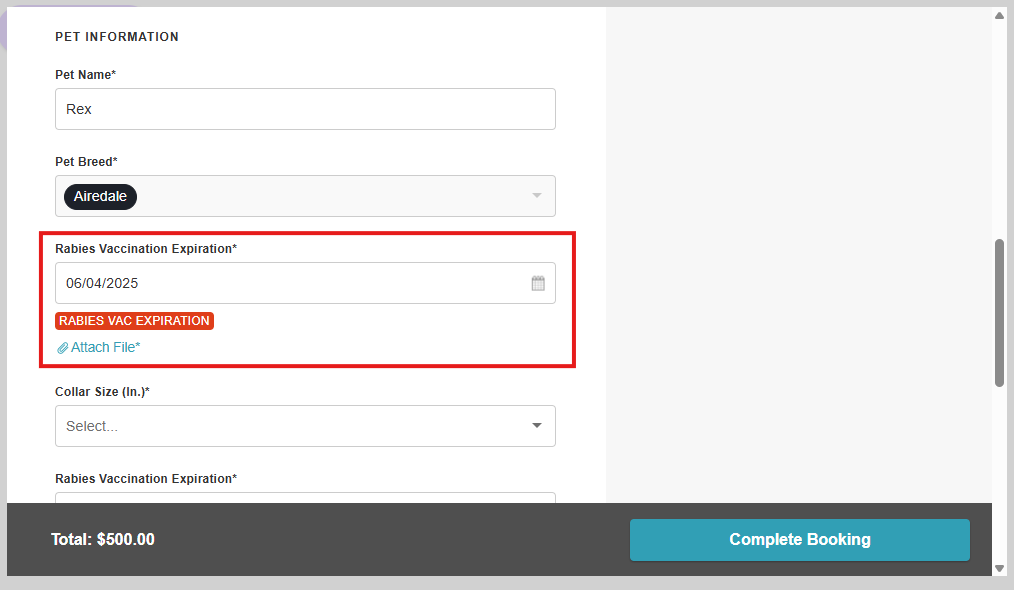
- Expires Soon (Orange): Appears if the date falls within the designated advance warning period.
- If the field allows uploads, click Attach File to select and upload a supporting image or document (such as a vaccination certificate or medical record). The attached file will display directly below the date field once uploaded.
- Enter payment information (if required) and click Book to confirm the appointment. All submitted dates and uploaded records are automatically saved to the profile.

If you have any questions, please contact our Support Team at support@mytime.com
Related Articles:
Was this article helpful?
That’s Great!
Thank you for your feedback
Sorry! We couldn't be helpful
Thank you for your feedback
Feedback sent
We appreciate your effort and will try to fix the article