Manually adding a gift card to a client’s profile allows it to be automatically available as a payment option when checking out a purchase for that client in POS. This article walks you through how to add a gift card from the client’s profile on the scheduler app.
Things to Know:
- The ability to manually add gift cards on a client’s profile is governed by the "Accessing Gift Cards" access control setting.
- By default, gift cards can be added to a client’s profile without payment. However, if the "Prevent adding a gift card to a client record without taking payment" hidden setting is enabled, the system will prevent adding a gift card unless payment has been received.
- When adding a gift card, you can set an expiration date—this is controlled by the “Enable Gift Card Expiration” setting. Learn more here.
- You can enter a custom gift card number, or leave the field blank for the system to generate one automatically.
- When multiple gift cards are assigned to a client profile, the gift cards displayed on the Take Payment page in POS depend on the ticket total.
- If the ticket total is less than the value of the first (oldest) gift card, only that gift card is displayed.
- If the ticket total exceeds the value of the first gift card, additional gift cards are displayed so the full amount can be covered. Example: A client has two gift cards:
- Gift Card A: $100 (purchased first)
- Gift Card B: $150
- If the ticket total is less than $100, only the $100 gift card is displayed on the Take Payment page.
- If the ticket total is more than $100, both the $100 and $150 gift cards are displayed
To add a gift card to a client profile:
- Launch the MyTime Scheduler app on your device
- Choose your login method:
- Standard: Enter your registered email address and password, then tap 'Sign In'
- Social Login: Select 'Continue with Google' or 'Continue with Apple' to use your existing credentials for a faster login experience. For detailed instructions, learn here

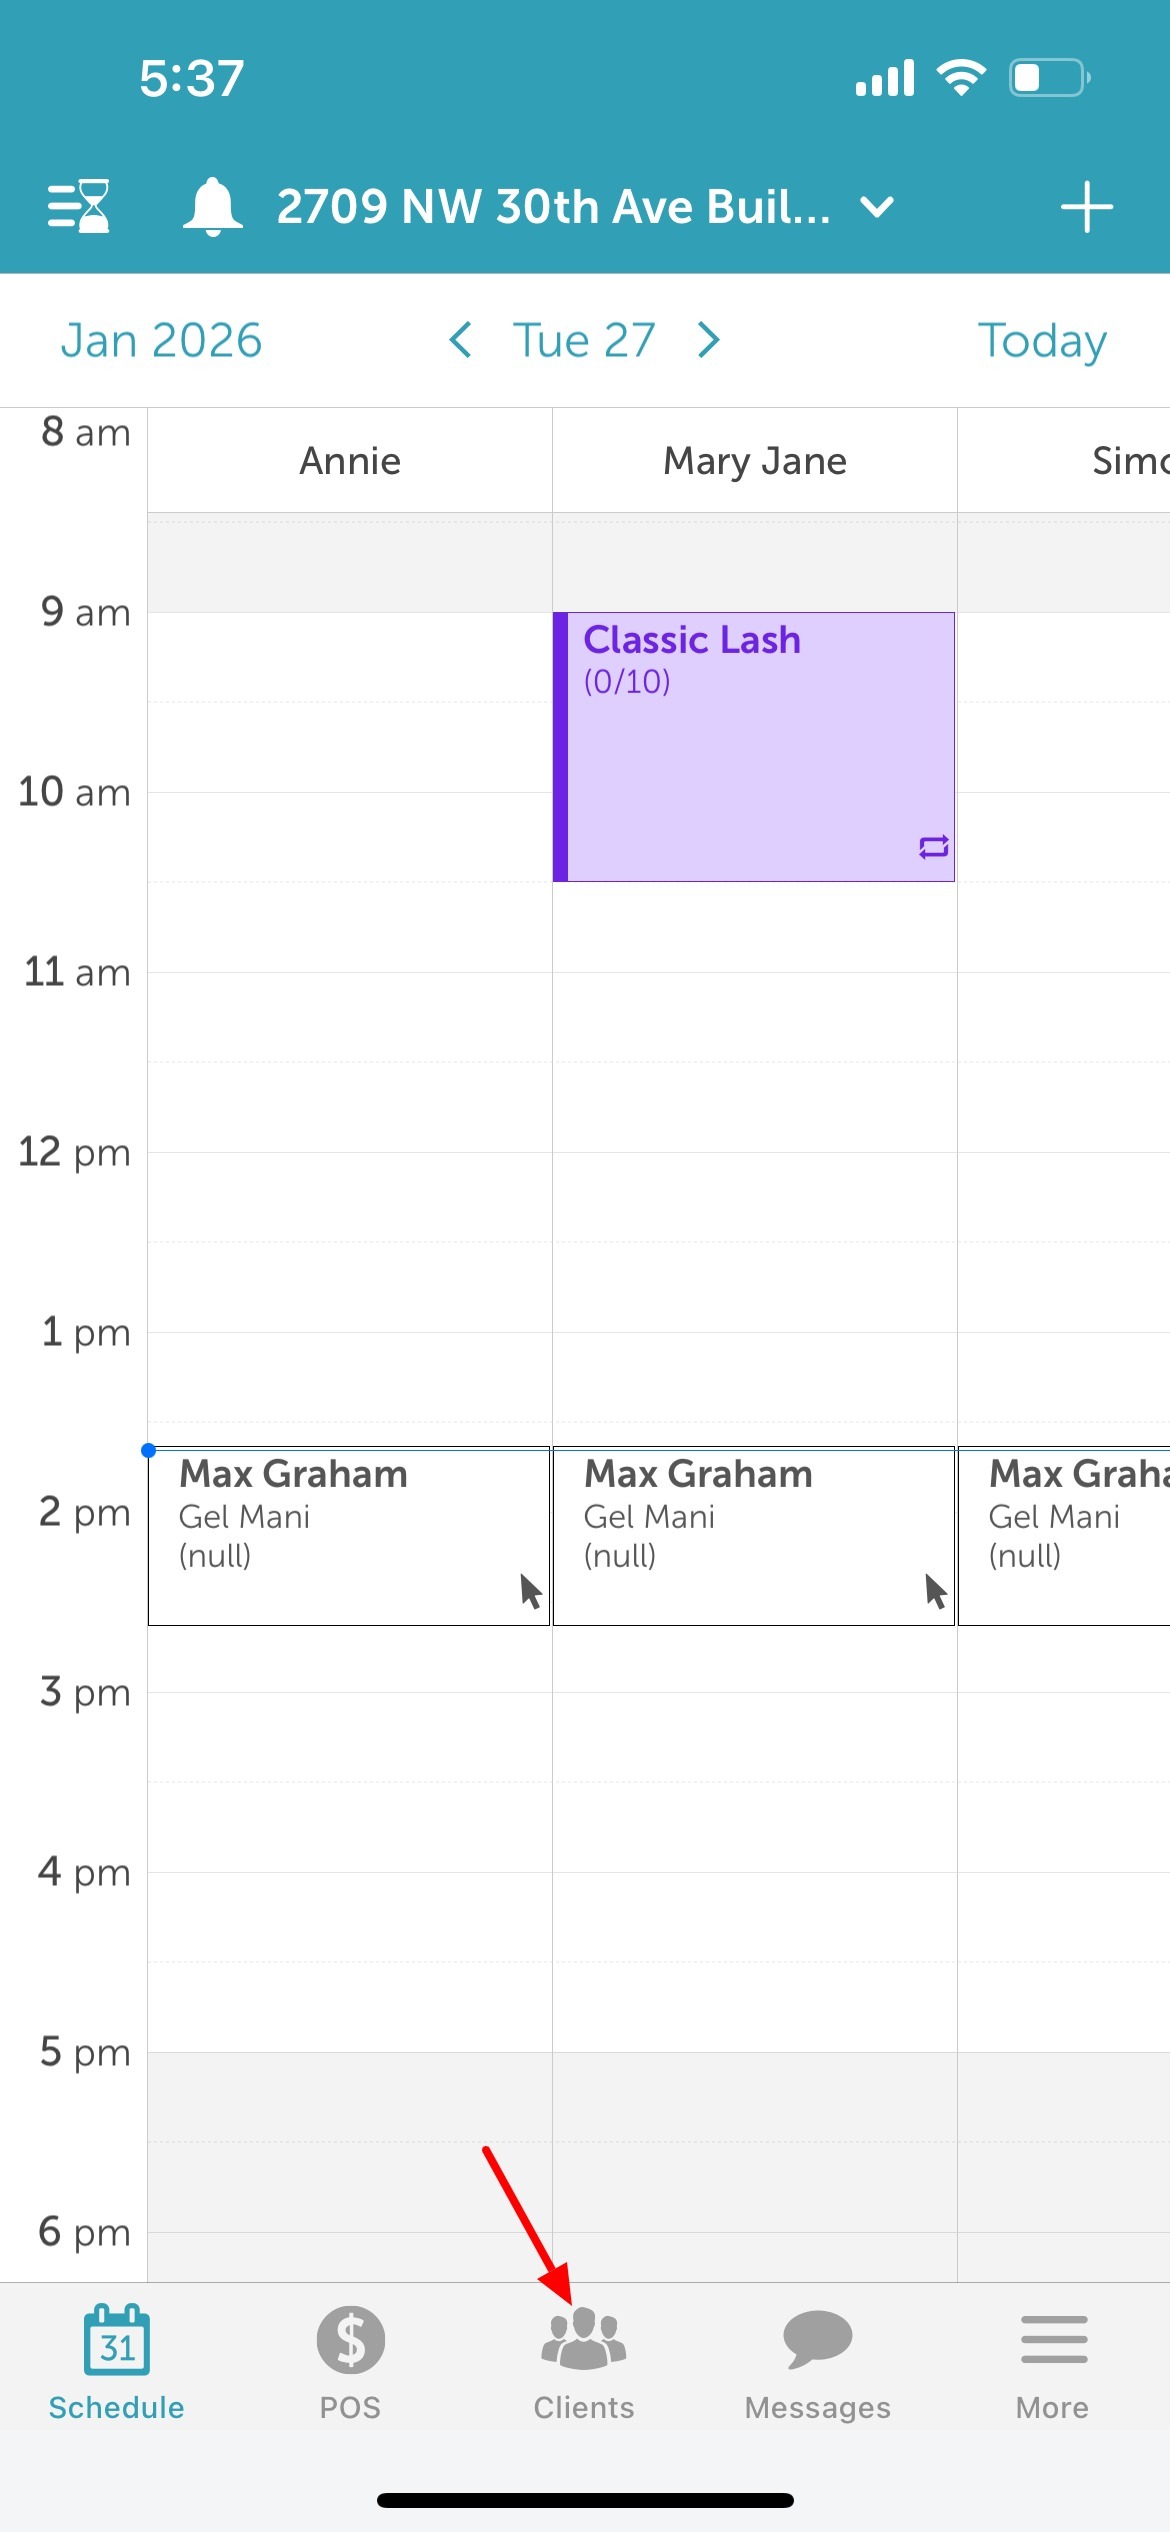
- After signing in, you will be directed to the Schedule by default
- Tap the Clients icon located at the bottom of the screen
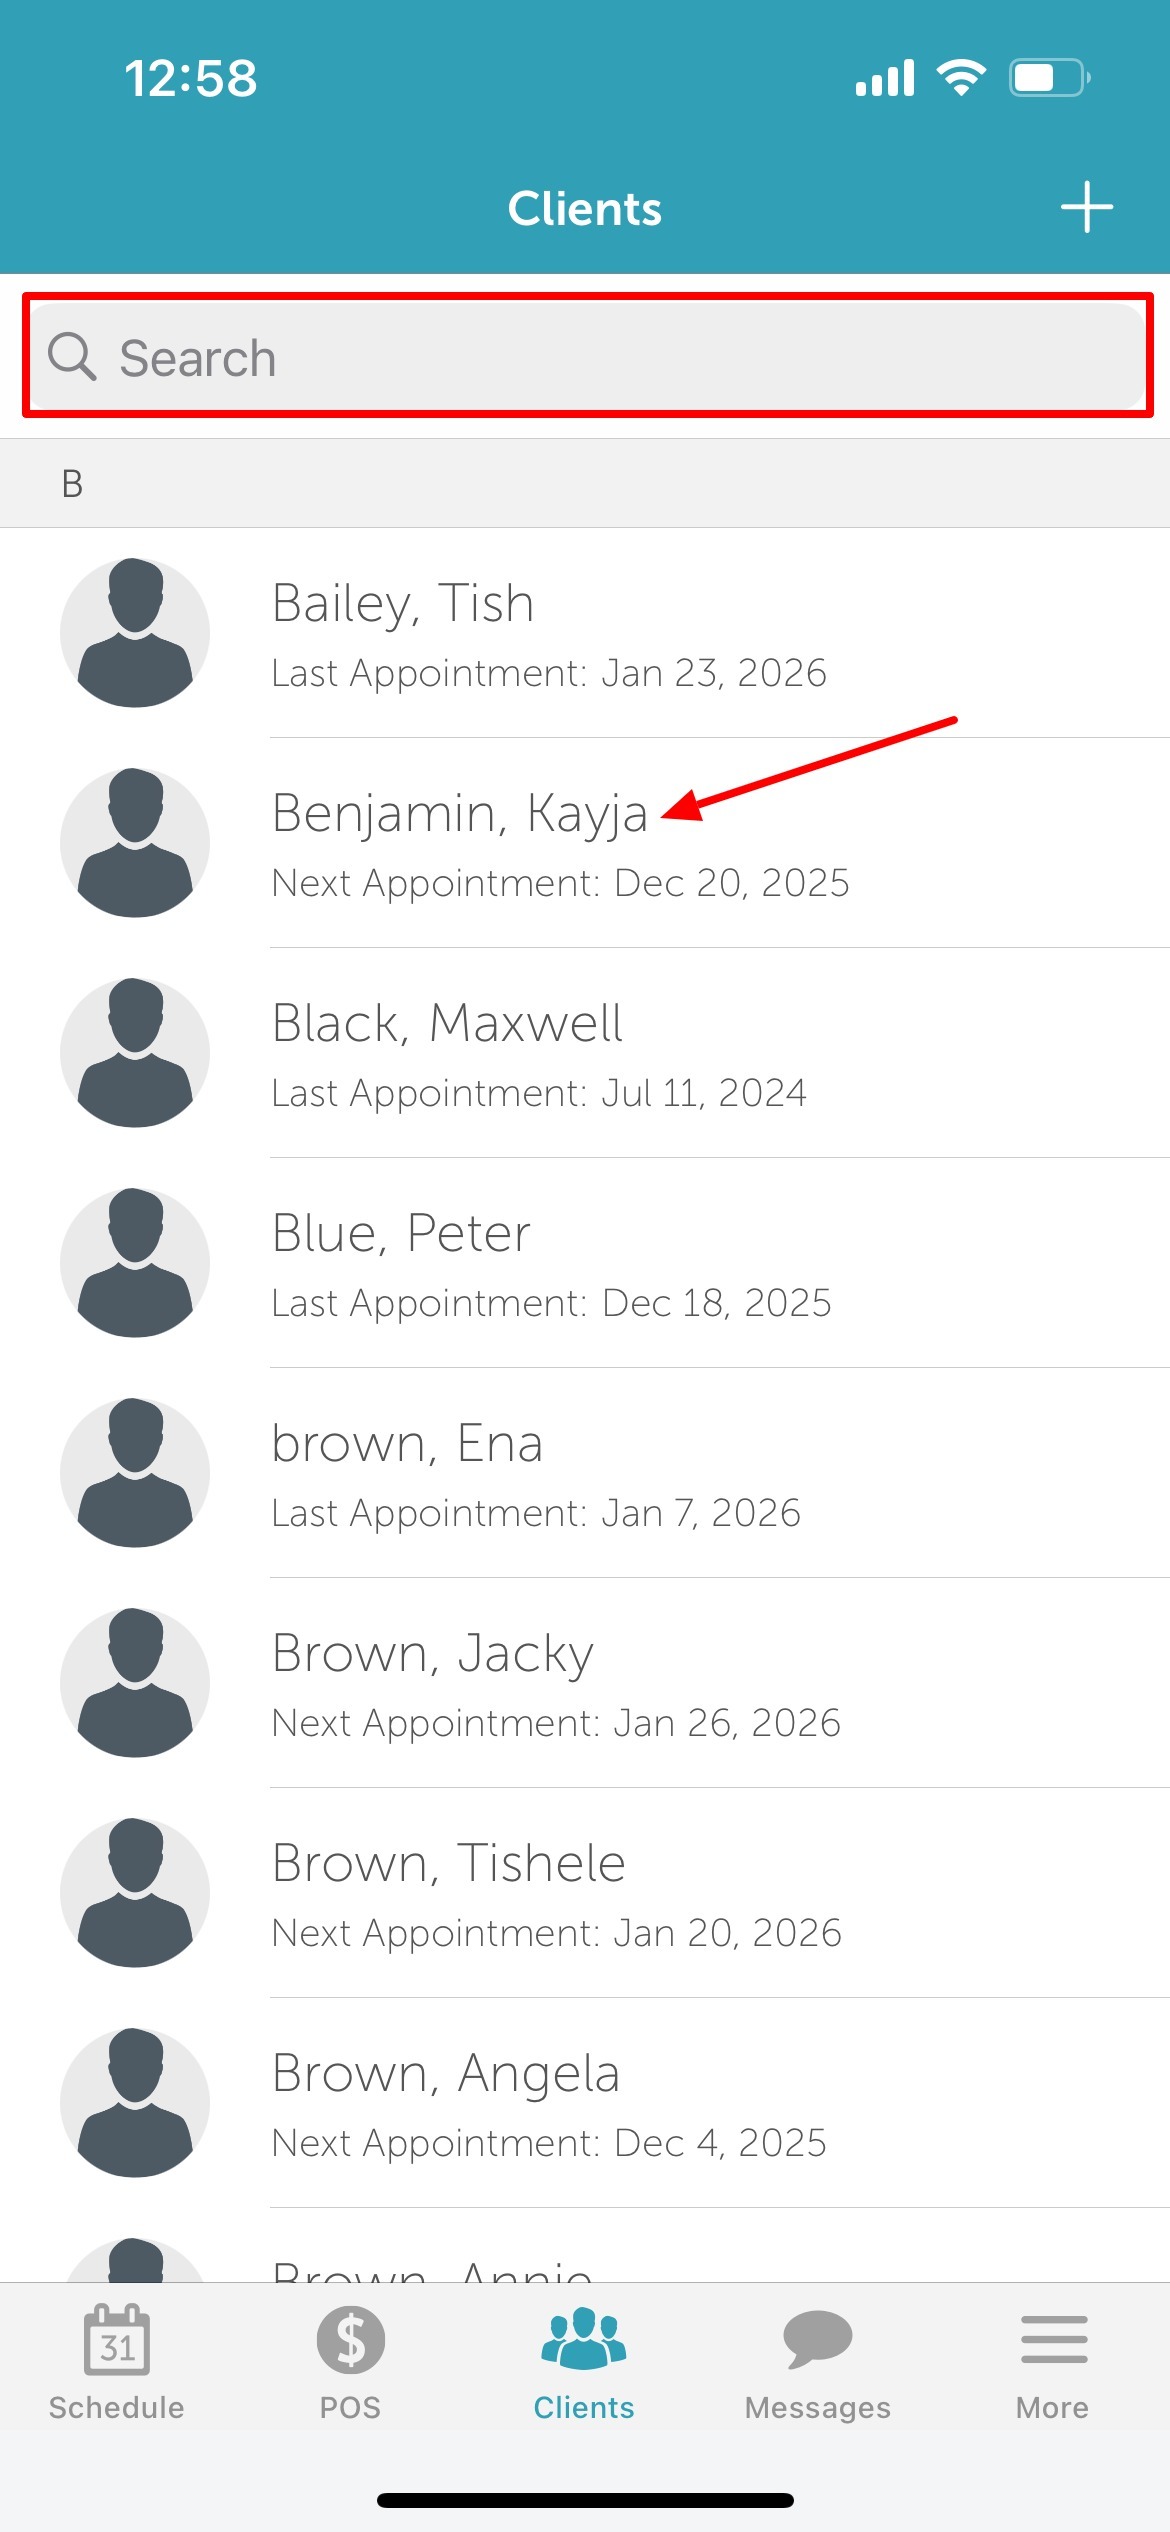
- Type the client’s name in the Search field, or select the client from the client list.
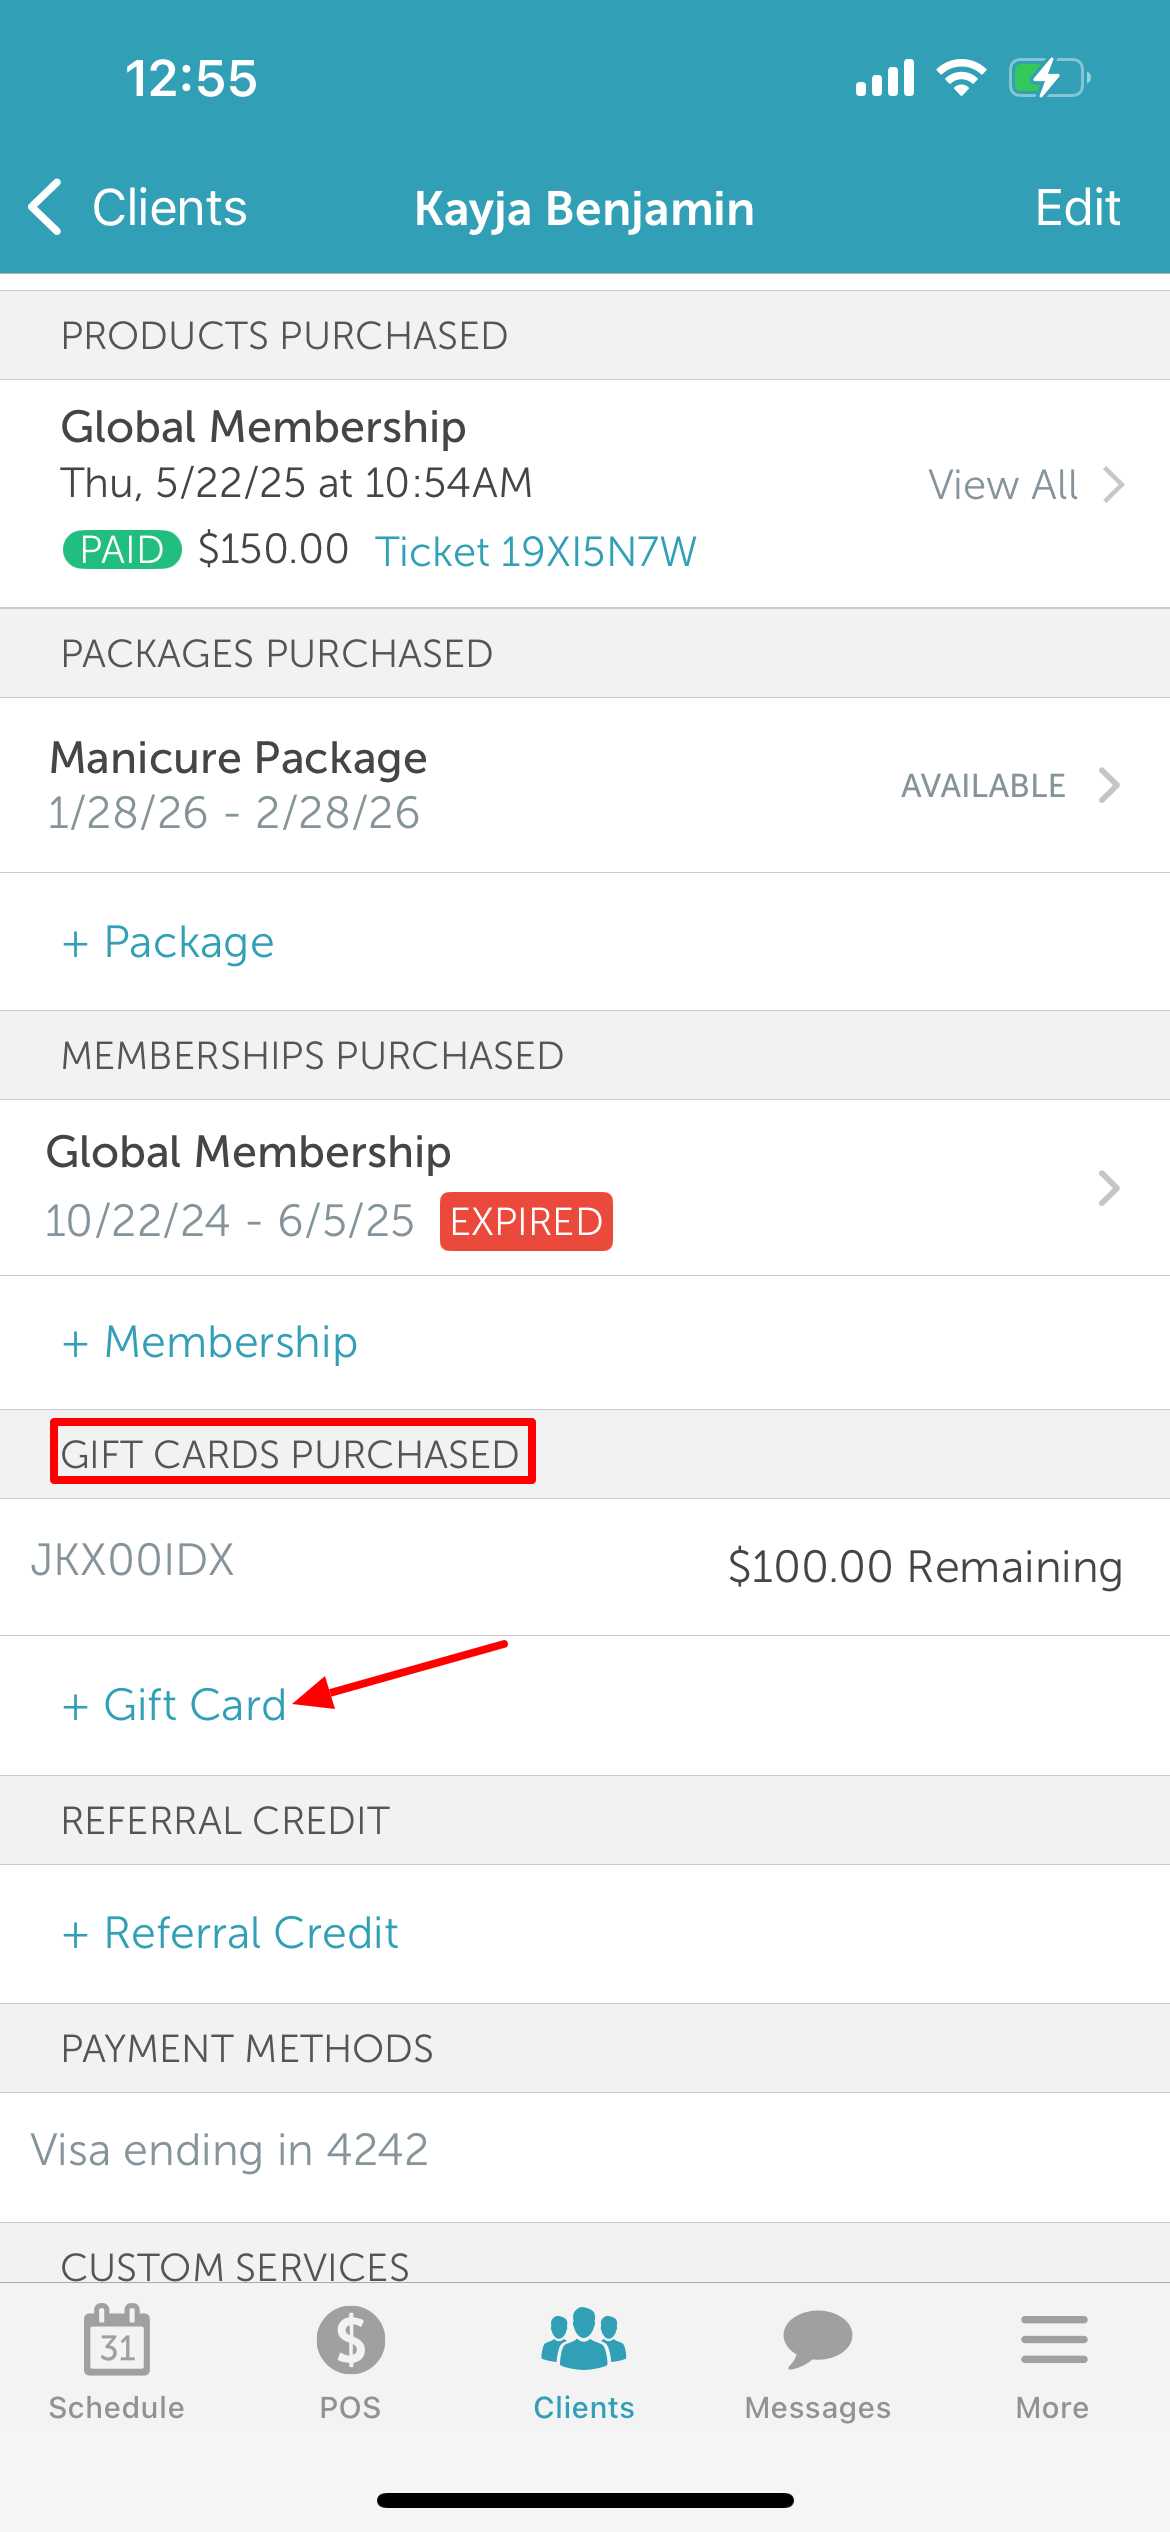
- Navigate to the 'Gift Cards Purchased' section
- Tap '+ Gift Card'
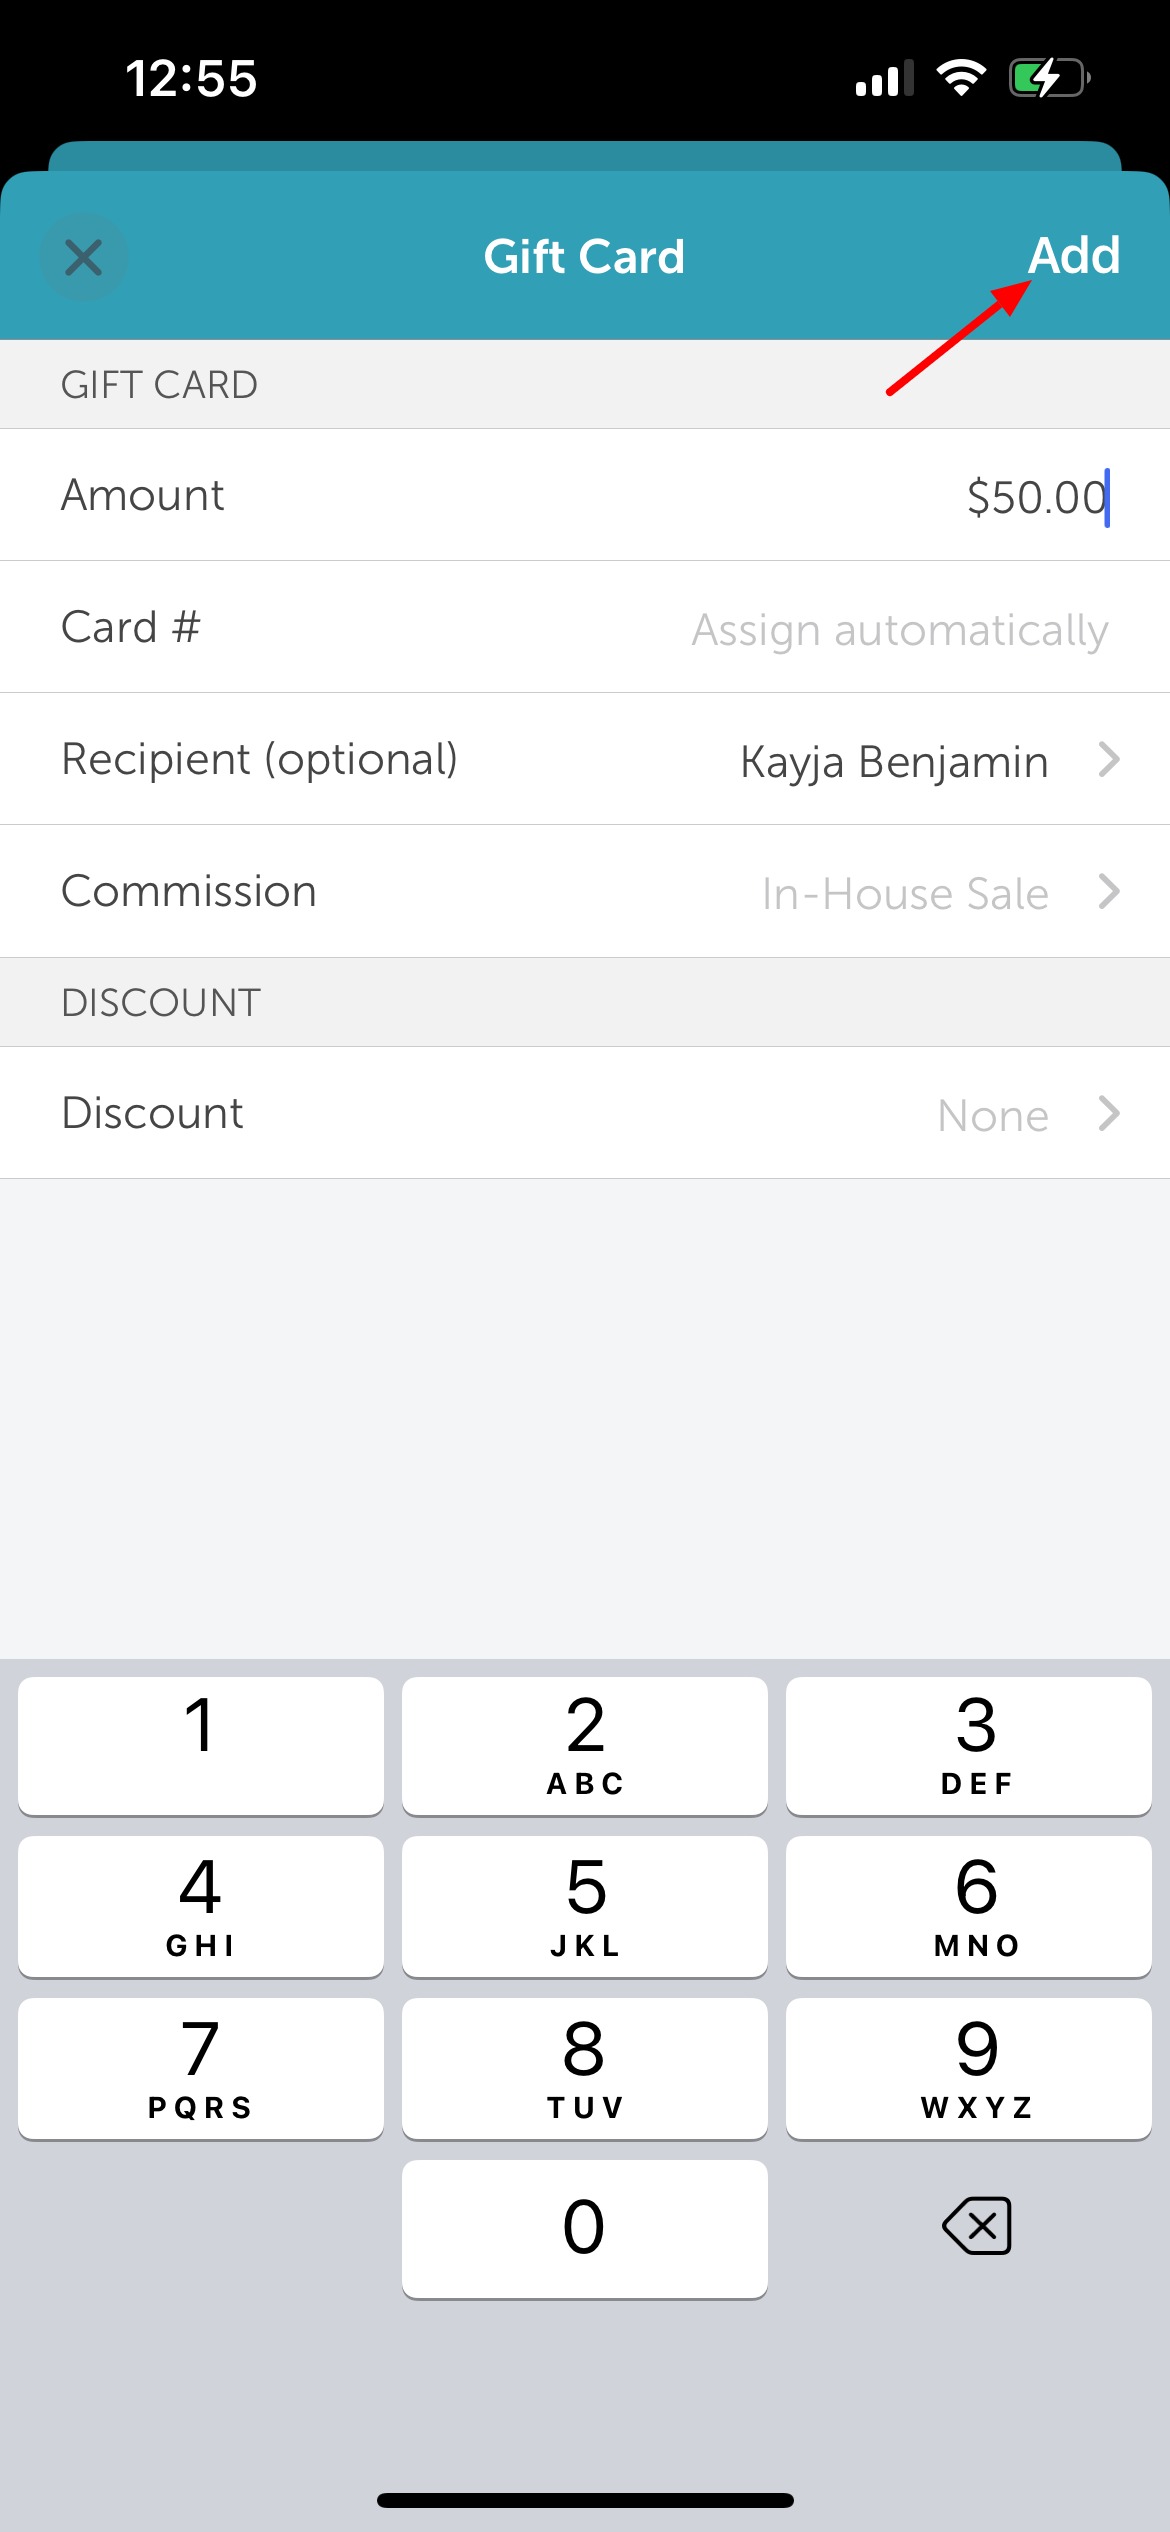
- On the 'Gift Card' screen, you can:
- Enter the gift card amount
- Enter the card number (optional)
- Add a recipient
- Select a staff member to receive commission for the gift card sale
- Apply a discount, if applicable
- Tap 'Add' in the top right corner
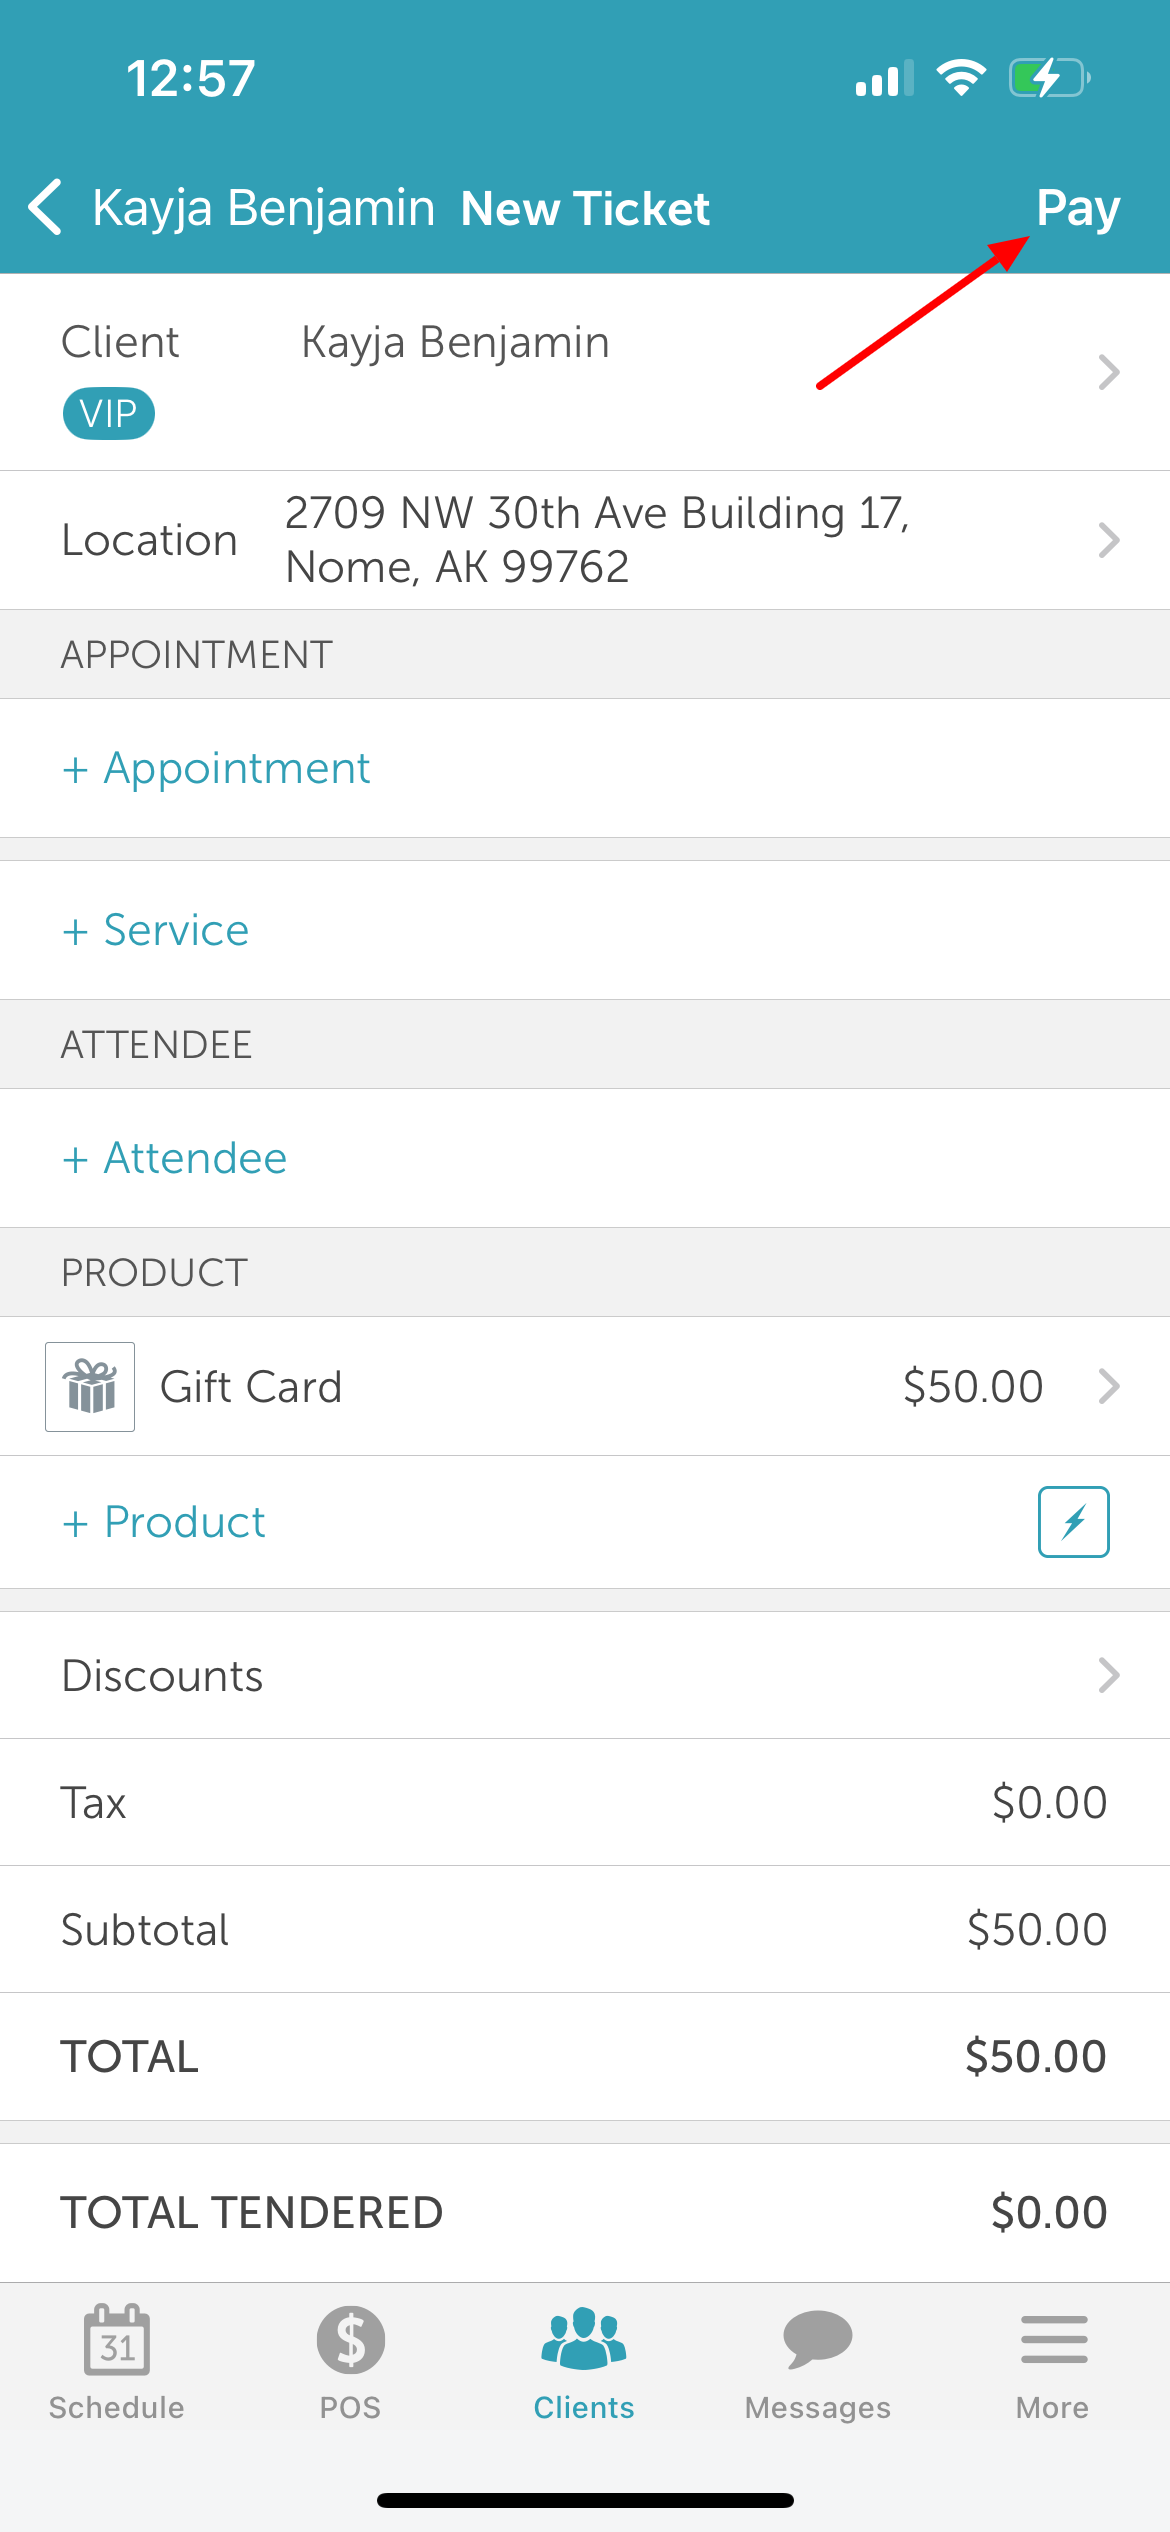
- You will be directed to the 'New Ticket' screen
- Tap 'Pay' in the top right corner
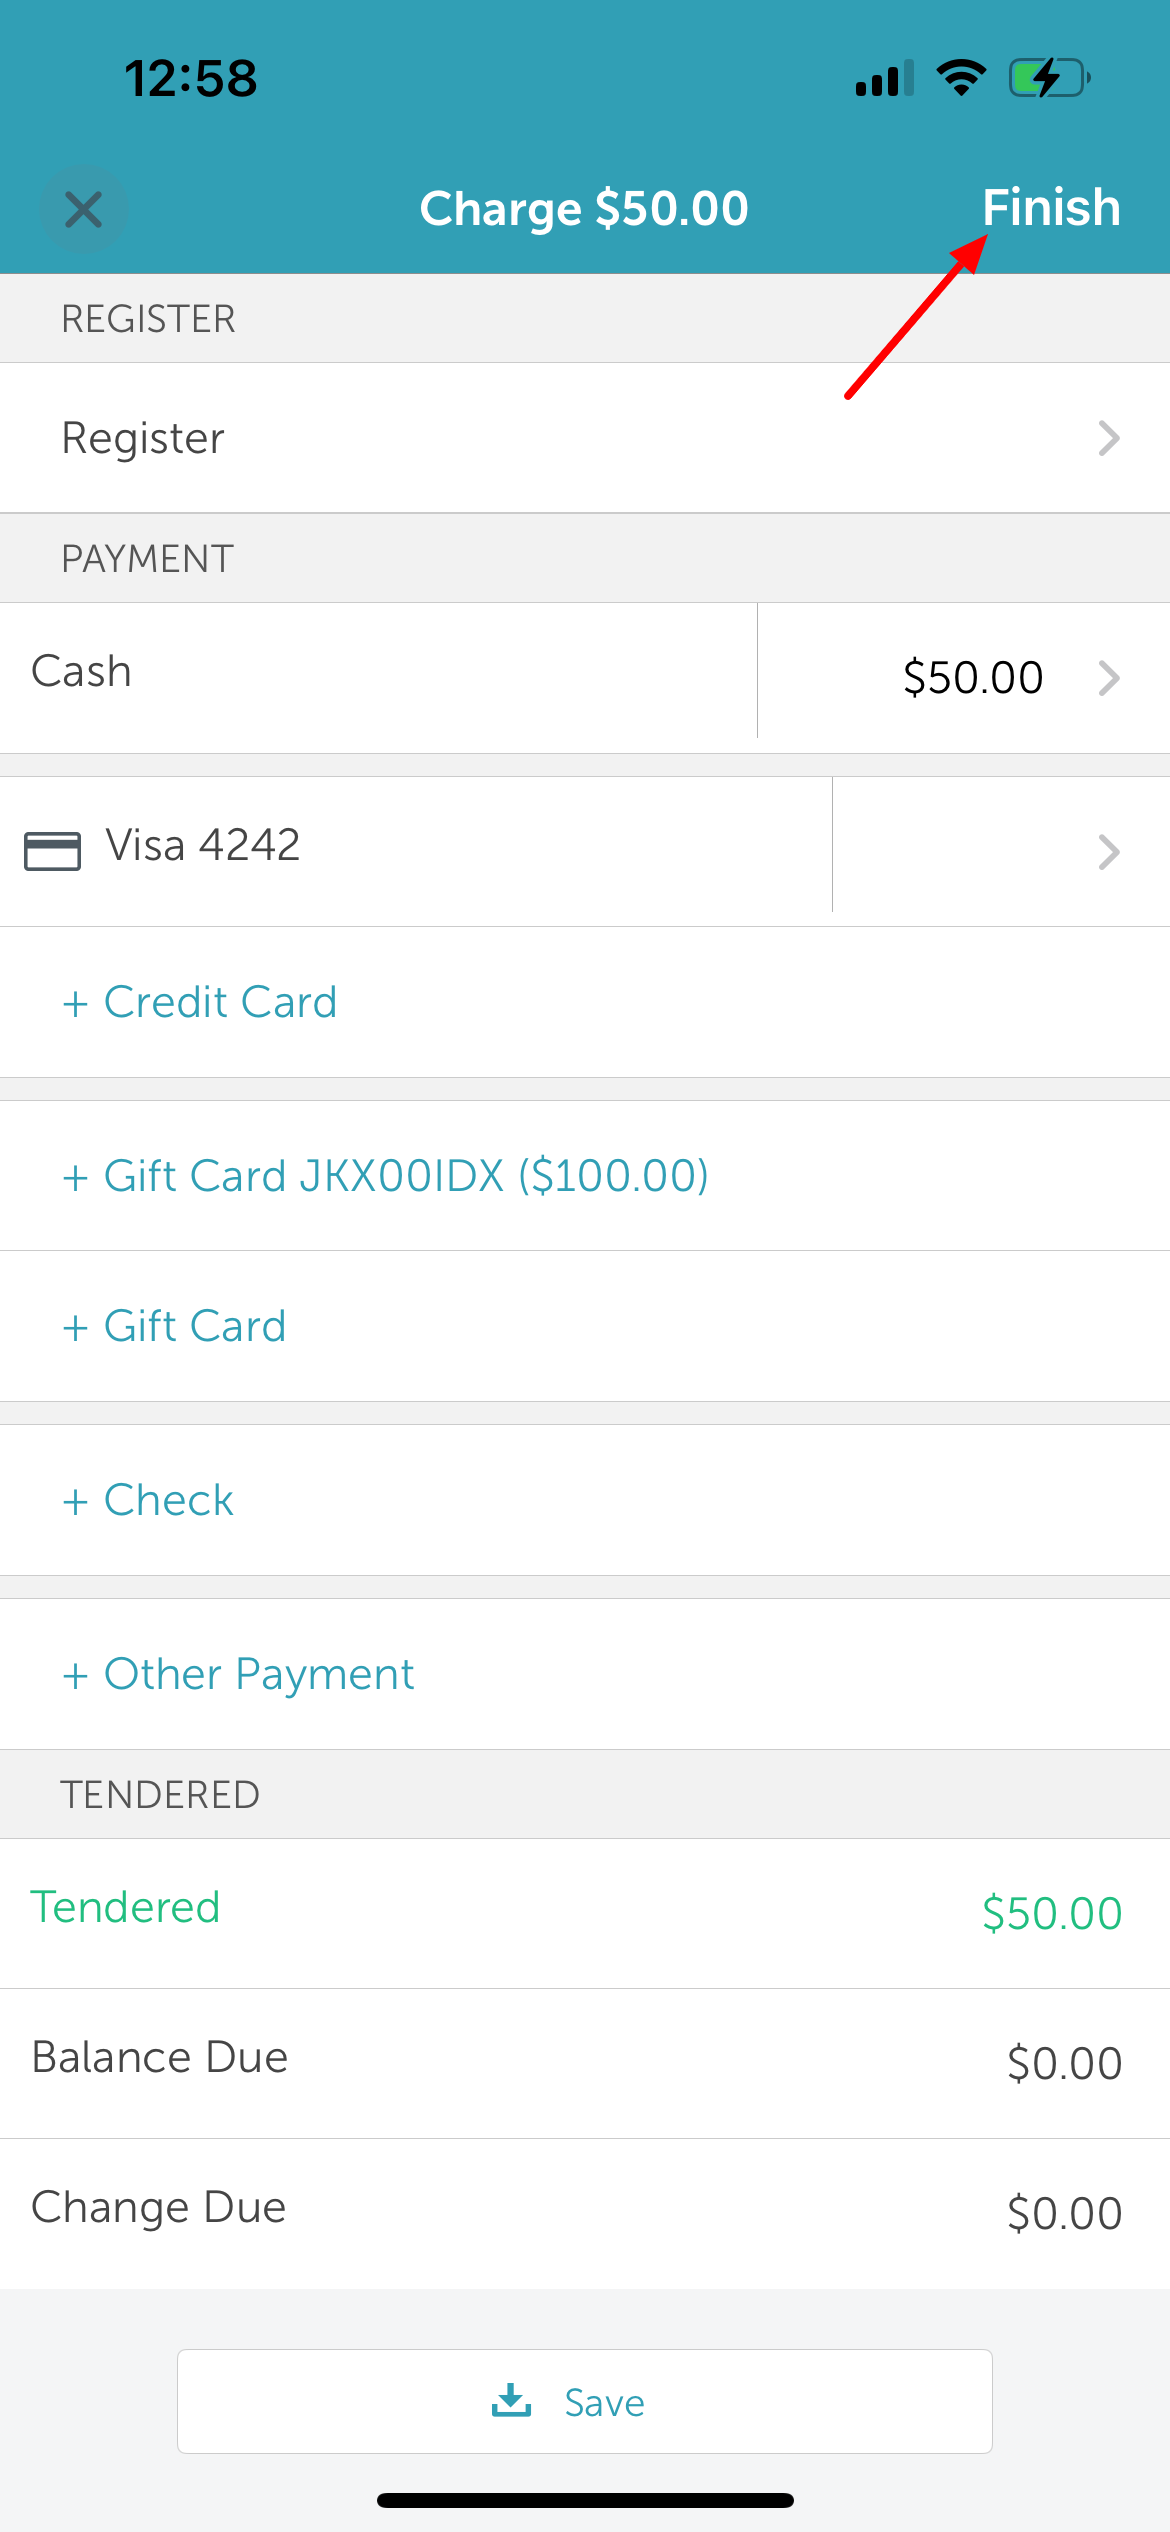
- Select the desired payment method
- Tap 'Finish' in the top right corner
- Once payment is processed, tap 'Done' in the top right corner
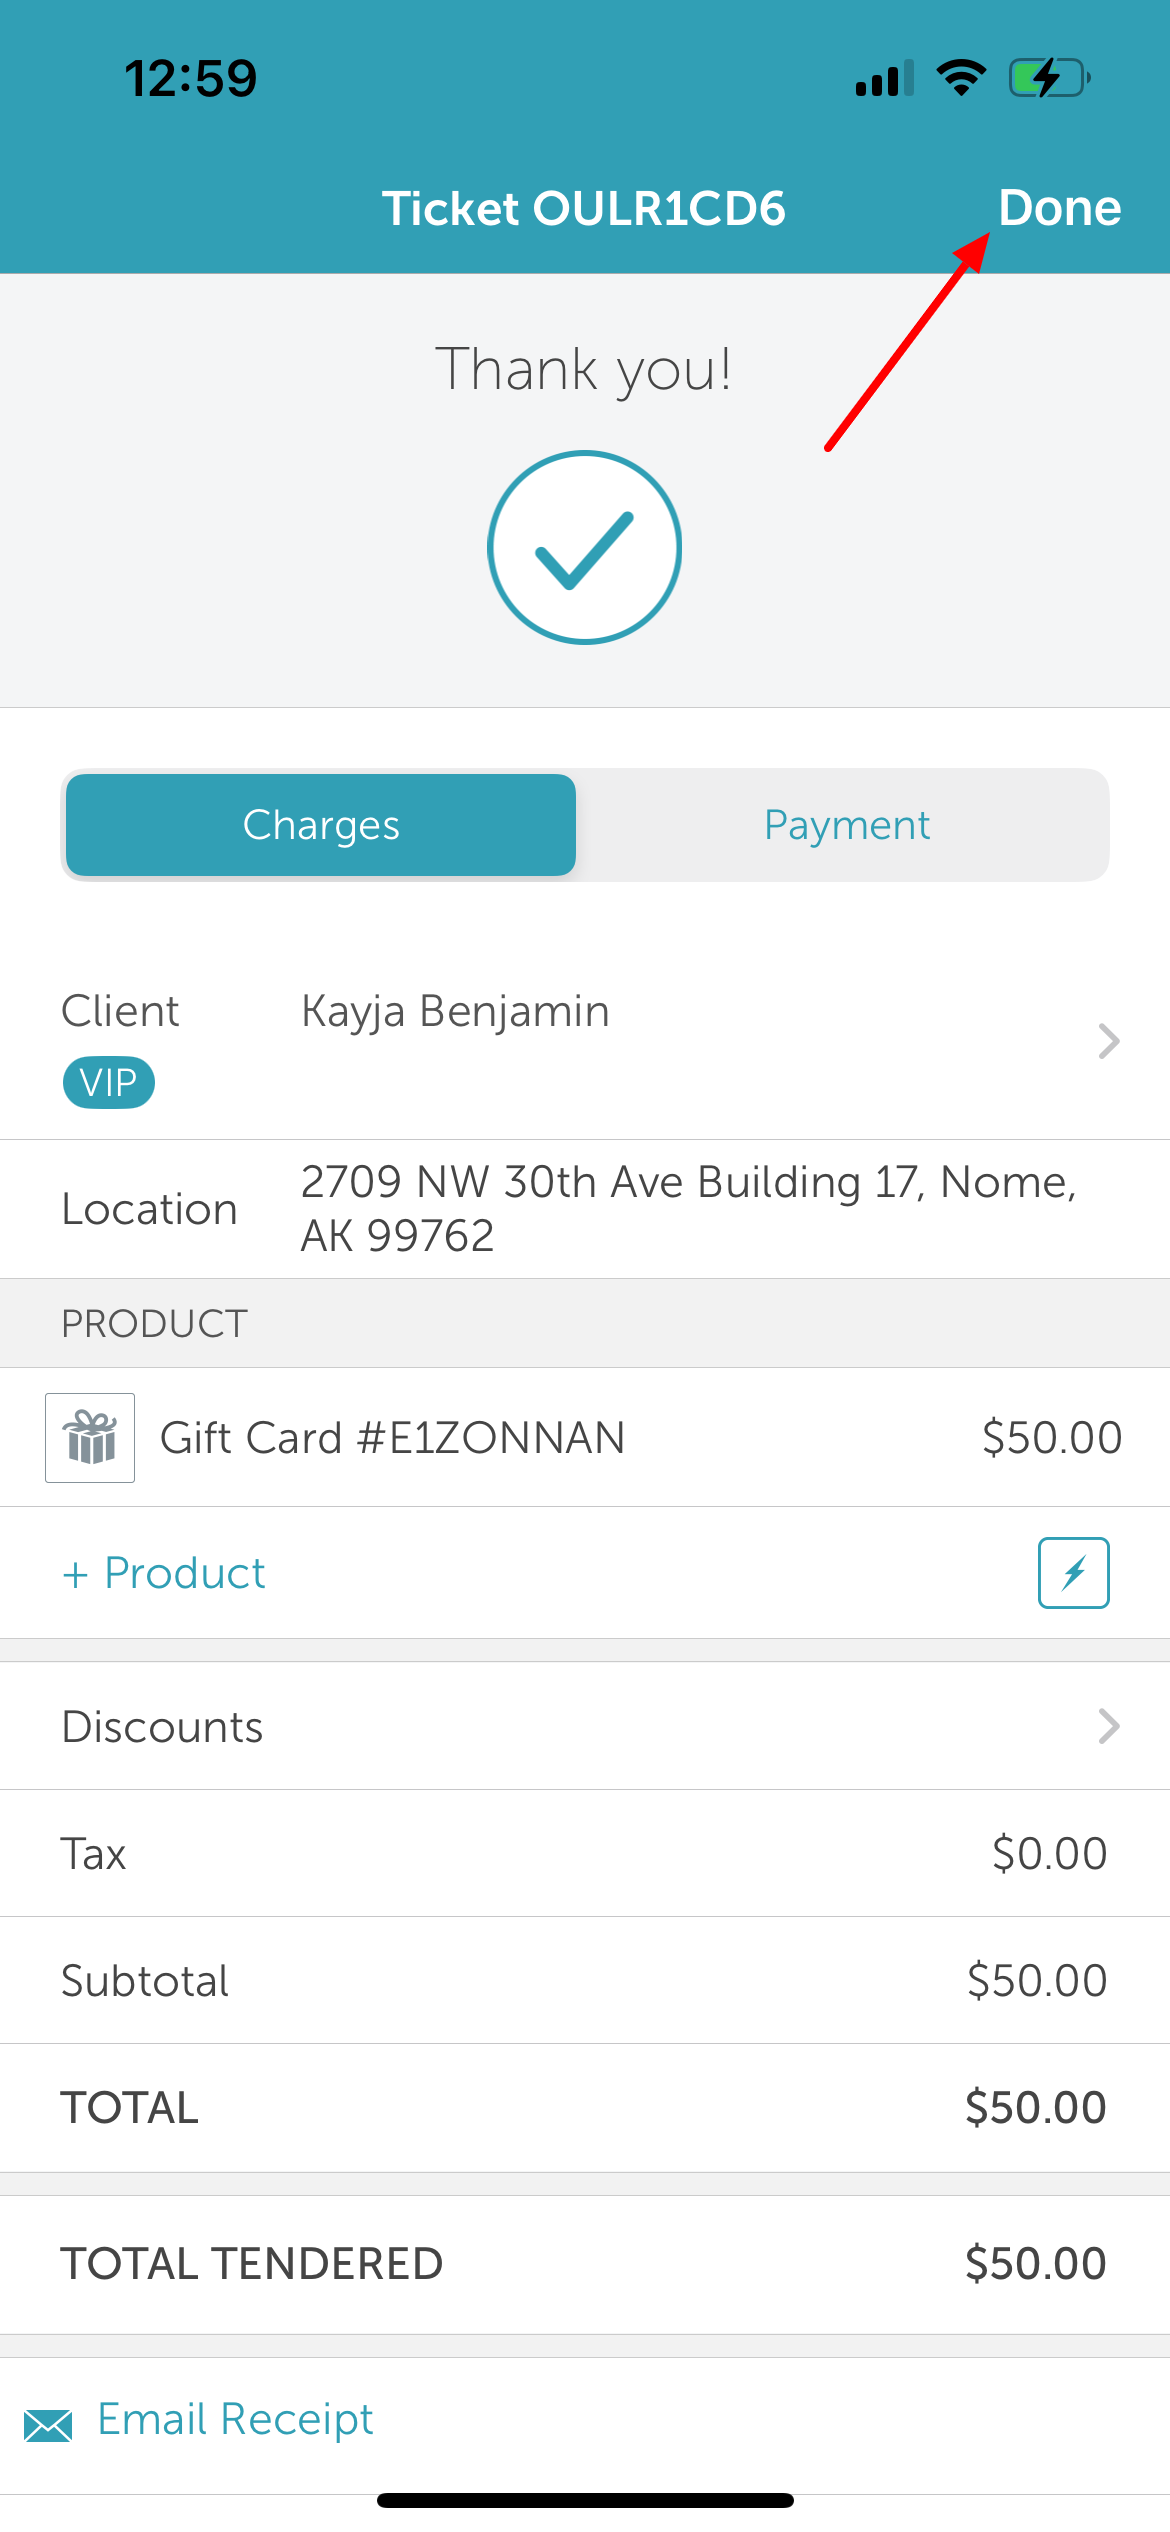
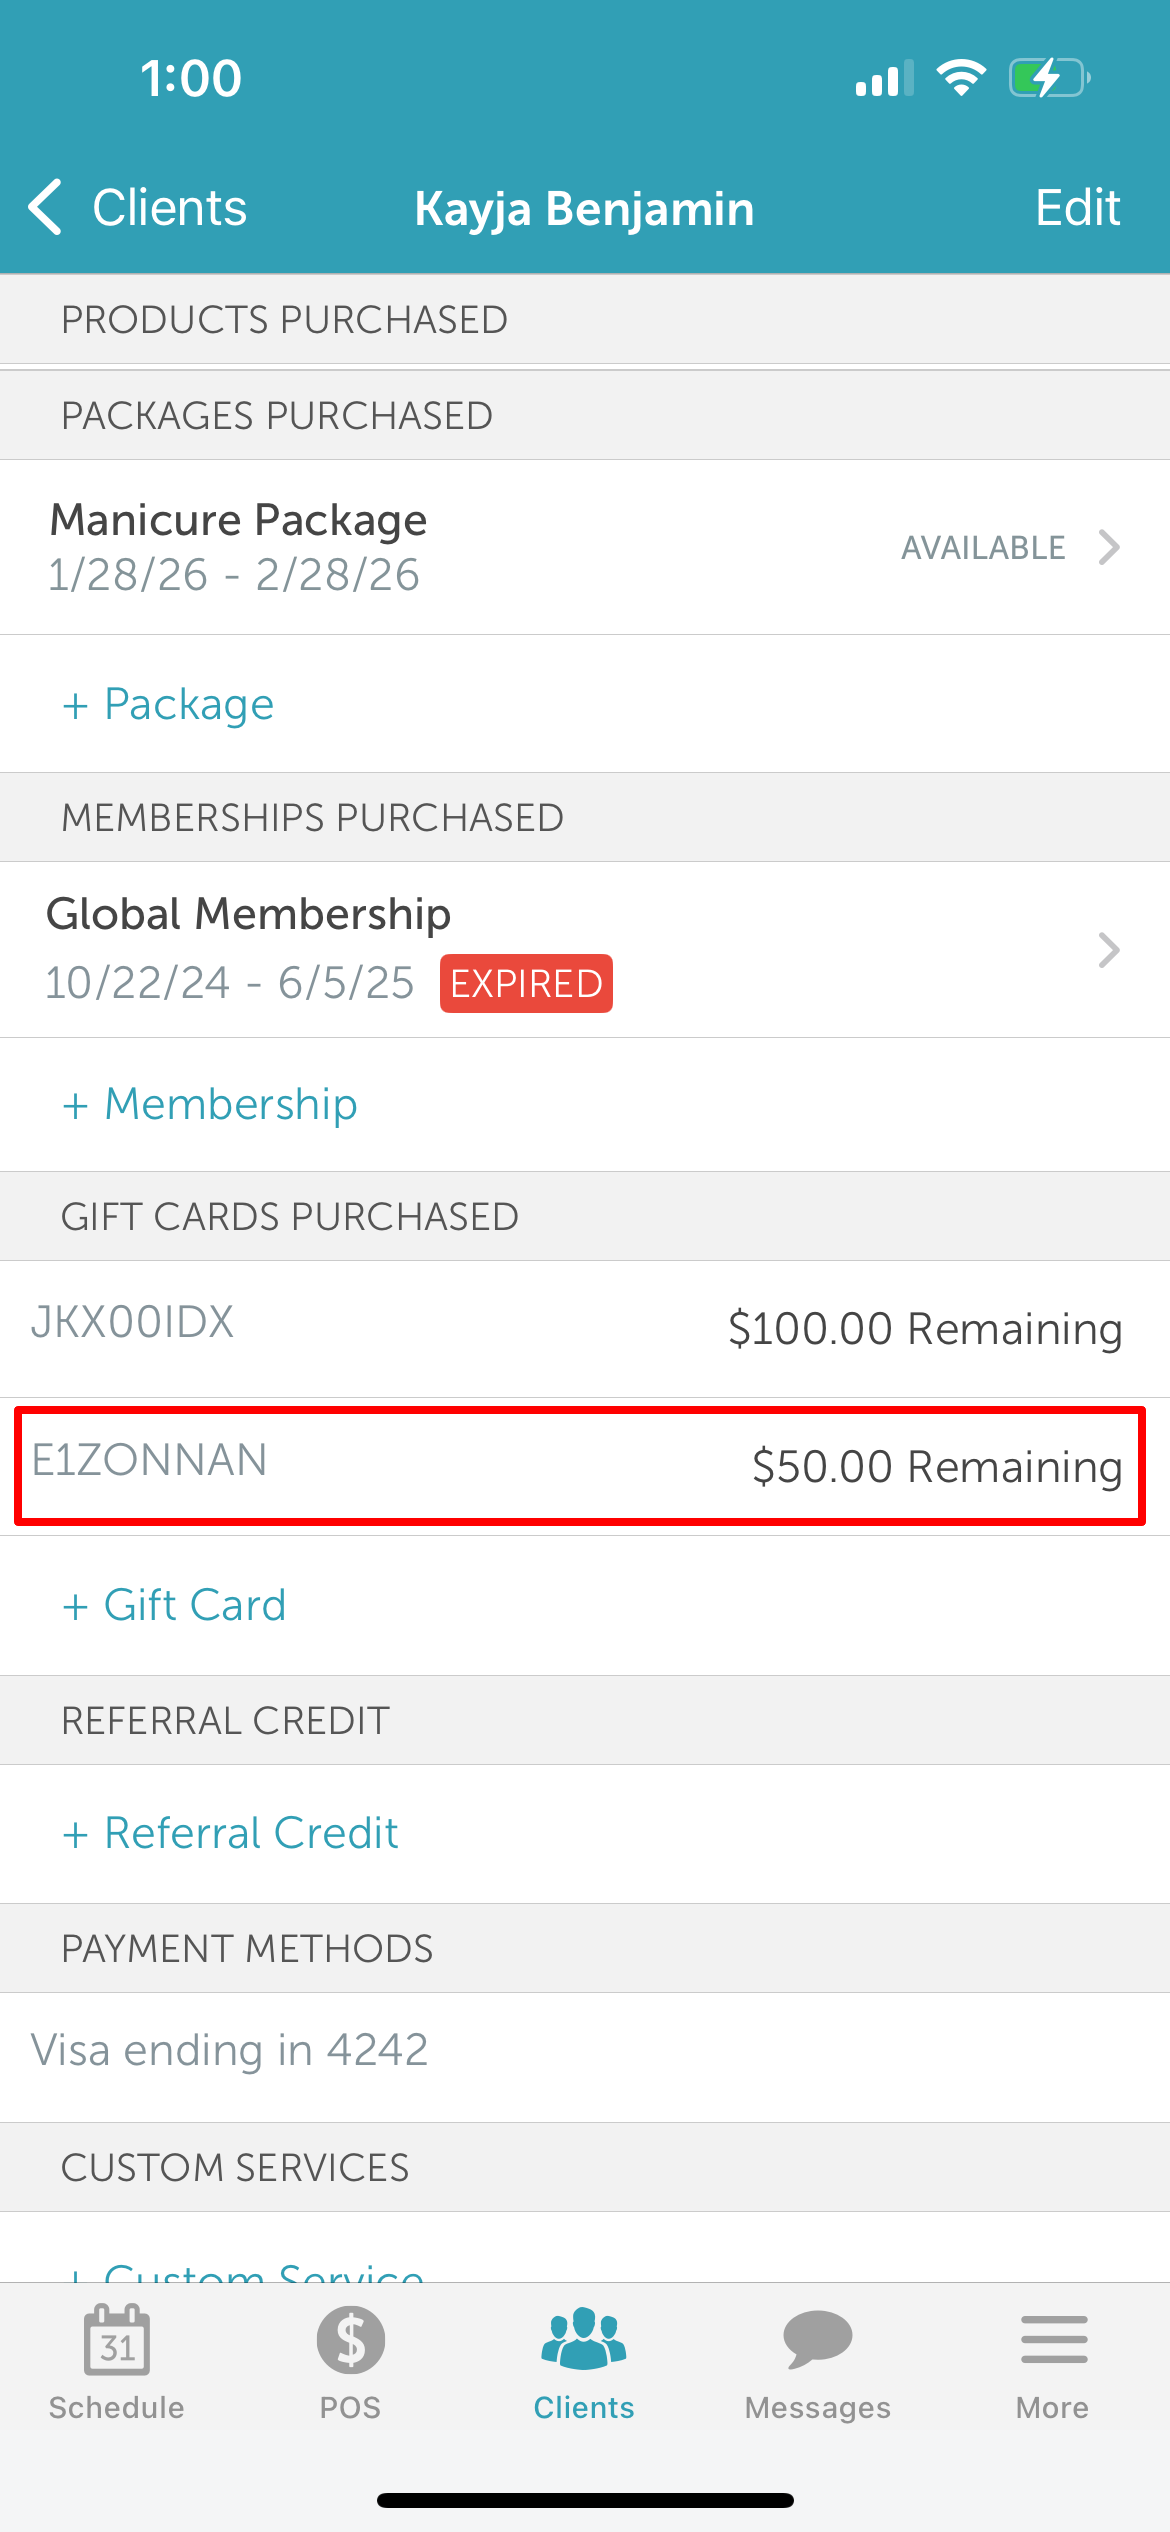
- The gift card will be added to the client profile
For more information, contact support@mytime.com.
Related Articles:
Installing MyTime on Scheduler App (Android and iOS)
Signing into MyTime on Scheduler App (Android and iOS)
Adding Family Member on Scheduler App
Deleting Family Members on Scheduler App
Was this article helpful?
That’s Great!
Thank you for your feedback
Sorry! We couldn't be helpful
Thank you for your feedback
Feedback sent
We appreciate your effort and will try to fix the article