You have the option to establish custom prices or durations for specific clients, pets, or family members, which will automatically apply to all future in-store and online bookings. This eliminates the need to make adjustments each time a client schedules an appointment. You can manage these settings either through the scheduler or within the client's profile. In this article, we will provide a step-by-step guide on how to set custom durations and prices for clients on the scheduler app.
Things to know:
- Once a staff member has the "Accessing Client Records" or "Accessing Appointments" access control setting enabled, they will have the ability to set custom pricing and duration. However, if you wish to allow staff members to edit client information and appointments but prevent them from saving custom pricing or duration, a hidden setting needs to be enabled. To enable this hidden setting, please contact our support team at support@mytime.com.
- Custom pricing and duration are independent of one another.
- Custom price and duration won't be applied retroactively to appointments that are already in your calendar. They will only be applicable to future appointments.
- When a custom price or duration is set for a client, pet, or family member, and that client books online, the widget will display the custom price or duration.
- For pet businesses, setting a custom price or duration overrides the pricing and duration set by breed on the service menu.
- If the general pricing or duration for a service is updated on the service menu, any custom pricing or duration set for the client will remain unchanged and will not be affected by the update.
Contents:
- Set Custom Service Price on the Appointment Modal
- Set Custom Service Duration on the Appointment Modal
- Set Custom Service Price and Duration from the Client's Profile
- Set Custom Service Price and Duration from the Family Member's Profile
- Set Custom Service Price and Duration from the Pet's Profile
Set Custom Service Price on the Appointment Modal
- Log into the app. For detailed instructions, learn more here
- Once signed in, you will be directed to the schedule by default
- Filter to the appropriate location and staff. Learn more here.
- Tap the desired time slot under the preferred staff to add the appointment, or tap the '+' icon in the bottom right corner to open the 'New Event' modal and complete the appointment details.
- Add the client, staff, and service
- The service field will only display the service price. Tap to edit the price

- Tap the price field

- Edit the price

- Save your changes
- Toggle the "Always Charge Client this Price" button if needed
- Select Done
- Save again to confirm changes
Set Custom Service Duration on the Appointment Modal
- Log into the app. For detailed instructions, learn more here
- Once signed in, you will be directed to the schedule by default
- Filter to the appropriate location and staff. Learn more here.
- Tap the desired time slot under the preferred staff to add the appointment, or tap the '+' icon in the bottom right corner to open the 'New Event' modal and complete the appointment details.
- Add the client, staff, and service
- Tap the time field to edit the date and time

- Select the desired start and end times for the appointment

- Tap "Save"

- Tap the service field
- Toggle the "Always Use This Duration for Client" button if needed

- Select "Done"
- Save your changes
Set Custom Service Price and Duration from the Client's Profile
- Log into the app. For detailed instructions, learn more here
- Once signed in, you will be directed to the schedule by default
- Filter to the appropriate location and staff. Learn more here.
- Select the Clients icon
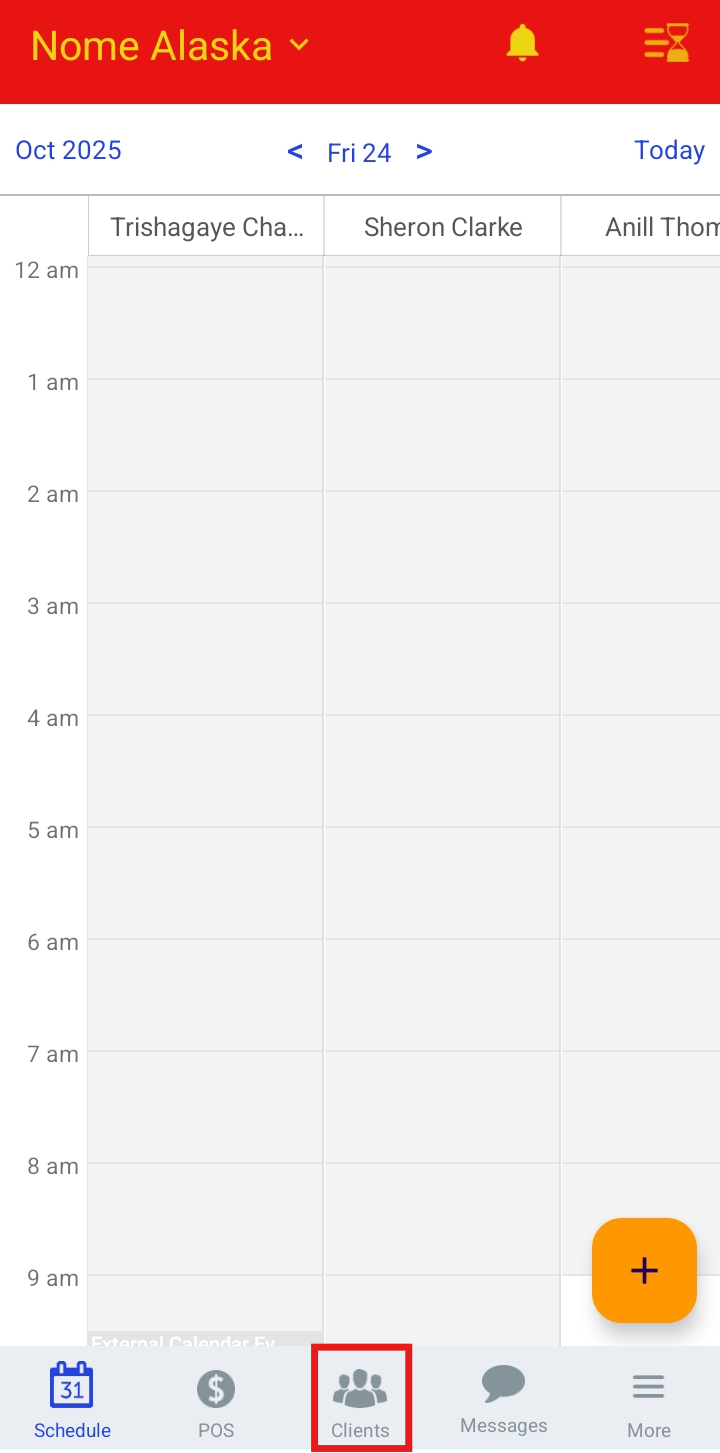
- Search for the desired client.
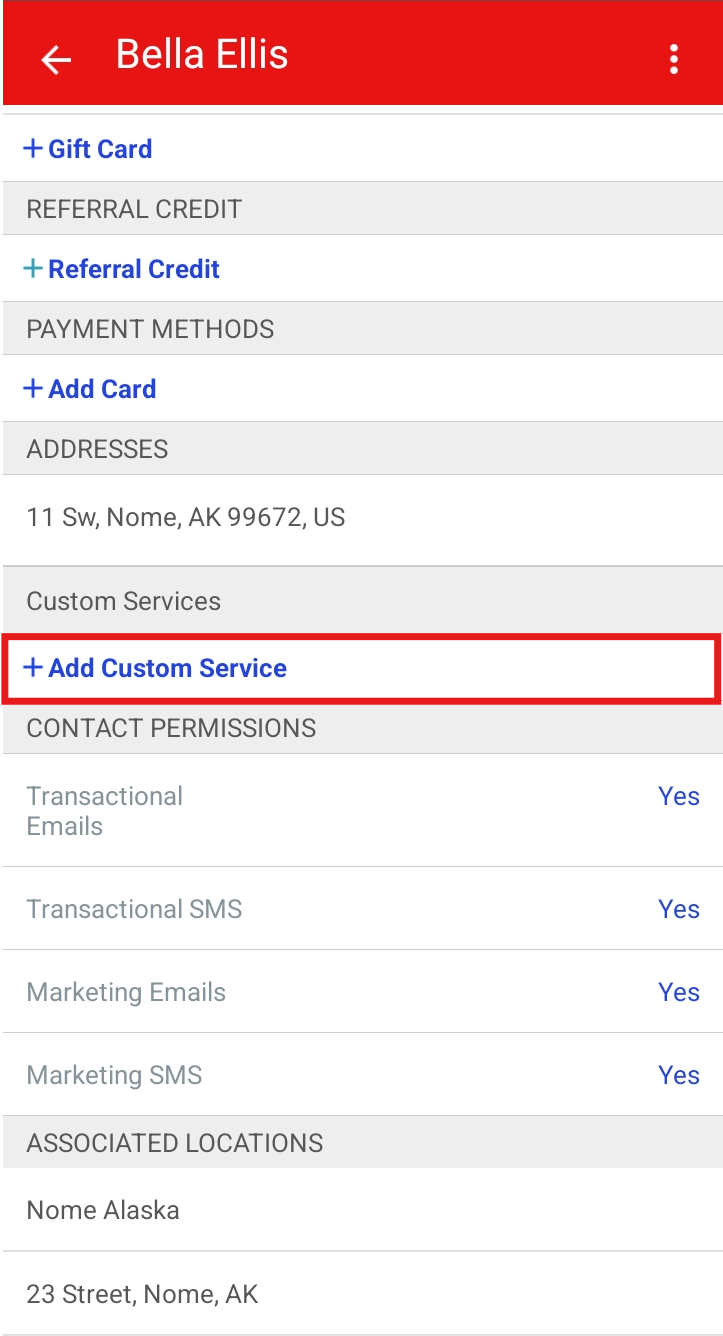
- Scroll to the Custom Service section on the client’s profile
- Select the +Add Custom Service link
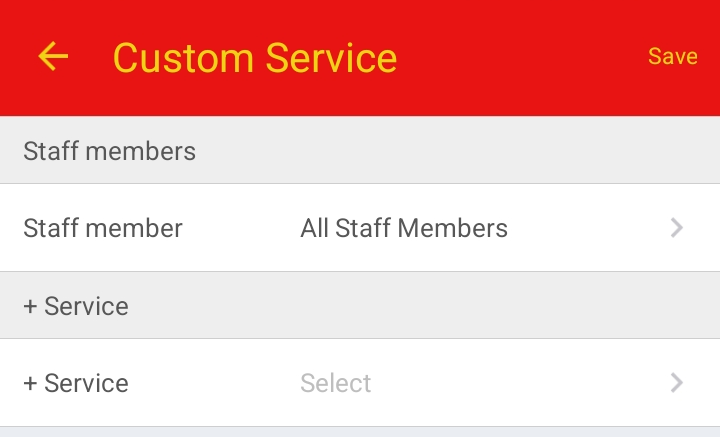
- Choose the desired staff member or select All Staff Members

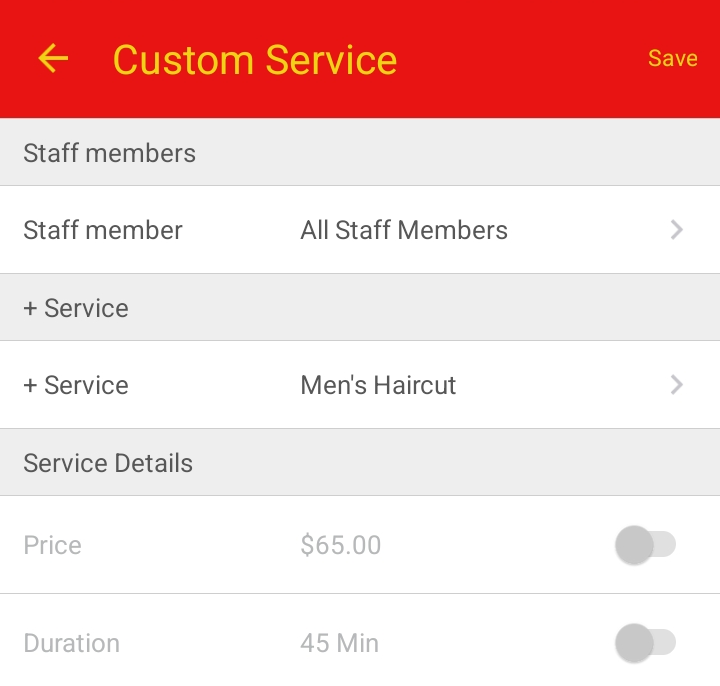
- Select the desired service

- After selecting a service, you can enable custom price and duration options
- Toggle the settings to configure the custom price and duration
- Once configured, select Save at the top of the page

- The custom price and duration for this service will then be saved to the client’s profile

Set Custom Service Price and Duration from the Family Member's Profile
- Log into the app. For detailed instructions, learn more here
- Once signed in, you will be directed to the schedule by default
- Filter to the appropriate location and staff. Learn more here.
- Select the Clients icon

- Search for the desired client
- On the client’s profile, locate and select the desired family member’s profile
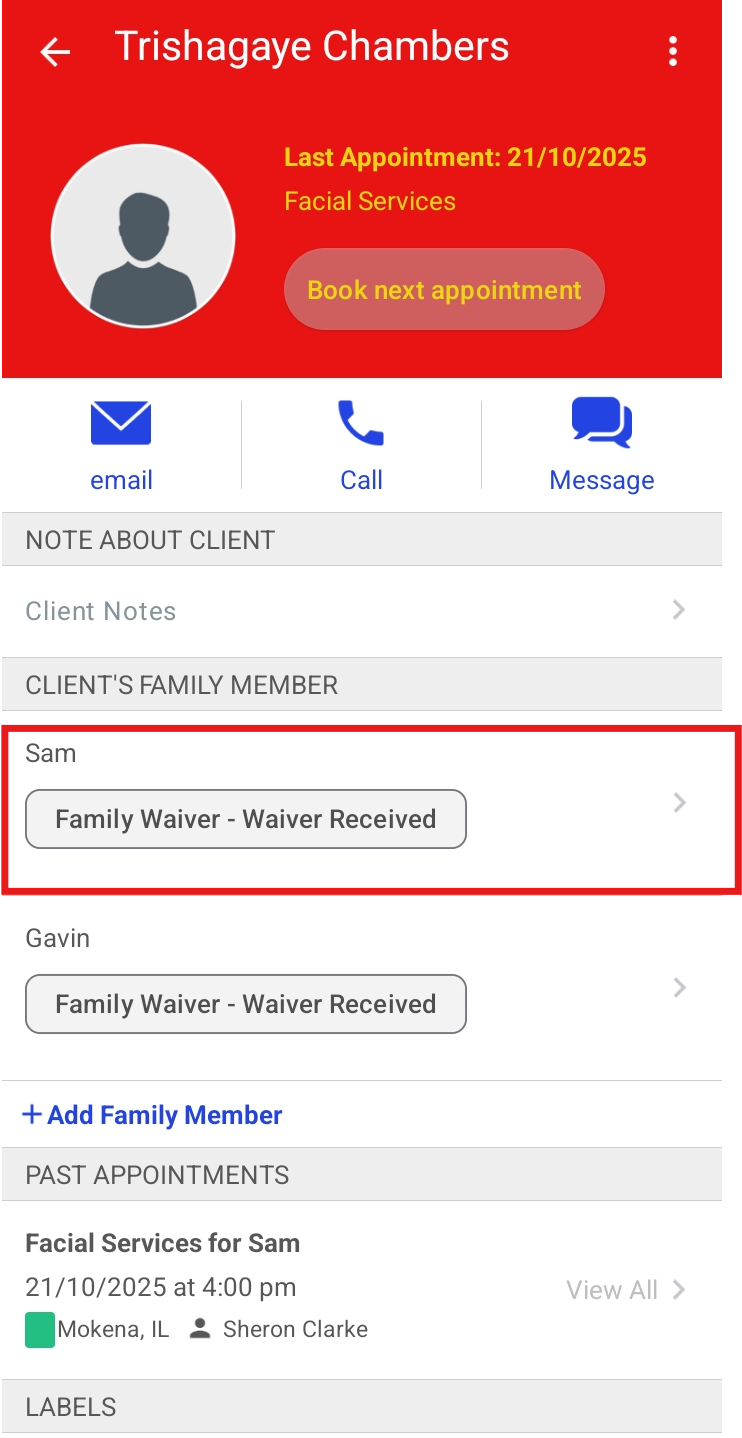
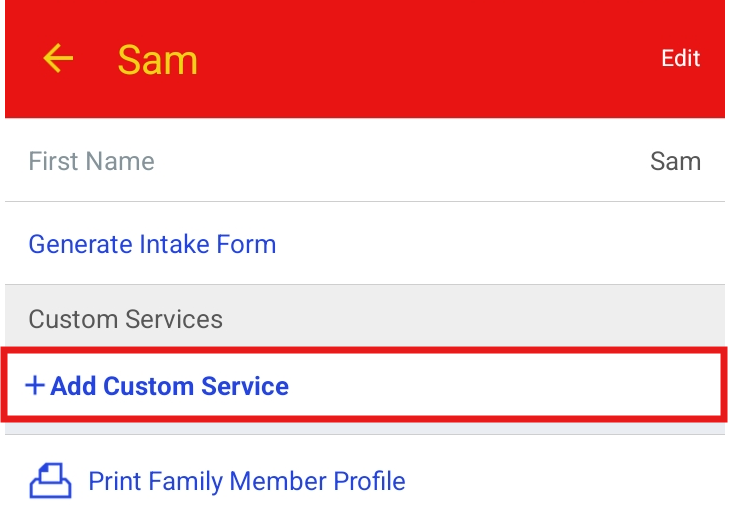
- Find the Custom Service section
- Select the +Add Custom Service link
- Choose the desired staff member or select All Staff Members
- Select the desired service
- After selecting a service, you can enable custom price and duration options
- Toggle the settings to configure the custom price and duration
- Once configured, select Save at the top of the page

- The custom price and duration for the service will be saved to the family member’s profile

Set Custom Service Price and Duration from the Pet's Profile
- Log into the app. For detailed instructions, learn more here
- Once signed in, you will be directed to the schedule by default
- Filter to the appropriate location and staff. Learn more here.
- Select the Clients icon

- Search for the desired client.On the client’s profile, locate and select the desired pet’s profile

- Find the Custom Service section
- Select the +Add Custom Service link

- Choose the desired staff member or select All Staff Members

- Select the desired service

- After selecting a service, you will have the option to enable custom price and duration for the service

- Toggle the settings to configure the custom price and duration
- Once configured, select Save at the top of the page
- The custom price and duration for the service will be saved to the pet’s profile
For more information, contact us at support@mytime.com.
Related Articles:
- Installing and Signing into MyTime Scheduler App (Android and iOS)
- Scheduling Appointments on Scheduler App
- Custom Service Pricing and Duration by Client
- Prompt to Update Appointment Service Prices on Appointment Modal
Was this article helpful?
That’s Great!
Thank you for your feedback
Sorry! We couldn't be helpful
Thank you for your feedback
Feedback sent
We appreciate your effort and will try to fix the article