In this article, we will walk through how to add clients to the walk-in queue in-store.
Things to know:
- The ability to add clients to the walk-in queue is governed by the 'Accessing Account Settings' and 'Accessing Appointments' access control settings.
- By default, walk-in queue estimation will ignore appointments that are waiting for more than 15 minutes.
- All the waiting appointments that are ignored in estimation will display ’N/A’. If you want the walk-in queue estimation to ignore appointments that have been waiting for more or less than 15 minutes, please contact our Customer Support Team at support@mytime.com to enable this on your behalf.
- Quoted time is the estimated time the client will be on the walk-in queue from the moment they joined.
- The quoted time is based on the selected employee's availability (working hours and appointments) and resource availability. It is calculated by the next available appointment start time minus the current time. So if the next available appointment slot is at 9:00 am and it is now 8:45 am, the quoted time that will be shown to clients will be 15 minutes.
- The Elapsed column updates every second to show exactly how long a client has been waiting.
- The Staff column will automatically hide itself if you are operating a single-employee location
- You can manually reorder the queue by dragging and dropping rows
- The Start button turns green the exact moment a client’s quoted wait time has elapsed, signaling they are overdue.
- The Chat button opens the Communicator directly, allowing you to message the client without leaving the screen.
- Clicking Delete will always trigger a confirmation dialog first to prevent accidental removals from the queue.
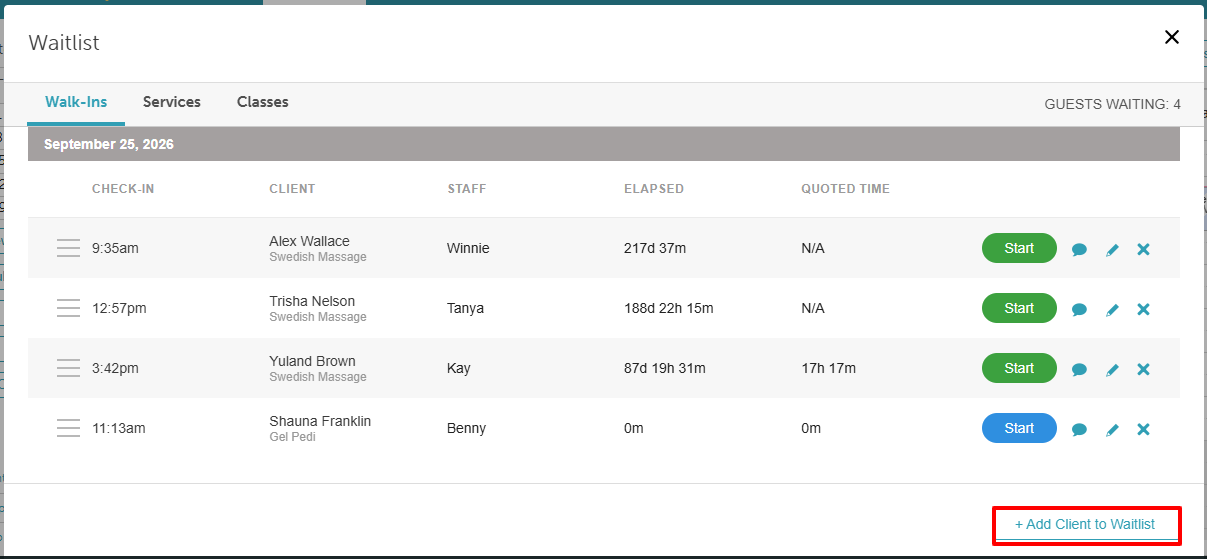
- When we add a walk-in queue item with Next Resource Available or Next Staff Available, the staff/resource auto-selection will be prefixed with an asterisk, (*) as in the first row. Below the employee name is the resource name.
- The ‘Next Staff Available’ algorithm for the walk-in queue is calculated like this:
- Which employees can perform the appointment sooner?
- Which is the least busy employee now? If employee A already has an appointment, but he can perform 2 appointments at the same time, and B and C have no appointments now, then the system will choose between B and C.
- Which had an appointment auto-assigned recently? If we auto-assigned an appointment to B a few minutes ago and to A 1 hour ago, then A will be preferred by the system.
- Clients will not be notified when they are added to or removed from the walk-in queue.
- Once the staff member becomes available, the Start button on the walk-in queue will turn green.
- When a client's walk-in queue appointment has started, the 'Notify client of change' option is disabled by default, which prevents them from receiving notifications about any updates to the appointment.
- The setup option displayed in the top-right user menu depends on how you access the account and your assigned role:
- When navigating from the Parent Account (Location Management tab):
- Admin: Displays Business Setup when viewing the location account.
- Login As: Displays Location Setup when viewing the location account.
- When logged in directly at the Location Level:
- Location Owners & Location Managers: Display Location Setup.
- Service Providers & All Other Roles: Display Profile Setup.
Contents
- Enabling Walk-In Queue
- Adding Clients to the Walk-in Queue
- Editing Walk-In Queue Entries
- Viewing and Managing the Walk-in Queue
Enabling Walk-In Queue
To enable the walk-in queue manager feature, simply:
- Navigate to Business Setup / Location Setup > Settings

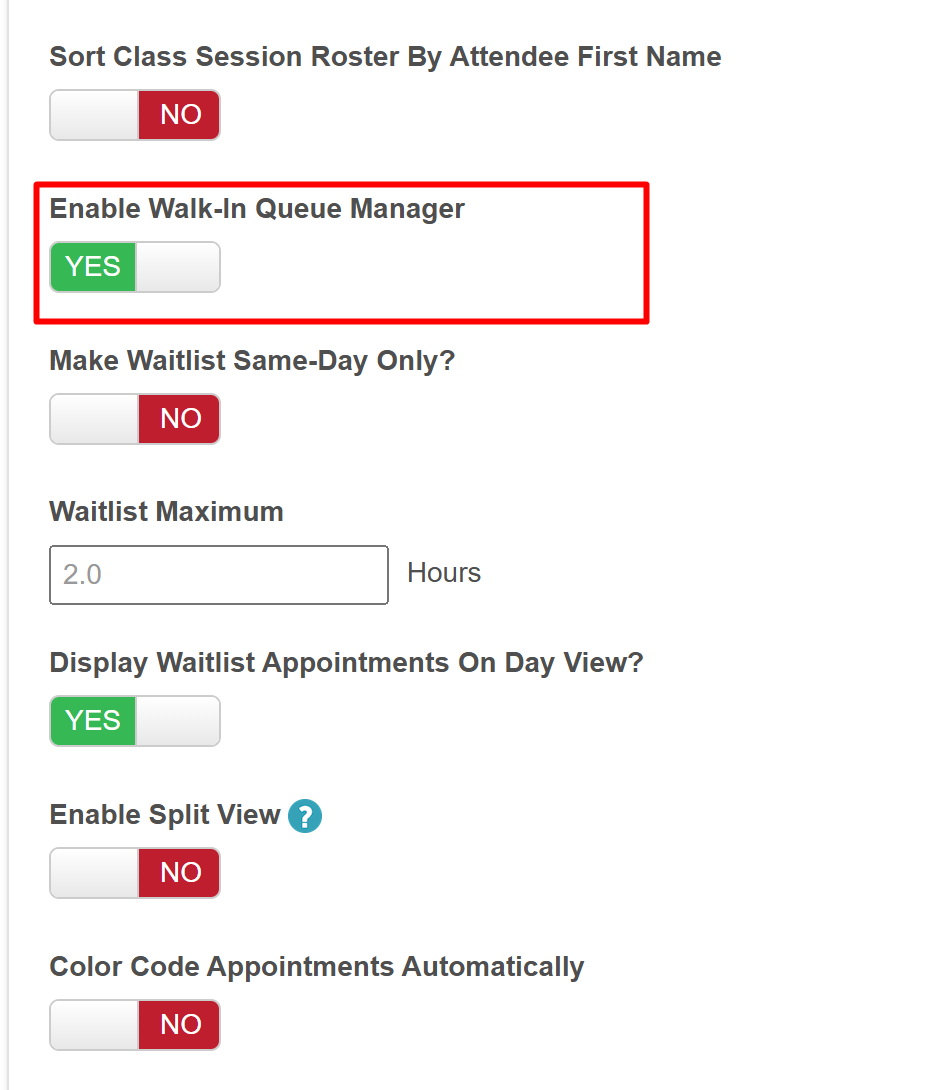
- Scroll down to the Calendar section and locate the "Enable Walk-In Queue Manager" setting
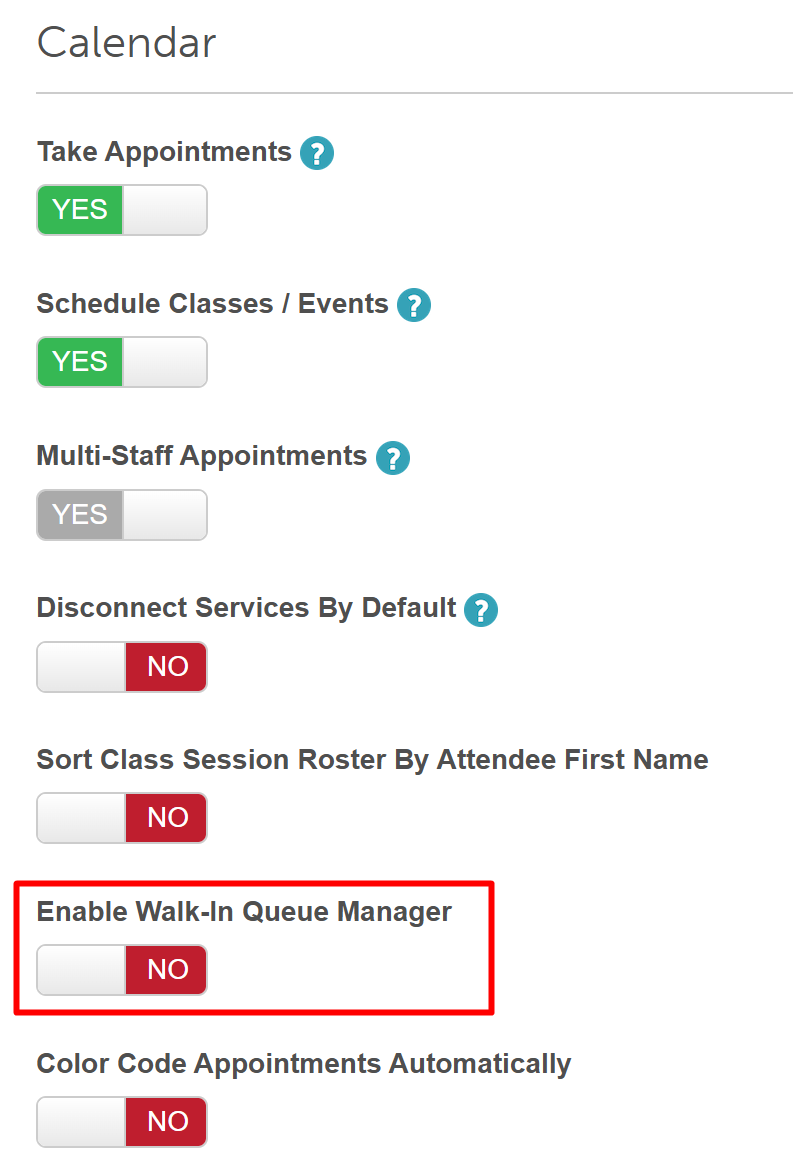
- Toggle the setting to “Yes”
Adding Clients to the Walk-in Queue
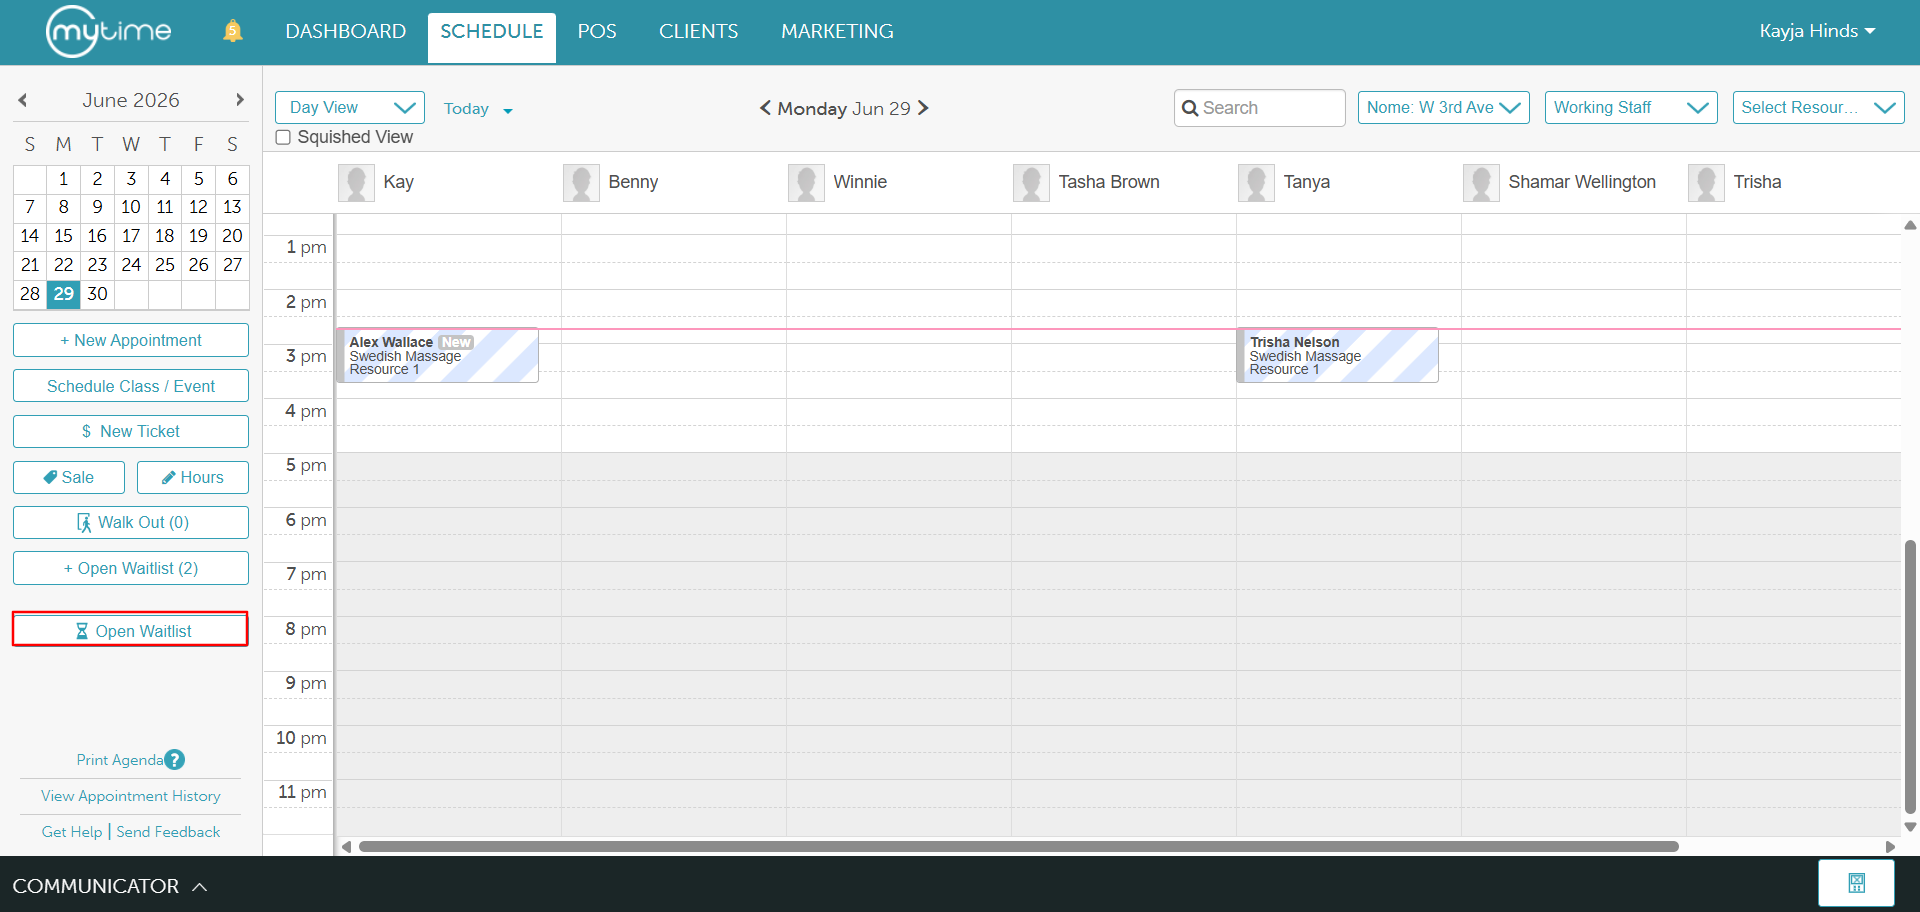
- Navigate to the Schedule
- Click the Open Waitlist button on the left side of the screen.
- Open the Waitlist modal and select the Walk-Ins tab
- Click the + Add Clients to Waitlist button
- In the Edit Client in Waitlist modal, complete the following:
- Select the client
- Choose the service and preferred staff member
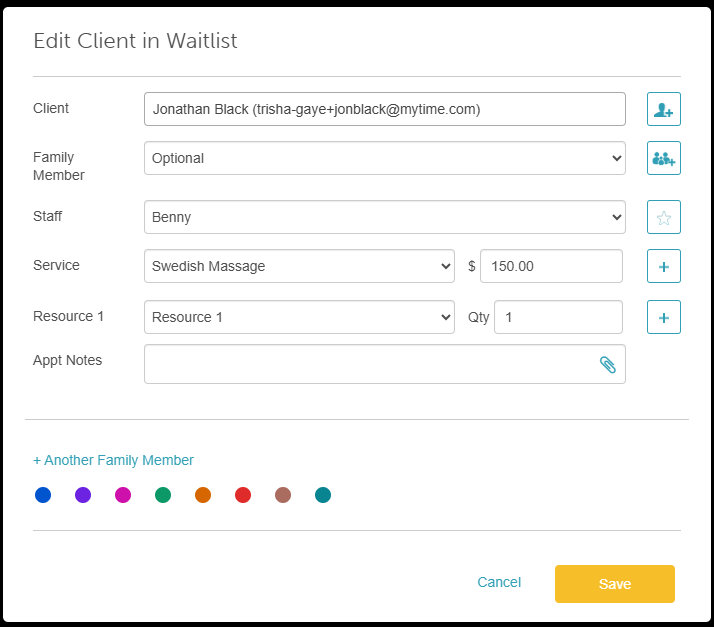
- Click Save. The client will now appear in the walk-in queue within the Waitlist modal
Editing Walk-In Queue Entries
You can edit a walk-in queue entry to update the client's service, preferred staff member, or other details without deleting and re-adding the item.
To edit a walk-in queue entry:
- Navigate to the Schedule.
- Click the Open Waitlist button on the left side of the screen.
- Select the Walk-Ins tab.
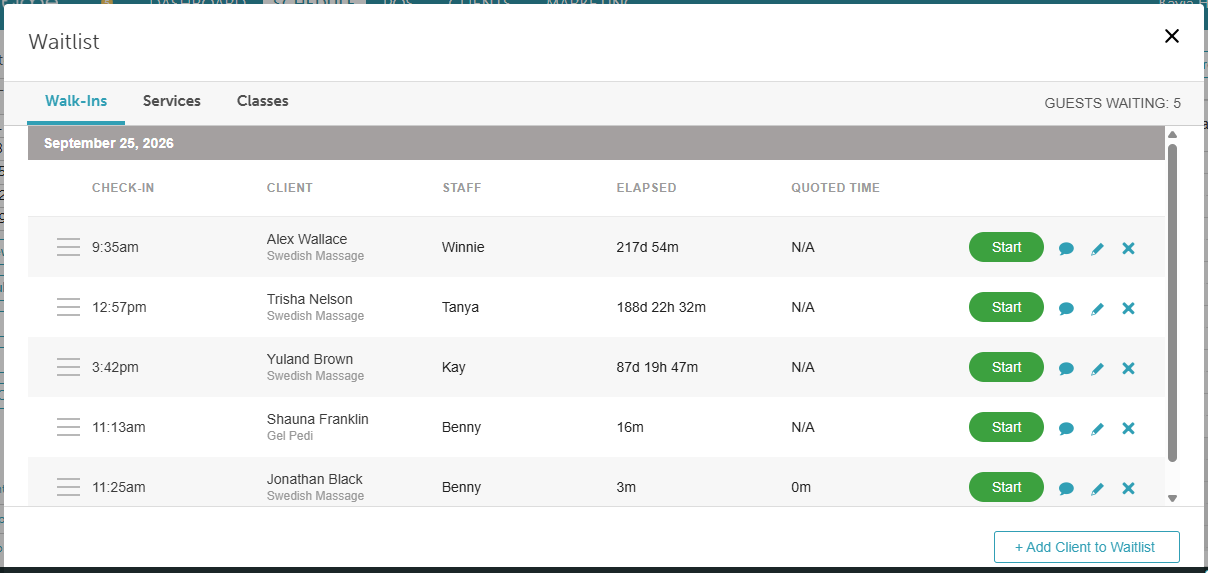
- Locate the entry you want to edit.
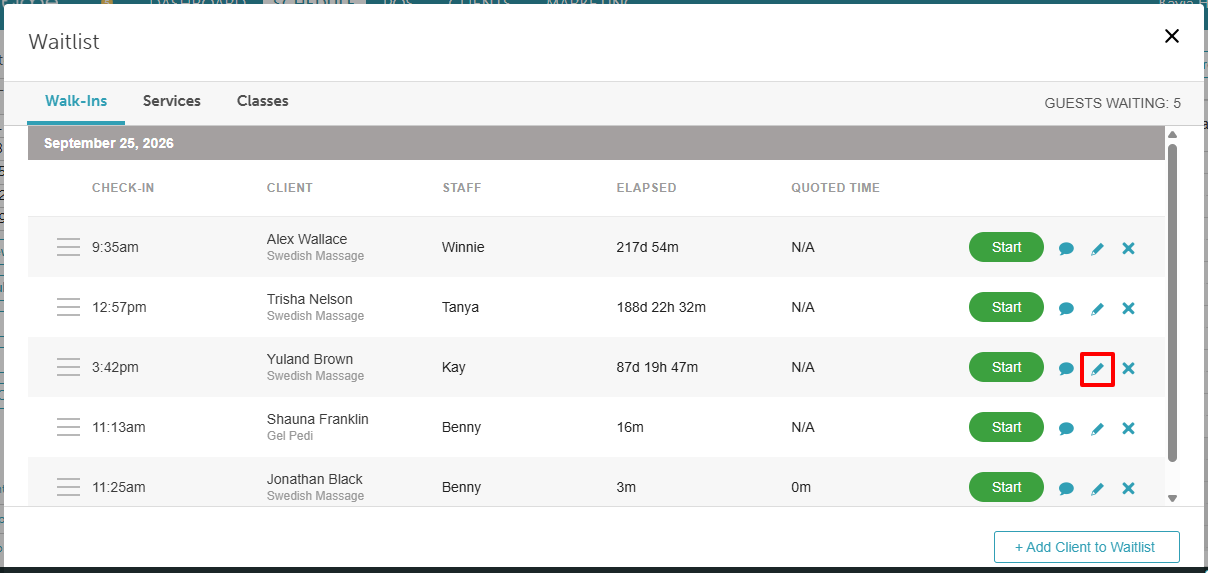
- Click the Edit icon (pencil) next to the client's name.
- In the Edit Client in Waitlist pop-up, update any of the following:
- Client selection
- Service
- Preferred staff member
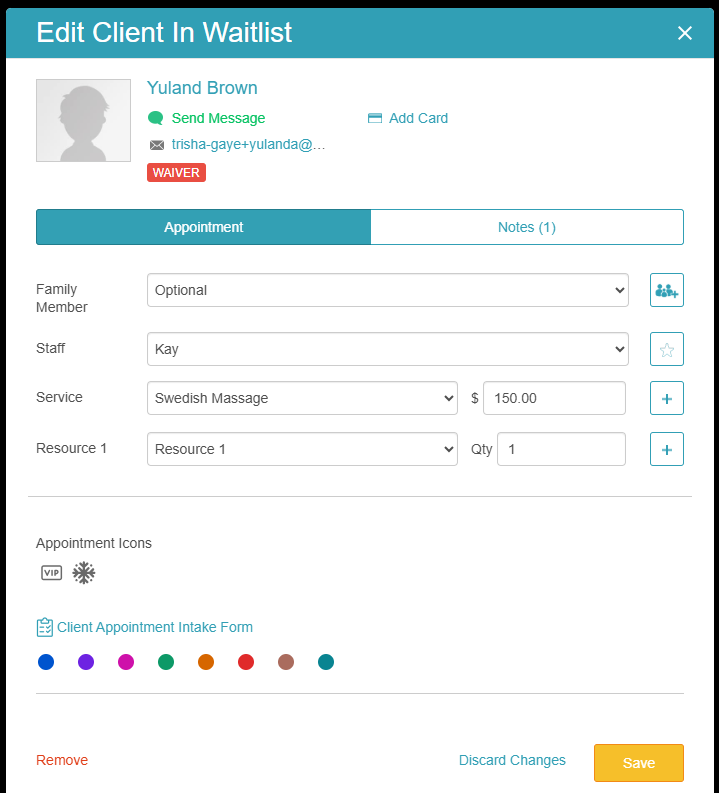
- Click Save to apply your changes
The walk-in queue entry will update with your new selections. The client will remain in their current position in the queue unless you change the service or staff assignment.
Viewing and Managing the Walk-in Queue
- Navigate to the Schedule
- Click the Open Waitlist button (located on the left side, below the calendar)
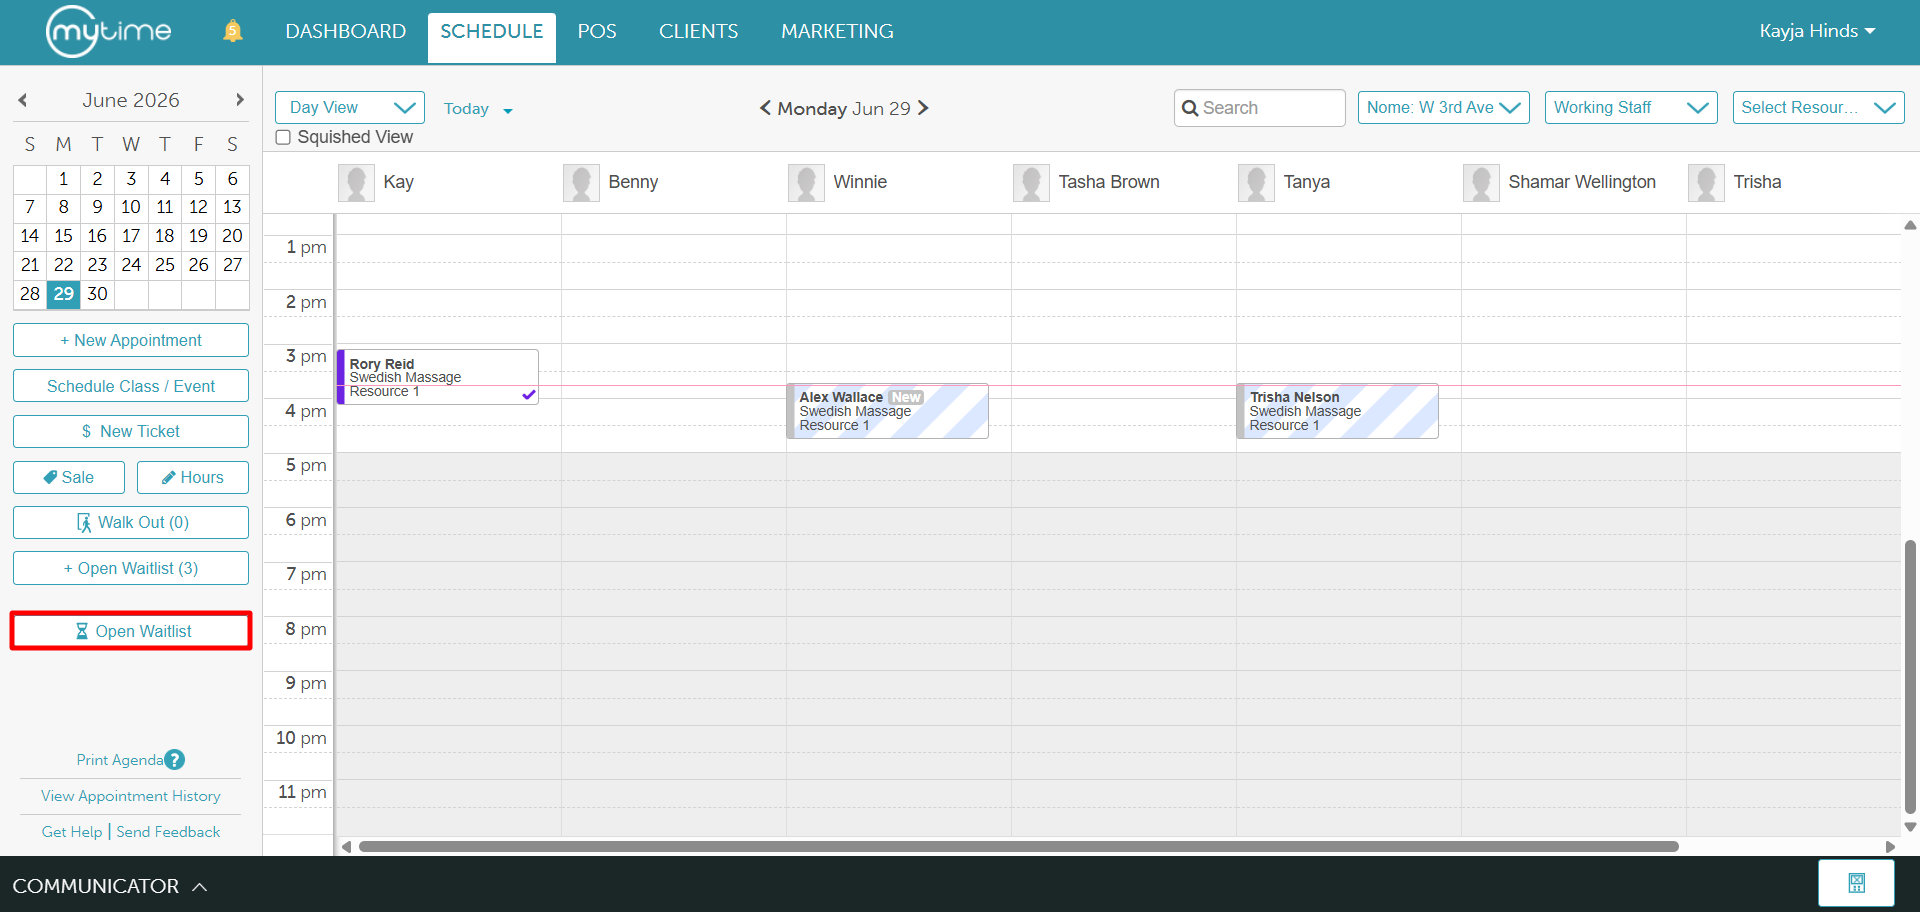
- Select the Walk-Ins tab
- From this modal, you can manage the queue using the following actions:
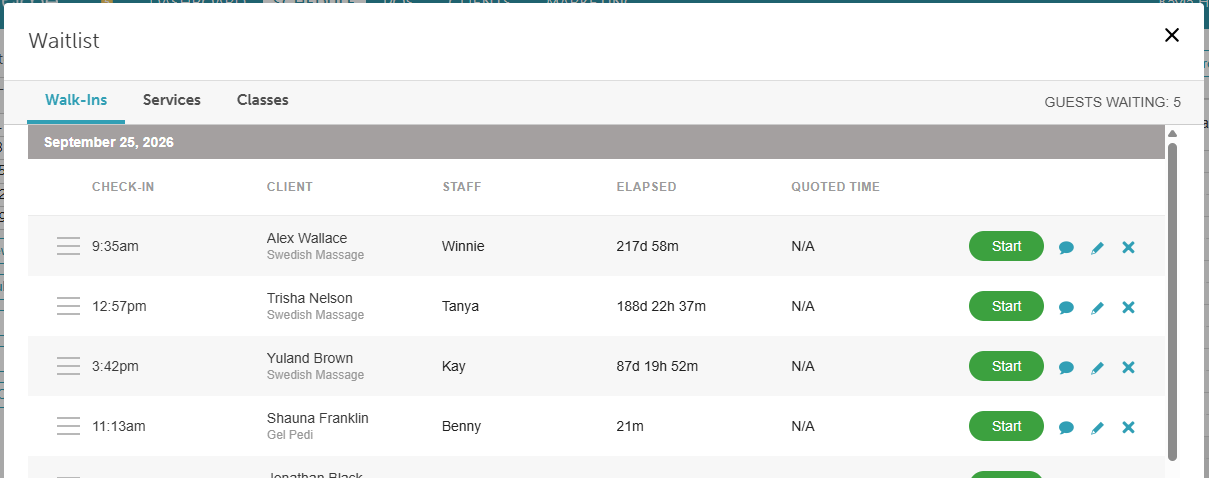
- Drag and Drop: Click and hold a row to manually change its position in the queue.
- Start Button: Click this to move a client from the walk-in queue into an active appointment. Note: This button turns green when the client's quoted wait time has elapsed (overdue).
- Chat Icon: Click this to open the Communicator tray and message the client directly.
- Delete Icon (X): Click this to remove a client from the walk-in queue (requires confirmation).
- Drag and Drop: Click and hold a row to manually change its position in the queue.
Related Articles:
Adding Clients to Walk-In Queue on Scheduler App
Walk-In Queue Maximum Wait Time
Was this article helpful?
That’s Great!
Thank you for your feedback
Sorry! We couldn't be helpful
Thank you for your feedback
Feedback sent
We appreciate your effort and will try to fix the article