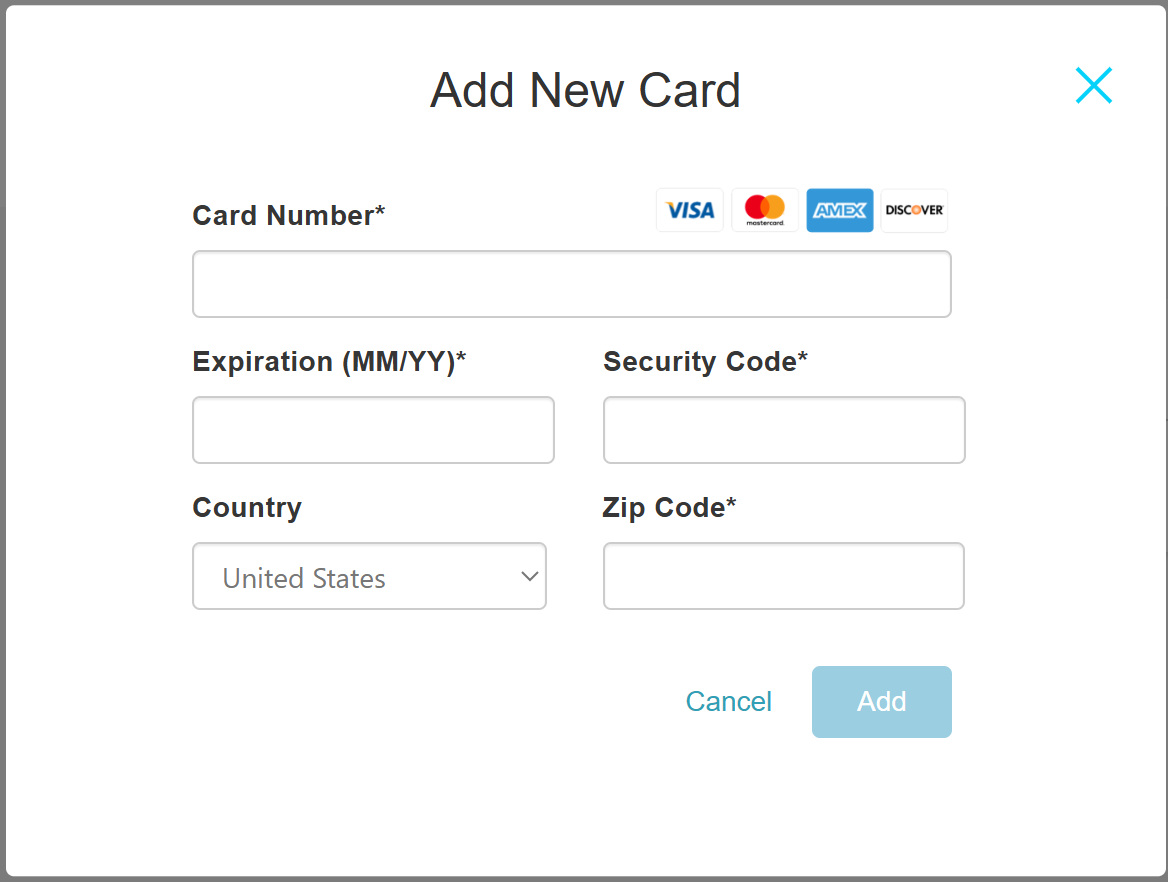
In this article, we will go over the ways clients can manually add a card utilizing the Cloud9-hosted credit card entry form online.
Things to know:
- The credit card entry form will be hosted by Cloud9 (TSYS) rather than MyTime. This feature only affects the Key-In card modal and Cloud9 businesses.
- This form will be present on the client's profile, appointment modal, and in POS by default for Cloud9 users; however, to get your clients to use this Cloud9 form on your booking widget as well as their account page, it is controlled by a hidden setting that only the MyTime team can enable. To enable the hidden setting, please contact our Support Team at support@mytime.com.
- The card details must be entered into Cloud9's form, and Cloud9 will then send us the necessary card data. Once we have that data, we display it for you to verify before saving it in our system.
- In order to accept credit card payments, you must have a merchant payment account. If you don’t have one, you can speak with a member of our Processing Team at processing@mytime.com to have your merchant account set up.
Contents:
Manual Card Entry on My Account > Payment Method
- Clients would navigate to your booking widget using the booking URL or book button on your website
- They can sign in if they already have a MyTime user account. If they don't already have one, they can create one by clicking the Sign Up Now option
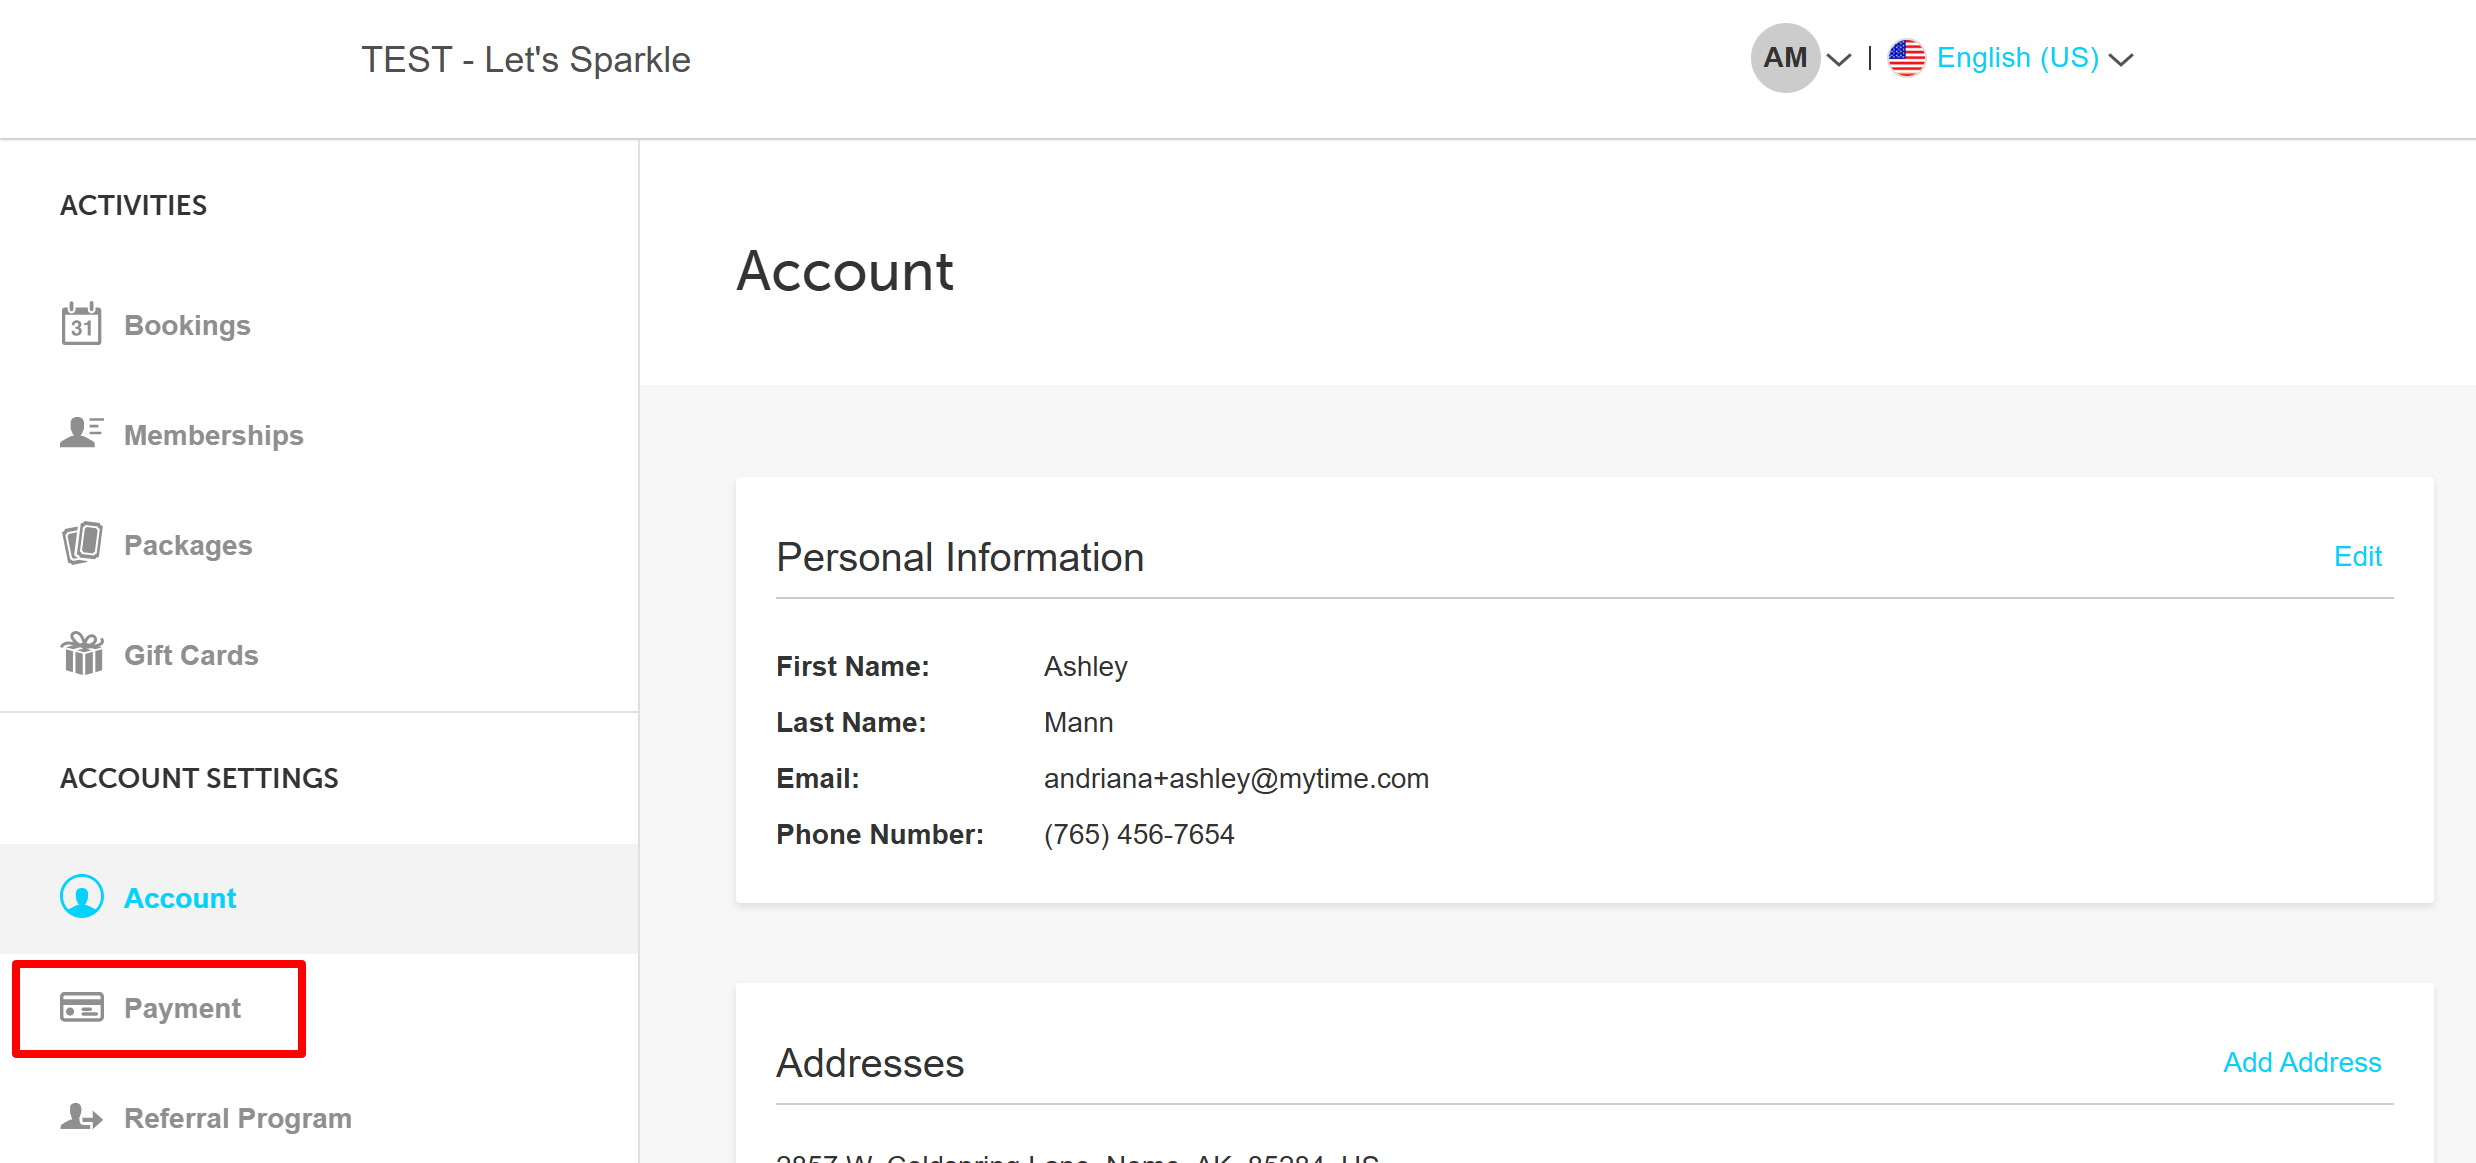
- Once signed in, click the dropdown arrow at the top next to their initials > Click 'Account'

- Click the 'Payment' link under the 'Account Setting' section in the left panel on the 'Account' page

- Click the 'Add Card' link

- The Cloud9-hosted credit card entry form will appear. Enter the card details > Click the "Add" button

- A confirmation message will appear at the top of the page and the card's type and the last 4 digits will be displayed below 'Payment Method'


Manual Card Entry on the Checkout Page
- Clients would navigate to your booking widget using the booking URL or book button on your website
- Select the desired location (applicable for accounts with multiple locations)

- They can sign in if they already have a MyTime user account. If they don't already have one, they can create one by clicking the Sign Up Now option
- Select 'Book' next to the desired service

- Click on 'Select Time' to proceed to the date and time picker. From there, choose a date and time. (The time picker will display a monthly view by default)
- On the checkout page, the stripe-hosted credit card form will be visible in the payment information section

- Enter the card details > Click the "Add" button
- Complete any intake forms present, and complete the booking
For more information, contact us at support@mytime.com.
Related Article:
Was this article helpful?
That’s Great!
Thank you for your feedback
Sorry! We couldn't be helpful
Thank you for your feedback
Feedback sent
We appreciate your effort and will try to fix the article